
Are you tired of your outdated ceiling cans but not ready for a full lighting overhaul? A Can to Pendant Light Conversion Kit might be just what you need.
It’s an easy, affordable way to transform your space with stylish pendant lighting—without the hassle of rewiring or major renovations. Imagine adding a touch of modern charm and improving your room’s ambiance in minutes. If you want a quick upgrade that makes a big impact, keep reading to discover how this simple kit can change your lighting game for good.

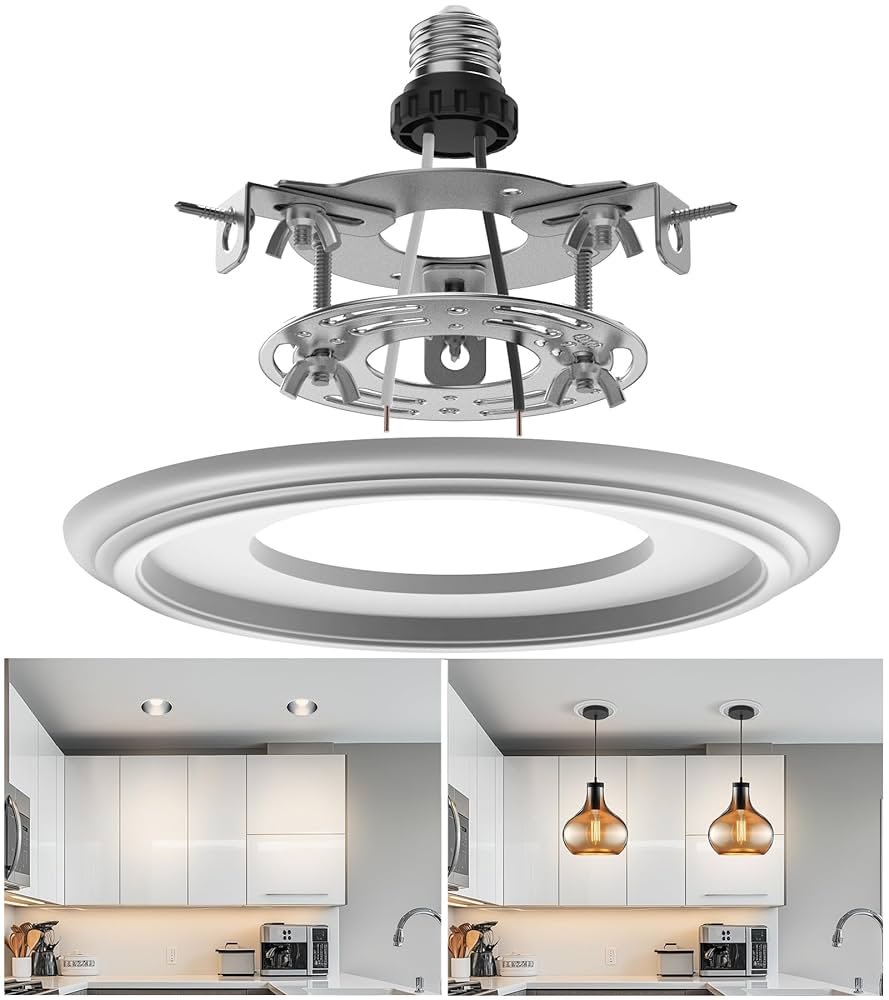
Credit: www.amazon.com
Why Choose A Can To Pendant Conversion Kit
Choosing a Can to Pendant Conversion Kit is a smart move if you want to refresh your lighting without a full renovation. It lets you turn plain recessed lights into stylish pendants, instantly changing the vibe of any room. This upgrade is not only practical but also adds a touch of personality to your space.
Benefits Of Upgrading
Upgrading to a pendant light from a can light improves the overall ambiance of your room. Pendants provide focused lighting, which is great for tasks or creating cozy corners. You also get more control over the style and brightness, making your space feel more inviting and functional.
Think about how different your kitchen or dining area could look with hanging lights instead of recessed ones. It’s a simple switch that can make a big difference in how you experience your home daily.
Cost-effectiveness
Replacing recessed lighting with a pendant doesn’t mean a costly electrical overhaul. Conversion kits are designed to fit into existing fixtures, saving you time and expensive rewiring. You avoid the hassle of hiring an electrician for major changes, which makes this an affordable upgrade.
This approach is perfect if you want a stylish update without breaking the bank. You get new looks and better lighting while keeping your budget intact.
Style Transformation
Pendants come in countless styles, from modern minimalism to vintage charm. Switching to a pendant lets you express your personal taste easily. You can choose a design that complements your décor, adding character and depth to your room.
Imagine turning a plain living room into a space that feels curated and intentional just by changing the light fixture. What style would you pick to reflect your personality?
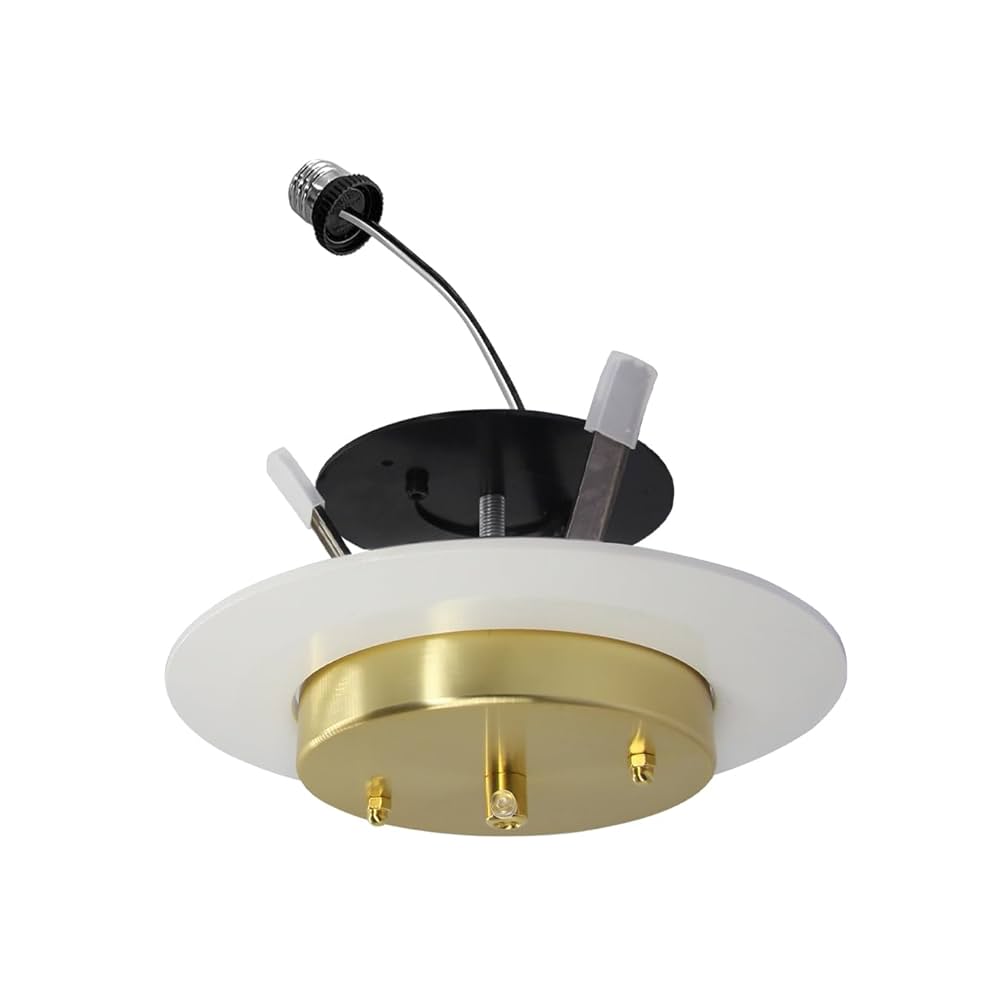
Credit: www.amazon.ca
Types Of Pendant Light Conversion Kits
Pendant light conversion kits offer a simple way to change recessed can lights into stylish pendant fixtures. These kits come in different types to match various needs and tastes. Choosing the right type depends on room size, ceiling height, and design preferences.
Basic Kits
Basic conversion kits include all essential parts for installation. They have a socket, cord, and ceiling canopy. These kits work well for straightforward conversions. Easy to install and cost-effective, they suit most standard cans.
Adjustable Length Options
Kits with adjustable cords allow control over pendant height. This feature fits rooms with high or sloped ceilings. Users can shorten or lengthen the cord as needed. Flexibility in length helps create the perfect lighting effect.
Design Variations
Design-focused kits offer different styles and finishes. Options include modern, vintage, or industrial looks. Some kits include decorative bulbs or unique canopies. This variety helps customize the room’s atmosphere and match decor.
Tools Needed For Installation
Basic tools like a screwdriver, wire stripper, and voltage tester are essential for installing a can to pendant light kit. A ladder helps reach ceiling fixtures safely. These simple tools make the process smooth and safe.
Installing a Can to Pendant Light Conversion Kit can transform your space. It’s a simple project if you have the right tools. Gathering these tools beforehand ensures a smooth installation. Below are the essentials you’ll need.Essential Tools
To start, you’ll need a few basic tools. A screwdriver set is crucial for removing and installing screws. Get a voltage tester to ensure safety by checking power levels. Wire strippers help in trimming and preparing wires. A measuring tape ensures precise placement of your new fixture. Finally, a ladder or step stool provides access to the ceiling.Safety Equipment
Safety is important when working with electricity. Use insulated gloves to protect your hands from electric shock. Safety goggles shield your eyes from dust and debris. A dust mask is helpful if you’re cutting into drywall. These items ensure your safety while installing your new light.Step-by-step Installation Guide
Installing a can to pendant light conversion kit might seem tricky at first, but with clear steps, you can transform your lighting setup quickly and safely. This guide breaks down the process into manageable parts, so you know exactly what to do from start to finish. Ready to bring a fresh look to your room? Let’s dive into the installation.
Preparing The Workspace
Start by turning off the power to the light fixture at the circuit breaker to avoid any electrical hazards. Clear the area beneath the can light to give yourself plenty of room to work comfortably. Gather all your tools and the conversion kit parts before you begin—having everything at hand prevents unnecessary interruptions.
Removing The Can Light
Remove the existing bulb and trim from the can light carefully. You might need to twist or pull the trim depending on the model. Next, disconnect the wiring by unscrewing the wire nuts and gently separating the wires; remember how they connect because you’ll need to reconnect them later.
Attaching The Conversion Kit
Take the mounting bracket from your conversion kit and secure it to the existing electrical box inside the ceiling. Make sure it fits snugly and is aligned properly to support the pendant. Connect the kit’s wiring to the ceiling wires, matching colors (usually black to black, white to white, and ground to ground) and twist the wire nuts firmly to ensure a good connection.
Securing The Pendant
Attach the pendant light to the mounting bracket according to your kit’s instructions. This usually involves hooking or screwing the fixture into place. Adjust the pendant’s length if your kit allows it, so it fits your space perfectly. Don’t rush this step—double-check the fixture is secure and hangs straight.
Testing The Light
Turn the power back on at the circuit breaker. Switch on your new pendant light and observe if it lights up without flickering or buzzing. If it doesn’t work immediately, turn the power off and check all connections again. Once it’s on and stable, you’ve successfully upgraded your lighting!
Design Tips For Stylish Lighting
Lighting shapes the mood and style of any room. Using a can to pendant light conversion kit lets you add charm and function easily. Simple design choices can make your pendant lights stand out. Focus on style, color, and placement to create a perfect look.
Choosing The Right Pendant Style
Select a pendant style that fits your room’s theme. Modern, vintage, or industrial designs each tell a different story. Consider the size and shape of the pendant. Large pendants work well over dining tables, while smaller ones suit kitchen islands.
- Glass shades add elegance and brightness.
- Metal pendants bring a sleek, modern vibe.
- Wood or woven materials offer a natural touch.
Color And Finish Options
Colors and finishes impact the room’s feel. Neutral tones blend smoothly with most decors. Bold colors create a striking focal point. Matte finishes offer a soft look, while polished finishes add shine and glamour.
- Black or white for classic, timeless appeal.
- Brass or gold for warmth and luxury.
- Brushed nickel for a subtle, modern touch.
Placement Ideas
Correct placement enhances both function and style. Hang pendants in clusters for a dramatic effect. Use a single pendant for a minimalist look. Keep pendants about 30-36 inches above tables or countertops.
- Align pendants evenly for balanced lighting.
- Adjust height to avoid glare or obstruction.
- Consider symmetry to create harmony in the space.
Common Installation Challenges
Installing a can to pendant light conversion kit can seem straightforward, but many face unexpected hurdles during the process. Knowing what common challenges to expect helps you prepare and avoid frustration. Let’s dive into some typical issues and how you can handle them with confidence.
Wiring Issues
Wiring is often the trickiest part of the installation. You might find wires that don’t match the color coding mentioned in the instructions, or the existing wiring could be outdated or damaged. Have you ever opened a ceiling box only to see tangled wires that leave you guessing?
Before you start, turn off the power and use a voltage tester to ensure safety. If your wires don’t have clear markings, label them yourself using colored tape or markers. In some cases, consulting an electrician can save you time and prevent hazards.
Fixture Compatibility
Not every pendant light works perfectly with every can light housing. Some kits don’t fit well with older or non-standard cans, leading to loose fixtures or alignment problems. Have you checked if your can light’s size and shape match the kit’s specifications?
Measure your existing can carefully and compare those dimensions with the kit details. Look for conversion kits designed specifically for your can size. If the fit feels off, don’t force it—this can cause damage or poor performance.
Troubleshooting Tips
If the pendant light doesn’t work after installation, don’t panic. Start by checking all wire connections—loose or reversed wires are common culprits. Is the switch turned on, and is the circuit breaker intact?
Try these quick fixes:
- Re-tighten all wire nuts and connectors.
- Make sure the fixture’s bulb is the correct type and screwed in properly.
- Reset the circuit breaker to rule out electrical trips.
Sometimes, gently wiggling the fixture while the power is off can reveal loose parts needing adjustment. What small detail might you have missed during the initial setup?
Maintenance And Care For Pendant Lights
Keeping your pendant lights in top shape not only preserves their look but also ensures safety and efficiency. Regular care can prevent common issues like flickering or dullness that might affect your room’s ambiance. How often do you inspect your lighting fixtures for signs of wear or dirt buildup?
Cleaning Tips
Dust and grime can quickly dull the shine of your pendant lights. Use a soft microfiber cloth to gently wipe the surface weekly. For glass or metal parts, a mild soap solution works well—just avoid harsh chemicals that can damage finishes.
Be sure to turn off the power before cleaning to avoid any accidents. Pay special attention to the inside of the shade, where dust often collects unnoticed. Have you noticed how a clean fixture can instantly brighten a space?
Bulb Replacement
Choosing the right bulb is crucial for your pendant light’s performance. Check the fixture’s maximum wattage to prevent overheating. LED bulbs are a great choice—they use less energy and last longer than traditional bulbs.
When replacing bulbs, handle them with a cloth or gloves to prevent oils from your skin shortening their lifespan. If your light flickers after a new bulb is installed, double-check the socket and connection. Have you ever struggled with bulbs that burn out too quickly?
Extending Fixture Life
Regular maintenance extends the life of your pendant light and saves you money. Tighten any loose screws or parts to prevent wear and tear. Inspect wiring occasionally for signs of damage or corrosion, especially in older homes.
Consider using a surge protector to shield your fixture from electrical spikes. How often do you think about the long-term care of your home’s lighting fixtures? Small, consistent efforts keep your pendant light looking and working like new for years.

Credit: www.amazon.com
Frequently Asked Questions
What Is A Can To Pendant Light Conversion Kit?
A can to pendant light conversion kit changes recessed can lights into hanging pendant fixtures. It updates lighting style easily. It fits into existing recessed housings, offering a decorative and functional lighting solution.
How Do You Install A Can To Pendant Light Kit?
Installation involves removing the recessed trim, attaching the conversion kit to the housing, and securing the pendant. No major rewiring is needed. It’s designed for easy DIY upgrades to existing recessed lighting.
Are Can To Pendant Light Kits Compatible With All Cans?
Most kits fit standard 5-6 inch recessed cans. Check product specifications for compatibility. Some kits may not suit older or specialty housings, so verify before purchasing.
Can I Adjust The Pendant Height With The Conversion Kit?
Yes, most kits include adjustable cords or rods. This allows customization of pendant height to fit room design and lighting needs.
Conclusion
A can to pendant light conversion kit offers a simple way to update lighting. It changes recessed cans into stylish hanging lights quickly. This upgrade improves the room’s look and feel. Installation takes little time and few tools. Everyone can enjoy new lighting without a full remodel.
Choose a kit that fits your style and needs. Brighten your space with ease and confidence. A small change can make a big difference. Try this solution to refresh your home lighting today.


