
Are your walls feeling a bit bare, lacking personality and flair? Imagine transforming them into a vibrant gallery of your own creation.
With do-it-yourself canvas wall art, you have the power to add a personal touch to your space, making it uniquely yours. This isn’t just about decoration; it’s about expressing your creativity and style. You’ll find that creating your own art can be both fulfilling and surprisingly simple.
Ready to turn your blank walls into a masterpiece? Stay with us, and we’ll guide you through the magical world of DIY canvas art, where your imagination is the only limit.
Choosing The Right Canvas
Choosing the right canvas is key to creating beautiful DIY wall art. The canvas sets the foundation for your work. Picking the correct size, shape, and material affects the final look. A well-prepared workspace also helps you focus and work neatly. This section covers everything needed to start your project with confidence.
Canvas Sizes And Shapes
Canvas size impacts the room’s feel and the art’s style. Small canvases suit detailed work or tight spaces. Large canvases make bold statements and fill empty walls. Shapes vary from traditional rectangles to squares and circles. Choose a shape that fits your design idea and room decor.
Selecting Quality Materials
Use good-quality canvas for better paint absorption and durability. Cotton and linen are common choices. Linen is stronger but more expensive. Cotton is affordable and works well for beginners. Check the canvas texture—smooth for fine detail, rough for bold strokes. Stretched canvases save time, but you can buy canvas rolls too.
Preparing Your Workspace
Clear a flat surface with enough space for your canvas and tools. Good lighting helps you see colors accurately. Cover your table with newspaper or a plastic sheet to avoid stains. Keep brushes, paints, and water nearby for easy access. A tidy workspace boosts creativity and reduces mistakes.

Credit: www.gotithere.com
Creative Painting Techniques
Creative painting techniques bring life and personality to DIY canvas wall art. They let you explore colors and textures beyond basic brush strokes. Experimenting with various methods helps you craft unique pieces. Each technique offers a different way to express your style and mood.
Acrylic Pouring
Acrylic pouring creates smooth, flowing patterns on your canvas. Mix paint with a pouring medium for a liquid texture. Pour the mixture onto the canvas and tilt it to spread colors. This technique forms natural swirls and cells that look stunning and abstract. It’s easy to try and produces vibrant, glossy finishes.
Stencil Art
Stencil art uses cut-out shapes to add crisp designs. Place the stencil on the canvas and apply paint with a sponge or brush. This method allows precise patterns or images without freehand drawing. Change stencils to create layered or repeated effects. Stencils work well for geometric, floral, or themed designs.
Texture And Layering
Add texture by using thick paints or materials like modeling paste. Spread the paste with a palette knife to build raised surfaces. Layer colors over textured areas for depth and interest. This technique turns flat canvases into tactile artworks. It invites viewers to see and feel the art’s dimension.
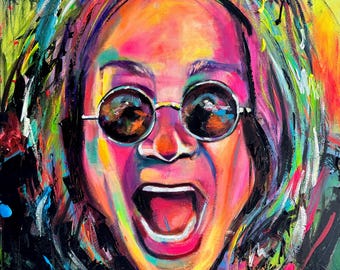
Abstract Designs
Abstract designs focus on shapes, colors, and forms without clear subjects. Use bold brush strokes, splatters, or color blocks to express emotions. Let your intuition guide the brush for spontaneous effects. Abstract art frees you from rules and encourages creativity. It fits any space with its vibrant and dynamic look.
Incorporating Mixed Media
Adding mixed media to your DIY canvas wall art can transform a simple painting into a tactile experience. It brings depth and personality that paint alone often can’t achieve. Have you ever thought about how different textures or unexpected materials could change the way your art feels and looks?
Using Fabric And Paper
Fabric and paper are easy materials to work with and offer endless possibilities. You can glue scraps of patterned fabric or torn pages from old books onto your canvas to create interesting backgrounds or focal points.
Try layering different types of fabric, like lace or burlap, to create contrast. Paper can be painted or stamped before attaching to add even more dimension. This technique invites you to experiment with color and texture in ways that paint alone cannot.
Adding Metallic Accents
Metallic touches catch the eye and add a bit of sparkle to your wall art. Small bits of gold leaf, metallic paint, or even foil can highlight certain areas of your canvas and make your piece pop.
Consider using a thin brush or a sponge to dab metallic paint in strategic spots. You might also press metallic tape or foil shapes onto your canvas for a modern, shiny effect. These accents can turn simple designs into striking statements.
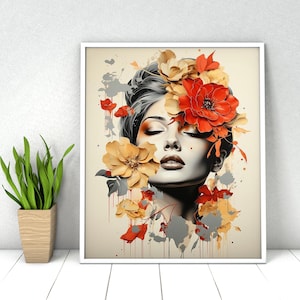
Incorporating Natural Elements
Natural materials like dried flowers, leaves, or small twigs bring organic beauty to your canvas art. They add a unique texture and a story that connects your artwork to the world outside your home.
You can press flowers flat and glue them directly onto your canvas or arrange small twigs to create patterns. Have you thought about how nature’s imperfections could add authenticity and charm to your project?

Credit: inmyownstyle.com
Personalized Themes And Patterns
Creating your own canvas wall art offers a chance to express your style. Personalized themes and patterns make your art unique and meaningful. They reflect your personality and the mood you want to set in a room.
Choosing themes and patterns that speak to you adds charm and character. Each design choice can transform a blank canvas into a personal story. Explore ideas that match your taste and home decor.
Nature-inspired Art
Nature themes bring calmness and beauty indoors. Use leaves, flowers, trees, or animals as your main elements. Soft earth tones or bright greens work well for this style.
- Paint simple leaf shapes with bold colors.
- Create a sunset scene with warm gradients.
- Use animal silhouettes for a minimalist look.
These designs connect your space with the outdoors. They add freshness and a peaceful vibe to any room.
Geometric Patterns
Geometric patterns offer a modern and clean look. Shapes like triangles, circles, and squares create visual interest. Use contrasting colors to make patterns pop.
- Try repeating shapes for a rhythmic effect.
- Mix different sizes to add depth.
- Use lines to divide the canvas into sections.
These patterns fit well in contemporary spaces. They create balance and order without being dull.
Typography And Quotes
Words can inspire and motivate. Choose favorite quotes or meaningful phrases for your canvas. Use bold fonts or handwritten styles for personality.
- Highlight key words with different colors.
- Mix fonts for a creative touch.
- Keep backgrounds simple to focus on text.
Typography art makes your walls speak your thoughts. It adds a personal and uplifting element to your decor.
Finishing Touches
Adding the final touches to your DIY canvas wall art can make all the difference between a good piece and a stunning one. These finishing steps help preserve your work, enhance its presentation, and ensure it stands out on your wall exactly the way you want. Paying attention to these details shows your dedication and brings your creative vision to life.
Sealing And Protecting Your Art
Protect your canvas by applying a clear sealant. This shields your artwork from dust, moisture, and fading over time. Choose between matte, satin, or glossy finishes depending on the look you want.
Use a spray varnish for even coverage without disturbing the paint texture. Apply thin, light coats and allow each layer to dry completely before adding the next. This simple step can extend your artwork’s life for years.
Framing Options
Frames add polish and style but aren’t always necessary. Floating frames create a modern look by leaving space around the canvas edges. Classic wooden frames give a traditional vibe and can complement your room’s decor.
Consider unconventional framing materials like metal or reclaimed wood for a unique touch. If you prefer no frame, clean the canvas edges and consider painting them for a crisp, finished look. Which style matches your personality and space best?
Hanging Tips For Impact
Where and how you hang your canvas affects its visual impact. Eye-level placement ensures the artwork grabs attention effortlessly. Group smaller canvases together to create a gallery effect that tells a story.
Use sturdy hooks or wall anchors to support heavier pieces safely. Don’t forget about lighting—natural or spotlighting can highlight textures and colors beautifully. How can you arrange your art to spark conversation every time someone enters the room?
Budget-friendly Supplies
Creating your own canvas wall art doesn’t have to drain your wallet. With the right budget-friendly supplies, you can craft stunning pieces without sacrificing quality. Let’s dive into how you can gather affordable materials that make your DIY project both fun and cost-effective.
Affordable Paints And Brushes
You don’t need expensive paints to achieve vibrant colors. Student-grade acrylic paints offer a wide range of shades and dry quickly, making them perfect for beginners. Look for small tubes or sets that cover basic colors—mixing them yourself can create endless options without extra cost.
When selecting brushes, focus on versatility. A few synthetic brushes in different shapes—flat, round, and detail—can handle most techniques. Remember, good brush care extends their life, so clean them thoroughly after each use.
Diy Tools And Alternatives
Not every tool has to come from an art store. Household items can double as painting tools. For example, old credit cards work well for spreading paint or creating texture, and sponges can add interesting patterns.
Consider repurposing everyday items: toothpicks for fine lines, cotton swabs for blending, and even kitchen forks for unique designs. These alternatives help you experiment without extra expense.
Where To Shop Smart
Finding deals is key to staying on budget. Check out local thrift stores and craft fairs for hidden gems like canvases and brushes. Sometimes, you’ll find unopened paint sets at a fraction of retail prices.
Online marketplaces often offer bulk deals or discounted supplies. Sign up for newsletters from art supply stores to catch sales and coupons. Do you have a favorite spot for bargain supplies? Sharing tips can help others save too.
Troubleshooting Common Issues
Tackling issues in your DIY canvas wall art can feel frustrating, but many problems have simple fixes that save both time and effort. Understanding common challenges helps you keep your creative momentum going without unnecessary setbacks. Let’s look at practical solutions for typical hurdles you might face during your project.
Fixing Paint Mistakes
Accidental paint smudges or uneven strokes are common, but you don’t have to start over. If the paint is still wet, gently blot the area with a clean, damp cloth instead of rubbing it—this prevents spreading the mistake.
Once the paint dries, lightly sanding the area with fine-grit sandpaper can smooth out any bumps or thick spots. You can then repaint over the sanded patch, matching your colors carefully for a seamless fix.
Have you tried using a palette knife to scrape off thick paint layers? It’s a handy trick to correct excess paint without damaging the canvas.
Canvas Warping Solutions
Canvas warping often happens due to humidity or improper stretching. To fix slight warping, place your canvas face down on a flat surface and gently press the warped areas.
If the canvas is loose or sagging, tightening the stretcher bars can help by pulling the fabric taut again. Use a staple remover to adjust staples if needed and re-stretch the canvas evenly.
For stubborn warping, lightly mist the back of the canvas with water and let it dry stretched tight. This technique can help the fibers relax and flatten out.
Maintaining Color Vibrancy
Colors can fade over time or appear dull after drying. To keep your art vibrant, apply a clear acrylic varnish once your painting is completely dry. This not only protects the paint but also enhances the color depth.
Store your canvas away from direct sunlight and moisture to prevent fading and damage. If you notice dullness, consider refreshing the paint with a thin glaze layer using the original colors.
Have you ever tested different varnishes to see which one works best with your paints? Trying matte, satin, or glossy finishes can change how your colors pop.
Credit: www.etsy.com
Frequently Asked Questions
What Materials Do I Need For Diy Canvas Wall Art?
You need a blank canvas, acrylic paints, brushes, painter’s tape, and a palette. Optional items include stencils and sealant spray. These materials are affordable and easy to find at craft stores or online.
How Can I Create Unique Designs On Canvas?
Use painter’s tape for geometric patterns or stencils for detailed shapes. Experiment with color blending and layering. Personalize with hand-painted quotes or abstract art to make your canvas truly unique.
What Techniques Work Best For Canvas Painting?
Acrylic painting, sponging, and stamping work well on canvas. Layering colors enhances depth. Use a dry brush for texture and a fan brush for soft blending effects.
How Do I Preserve My Finished Canvas Art?
Apply a clear sealant spray to protect the paint from dust and fading. Keep the canvas away from direct sunlight and humidity for long-lasting vibrancy.
Conclusion
Creating your own canvas wall art brings joy and personal touch. It saves money and lets your creativity flow freely. Simple tools and ideas make the process easy and fun. Each piece you make tells your unique story. Try different colors and styles to match your space.
Enjoy the satisfaction of decorating with your own hands. Start today, and watch your walls come alive with art.


