
Imagine turning your favorite photo into a stunning centerpiece that grabs everyone’s attention the moment they walk into the room. Having a picture blown up and framed isn’t just about decoration—it’s about preserving your special memories in a way that feels alive and personal.
Whether it’s a family portrait, a breathtaking landscape, or a snapshot from a meaningful trip, enlarging and framing your photo can transform it into a powerful piece of art. Ready to learn how to make your picture stand out and bring your walls to life?
Keep reading, and discover the simple steps to create a framed masterpiece you’ll cherish forever.
Choosing The Right Photo
Choose a clear, high-quality photo for blowing up and framing. Bright images with good focus work best to keep details sharp. Consider the photo’s size and resolution to avoid pixelation on larger prints.
Choosing the Right Photo Selecting the perfect photo to blow up and frame is a delightful yet crucial task. The right image can evoke emotions, tell a story, and become a focal point in your space. But with endless options in your digital gallery, how do you pick the best one?Selecting High-resolution Images
Ensure your chosen photo is high-resolution. A clear and sharp image is essential for quality enlargement. Blurry or pixelated photos will not translate well to a larger format. Check the megapixels of your image. Generally, a higher megapixel count means the photo will look better when enlarged. Aim for an image with at least 300 DPI (dots per inch) for optimal clarity.Personal Vs Professional Photos
Decide whether you want a personal touch or a polished look. Personal photos capture unique moments and hold sentimental value. They are perfect for creating a cozy, personalized atmosphere at home. On the other hand, professional photos offer a refined aesthetic. They often showcase superior composition and lighting, ideal for more formal spaces like offices or living rooms. Reflect on the mood and purpose of the room where the photo will be displayed.Colors And Composition
Consider the colors in your photo. Vibrant colors can energize a room, while muted tones provide a calming effect. Match the colors with the existing decor to create a harmonious look. Evaluate the composition of the image. A well-composed photo will have a clear subject and a balanced layout. Look for elements like leading lines or the rule of thirds to guide the viewer’s eye. Choosing the right photo is about blending personal preferences with technical considerations. What story do you want your photo to tell?Blow-up Techniques
Blowing up a picture to a larger size requires careful techniques to keep it clear and sharp. Different methods help increase the size without losing quality. Understanding these techniques helps create beautiful framed images that stand out. Choosing the right approach depends on the original photo and how large you want it to be.
Digital Enlargement Methods
Digital tools offer several ways to enlarge images. Software like Photoshop uses algorithms to add pixels. This process smooths edges and fills gaps for better clarity. Vector conversion turns photos into shapes that can grow without pixelation. Some apps use artificial intelligence to improve details while enlarging. Choosing the right tool depends on your image type and desired size.
Maintaining Image Quality
Keeping image quality high is key to a good blow-up. Start with the highest resolution photo available. Avoid stretching images too far beyond their original size. Use sharpening tools carefully to enhance edges. Print on quality materials that capture detail well. Proper lighting during photography also helps maintain clarity. These steps keep your blown-up picture crisp and vibrant.
Common Mistakes To Avoid
- Using low-resolution images that look blurry when enlarged
- Ignoring the photo’s aspect ratio, causing distortion
- Over-sharpening, which creates unnatural edges
- Printing on poor-quality paper that dulls the image
- Skipping color correction, resulting in faded tones
- Choosing the wrong frame size, affecting presentation
Framing Options
Choosing the right frame for your blown-up picture is more than just picking something that looks nice. It’s about protecting your artwork and enhancing its presence in your space. The options available allow you to tailor the look and feel to your style, the picture’s theme, and the room where it will hang.
Material Choices: Wood, Metal, And More
Wood frames offer warmth and a classic touch. They come in various finishes, from rustic to polished, and can complement both traditional and modern decor.
Metal frames bring a sleek, contemporary vibe. They are durable and often lighter than wood, making them ideal for larger prints. Consider brushed aluminum or matte black for a minimalist look.
Beyond wood and metal, you’ll find frames made from acrylic or composite materials. These can be budget-friendly and versatile, fitting casual or creative spaces.
Matting Styles And Colors
Matting adds an extra border between your picture and the frame, creating depth and focus. A white or cream mat is a safe choice that brightens the image and adds elegance.
Colored mats can evoke mood or highlight a particular shade in your picture. For example, a deep blue mat can enhance a seascape or a vibrant red can bring out details in a floral print.
Consider the thickness of the mat too. Thick mats give a gallery-style feel, while thin mats offer a subtle accent. Have you thought about double matting for a layered effect?
Custom Vs Ready-made Frames
Custom frames allow you to match exact dimensions and select every detail. They are perfect when your picture has an unusual size or when you want a unique style. Custom framing may cost more but often results in a perfect fit and finish.
Ready-made frames are convenient and budget-friendly. They come in standard sizes and styles, making them a quick option if your picture fits common dimensions. However, they might not offer the precision or personal touch of custom frames.
Ask yourself: does your picture need a tailored approach, or will a ready-made frame do the job? Your answer will guide a smart framing choice that highlights your artwork beautifully.
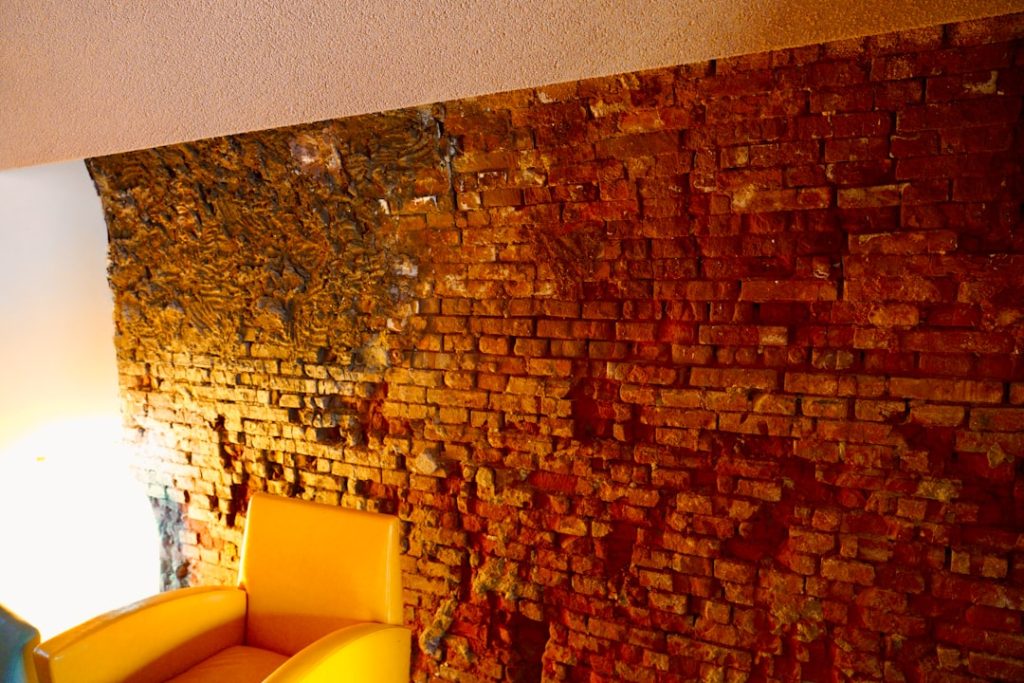
Credit: m.yelp.com
Placement Ideas
Choosing the right place for your blown-up and framed picture enhances your room’s look. The placement affects how people notice and enjoy your art. Thoughtful positioning brings balance and style to any space. Consider the mood and purpose of the room before placing your picture. Placement ideas help you make your art stand out and fit perfectly with your decor.
Focal Wall Displays
Create a focal point by placing your picture on a large, empty wall. This draws attention immediately. Use a clean wall above a sofa or bed for best effect. Position the frame at eye level for easy viewing. A single, bold image can set the tone of the entire room. Use lighting to highlight the picture and add depth.
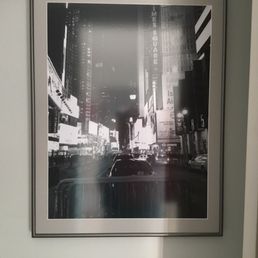
Gallery Walls And Groupings
Group your blown-up picture with smaller frames for a gallery wall. Mix different sizes and styles for visual interest. Keep a consistent color theme to tie the display together. Arrange frames in a grid or freeform pattern. Leave equal space between frames for a neat look. Gallery walls create a story and make walls lively.
Incorporating Art Into Room Themes
Match your picture style to the room’s theme for harmony. Use landscapes in natural-themed rooms for calmness. Abstract art fits modern or minimalist rooms well. Family photos work great in cozy, personal spaces. Choose frame colors that complement the furniture and walls. Art that fits the theme makes the room feel complete.
Creative Enhancements
Creative enhancements bring new life to blown-up pictures and framed art. They make your image stand out and add a personal touch. Small details can turn a simple picture into a captivating piece. These enhancements improve the visual impact and help the artwork fit your space perfectly.
Adding Texture With Mixed Media
Using mixed media adds depth and interest to your picture. Materials like fabric, paper, or paint create a rich texture. Texture makes the artwork more tactile and engaging. It invites viewers to look closer and feel the art’s layers. This technique works well with both modern and classic images.
Using Lighting To Highlight Art
Lighting changes how your framed picture looks at any time of day. Spotlights or LED strips can focus attention on key parts. Soft lighting creates a warm, inviting mood. Bright lights make colors pop and details sharper. Proper lighting enhances the picture’s features without glare or shadow.
Incorporating Frames With Decor
Choosing the right frame ties your art to the room’s style. Frames come in wood, metal, and many colors to match your decor. A simple frame suits modern interiors. Ornate frames fit classic or vintage styles. The frame should complement, not overpower, your picture. Consider the wall color and furniture when picking frames.
Credit: www.mpix.com
Care And Maintenance
Taking care of a blown-up and framed picture ensures it stays beautiful for years. Proper maintenance protects your photo from damage and keeps colors vibrant. Simple steps help your framed photo look its best.
Protecting Against Fading
Sunlight and strong light cause photos to fade quickly. Place framed pictures away from direct sunlight. Use UV-protective glass or acrylic to block harmful rays. Keep room light soft and avoid harsh bulbs. These actions help keep colors bright and fresh.
Cleaning Framed Photos
Dust and dirt can build up on frames and glass. Use a soft, dry cloth to wipe the glass gently. Avoid sprays or cleaners that can seep inside and damage the photo. Clean the frame with a dry brush or cloth. Regular cleaning prevents grime buildup and keeps your photo clear.
Handling And Storage Tips
Hold frames by the sides to avoid fingerprints on glass. Always wash hands before touching photos. Store framed pictures upright in a cool, dry place if not hanging. Avoid damp areas to prevent mold and warping. Use protective coverings when moving or storing photos. Careful handling preserves your photo’s quality and shape.
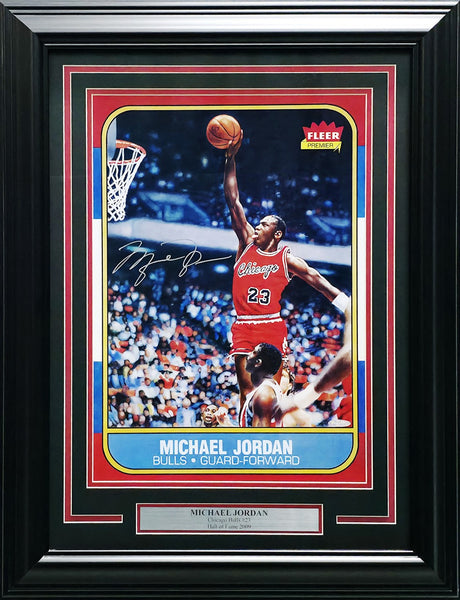
Credit: www.supersportscenter.com
Frequently Asked Questions
How To Choose The Best Photo For Blowing Up?
Select a high-resolution image with clear details. Avoid blurry or pixelated photos. Choose one with good lighting and composition. This ensures sharp, quality results when enlarged and framed. High-quality images maintain clarity and visual appeal after printing.
What Are Popular Sizes For Blown-up Pictures?
Common sizes include 8×10, 16×20, 20×30, and 24×36 inches. Larger sizes work well for statement pieces. Choose based on wall space and image resolution. Matching size to room decor enhances overall aesthetics.
Which Framing Options Suit Blown-up Pictures Best?
Frames vary from wood, metal, to acrylic. Choose a frame that complements the photo style and room decor. Consider matting for added elegance. Quality framing protects the photo and enhances its appearance.
How To Ensure Photo Quality Remains High When Enlarged?
Use high-resolution original images to avoid pixelation. Consult professional printing services for advice. Avoid excessive digital zoom or cropping. Proper file formats like TIFF or PNG help maintain quality.
Conclusion
A large, framed picture adds life to any room. It shows your style and memories clearly. Choose the right size and frame to fit your space. Printed photos last long and look great on walls. Take time to pick a good place to hang it.
Enjoy seeing your favorite moments every day. A blown-up picture makes your space feel warm and personal. It’s simple to do and brings joy to your home. Try it and see how your walls change with art.


