
Are you thinking about adding a stylish pendant light to your room but unsure how to install it yourself? Installing a pendant light can seem tricky, but with the right steps, you can do it quickly and safely.
Imagine transforming your space with just a simple change above your head. In this guide, you’ll discover easy-to-follow instructions that will make the process clear and stress-free. Keep reading, and you’ll be lighting up your home like a pro in no time!
Tools And Materials Needed
Installing a pendant light requires specific tools and materials for a smooth process. Gathering these items before starting ensures safety and efficiency. This section covers what you need to get started.
Essential Tools
- Screwdriver (flathead and Phillips)
- Wire stripper
- Voltage tester
- Drill with bits
- Measuring tape
- Wire nuts
- Ladder or step stool
- Pliers
Choosing The Right Pendant Light
Select a pendant light that fits your room’s size and style. Consider the height of your ceiling and the light’s length. Choose a fixture with easy-to-follow installation instructions. Check the wattage limit for safety and brightness.
Safety Gear
- Insulated gloves to protect from electric shock
- Safety goggles to guard eyes during drilling
- Dust mask if working in dusty areas
- Non-slip shoes for stable footing

Credit: 100things2do.ca
Preparing The Space
Clear the area around the ceiling fixture to ensure easy access. Turn off the power at the breaker to stay safe during installation. Gather all tools and materials before starting.
Preparing the space for a pendant light installation is crucial. A well-prepared area ensures safety and efficiency. This process involves several key steps. Each step lays the foundation for a successful installation.Turning Off Power
Safety comes first. Locate your home’s main electrical panel. Switch off the circuit breaker for the room. This prevents any electrical hazards. Test the power with a voltage tester. Confirm that no electricity flows to the light fixture. Never skip this step. Safety is non-negotiable.Removing Old Fixtures
Begin by unscrewing the fixture’s base. Gently lower it to reveal the wiring. Carefully disconnect the wires. Twist off the wire connectors. Note how the wires connect for later. If the fixture is heavy, seek assistance. Remove the fixture from the mounting bracket.Checking Electrical Box
Inspect the electrical box for stability. Ensure it is securely attached to the ceiling. Confirm it can support the new pendant light’s weight. Look for any damage or wear. Replace the box if necessary. A sturdy box prevents future issues.Wiring The Pendant Light
Wiring the pendant light is a crucial part of the installation process. It ensures the light functions safely and correctly. Proper wiring protects your home from electrical hazards. Follow simple steps to connect the wires securely and test the setup.
Connecting Wires Safely
Turn off the power at the circuit breaker before starting. Identify the wires from the ceiling and the pendant light. Typically, the black or red wire is live, white is neutral, and green or bare copper is ground.
Match the wires by color: live to live, neutral to neutral, and ground to ground. Hold the wire ends together tightly to prepare for secure connection. Never twist wires without tools or proper materials.
Using Wire Nuts And Electrical Tape
Use wire nuts to join the wire ends safely. Twist the nut clockwise until it is tight and holds the wires firmly. Wrap electrical tape around the wire nut and wires for extra security.
Check that no bare wire is exposed outside the wire nut. This prevents accidental contact and short circuits. Proper insulation ensures a long-lasting connection.
Testing The Connections
Restore power at the circuit breaker after wiring is complete. Turn on the light switch and observe if the pendant light works. If it does not turn on, switch off the power and recheck all connections.
Use a voltage tester to confirm current flow in the wires. This tool helps identify loose or incorrect wiring. Testing guarantees safe and functional pendant light installation.
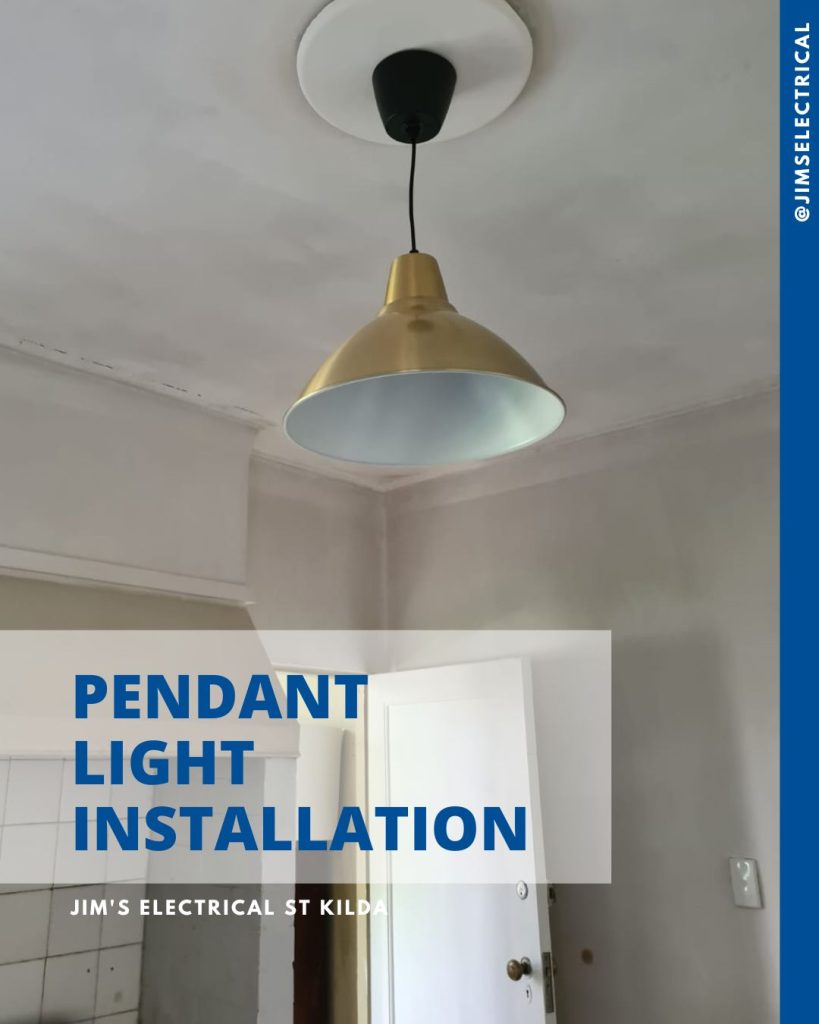
Mounting The Pendant Light
Mounting the pendant light is a crucial step that ensures your fixture is both secure and visually appealing. Getting this right not only keeps your light safe but also enhances the overall look of your space. Let’s dive into how you can mount your pendant light effectively.
Securing The Mounting Bracket
The mounting bracket holds your pendant light firmly to the ceiling, so it’s important to attach it securely. Start by turning off the power at the circuit breaker to avoid any electrical hazards.
Align the bracket with the electrical box in the ceiling and use the screws provided to fasten it tightly. If the bracket feels loose or the box isn’t sturdy, consider adding a support brace to avoid any future accidents.
Attaching The Pendant
Once the bracket is secure, it’s time to connect the pendant light. Carefully match the wires from your pendant to the house wires—usually black to black (live), white to white (neutral), and green or bare copper to ground.
Twist wire connectors onto the joined wires and tuck them neatly into the electrical box. Then, attach the pendant’s canopy to the mounting bracket, making sure it fits flush against the ceiling to give a clean finish.
Adjusting Height And Position
Adjusting the height of your pendant light can change the mood and functionality of your room. Most pendants allow you to shorten or lengthen the cord—do this before fully tightening the canopy.
Think about what the light will be used for. Do you want focused task lighting over a kitchen island or soft ambient light in a living room? Set the height accordingly and double-check that the pendant hangs straight to avoid an awkward look.
Final Steps And Testing
After securely mounting your pendant light and connecting all the wiring, the final steps involve restoring power and testing the fixture to ensure everything works perfectly. This phase is crucial because it confirms the safety and functionality of your installation. Taking the time to carefully check your work now can save you from troubleshooting headaches later.
Restoring Power
Before you restore power, double-check that all wire connections are tight and insulated with wire nuts or electrical tape. Make sure the mounting bracket and canopy are firmly attached, so nothing shifts when the light is turned on.
Once you’re confident everything is secure, go to your circuit breaker and switch the power back on. It’s a good idea to have your hand near the switch or breaker to quickly turn it off if you smell burning or see sparks. Safety first—never rush this step.
Testing The Light
Flip your light switch to test the pendant light. Does it illuminate evenly without flickering? If yes, great job! A steady glow means your wiring and connections are solid.
If your light doesn’t turn on, try tightening the bulb or swapping it with a new one. Sometimes, the simplest fix is all it takes. Also, check if the switch or dimmer is functioning properly by toggling it a few times.
Troubleshooting Common Issues
If your pendant light still isn’t working as expected, consider these common problems:
- Loose connections:Turn off the power and inspect all wire nuts and terminals.
- Wrong bulb type:Verify you’re using the correct wattage and bulb base.
- Faulty switch or breaker:Test the switch with a multimeter or try a different one.
- Grounding issues:Ensure the ground wire is properly connected to prevent shocks.
Have you ever faced a stubborn light fixture that refused to work? Sometimes, stepping away and returning with fresh eyes helps you spot what you missed. Don’t hesitate to call a professional if you’re unsure—your safety matters most.

Credit: www.amazon.in
Tips For Perfect Lighting
Getting the lighting right with your pendant light can transform any room. It’s not just about installing the fixture; it’s about how you use it to create the perfect atmosphere. Here are some practical tips to help you get the most out of your pendant light.
Choosing The Right Bulb
The bulb you select affects the brightness and warmth of your space. Look for bulbs with a color temperature between 2700K and 3000K for a cozy, inviting glow. If you want a more energetic vibe, choose bulbs with a cooler temperature around 4000K.
Consider the bulb’s wattage and lumens to match your room size. LED bulbs are a smart choice because they save energy and last longer. Have you noticed how a simple bulb swap can change the whole feel of a room?
Adjusting Light For Ambiance
Dimming your pendant light makes a big difference in setting the mood. Installing a compatible dimmer switch lets you control the light intensity easily. Think about the activities in the room—brighter light for reading, softer light for relaxing.
Try adjusting the height of your pendant light to control the spread of light. Lower it for focused task lighting or raise it for broader illumination. What kind of ambiance do you want to create in your space?
Maintaining Your Pendant Light
Regular cleaning keeps your pendant light shining bright. Dust the fixture weekly and clean the glass or shade with a gentle cleaner every few months. This simple habit maintains the light’s appearance and brightness.
Check the wiring and bulb regularly to ensure everything works safely. If you notice flickering or dimming, it might be time to replace the bulb or inspect the fixture. How often do you check your lights for maintenance?

Credit: 100things2do.ca
Frequently Asked Questions
How Do You Prepare For Pendant Light Installation?
Turn off the power at the circuit breaker first. Gather tools like a screwdriver, wire stripper, and voltage tester. Remove the old fixture carefully. Check the ceiling box to ensure it supports the new pendant light safely.
What Are The Basic Steps To Install A Pendant Light?
Attach the mounting bracket to the ceiling box. Connect the fixture wires to the house wires using wire nuts. Secure the pendant light canopy to the bracket. Finally, install the light bulb and restore power to test.
How Do You Adjust Pendant Light Height?
Most pendants have adjustable cords or rods. Loosen the set screw or locking mechanism. Slide the cord or rod to your desired length. Tighten the screw to secure the height. This customization helps match your room’s style and function.
Can I Install A Pendant Light Myself Safely?
Yes, if you follow safety guidelines and local codes. Always turn off power before starting. Use a voltage tester to confirm power is off. If unsure, consult a professional electrician for help.
Conclusion
Installing a pendant light can brighten any room quickly. Follow each step carefully to stay safe and get good results. Check your tools and parts before starting the work. Take your time and connect wires properly for safe use. Adjust the height to fit your space and style.
Enjoy the new light and fresh look it brings. Simple steps lead to a great upgrade in your home lighting.


