
Have you ever looked at your bathroom mirror and thought, “How do I get this off the wall without causing a mess?” Removing a bathroom mirror might seem tricky, but with the right steps, you can do it safely and easily. Whether you’re updating your bathroom or fixing a broken mirror, knowing the proper way to remove it will save you time, money, and frustration.
Keep reading, and you’ll discover simple tips that make this task straightforward—even if you’ve never done it before. Your bathroom makeover starts here!
Credit: bfymirror.com
Tools You’ll Need
Removing a mirror from a bathroom wall might seem straightforward, but having the right tools makes the task smoother and safer. Without proper equipment, you risk damaging your wall or even the mirror itself. Let’s look at what you’ll need before you start pulling that mirror off the wall.
Safety Gear
Protecting yourself is the first priority. Safety goggles shield your eyes from glass shards or dust. Thick gloves prevent cuts and give you a better grip on the mirror’s edges.
Have a dust mask handy if your wall material is prone to crumbling or creating debris. It’s better to be cautious than face unexpected injuries.
Cutting Tools
A utility knife is essential for cutting through any caulk or adhesive sealing the mirror to the wall. Sharp blades make clean cuts and reduce the chance of damaging the wall surface.
Sometimes, a putty knife or a thin scraper helps to gently pry the edges away once the adhesive is cut. Avoid using anything too thick or rigid to prevent wall damage.
Leveraging Tools
A flat pry bar or a sturdy paint scraper can help you carefully lift the mirror off the wall after loosening it. Use a tool that offers control rather than brute force.
Think about how much pressure you can apply without cracking the glass. A plastic putty knife might even work better in tight spots where metal tools could scratch the wall.
Support Materials
Have a pair of suction cups designed for glass handling; they make lifting and carrying large mirrors safer and easier. If you don’t have suction cups, thick blankets or towels can protect the mirror when setting it down.
Consider placing a drop cloth on the floor to catch any falling debris or accidental drops. These small preparations save you from bigger cleanups or repairs later.
Measuring And Marking Tools
A tape measure and a pencil come in handy to mark the mirror’s edges and ensure you work evenly around it. Marking helps you stay focused and avoid unnecessary damage.
Knowing the exact size of your mirror also helps if you plan to replace it or need to buy a new one. Precision here saves time and money down the road.
Prepare The Area
Clear the bathroom wall and floor around the mirror to avoid damage. Gather tools like a putty knife, gloves, and safety glasses before starting. Protect surfaces with a drop cloth or old towels to catch debris.
Removing a mirror from a bathroom wall requires careful preparation. Ensuring the area is ready helps prevent accidents and damage. Begin by taking a few straightforward steps to safeguard your workspace and yourself.Clear The Space
Move any items near the mirror. Remove toiletries and decorations. This prevents accidental damage during the process. Keep the space around the mirror clear for ease of movement.Protect The Floor
Place a drop cloth or old towel on the floor. This catches any falling debris. It also protects the floor from scratches. Ensure the cloth covers the entire area beneath the mirror.Gather Necessary Tools
Have your tools ready before starting. You’ll need a screwdriver, utility knife, and tape. Having everything in place saves time and ensures a smooth process.Turn Off Power
Switch off any nearby electrical outlets. This prevents potential shocks. It’s a crucial safety step if the mirror is near a power source.Wear Safety Gear
Put on safety goggles and gloves. This protects your eyes and hands. Safety is paramount when handling glass.Identify How The Mirror Is Attached
Before you begin removing a mirror from your bathroom wall, it’s crucial to understand how it’s attached. Mirrors can be fixed in several ways, and knowing the exact method will save you time and prevent damage to your wall or the mirror itself. Take a close look and feel around the edges to get a clear idea of what’s holding it in place.
Check For Clips Or Brackets
Start by examining the perimeter of the mirror for any visible clips or brackets. These small metal or plastic pieces often grip the mirror securely but can be unscrewed or gently pried off.
If you spot clips, test their tightness by pressing lightly or trying to wiggle the mirror. Loose clips usually mean the mirror can be carefully lifted out once the clips are removed.
Look For Adhesive Or Glue
Sometimes mirrors are glued directly to the wall. Run your hand along the edges to feel if the mirror is stuck flat against the surface without any hardware.
If the mirror feels firmly attached with no clips or screws, adhesive is likely used. In this case, you’ll need to use heat or a special cutting wire to soften the glue and safely separate the mirror from the wall.
Inspect For Screws Or Nails
Take a close look at the frame or the edges for any screws or nails holding the mirror. These are often hidden behind decorative trims or under caulked seams.
Use a flashlight and a small screwdriver to check for tiny screw heads or nail tips. Removing these fasteners will usually allow the mirror to come away cleanly without damage.

Credit: www.youtube.com
Remove Mirrors Held By Clips
Removing a mirror held by clips can seem tricky, but it’s usually straightforward with the right approach. These clips secure the mirror firmly, so you’ll want to handle them carefully to avoid damaging the wall or the mirror itself. Let’s go through the process step-by-step to make your removal smooth and safe.
Gather The Right Tools
Before you start, make sure you have the necessary tools handy. Typically, you’ll need a flathead screwdriver, a putty knife, and possibly a pair of gloves for safety.
Having these ready will save you from interruptions. Do you have a spot to safely place the mirror once it’s off the wall? Think about that before you begin.
Loosen The Clips Gently
Use the flathead screwdriver or putty knife to carefully pry the clips away from the mirror edges. Take your time to avoid bending or breaking the clips.
If the clips seem stuck, don’t force them. Applying a little extra leverage slowly can prevent damage. Have you noticed if the clips are rusted or painted over? That can affect how easily they come off.
Remove Clips And Support The Mirror
Once the clips are loosened, gently slide them off. Keep your hand on the mirror to support its weight as you remove the last clip.
This part can be surprising—you might feel the mirror shift suddenly. Are you ready to catch it securely? Having a helper can make this step safer and easier.
Lift The Mirror Off The Wall
With clips removed, carefully lift the mirror straight off the wall. Avoid tilting it too much to prevent stress on the glass.
Place the mirror on a padded surface to protect it from scratches or cracks. What’s your plan for handling the mirror once it’s off? Planning ahead helps avoid accidents.
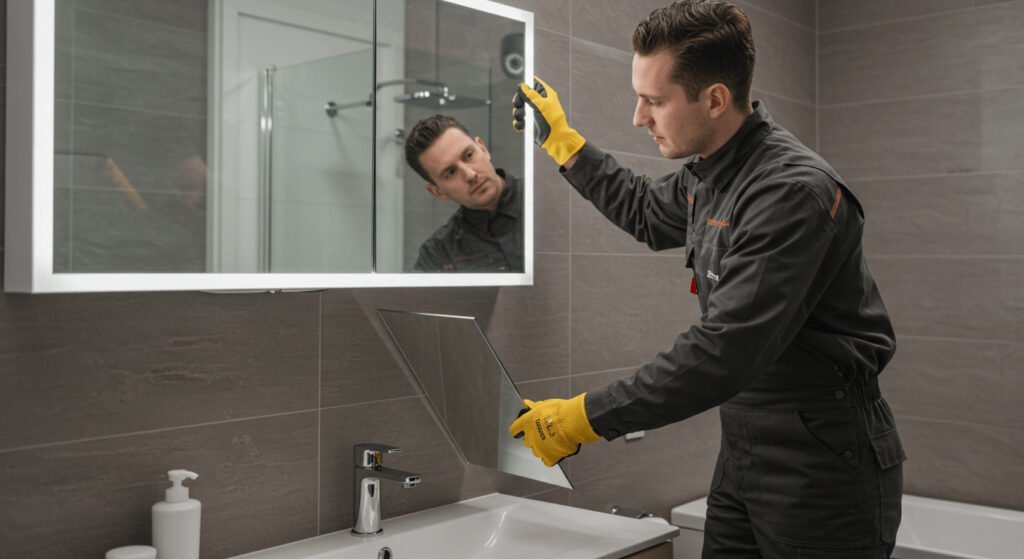
Detach Mirrors With Adhesive
Detaching a mirror that’s glued to your bathroom wall can feel tricky, but with the right approach, it’s manageable without damage. Adhesive mirrors are common because they create a sleek look, but they require patience and the right tools to remove safely. Let’s go over some practical ways to get that mirror off your wall without cracks or leftover sticky mess.
Use A Hairdryer Or Heat Gun
Heat softens the adhesive holding your mirror in place. Using a hairdryer or heat gun, gently warm the edges of the mirror. Keep the heat source moving to avoid overheating one spot and cracking the glass.
Try warming for a few minutes, then test if the mirror feels less stuck. This simple step can make peeling away the adhesive easier and less risky. Have you noticed how heat changes the texture of glue on other surfaces? It works similarly here.
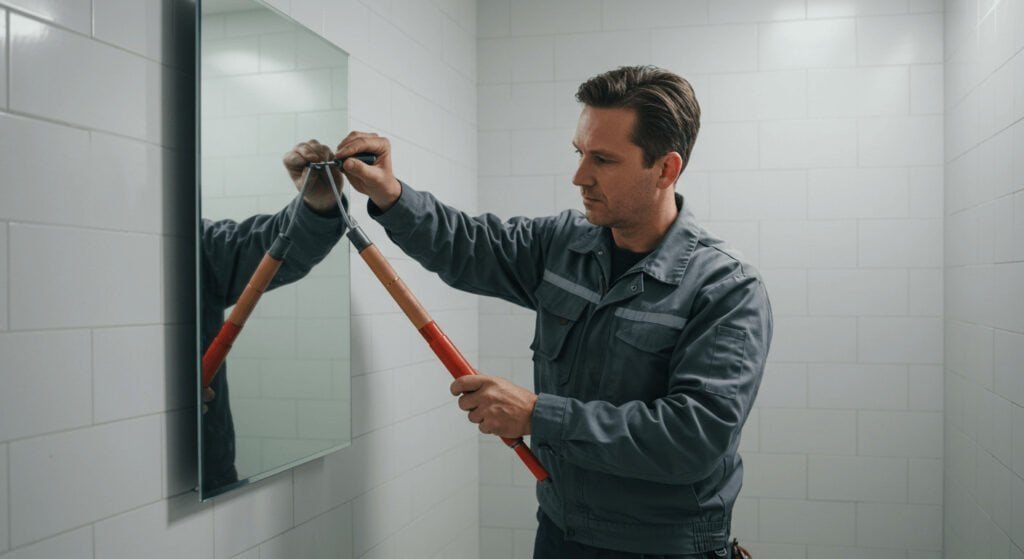
Apply A Wire Or Fishing Line
Once the adhesive is warm, slide a thin wire or fishing line behind the mirror edge. Use a gentle sawing motion to cut through the softened glue. This approach helps separate the mirror cleanly from the wall without forcing it.
Make sure to hold the mirror steady as you work. If you rush or pull too hard, the glass might crack or the wall might get damaged. Patience here pays off—think of it as cutting through a stubborn thread rather than yanking.
Carefully Pry The Mirror
If the wire or line doesn’t fully detach the mirror, use a flat tool like a putty knife to gently pry it loose. Insert the tool carefully between the mirror and wall, applying slow, even pressure. Avoid sharp or aggressive prying, which can break the glass or chip the wall.
Protect your hands with gloves and consider placing a soft cloth under the mirror edge as a cushion. This small precaution prevents accidental chips or scratches. Have you ever tried prying open a stuck window? The same delicate touch is key here.
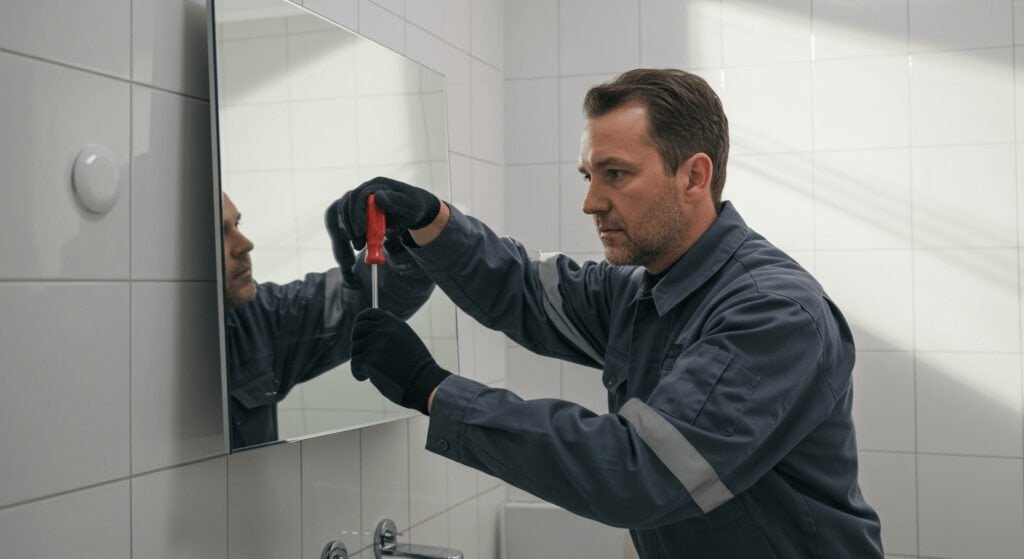
Unscrew Mirrors Attached With Hardware
Removing a mirror that’s attached with hardware is usually more straightforward than dealing with glued mirrors. These mirrors are secured with visible brackets, screws, or clips, making the process less messy and more controlled. Understanding how to safely unscrew these fixtures protects both your wall and the mirror itself.
Identify The Type Of Hardware Securing Your Mirror
Look closely at the edges of your mirror to find the brackets or clips holding it in place. Some mirrors have metal brackets at the top and bottom, while others use small clips along the sides. Knowing exactly what kind of hardware you’re dealing with helps you pick the right tools and approach.
Gather The Necessary Tools
Before you start, make sure you have the right screwdriver—usually a Phillips or flat-head will do. A step stool or ladder might be needed if your mirror is mounted high. Having a second person to help can make the process safer and easier.
Loosen And Remove The Screws Carefully
Start by loosening the screws on the brackets or clips, but don’t remove them all at once. This prevents the mirror from suddenly falling or shifting. Once the screws are loose, gently lift the mirror free from its hardware.
Handle The Mirror With Care After Removal
Mirrors can be heavy and fragile, so hold it firmly from the bottom and sides. Place it on a soft, flat surface to avoid scratches or cracks. If you plan to reinstall or move it, check the hardware for any damage and replace if necessary.
Safety Tips To Avoid Damage
Removing a mirror from a bathroom wall might seem straightforward, but it can easily lead to damage if you’re not careful. Safety is the key to protecting both your wall and yourself during the process. Taking a few precautions can save you from costly repairs and potential injury.
Wear Protective Gear
Always wear safety goggles and thick gloves before you start. Mirrors can shatter unexpectedly, and glass shards are dangerous. Protecting your eyes and hands reduces the risk of serious cuts.
Clear The Area
Remove any items around the mirror that might get broken or cause tripping. A clutter-free space lets you focus fully on the task. Have a towel or drop cloth ready to catch any falling debris.
Check For Hidden Wiring
Bathroom mirrors sometimes have built-in lighting or heating elements. Before you pull the mirror off, verify there are no electrical wires behind it. Turning off the power at the breaker panel can prevent shocks and accidents.
Use The Right Tools
Don’t try to pry the mirror off with your bare hands or inappropriate tools. A putty knife or a thin pry bar works best to gently loosen adhesive or mounting clips. Using the correct tools avoids wall damage and keeps the mirror intact.
Work Slowly And Steadily
Rushing can cause the mirror to crack or the wall to chip. Take your time and apply even pressure while removing it. Have a partner assist you to hold the mirror steady if it’s large or heavy.
Prepare For Adhesive Residue
Adhesive can stick stubbornly to the wall after the mirror is removed. Plan to clean the surface with an appropriate solvent or warm soapy water. Avoid scraping hard with sharp objects that might gouge your wall.
Credit: bfymirror.com
Clean Up After Removal
After you’ve removed the mirror from your bathroom wall, the cleanup process is crucial to restore the area and prepare it for any new fixtures. Leftover adhesive, dust, and damaged paint can make your wall look messy and uninviting. Taking the time to clean up properly not only improves the appearance but also helps prevent future problems like mold or peeling paint.
Remove Residual Adhesive And Caulk
Sticky glue or caulk often remains on the wall after the mirror is gone. Use a plastic scraper to gently lift off large chunks without damaging the drywall. For stubborn residue, apply a small amount of adhesive remover or rubbing alcohol on a cloth, then rub carefully until the surface is clean.
Have you noticed how some adhesives soften with heat? A hairdryer can warm the glue, making it easier to scrape off. Just be cautious not to overheat and damage your wall.
Patch And Sand Wall Imperfections
Removing a mirror can leave holes or rough spots on your wall. Fill these with spackling paste or wall filler using a putty knife. Once dry, sand the patches smooth so the surface feels even to the touch.
Think about the last time you skipped sanding—did the paint go on uneven or peel? Taking the time to smooth out the wall now saves you from future headaches.
Clean Dust And Debris Thoroughly
Dust and tiny debris tend to settle around the work area. Use a vacuum with a brush attachment or a damp cloth to clear the dust from the wall and floor. This ensures a clean surface for painting or installing a new mirror.
Ignoring dust might cause paint to stick poorly or look patchy. What’s your plan to keep the space spotless after cleanup?
Prepare The Wall For Painting Or New Fixtures
After cleaning and patching, prime the wall if needed to seal repaired areas. This step helps paint or new adhesive stick better and last longer. Choose a primer suitable for bathroom environments to resist moisture.
Have you checked if your primer is mold-resistant? Bathrooms are humid, so using the right products extends your wall’s life and keeps it looking fresh.
Frequently Asked Questions
How Do You Safely Remove A Bathroom Mirror?
To safely remove a bathroom mirror, first turn off the power to any nearby lights. Use a utility knife to cut through caulk or adhesive. Gently pry the mirror off the wall with a putty knife or pry bar. Wear gloves and protect your eyes.
What Tools Are Needed To Remove A Bathroom Mirror?
You need a utility knife, putty knife, pry bar, gloves, and safety glasses. A heat gun or hairdryer helps soften adhesive. Use drop cloths to protect surfaces. These tools make mirror removal easier and safer without damaging walls.
How To Avoid Wall Damage When Removing A Mirror?
Cut all caulk or adhesive around the mirror edges. Use gentle, steady pressure with a putty knife or pry bar. Avoid pulling the mirror too quickly. Work slowly to prevent drywall or paint damage. Repair minor damage with spackle and touch-up paint.
Can You Remove A Bathroom Mirror Without Professional Help?
Yes, you can remove a bathroom mirror safely by following simple steps. Use proper tools and safety gear. Take time to soften adhesive and pry carefully. If the mirror is large or glued heavily, consider professional help to avoid damage.
Conclusion
Removing a mirror from a bathroom wall is easier than it seems. Take your time and follow safe steps carefully. Use the right tools to avoid damage. Always protect your hands and eyes during the process. After removal, clean the wall for a fresh look.
This simple task can refresh your bathroom space quickly. With patience and care, you can do it yourself. No need to call a professional every time. Try these tips and see the difference today.


