
Wiring a chandelier might sound tricky, but it doesn’t have to be. Imagine transforming your room with a stunning light fixture that you installed yourself.
You’re just a few simple steps away from making that happen. In this guide, you’ll learn exactly how to wire a chandelier safely and confidently, even if you’ve never done it before. By the end, you’ll feel proud knowing you brought new light and style to your space all on your own.
Ready to get started? Let’s dive in.

Credit: theprojectlady.com
Tools And Materials Needed
Wiring a chandelier requires specific tools and materials for safety and efficiency. Having the right items makes the process smooth and reduces the risk of mistakes. Gather everything before starting your project.
Essential Tools
- Wire strippers – for removing insulation from wires
- Screwdriver set – both flathead and Phillips
- Voltage tester – to check if power is off
- Needle-nose pliers – for bending and twisting wires
- Electrical tape – to secure wire connections
- Wire nuts – for connecting wires safely
- Drill with bits – if new holes are needed
- Step ladder – to reach ceiling fixtures comfortably
Required Materials
- Chandelier fixture – the light piece to install
- Electrical wires – typically 14 or 12 gauge
- Mounting bracket – to attach the chandelier to the ceiling
- Ground wire – for safety grounding
- Light bulbs – compatible with your chandelier
- Wire connectors – to join wires securely
- Ceiling box – if not already installed
Turn Off Power Safely
Turning off power safely is the most crucial part of wiring a chandelier. Skipping this step can lead to serious injury or damage. Before you touch any wires, make sure the electricity is completely off.
Locate The Circuit Breaker
Start by finding your home’s electrical panel, usually in the basement, garage, or utility room. Open the panel door and look for the breaker that controls the room where you’ll install the chandelier.
If you’re unsure which breaker controls the light fixture, turn off the main breaker to cut power to the entire house. While it’s less convenient, it guarantees safety. Remember, better safe than sorry.
Confirm Power Is Off
Even after switching off the breaker, never assume the power is off. Use a non-contact voltage tester to check the wires where the chandelier will connect.
Hold the tester close to each wire and the metal box. If the tester doesn’t light up or beep, it means the electricity is off and you can proceed.
Have you ever thought about how many accidents happen because this step is skipped? Taking a few extra seconds to double-check can save you from a dangerous shock.
Remove Old Fixture
Turn off the power before removing the old fixture to ensure safety. Carefully disconnect wires and take down the existing light. This clears the space for wiring your new chandelier properly.
Removing an old fixture is the first crucial step in wiring a chandelier. This process not only ensures safety but also paves the way for a seamless installation of your new chandelier. Whether you’re replacing a dated fixture or simply switching styles, knowing how to remove the old fixture properly is essential. Let’s dive into the steps to accomplish this task efficiently.Unscrew And Detach
Begin by turning off the power to the existing fixture at the circuit breaker. Safety should be your top priority, and this step prevents any accidental shocks. Once the power is off, use a screwdriver to carefully unscrew the fixture from the ceiling. As you remove the screws, support the fixture with your other hand to prevent it from falling. If the fixture is heavy, have someone assist you. Once unscrewed, gently detach the fixture from its mounting bracket.Disconnect Wiring
Now that the fixture is detached, it’s time to disconnect the wiring. Identify the wires connecting the fixture to the ceiling. Typically, you’ll see black, white, and a ground wire. Carefully unscrew the wire nuts connecting these wires. As you disconnect each wire, make a mental note of their positions, or better yet, take a quick photo for reference when installing the new chandelier. Make sure the exposed wires are not touching each other. Have you ever wondered why chandeliers add so much elegance to a room? The process of installing one might seem daunting, but with patience and careful attention to detail, you can transform your space effortlessly.Prepare The Chandelier
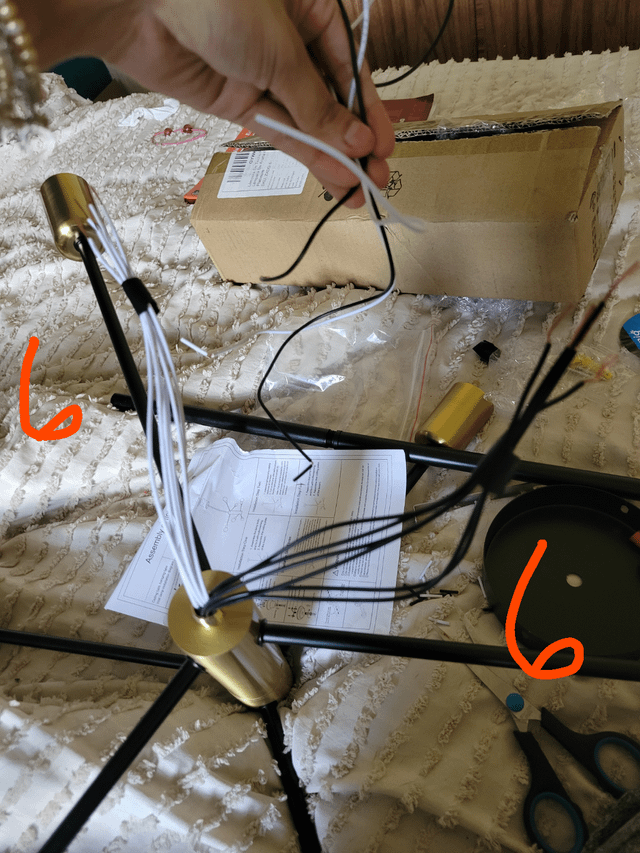
Preparing your chandelier before wiring is a crucial step that sets the stage for a smooth installation. It’s more than just unpacking the box—this is your chance to ensure every piece is ready and fits perfectly. Taking the time here can save you from headaches later and help you avoid costly mistakes.
Assemble Components
Start by laying out all the parts included in your chandelier kit. Check for the frame, arms, bulbs, canopy, chains, and screws. If any pieces are missing, contact the supplier before you proceed; missing parts can halt your progress abruptly.
Carefully follow the manufacturer’s instructions to put the chandelier together. Some parts might snap or screw together easily, but others require a bit more patience. When I first wired a chandelier, I learned the hard way that forcing parts can cause damage—slow and steady wins here.
Double-check that all decorative elements like crystals or covers are securely attached. Loose pieces can fall during or after installation, which might cause damage or injury. Are you confident that your chandelier is fully assembled and ready to hang?
Check Wiring Length
Next, examine the length of the chandelier’s wires. They need to be long enough to reach your ceiling junction box comfortably but not so long that excess wire creates clutter. If the wires are too short, you may need to extend them using wire nuts and additional wiring, which adds complexity.
Measure the distance from the chandelier’s top to the ceiling where you’ll mount it. This helps you decide if you need to adjust the chain or rod length. Remember, having extra wire is better than too little—you can always trim excess wire, but adding more requires extra work.
Have you considered how the wire length impacts your final chandelier position? Sometimes a small adjustment here changes the entire room’s lighting ambiance.
Connect Wiring
Connecting wiring is a crucial part of installing your chandelier safely and effectively. It’s where precision and attention to detail really matter because the right connections ensure your chandelier will function without any electrical issues. Let’s focus on how to properly connect those wires to get your chandelier shining bright.
Match Wire Colors
Start by identifying the wires from your chandelier and the ceiling. Typically, black or red wires are hot, white wires are neutral, and green or bare copper wires are ground. Matching these colors correctly is vital to avoid electrical shorts or shocks.
Never guess the wire functions based solely on appearance; use a voltage tester if you’re unsure. Matching colors might seem obvious, but even a small mistake here can cause big problems later.
Secure Wire Nuts
After matching the wires, twist them together tightly and cover each connection with a wire nut. Wire nuts keep the wires securely joined and prevent them from coming loose over time. Choose the right size wire nut for the wires you are connecting to ensure a snug fit.
Give each wire nut a gentle tug to check it’s firmly in place. Loose connections can cause flickering lights or even electrical fires, so don’t skip this step.
Use Electrical Tape
Wrapping electrical tape around the base of each wire nut adds an extra layer of security. This tape helps keep the wire nut from turning or loosening, especially if the chandelier moves slightly. It’s a simple step that many overlook but can save you from future headaches.
Make sure the tape covers the entire wire nut and a bit of the wires underneath to hold everything in place. It’s a small investment of time for peace of mind.
Mount The Chandelier
Mounting the chandelier is a crucial step to ensure it hangs securely and looks stunning. You want it perfectly balanced and firmly attached to avoid any safety risks. Let’s break down the process into clear actions that will help you feel confident handling this task.
Attach Mounting Bracket
Start by securing the mounting bracket to the electrical box in your ceiling. Use the screws provided with your chandelier to fasten it tightly. Make sure the bracket is aligned properly—this will support the entire weight of the fixture.
Double-check that the electrical box is rated to hold the chandelier’s weight. If not, you might need to install a brace or upgrade the box before proceeding. Skipping this can cause dangerous accidents later on.
Hang The Fixture
Once the bracket is in place, carefully lift your chandelier and hook it onto the bracket. This step often requires a second pair of hands, especially with larger fixtures. Holding the chandelier steady is key while you connect the wiring.
Think about how the chandelier’s weight is distributed. If it seems off-balance, adjust the chain length or the hooks. A well-balanced chandelier won’t just look better—it will stay secure for years to come.
Tighten Screws
With the chandelier hanging, focus on tightening all screws and fasteners. This includes those on the mounting bracket and any additional support chains or hooks. Use a screwdriver or wrench to ensure everything is snug but avoid over-tightening, which could strip the screws.
After tightening, gently shake the fixture to test its stability. If it wobbles or feels loose, revisit the mounting points. Remember, a chandelier that’s not firmly fixed can be a hazard—not just an eyesore.
Restore Power And Test
After wiring your chandelier, restoring power is the next crucial step. This process ensures your new fixture is ready to light up your space. Testing the chandelier confirms everything is connected correctly and working safely.
Turn On Circuit Breaker
Locate the circuit breaker panel in your home. Find the switch labeled for the chandelier or the room. Flip the switch to the “On” position. This action restores electricity to the chandelier wiring. Wait a moment for the power to stabilize before testing.
Check Light Functionality
Use the light switch that controls the chandelier. Turn the switch on and observe the lights. Each bulb should illuminate brightly and evenly. Flickering or dim lights may indicate a wiring issue or loose connection. Turn off the power before fixing any problems to stay safe.

Credit: www.reddit.com
Safety Tips And Troubleshooting
Wiring a chandelier requires careful attention to safety and troubleshooting. Mistakes can cause electrical problems or accidents. Following safety tips helps prevent injuries and ensures the chandelier works properly. Troubleshooting helps identify and fix wiring issues quickly.
Avoid Common Mistakes
- Turn off power at the breaker before starting work.
- Use a voltage tester to confirm power is off.
- Match wire colors correctly: black to black, white to white, and ground to ground.
- Tighten all wire connections securely with wire nuts.
- Do not overload the circuit with too many fixtures.
- Check that the mounting bracket supports the chandelier’s weight.
- Follow the chandelier’s instruction manual carefully.
Handle Wiring Issues
- Check for loose connections if the chandelier does not light up.
- Replace damaged wires to prevent shorts or shocks.
- Use electrical tape to cover exposed wire ends safely.
- Test the circuit breaker if the power keeps tripping.
- Confirm the light bulbs are the correct wattage and installed properly.
- Consult a professional electrician if problems continue.

Credit: www.seuslighting.com
Frequently Asked Questions
How Do You Safely Wire A Chandelier?
Turn off power at the breaker before starting. Use a voltage tester to confirm no electricity. Connect the chandelier wires to matching house wires—black to black, white to white, and ground to ground. Secure connections with wire nuts and follow local electrical codes.
What Tools Are Needed To Wire A Chandelier?
You need a voltage tester, wire strippers, screwdriver, electrical tape, and wire nuts. A ladder and safety goggles are also helpful. Having these tools ready ensures a smooth and safe wiring process.
Can I Wire A Chandelier Myself?
Yes, if you have basic electrical knowledge. Always turn off power first. Follow wiring instructions carefully. If unsure, consult a licensed electrician to avoid hazards and ensure proper installation.
How Do You Identify Chandelier Wires?
Typically, black or red wires are hot, white is neutral, and green or bare copper is ground. Use a voltage tester to verify. Always match chandelier wires with the corresponding house wires during installation.
Conclusion
Wiring a chandelier can seem tricky but becomes clear step by step. Always turn off the power before starting any work. Connect wires carefully, matching colors to avoid mistakes. Secure all connections tightly to keep the chandelier safe. Test the light once wiring is complete to ensure it works.
Taking your time makes the process easier and safer. A well-wired chandelier adds beauty and light to any room. Now, you can enjoy your new lighting with confidence.


