
Thinking about giving your walls a fresh new look with vinyl wall stickers? You might be wondering, how hard is it really to apply them?
You want to make sure your walls look perfect without spending hours or dealing with frustrating mistakes. The good news is, with the right steps, applying vinyl wall stickers can be easier than you think. You’ll discover simple tips and tricks that will help you get a smooth, professional finish every time.
Keep reading to learn how to transform your space quickly and confidently!
Credit: kraftmatics.com
Choosing The Right Vinyl Stickers
Choosing the right vinyl stickers is a key step that can make applying wall stickers easier and more satisfying. The right choice can save you from frustration and give your space the perfect look you want. Understanding what’s available and what fits your needs can help you avoid common pitfalls.
Types Of Vinyl Stickers
Vinyl stickers come in various types, each with its own advantages. Removable vinyl is great if you like to change designs often, as it peels off without leaving residue. Permanent vinyl sticks firmly, perfect for long-term decoration but can be tricky to remove later.
There are also matte and glossy finishes. Matte finishes reduce glare and work well in bright rooms, while glossy stickers can make colors pop. Think about where you’ll place the sticker and what effect you want before choosing the type.
Size And Design Considerations
Size matters a lot when applying vinyl stickers. Large stickers can be challenging to handle alone, especially if you’ve never done it before. Smaller or medium-sized stickers are easier to position and adjust without bubbles or wrinkles.
Design complexity also plays a role. Simple shapes are easier to apply than intricate patterns with many tiny details. Ask yourself if you feel comfortable working with fine lines or if a bold, straightforward design suits you better.
Quality And Durability Factors
Not all vinyl stickers are made equal. Higher quality vinyl tends to stick better, resist fading, and last longer on your walls. Cheaper stickers might peel off quickly or leave marks, which defeats the purpose of decorating.
Check product reviews and material descriptions before buying. Some vinyls are water-resistant or UV-protected, adding durability if your walls get sunlight or occasional moisture. Investing in quality saves time and effort in the long run.
Preparing Your Wall Surface
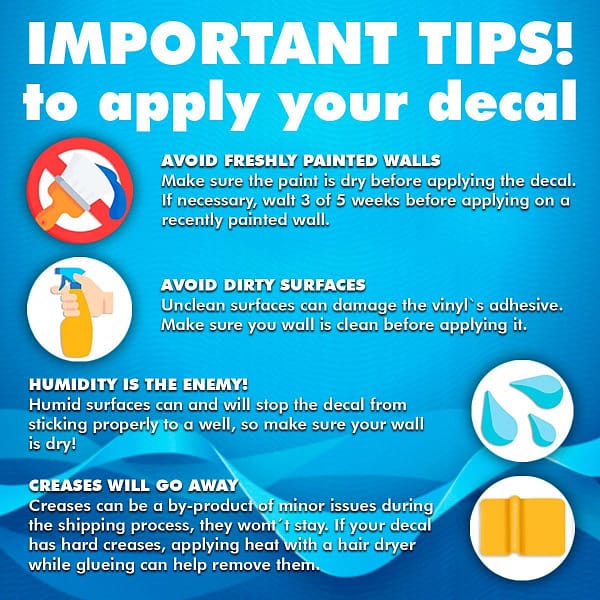
Preparing your wall surface is the key to a smooth vinyl wall sticker application. The wall must be clean, dry, and free from bumps. A well-prepped wall helps the sticker stick better and last longer.
Cleaning And Drying The Wall
Start by removing dust and dirt with a soft cloth or sponge. Use mild soap and water for stubborn spots. Avoid harsh chemicals as they can damage the paint or wall surface. After cleaning, let the wall dry completely. Moisture can stop the vinyl from sticking properly.
Smoothing Out Imperfections
Check the wall for cracks, holes, or bumps. Use spackling paste or filler to fix these areas. Sand the surface gently once dry to make it even. A smooth wall allows the vinyl sticker to lay flat and look perfect.
Ideal Wall Materials For Application
Vinyl stickers work best on smooth, clean, and dry surfaces. Painted drywall, glass, metal, and finished wood are ideal. Avoid rough or textured walls, wallpaper, and brick. These surfaces make the sticker peel or bubble easily.
Gathering Necessary Tools
Applying vinyl wall stickers can transform a room instantly. To make this process smooth, gather the right tools. This ensures precision and a clean finish. Being prepared saves time and avoids mistakes. Let’s explore what you need.
Essential Tools For Application
Start with the basics for a successful application. These tools help in handling stickers easily.
- Squeegee:Removes air bubbles for a smooth surface.
- Measuring Tape:Ensures accurate placement and spacing.
- Level:Keeps your stickers straight and aligned.
- Painter’s Tape:Temporarily holds stickers in place for positioning.
- Scissors or Utility Knife:Trims excess material for a neat look.
- Soft Cloth:Cleans the wall before applying stickers.
Optional Accessories For Precision
For a more refined application, consider these additional accessories. They offer extra control and precision.
- Pencil:Marks guidelines without damaging surfaces.
- Laser Level:Projects straight lines for alignment.
- Heat Gun or Hair Dryer:Softens vinyl for easier shaping.
- Pin:Pops stubborn air bubbles without tearing.

Credit: www.ebay.ca
Step-by-step Application Process
Applying vinyl wall stickers might seem tricky at first, but breaking down the process into clear steps can make it much easier. Understanding each phase helps you avoid common mistakes and ensures a smooth, bubble-free finish. Let’s walk through the key actions you’ll take to get your sticker perfectly placed.
Positioning The Sticker
Start by deciding exactly where you want your sticker. Hold it up against the wall and step back to see how it looks from different angles. Consider the height, alignment with furniture, or any patterns on the wall.
Use painter’s tape to temporarily fix the sticker in place. This lets you adjust the position without committing right away. Ask yourself: Does this spot catch the eye the way I want it to?
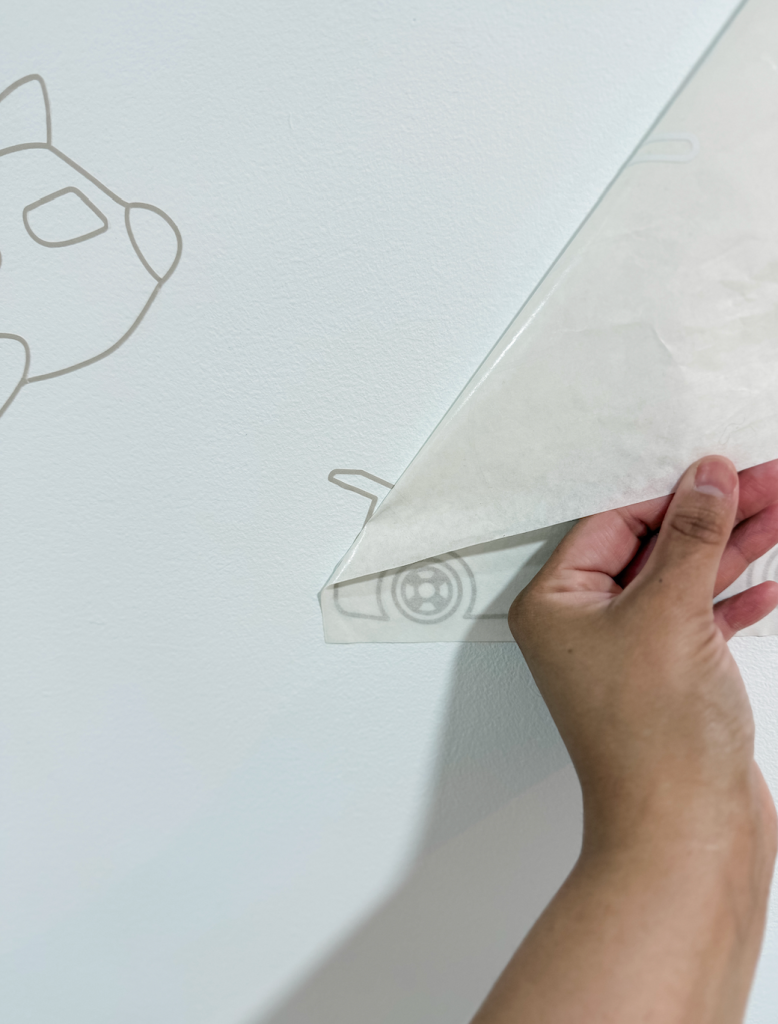
Peeling And Applying
Carefully peel the backing paper from one edge of the sticker. Avoid pulling off the entire backing at once to prevent the sticker from folding or sticking to itself.
Slowly press the exposed part onto the wall. Work your way down or across, peeling and sticking a little at a time. This controlled approach reduces mistakes and keeps the sticker flat.
Smoothing Out Air Bubbles
Use a plastic card or a squeegee to smooth the sticker as you go. Push from the center toward the edges to remove trapped air.
If you spot small bubbles, gently lift the nearest corner and reapply while smoothing out the air. This step is crucial for a clean look and long-lasting adhesion.
Final Touches And Adjustments
Once the sticker is fully applied, check all edges to make sure they’re firmly stuck down. Press any loose spots with your fingers or card.
If you notice any imperfections, don’t hesitate to fix them now. A little patience here makes a big difference in the end result.
Common Challenges And Fixes
Applying vinyl wall stickers can be a fun way to personalize your space, but it often comes with a few hurdles. Understanding common challenges helps you stay calm and fix issues without frustration. Let’s look at some typical problems and how you can easily overcome them to get a flawless finish.
Dealing With Wrinkles And Bubbles
Wrinkles and bubbles are the most frequent annoyances during application. They usually happen when air gets trapped under the sticker or the vinyl isn’t smoothed out properly.
To fix this, use a flat edge like a credit card or a squeegee to gently push the bubbles towards the edges. If a bubble persists, carefully lift the sticker from the nearest corner and reapply it slowly, smoothing as you go.
Have you ever tried using a pin to pop tiny bubbles? It can help release trapped air, but be cautious not to puncture the vinyl too much. Patience and slow, steady pressure work wonders here.
Removing And Reapplying Stickers
Sometimes, your first placement isn’t perfect, and you need to remove and reposition the sticker. This can feel risky, especially if you worry about tearing or losing stickiness.
Peel the sticker off slowly at a low angle to avoid stretching or damaging it. If the adhesive loses strength, try warming the sticker slightly with a hairdryer to make it more flexible and easier to reposition.
Remember, not all vinyl stickers are designed for multiple reapplications. Check the product details before attempting this step to avoid frustration.
Avoiding Damage To Walls
Protecting your walls during sticker application is crucial, especially if you rent or want to keep your walls pristine. The wrong removal technique can peel paint or leave sticky residue behind.
Test a small area first by applying and removing a sticker piece to see how your wall reacts. When removing, pull the sticker off slowly and steadily, ideally at a 45-degree angle.
If residue remains, use a gentle adhesive remover or warm soapy water instead of harsh chemicals. This approach keeps your walls safe and your stickers reusable if needed.
Maintenance And Longevity Tips
Keeping your vinyl wall stickers looking fresh and vibrant doesn’t stop at applying them. How you maintain them plays a big role in their lifespan and appearance. Simple care routines can save you from the hassle of peeling edges or faded colors, making your walls look great for longer.
Cleaning Vinyl Stickers
Cleaning vinyl stickers is easier than you might think, but it requires gentle care. Use a soft, damp cloth with mild soap to wipe away dust and dirt. Avoid harsh chemicals or abrasive scrubbers that can damage the vinyl surface or the adhesive underneath.
If you notice stubborn stains, test the cleaning solution on a small corner first. This prevents unexpected discoloration. How often you clean depends on your environment—high-traffic areas might need a quick wipe every week, while less exposed walls can be cleaned less frequently.
Preventing Peeling And Fading
Peeling often starts at the edges when stickers are exposed to moisture or rough handling. To prevent this, avoid placing stickers where they might get bumped or scratched often. If you’re applying stickers in a humid room like a bathroom, make sure the area is well-ventilated.
Fading happens mainly due to direct sunlight. If your vinyl stickers are on walls that get a lot of sun, consider using window films or curtains to reduce UV exposure. Have you checked your stickers after a few weeks in a sunny spot? You might notice subtle color changes already.
Simple maintenance like these can keep your vinyl stickers sticking strong and looking sharp. What small habit will you try first to extend the life of your wall art?

Credit: www.amazon.ca
Frequently Asked Questions
How Difficult Is It To Apply Vinyl Wall Stickers?
Applying vinyl wall stickers is generally easy. With proper surface cleaning and careful peeling, most people can apply them without professional help. Patience and a steady hand improve results.
Do Vinyl Wall Stickers Damage Walls Upon Removal?
No, vinyl wall stickers usually peel off cleanly without damaging walls. Removing them slowly and gently helps prevent paint or wallpaper damage.
What Tools Are Needed To Apply Vinyl Wall Stickers?
You only need a clean cloth, a squeegee or credit card, and a steady hand. These simple tools ensure smooth application without bubbles.
Can I Reposition Vinyl Wall Stickers After Applying?
Yes, you can reposition vinyl wall stickers shortly after applying. However, repeated repositioning may reduce adhesion, so it’s best to place them carefully at first.
Conclusion
Applying vinyl wall stickers is easier than many think. With careful steps, anyone can do it well. Clean walls, smooth surfaces, and patience help a lot. Small bubbles or wrinkles can be fixed quickly. Practice makes the process less tricky over time.
Vinyl stickers offer a quick way to change a room’s look. No special skills or tools are needed. Just take your time and enjoy the creative process. This simple project can add fun and style to any space.


