
Are you tired of your motion sensor light switch turning off too quickly or not sensing movement properly? Adjusting your motion sensor light switch can make a huge difference in how well it works for you.
Imagine coming home to a perfectly lit room without fumbling for a switch every time. In this guide, you’ll discover simple steps to fine-tune your motion sensor light switch so it responds exactly the way you want. Keep reading, and you’ll learn easy adjustments that save energy, increase convenience, and make your space safer.
Your perfect lighting setup is closer than you think!

Credit: www.amazon.ca
Types Of Motion Sensor Switches
Motion sensor light switches come in different types, each designed to detect movement in unique ways. Understanding these types helps you adjust your switch more effectively and troubleshoot if something doesn’t work as expected. Let’s break down the main categories to help you find the right fit for your space and needs.
Passive Infrared Sensors
Passive Infrared (PIR) sensors detect heat emitted by moving objects, like people. They work best when someone walks across their field of view, as they sense changes in infrared energy. PIR sensors are common in homes because they are reliable and energy-efficient.
One thing to remember: PIR sensors might not detect motion if you’re moving directly toward them. Have you noticed your hallway light doesn’t turn on when you walk straight ahead? That’s probably why.
Ultrasonic Sensors
Ultrasonic sensors emit high-frequency sound waves and measure the reflection to detect movement. They can sense motion even through thin walls or objects, making them sensitive in enclosed spaces. These sensors work well in areas where you expect subtle movements, like offices or basements.
However, ultrasonic sensors may trigger false alarms from things like curtains fluttering or fans moving. Adjusting their sensitivity can help reduce such issues.
Dual Technology Sensors
Dual technology sensors combine PIR and ultrasonic technologies to improve accuracy. Both sensors must detect motion before the light turns on, reducing false triggers. This makes them a smart choice for busy spaces where you want reliable detection without constant flickering.
If your motion sensor light switch is turning on too often without reason, consider whether a dual sensor might solve the problem. Have you tried adjusting both sensors separately to fine-tune performance?
Tools And Safety Tips
Adjusting a motion sensor light switch is straightforward, but having the right tools and following safety tips can make the process smoother and safer. Knowing what you need and how to protect yourself ensures you won’t face unnecessary risks or delays. Let’s look at what tools you should have ready and the key precautions to keep in mind.
Essential Tools Needed
Before you start, gather the tools that will make adjusting your motion sensor light switch easier and more efficient. Having these on hand saves you from interruptions and frustration.
- Screwdriver:A flathead and a Phillips head screwdriver are usually required to remove the switch cover and adjust screws.
- Voltage Tester:This tool helps you confirm that the power is off before touching any wires, preventing shocks.
- Wire Strippers:Useful if you need to trim or adjust wiring for better connections.
- Electrical Tape:Handy for securing wire nuts and ensuring safe connections.
- Flashlight:Sometimes the switch area is poorly lit, so a flashlight can help you see clearly.
Imagine trying to adjust your motion sensor in a dim hallway without a flashlight—simple things like this can delay your work. Having all these tools ready means you can focus on the adjustment itself.
Power Off Precautions
Safety should be your top priority when working with electrical switches. Before touching anything, turn off the power to the switch at your circuit breaker panel. This simple step is your first line of defense against electric shock.
After switching off the power, use your voltage tester to double-check that there’s no electricity flowing to the wires. Don’t skip this step; sometimes breakers are mislabeled or not fully off.
It might feel inconvenient to shut off power, especially if it affects other parts of your home, but ask yourself: Is risking a shock worth saving a few minutes? Taking this precaution protects you and avoids costly medical bills or damage.
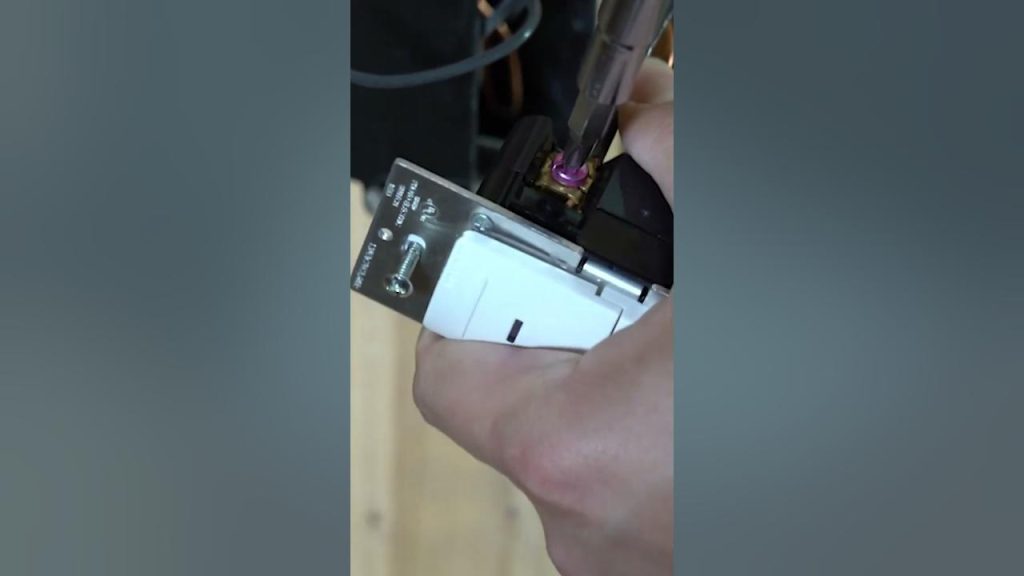
Removing The Existing Switch
Removing the Existing Switch First, turn off the power to ensure safety. Then, unscrew and gently remove the old switch. Disconnect the wires carefully, noting their positions for later reconnection.
Removing the existing switch is the first crucial step in adjusting your motion sensor light switch. By doing this, you’re setting the stage for a smooth transition to a more efficient lighting system. It’s a task that demands a bit of patience and attention to detail, but the payoff is worth it.Turn Off Circuit Breaker
Safety first! Before you even think about unscrewing anything, head to your circuit breaker panel. Find the switch that controls the power to the light switch you’re about to work on. Flip it off to cut the power. This is a non-negotiable step because you definitely don’t want to risk an electrical shock. It’s better to be safe now than sorry later.Unscrew And Disconnect Wires
Grab a screwdriver and carefully remove the screws holding the switch plate in place. Once you have the plate off, you’ll see the switch secured with more screws. Loosen these and gently pull the switch out to expose the wiring. Take note of how the wires are connected; a quick photo with your phone can serve as a helpful reference. Disconnect the wires by loosening the terminal screws or pulling apart the wire connectors. Now you’re ready to replace it with your new motion sensor switch. Isn’t it satisfying to see progress right at your fingertips?Installing The Motion Sensor Switch
Installing a motion sensor light switch is a simple way to add convenience to any room. It replaces a standard switch and automatically controls your lights. This saves energy and improves safety. The process requires basic tools and careful handling of wiring. Follow clear steps to ensure a safe and effective installation.
Wiring Connections
Turn off the power at the circuit breaker. Use a voltage tester to confirm no electricity flows. Remove the old switch from the wall box. Identify the wires: line, load, neutral, and ground.
Connect the motion sensor switch wires according to the color codes:
- Black wire to the line (power supply)
- Red or black wire to the load (light fixture)
- White wire to the neutral (white wires in the box)
- Green or bare copper wire to the ground
Use wire nuts to secure each connection tightly. Wrap electrical tape around wire nuts for extra safety. Push the wires gently into the box without damage.
Securing The Switch
Align the motion sensor switch with the wall box holes. Insert mounting screws and tighten them evenly. Avoid over-tightening, which can crack the switch plate.
Attach the switch cover plate. Turn the power back on at the breaker. Test the motion sensor to check if it works properly. Adjust settings as needed for sensitivity and light duration.
Adjusting Sensitivity Settings
Adjusting the sensitivity settings on your motion sensor light switch is key to making sure it responds exactly how you want. Too sensitive, and the light might turn on for every small movement, wasting energy. Not sensitive enough, and it may fail to detect you when you need it most.
Detecting Motion Range
Understanding the motion range your sensor covers helps you decide where to set the sensitivity. Most sensors have a detection distance from a few feet up to 30 feet or more. You want to ensure the sensor picks up movement within the area you care about, like a hallway or porch, without reacting to people passing by outside your intended zone.
Try walking through the detection area at different distances. Notice where the light turns on and where it doesn’t. This hands-on test helps you find the sweet spot where the sensor activates reliably without false triggers.
Setting Sensitivity Levels
Once you know the detection range, adjust the sensitivity dial or switch on your device. Most sensors offer settings like low, medium, and high. Higher sensitivity means the sensor detects smaller or more distant movements, while lower sensitivity requires bigger or closer motions.
If your light turns on too often from pets, cars passing by, or tree branches moving, dial the sensitivity down. If it doesn’t turn on when you enter the room, increase it. Don’t hesitate to tweak the setting multiple times; finding the perfect level can take a few tries.
Have you noticed your sensor reacting to things you didn’t expect? Adjusting sensitivity can be a simple fix that makes your light switch smarter and more efficient. What’s the most surprising trigger your motion sensor has picked up?

Credit: www.youtube.com
Configuring Time Delay
Configuring the time delay on a motion sensor light switch sets how long the light stays on after detecting movement. This setting helps save energy by turning off the light automatically. Adjusting the delay ensures the light stays on long enough for comfort but not longer than needed.
Choosing Delay Duration
Select a time delay that fits your routine and space. Common options range from 10 seconds to 30 minutes. Short delays work well in hallways or bathrooms. Longer delays suit larger rooms or outdoor areas. Consider how often people pass through and how much light they need.
- Short delay: 10 to 60 seconds for quick trips
- Medium delay: 1 to 5 minutes for moderate use
- Long delay: 5 to 30 minutes for extended stays
Testing Time Settings
After setting the delay, test the light to see if it meets your needs. Walk away and observe how long the light stays on. Adjust the time if the light turns off too soon or stays on too long. Repeat testing until the timing feels right.
Setting Ambient Light Levels
Setting the ambient light levels on your motion sensor light switch is key to making sure it works exactly when you need it. Adjusting these levels helps the sensor decide whether the room is bright enough to keep the lights off or if it should turn them on when motion is detected. Getting this balance right can save energy and prevent frustration from lights turning on at odd times.
Daylight Sensor Adjustment
Your motion sensor light switch likely has a daylight sensor that measures the surrounding light. Adjust this sensor to set the threshold at which the light activates. If you set it too low, the light might stay on during the day, wasting energy.
Try moving the adjustment dial or slider while observing the sensor’s response. You want the light to stay off during bright daylight but turn on when the room gets dim. For example, if you have a room with large windows, set the sensor to a higher level so natural light prevents the light from switching on.
Avoiding False Triggers
False triggers can be annoying—they turn your lights on even when no one’s around. These usually happen if the sensor is too sensitive to small movements or changes in ambient light, like shadows or passing cars outside a window.
To reduce false triggers, lower the sensitivity of the motion sensor slightly. Test it by walking around and noting when the light activates. Adjust the sensor until it responds only to meaningful motion, like a person entering the room.
- Check for reflective surfaces that might confuse the sensor.
- Reposition the sensor if possible, so it faces the main activity area.
- Make sure the sensor isn’t pointing directly at windows or heat sources.
Have you noticed your light turning on late at night with no one there? Adjusting these settings carefully can stop that from happening and give you control over your lighting environment.
Testing And Troubleshooting
Testing and troubleshooting your motion sensor light switch is key to making sure it works exactly how you want. Without proper checks, you might face unexpected flickers or missed triggers, which can get frustrating. Let’s dive into how you can quickly identify issues and fix them to keep your lighting system smooth and reliable.
Checking Sensor Response
Start by observing how the sensor reacts when you enter its detection zone. Walk slowly across the room and watch if the light turns on promptly. If the light doesn’t respond, make sure the sensor lens is clean—dust or smudges can block detection.
Try testing the sensor from different angles and distances. Sometimes, a slight adjustment to the sensor’s position can make a big difference. Ask yourself: Does the light activate consistently when you move within range, or only sporadically?
Also, check the time delay settings. If the light turns off too quickly or stays on too long, tweak the timer until it fits your needs. This simple test can save you a lot of annoyance later on.
Common Issues And Fixes
- Light Won’t Turn On:Verify the power supply and wiring connections first. Loose wires or a tripped breaker might be the culprit.
- Light Flickers or Turns Off Too Soon:Adjust the sensitivity and timer settings. Sometimes, strong sunlight or reflective surfaces confuse the sensor.
- Sensor Detects Movement Too Far Away:Reduce the sensor’s detection range to prevent false triggers from passing cars or animals.
- Light Stays On Constantly:Check for nearby heat sources like vents or appliances that might be activating the sensor mistakenly.
Have you ever had your motion sensor light turn on at odd times? It’s often a quick fix once you identify the cause. Don’t hesitate to experiment with settings or reposition the sensor until it feels just right. Your comfort and energy savings depend on it.
Maintenance Tips
Proper maintenance keeps your motion sensor light switch working well. Dirt and dust can block the sensor. Small problems may stop the system from working. Regular care helps avoid issues and extends the switch’s life.
Cleaning The Sensor Lens
Keep the sensor lens clean for accurate detection. Use a soft, dry cloth to wipe the lens gently. Avoid harsh chemicals or water that may damage the sensor. Clean the lens every few months or when you notice reduced sensitivity. This simple step improves performance significantly.
Regular System Checks
Test the sensor switch regularly to ensure it works correctly. Walk in front of the sensor to check if lights turn on. Adjust the detection range if needed. Look for loose wires or damage around the switch. Fix small problems early to prevent bigger issues later. Regular checks keep the system reliable and safe.

Credit: www.youtube.com
Frequently Asked Questions
How Do I Adjust The Sensitivity Of A Motion Sensor Light Switch?
To adjust sensitivity, locate the sensor dial or switch on your device. Turn it clockwise to increase sensitivity or counterclockwise to decrease it. This controls how far motion is detected, helping to avoid false triggers or missed movements.
How Can I Change The Light Duration On A Motion Sensor Switch?
Find the time delay dial on the switch. Turn it to set how long the light stays on after detecting motion. Adjusting this helps save energy or keeps the area lit longer based on your needs.
What Is The Best Placement For A Motion Sensor Light Switch?
Install the sensor where it has a clear view of the area to monitor. Avoid obstructions like furniture or walls. Position it away from heat sources or direct sunlight to prevent false triggers.
How Do I Reset A Motion Sensor Light Switch?
Turn off the power at the circuit breaker. Remove the switch and disconnect wires. Wait a few minutes, then reconnect and restore power. This resets the sensor to factory settings.
Conclusion
Adjusting a motion sensor light switch is simple and useful. You can control how long the light stays on and how sensitive it is. This helps save energy and makes your space safer. Take time to test the settings to fit your needs.
With a few small changes, your light switch works better for you. Try adjusting it today and enjoy the benefits of smart lighting.


