
Have you ever noticed your motion light sensor switch turning on too early or staying on longer than you want? It can be frustrating when your lights don’t work exactly how you need them to.
But here’s the good news: you can easily adjust your motion light sensor switch to fit your routine perfectly. In this guide, you’ll discover simple steps to control when and how your lights respond. Keep reading, and you’ll soon have your lighting working smarter, saving energy, and giving you the convenience you deserve.
Choosing The Right Motion Sensor
Choosing the right motion sensor is key to effective lighting control. A suitable sensor improves safety and saves energy. Understanding sensor types and proper placement helps you pick the best option for your needs.
Types Of Motion Sensors
Motion sensors detect movement using different technologies. Each type suits certain areas and tasks.
- Passive Infrared (PIR): Detects body heat. Works well indoors and in warm areas.
- Ultrasonic: Sends sound waves to sense motion. Good for irregular shapes and corners.
- Microwave: Emits microwaves to detect movement. Covers large areas but can be sensitive.
- Dual-Technology: Combines PIR and microwave. Reduces false alarms and increases accuracy.
Sensor Placement Tips
Correct placement ensures sensors catch motion effectively. Install sensors at proper height and angle.
- Mount sensors 6 to 10 feet above the ground.
- Avoid pointing sensors at windows or heat sources.
- Place sensors where movement is expected, like doorways or walkways.
- Test sensor range and adjust sensitivity for best results.
Tools You’ll Need
Adjusting a motion light sensor switch is easier with the right tools at hand. Having these tools ready saves time and prevents mistakes. It also helps you work safely and efficiently.
The list below covers all essential tools needed for this task. Each tool plays a key role in making adjustments smooth and precise.
Flathead And Phillips Screwdrivers
- Use to remove cover plates and access sensor controls.
- Choose sizes that fit your screws to avoid damage.
Voltage Tester
- Ensures power is off before starting work.
- Keeps you safe from electric shocks.
Wire Strippers
- Helps strip insulation from wires if rewiring is needed.
- Prepares wires for clean connections.
Small Adjustable Wrench
- Useful for tightening nuts on sensor mounts.
- Provides better grip and control.
Step Ladder
- Allows safe reach to ceiling or wall-mounted sensors.
- Use a sturdy ladder for stability.
Power Off For Safety
Power off for safety before adjusting a motion light sensor switch. This prevents electrical shocks. Gently tweak the sensitivity and duration settings to suit your needs. Ensure it’s securely mounted and test the sensor by walking past it. Adjust as needed for optimal performance.
Powering off the motion light sensor switch ensures safety. Before adjusting or handling any electrical device, cutting the power is crucial. This step prevents accidents, such as electric shocks. Always prioritize safety by disconnecting the power source. Here’s how to do it effectively:Turn Off The Circuit Breaker
Locate the circuit breaker box in your home. Identify the switch that controls the motion light sensor. Flip it to the ‘Off’ position. This ensures the power is fully cut off. Confirm the light is off before proceeding.Double Check With A Voltage Tester
Use a voltage tester to verify the power is off. Place the tester near the wires of the sensor switch. Ensure the tester shows no active current. This step provides an extra layer of safety.Ensure The Area Is Safe
Make sure the area around the switch is dry and clear. Avoid touching wet surfaces while handling electrical components. Safety comes first before making any adjustments.
Credit: www.amazon.ca
Accessing The Sensor Controls
Accessing the sensor controls is the key to customizing your motion light sensor switch to fit your needs. Before making any adjustments, you need to get inside the sensor housing safely and locate the control elements. This process is simple but requires attention to detail and a bit of patience.
Removing The Cover
Start by turning off the power to the motion light to avoid any electrical hazards. Most sensor covers snap or screw into place, so check for visible screws or clips around the edges.
Use a flathead screwdriver or your fingers to gently pry the cover off. If screws are present, carefully unscrew them and set them aside in a safe spot. Keep your movements slow and steady to avoid damaging the cover or sensor.
Identifying Adjustment Knobs
Once the cover is off, you’ll see several small knobs or dials on the sensor circuit board. These are your control points for tweaking settings like sensitivity, time delay, and light level threshold.
Each knob usually has a label, such as “SENS” for sensitivity or “TIME” for how long the light stays on. If labels aren’t clear, consult the sensor’s manual or look for a small diagram printed inside the cover.
Have you ever wondered how changing these settings could save energy or improve security? Experimenting with these knobs lets you tailor the sensor’s behavior exactly to your environment.
Adjusting Sensitivity Settings
Adjusting the sensitivity settings of a motion light sensor switch helps control how easily the light activates. Sensitivity determines the distance and size of motion needed to trigger the sensor. Proper adjustment avoids false alarms and saves energy. It also ensures the light works well in the intended area.
Increasing Sensitivity
To increase sensitivity, locate the sensor’s adjustment dial or button. Turn the dial slowly toward the higher setting. This change makes the sensor detect smaller or distant movements.
Higher sensitivity suits large, open spaces or areas with low activity. It helps catch motion quickly and keeps the light on longer. Be careful not to set it too high to avoid triggering by small animals or wind.
Decreasing Sensitivity
To decrease sensitivity, turn the adjustment dial toward the lower setting. This reduces the sensor’s detection range and ignores minor movements.
Lower sensitivity works well in busy areas or places with many moving objects nearby. It prevents the light from turning on too often. Adjust gradually and test the sensor after each change for best results.
Setting The Time Delay
Setting the time delay on your motion light sensor switch controls how long the light stays on after detecting motion. Adjusting this feature helps save energy and match the lighting to your needs. Whether you want the light to turn off quickly or stay on longer, fine-tuning the time delay is a simple yet effective way to customize your lighting experience.
Shortening Light Duration
If you want the light to turn off quickly after motion stops, shortening the time delay is key. This is useful in areas where brief illumination is enough, like hallways or entryways. To do this, locate the time delay dial or switch on your sensor and turn it toward the shorter duration setting.
Try setting the delay to 15-30 seconds and observe how the light responds. Does it turn off too fast, leaving you in the dark? If so, increase it slightly until you find the sweet spot that fits your routine. Adjusting the time delay in small increments helps avoid frustration from lights shutting off prematurely.
Extending Light Duration
Sometimes, you need the light to stay on longer, especially in spaces where you spend more time, like garages or patios. Extending the time delay keeps the area illuminated without repeatedly triggering the sensor. Simply turn the time delay dial toward the longer duration setting.
Setting the delay between 5 to 10 minutes works well for most outdoor spaces. Think about how long you usually remain in the area after the light activates and set the timer accordingly. This prevents the light from switching off while you’re still present, improving safety and convenience.
Modifying The Detection Range
Modifying the detection range of your motion light sensor switch lets you control how much area the sensor covers. Adjusting this range can help prevent false triggers or ensure the sensor catches every movement you want it to. Whether you need the sensor to focus on a small spot or scan a wider area, tweaking the settings is simple and effective.
Narrowing Detection Area
If your sensor is picking up too many unwanted movements, narrowing the detection area can help. Most motion sensors have a dial or switch to reduce the range. Turn it down slowly and test the coverage by walking through the area to see if the sensor still detects your presence.
Another way to narrow the area is by adjusting the sensor’s angle or physically blocking parts of the lens with tape or a small shield. This limits the sensor’s field of view and stops it from detecting motion outside your desired zone.
Have you noticed lights turning on when a car drives by outside or when a pet moves nearby? Narrowing the detection area could solve this annoyance.
Widening Detection Area
On the other hand, if your sensor misses some movements, widening the detection area can increase its sensitivity. Use the control dial to expand the range gradually, then test it in different spots to ensure it picks up motion throughout the space.
Repositioning the sensor higher or angling it toward the area you want to monitor can also improve coverage. Sometimes a small shift in placement makes a big difference.
Think about areas like driveways or backyards where you want the light to activate as soon as someone approaches. Widening the detection range can give you that early warning and added security.

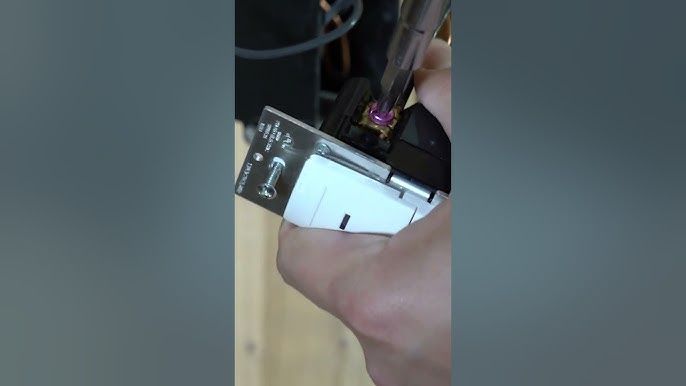
Credit: www.youtube.com
Testing Your Adjustments
Testing your adjustments ensures the motion light sensor switch works perfectly. It confirms the sensor detects motion at the right distance and the light stays on for a proper time. Testing also helps avoid false triggers and saves energy. Follow simple steps to check and improve your settings effectively.
Performing A Walk Test
Start by walking slowly through the sensor’s detection area. Watch if the light turns on immediately when you enter the zone. Move around to cover different spots within the sensor’s range. This test shows if the sensor covers the area you want to light up.
Note any spots where the light does not turn on or turns off too soon. Adjust the sensor angle or sensitivity if needed. Repeat the walk test until the light responds well to your movement.
Fine-tuning Settings
Adjust the sensitivity to control how much motion triggers the light. Use low sensitivity to avoid false alarms from small animals or leaves. Increase sensitivity if the light misses your movement.
Set the time delay to decide how long the light stays on. Choose shorter times to save energy. Longer times help if you need more light after motion stops.
Test the light again after each change. Small adjustments can improve performance greatly. Keep testing and tuning until the sensor works just right for your space.
Common Issues And Fixes
Motion light sensor switches can sometimes face issues that affect their performance. Understanding common problems and how to fix them helps maintain proper function. Troubleshooting these issues saves time and avoids unnecessary replacements.
False Triggers
False triggers happen when the light turns on without any real motion. This can waste energy and cause annoyance. Causes include:
- Nearby moving objects like trees or pets
- Strong sunlight or shadows affecting the sensor
- Incorrect sensitivity settings
Fix false triggers by adjusting the sensor’s sensitivity. Lowering sensitivity reduces reactions to small movements. Change the sensor angle to avoid direct sunlight or moving branches. Clearing any dirt or debris from the sensor lens also helps.
Light Not Turning On
The light may fail to turn on despite motion detection. Common reasons include:
- Power supply issues or loose wiring
- Incorrect time delay or daylight settings
- Sensor malfunction or damage
Check all wiring connections for tightness and proper installation. Adjust the time delay and daylight threshold to ensure the light activates in low light. Replace the sensor if it shows signs of damage or does not respond after adjustments.

Credit: www.amazon.co.uk
Frequently Asked Questions
How Do I Adjust The Sensitivity On A Motion Light Sensor?
To adjust sensitivity, locate the sensor’s sensitivity dial or switch. Turn it clockwise for higher sensitivity or counterclockwise to reduce detection range. Proper adjustment prevents false triggers and ensures the light activates only when needed.
What Is The Best Height To Install A Motion Light Sensor?
Install the sensor between 6 to 10 feet high. This height optimizes motion detection range and coverage. Too high or too low installation may reduce sensor effectiveness or cause false activations.
How Can I Change The Duration The Light Stays On?
Use the timer dial on the sensor to set how long the light stays on after motion detection. Adjust it to your preference, typically between 10 seconds to 10 minutes, depending on your needs.
Why Is My Motion Light Sensor Not Detecting Movement?
Check for obstructions blocking the sensor’s view. Also, verify the sensitivity setting and ensure the sensor is clean. Incorrect installation angle or strong sunlight can interfere with detection.
Conclusion
Adjusting your motion light sensor switch improves home safety and saves energy. Small changes to settings can make a big difference. Test the sensor to find the best range and time delay. Keep the sensor clean and clear from obstructions for better performance.
Regular checks help your light work smoothly every night. Simple steps keep your space bright and secure without wasting power. Try these tips and enjoy easy control of your motion lights.


