
Are you tired of your motion sensor light switch turning off too quickly or not sensing movement properly? Adjusting it the right way can make a big difference in how your lights respond and save you energy at the same time.
In this guide, you’ll learn simple steps to fine-tune your motion sensor light switch so it works exactly how you want. Keep reading, and you’ll soon enjoy smarter, more reliable lighting that fits your daily routine perfectly.
Choosing The Right Sensor Light
Choosing the right motion sensor light switch is key to effective lighting control. It ensures safety, saves energy, and adds convenience to your space. Picking the correct sensor depends on several factors. These include the type of sensor, the room size, and the power needs of your home or office.
Types Of Motion Sensor Switches
There are several types of motion sensor switches. Passive infrared (PIR) sensors detect heat from moving bodies. Ultrasonic sensors use sound waves to sense motion. Dual technology sensors combine both for better accuracy. Each type suits different environments and uses.
Matching Sensor With Room Size
Choose a sensor that fits the room size. Small rooms need sensors with a limited range. Large rooms require sensors with a wider detection area. Check the sensor’s coverage angle and distance. This ensures the light activates properly without false triggers.
Considering Power Requirements
Power needs vary among sensor switches. Some work with standard wiring and voltage. Others need specific power supplies or batteries. Confirm compatibility with your home’s electrical system. Proper power matching avoids electrical issues and extends sensor life.
Tools And Safety Measures
Adjusting a motion sensor light switch requires more than just technical know-how; it demands the right tools and a strong focus on safety. Before you dive into the wiring or settings, ensuring you have everything you need and that power is off can save you from accidents and frustration. Let’s break down what you should prepare and how to protect yourself while working on this task.
Essential Tools Needed
Having the correct tools on hand makes your job easier and safer. You will need:
- Screwdrivers:A flathead and a Phillips screwdriver to remove and secure the switch plate and switch.
- Wire strippers:To strip insulation from wires cleanly without damaging them.
- Voltage tester:To confirm whether the power is off before touching wires.
- Electrical tape:For securing wire connections safely.
- Needle-nose pliers:To bend wires or hold small parts firmly.
Try to organize your tools before starting to avoid searching mid-task, which can lead to distractions or mistakes.
Turning Off Power Safely
Never assume the power is off just because the light is off. Always switch off the circuit breaker that controls the light switch you want to adjust. This step is crucial to prevent electric shocks.
After turning off the breaker, test the switch by flipping it on and off to see if the light remains off. This simple action confirms that the electrical current is cut off. If you feel unsure, ask someone experienced to double-check with you.
Using A Voltage Tester
A voltage tester is your best friend for safety. Before touching any wires, use the tester to verify no electricity is flowing. Place the tester probes on the wires or terminals where you’ll be working.
If the tester lights up or beeps, the power is still live, meaning you need to double-check the breaker or look for another power source. This tool can prevent dangerous shocks and help you feel confident as you adjust your motion sensor light switch.
Installing The Motion Sensor Switch
Installing a motion sensor switch can be a game-changer for your home’s energy efficiency and security. Imagine walking into a room and having the lights automatically turn on, saving you the hassle of fumbling for a switch in the dark. To install a motion sensor switch, you’ll replace your old switch, wire up the new sensor, and ensure it’s securely in place. Let’s dive into the step-by-step process to get your new sensor switch up and running.
Removing The Old Switch
Begin by turning off the power to the switch at your circuit breaker. Safety is paramount, so double-check with a non-contact voltage tester to ensure no power is flowing. Once you’re sure, use a screwdriver to remove the switch plate and the screws holding the old switch in place.
Gently pull the switch out from the wall, exposing the wires. Take note of how the wires are connected. This will be crucial when connecting the new sensor switch. Unscrew the wire connectors and remove the old switch completely.
Wiring The New Sensor Switch
With the old switch out of the way, it’s time to wire up your new motion sensor switch. Most switches will come with detailed instructions, so have those handy. Connect the wires from the wall to the corresponding wires on the switch, usually color-coded for ease.
- Black wire to black (line) wire
- White wire to white (neutral) wire
- Green or bare copper wire to green (ground) wire
Once connected, use wire nuts to secure the connections. Tug on each wire gently to ensure they are firmly connected. A loose connection can lead to flickering lights or even a malfunction.
Securing The Switch In Place
After wiring, carefully push the wires back into the wall box. Align the switch in the box and secure it with screws. Make sure it’s flush with the wall for a neat finish.
Replace the switch plate and secure it with screws. Now, it’s time to turn the power back on at the circuit breaker. Test the sensor by walking into the room. Does it light up instantly? If so, you’ve successfully installed your motion sensor switch!
Installing a motion sensor switch is a straightforward task that can enhance your home’s functionality. Why not give it a try and experience the convenience and energy savings for yourself?
Adjusting Sensitivity Settings
Adjusting the sensitivity settings on your motion sensor light switch is key to getting the perfect balance between convenience and energy efficiency. Too sensitive, and the light might turn on at every minor movement. Not sensitive enough, and it might fail to detect you when you actually need it.
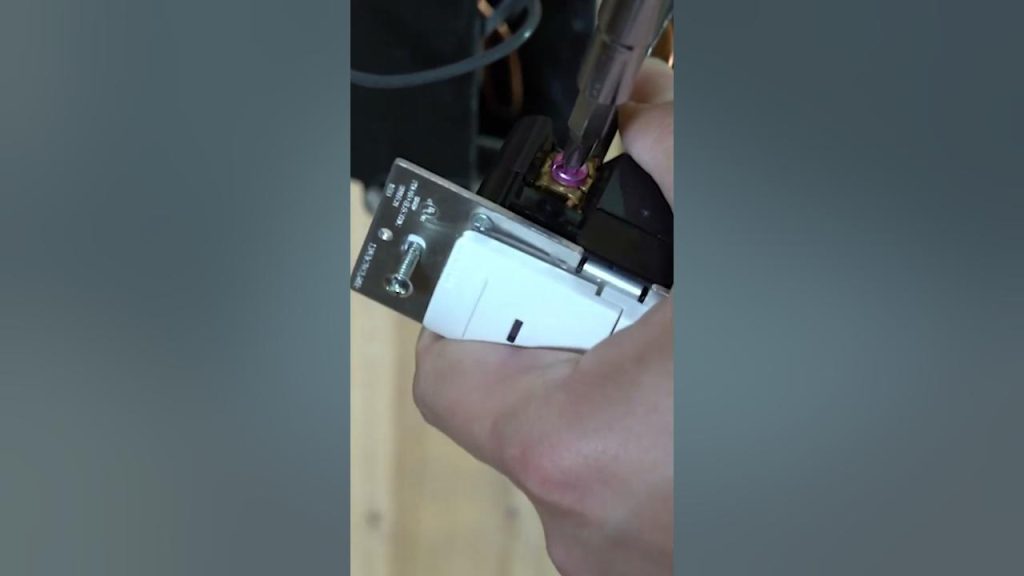
Locating Sensitivity Controls
Most motion sensor switches have a small dial or button labeled “sensitivity” inside the switch cover or on the side. You might need a screwdriver to remove the cover plate carefully. If you’re unsure, check your switch’s manual or look for tiny markings indicating sensitivity adjustment.
Once you find the control, try turning it slightly to see how it affects the sensor’s behavior. It’s easier to adjust in small increments rather than making big jumps and guessing.
Setting Detection Range
The detection range controls how far your sensor can “see” movement. A wider range means the sensor picks up motion from farther away, which can be helpful in large rooms or hallways. However, too wide a range might cause the light to activate from movements outside the intended area, like passing cars or neighbors.
Adjust the range by either turning the same sensitivity dial or using a dedicated range switch, depending on your model. Test the setting by walking through the area at different distances to find the sweet spot where the light activates reliably but not unnecessarily.
Avoiding False Triggers
False triggers happen when your sensor turns on the light without any actual need. Common causes include pets, curtains moving with airflow, or even changes in sunlight. To reduce these, position the sensor away from windows and vents if possible.
You can also lower the sensitivity slightly or narrow the detection range. Sometimes adding physical barriers, like small shields around the sensor, helps block unwanted movements. Have you noticed your sensor turning on when a tree branch sways outside? Adjusting sensitivity can solve that without losing functionality indoors.
Configuring Time Delay
Configuring the time delay on a motion sensor light switch controls how long the light stays on after no motion is detected. Adjusting this setting helps save energy and improves convenience. Setting the right delay time ensures the light does not turn off too soon or stay on too long. It’s a simple step that makes your motion sensor light more effective.
Understanding Time Delay Options
Time delay options vary by model but usually range from a few seconds to several minutes. Some switches allow you to select a fixed time, while others offer a range you can adjust. Common settings include:
- Short delay (15-30 seconds)
- Medium delay (1-5 minutes)
- Long delay (10-30 minutes)
Choosing the right delay depends on your needs and the room where the light is installed.
Setting The Light Duration
To set the light duration, locate the adjustment dial or buttons on your switch. Turn the dial or press the buttons to increase or decrease the time. Test the setting by moving away from the sensor and observing how long the light stays on. Make small adjustments until the duration feels right for your use.
Balancing Convenience And Energy Saving
Shorter time delays save more energy but may cause the light to turn off too soon. Longer delays keep the light on longer, adding convenience but using more power. Balance these by considering the room’s purpose and traffic flow. For example, use a longer delay in hallways and a shorter delay in closets.

Credit: www.youtube.com
Customizing Ambient Light Levels
Customizing ambient light levels helps your motion sensor light switch work better. Adjusting these settings controls how much natural light affects the sensor. This saves energy and improves comfort. Proper settings prevent the light from turning on during daylight. It also ensures the light activates only when needed.
Using The Photocell Feature
The photocell feature detects natural light around your sensor. It stops the light from turning on if there is enough daylight. This prevents unnecessary power use. To use this feature, find the photocell dial or switch. Adjust it to match the brightness in your room or outside area. The sensor will now respond better to changes in light.
Adjusting Light Thresholds
Light thresholds set the level of darkness that triggers the sensor. Lowering the threshold makes the light turn on in dimmer conditions. Raising it requires darker surroundings before activating the light. Use the adjustment dial or buttons on the switch to change this. Test different settings to find the best balance for your space.
Ensuring Proper Nighttime Operation
Make sure the sensor works well at night without false triggers. Keep the photocell clean and free from obstructions. Check the sensor angle to avoid stray lights from nearby sources. Set the light threshold low enough to activate after sunset. Regularly test the sensor to confirm it reacts only in the dark.
Testing And Fine-tuning
Testing and fine-tuning your motion sensor light switch is essential to ensure it works exactly how you want. This step helps you avoid constant false triggers or missed activations. With careful adjustments, you can customize the sensor’s sensitivity, duration, and detection range to fit your specific space and needs.
Initial Testing Procedures
Start by turning on the power and observing how the sensor reacts to movement in its default setting. Walk through the detection area slowly and from different angles to check if the light switches on consistently. Note any delays or failures in activation to understand how the sensor currently performs.
It’s helpful to test at different times of day, especially if your sensor has a built-in light sensor that affects operation during daylight. Does the light turn on when you expect it to? If not, jot down what seems off before making adjustments.
Making Incremental Adjustments
Adjust the sensitivity and time settings in small steps rather than big jumps. Increasing sensitivity too much might cause the light to activate from distant or irrelevant movements. Lowering it too far might miss important activity.
- Change the sensitivity first, then test the detection area again.
- Adjust the time delay so the light stays on long enough but not too long.
- Modify the detection angle if your sensor allows it to focus on specific zones.
After each change, test the sensor’s response thoroughly. This steady fine-tuning prevents frustration and helps you find the perfect balance.
Troubleshooting Common Issues
If your motion sensor light switch doesn’t work as expected, several common problems might be the cause. Check if the sensor is dirty or obstructed, as dirt and objects can block the detection range.
Another frequent issue is incorrect wiring or loose connections. Ensure the switch is wired according to the manufacturer’s instructions, and all connections are secure. Are there any bright lights nearby that could confuse the sensor? Sometimes streetlights or reflections cause false triggers.
Also, evaluate if the sensor’s placement suits your needs. Too high or too low can affect performance. If problems persist, resetting the device or consulting the manual can provide specific solutions for your model.

Credit: www.amazon.ca

Credit: www.youtube.com
Frequently Asked Questions
How Do I Set The Sensitivity On A Motion Sensor Switch?
To set sensitivity, locate the adjustment dial on the switch. Turn it clockwise to increase sensitivity and counterclockwise to decrease. Test by walking near the sensor. Adjust until it detects motion accurately without false triggers.
How Can I Adjust The Light Duration Time?
Find the time delay dial on the sensor switch. Rotate it to set how long the light stays on after motion stops. Shorten the duration to save energy or extend it for safety and convenience.
What Is The Best Height For Installing Motion Sensor Switches?
Install motion sensor switches between 5 to 6 feet high. This height ensures optimal detection range and accuracy. Mounting too low or high can cause poor sensor performance and false activations.
How Do I Adjust The Detection Range Of The Sensor?
Use the range adjustment dial or lens cover to change detection distance. Increase range for larger areas or reduce it to avoid detecting unwanted motion. Test adjustments by walking around the sensor’s field.
Conclusion
Adjusting your motion sensor light switch is simple and quick. Just follow the steps carefully for best results. You can control how long the light stays on and how sensitive it is. This helps save energy and adds convenience to your home.
Regular checks keep the sensor working well. Small changes make a big difference in your lighting setup. Enjoy the comfort and safety that comes with a well-adjusted motion sensor light switch. Give it a try today!


