
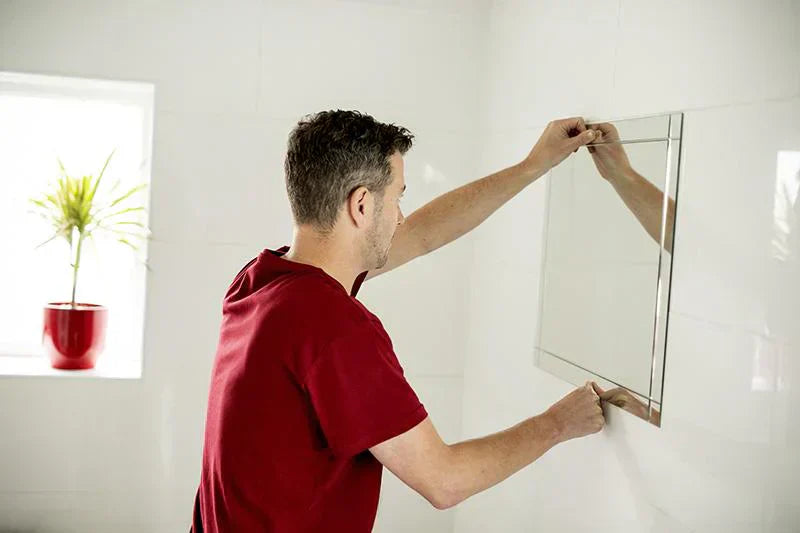
You want to hang a mirror, but the thought of hammering nails into your walls makes you hesitate. Maybe you’re renting, or you just want to avoid damage.
What if there was a way to attach your mirror securely without any nails at all? Imagine having a beautiful mirror on your wall without holes or mess. In this guide, you’ll discover simple and effective methods to hang your mirror safely and stylishly.
Keep reading—you’ll be surprised how easy it can be to transform your space without a single nail.

Credit: bfymirror.com
Choosing The Right Mirror
Choosing the right mirror is key to successfully attaching it to a wall without nails. The mirror’s size, weight, and frame material all influence the best way to secure it safely and attractively. Paying attention to these details upfront can save you from damage or extra work later.
Considering Mirror Size And Weight
Think about how big and heavy your mirror is before you decide how to hang it. Large, heavy mirrors need stronger support, which affects the type of adhesive or mounting strips you can use.
Smaller, lighter mirrors give you more flexibility. You might use double-sided tape or adhesive hooks safely without worrying about them falling.
Ask yourself: Will your wall surface hold the weight? Glass, tiles, and textured walls require different approaches. Testing your chosen method on a small area can prevent surprises.
Selecting Mirror Frame Material
The frame material changes how your mirror interacts with adhesive products. For example, metal frames can be slippery, making tape less effective, while wooden frames might absorb glue and weaken the bond.
Plastic frames are usually easier to work with, but they can be lightweight and may need additional support. Consider the frame’s texture and finish before picking your hanging method.
Have you noticed that some frames come with pre-installed hanging hardware? This can simplify the process and give you more options for nail-free mounting.

Credit: ledmirrorworld.co.uk
Preparing The Wall Surface
Clean the wall thoroughly to remove dust and dirt. Make sure the surface is dry and smooth for better adhesion. Test a small area to check if the wall holds adhesive materials well.
Attaching a mirror to a wall without nails is possible. It requires careful preparation of the wall surface. Proper preparation ensures the mirror stays secure and looks great. This section covers essential steps to prepare your wall effectively.Cleaning And Drying The Wall
Start by cleaning the wall surface thoroughly. Dust, dirt, or grease can affect adhesion. Use a mild detergent mixed with warm water. A soft cloth or sponge works well for cleaning. Gently scrub the wall to remove all residues. Avoid soaking the wall with too much water. After cleaning, dry the wall completely. Use a clean, dry towel to absorb any moisture. Ensure the surface is completely dry before moving on.Checking Wall Material Compatibility
Identify the wall material before attaching the mirror. Different materials require specific adhesives. Common wall types include drywall, plaster, and tile. For drywall, use adhesive strips designed for smooth surfaces. For tile, select a product that bonds well with ceramic. If the wall is textured, consider additional support methods. Check the packaging of adhesive products for compatibility information. Not all adhesives work with every wall type.Using Adhesive Strips
Using adhesive strips is a simple and effective way to hang a mirror without nails. These strips hold the mirror firmly and protect your walls from damage. They are ideal for renters or anyone who wants a clean wall surface.
Types Of Adhesive Strips
- Command Strips:Popular for strong hold and easy removal without marks.
- Double-Sided Mounting Tape:Thin tape that provides a secure bond on smooth surfaces.
- Velcro Strips:Allow easy removal and repositioning of the mirror.
- Heavy-Duty Adhesive Strips:Designed for heavier mirrors and stronger hold.
Step-by-step Application
- Clean the wall surface and mirror back with rubbing alcohol.
- Let the area dry completely before applying the strips.
- Attach the adhesive strips to the mirror’s back edges.
- Press strips firmly for 30 seconds to activate the adhesive.
- Remove the protective backing from the strips.
- Carefully press the mirror onto the wall, holding for 30 seconds.
- Wait one hour before placing any weight or adjusting the mirror.
Tips For Maximum Hold
- Use enough strips to support the mirror’s weight evenly.
- Choose strips rated for the mirror’s size and weight.
- Apply strips to a smooth, dry, and clean surface only.
- Avoid hanging mirrors in humid areas like bathrooms.
- Press firmly and hold to ensure the adhesive sticks well.
- Let the adhesive cure for the recommended time before use.

Credit: ledmirrorworld.co.uk
Applying Mirror Mounting Tape
Applying mirror mounting tape offers a simple way to hang mirrors without nails. This tape is strong and easy to use. It keeps your wall safe from holes or damage. The tape creates a firm bond between the mirror and the wall. Choosing the right tape and placing it correctly ensures the mirror stays secure for a long time.
Choosing Strong Double-sided Tape
Select tape designed for heavy items like mirrors. Look for these key features:
- High weight capacity
- Water and temperature resistance
- Strong adhesive on both sides
- Easy to cut to size
Check product labels for mirror or picture hanging use. Avoid general-purpose tapes that may not hold well. A strong tape prevents the mirror from slipping or falling.
Proper Placement Techniques
Clean the wall and mirror back with rubbing alcohol. Let both surfaces dry completely before applying tape. Cut tape strips to fit the mirror edges and corners. Press each strip firmly for 30 seconds to activate the adhesive.
Place the mirror on the wall carefully. Hold it against the wall for a minute to secure the bond. Avoid touching the tape once stuck to prevent weakening the hold. Use a level to ensure the mirror is straight before pressing fully.
Employing Command Hooks And Hangers
Using Command hooks and hangers is a smart way to hang mirrors without damaging your walls. These adhesive products hold strong and remove cleanly, making them perfect for renters or anyone avoiding nails. They come in various sizes and weight capacities, so you can find the right fit for your mirror.
Selecting Suitable Hooks
Pick hooks rated for the weight of your mirror. If your mirror is heavy, choose large or extra-large Command hooks designed for heavier loads. For smaller mirrors, medium or small hooks will do the job without being too bulky.
Consider the surface too. Command hooks work best on smooth, clean walls like painted drywall, tile, or glass. Avoid rough or textured surfaces, as the adhesive won’t stick well there.
Think about the style of your mirror’s hanging hardware. Command hooks come in different shapes—some have a curved hook, others have a flat base for hanging wire. Match the hook style to your mirror for secure hanging.
Installation Instructions
- Clean the wallwith rubbing alcohol. Avoid household cleaners as they can leave residue that weakens adhesion.
- Prepare the adhesive stripsby pressing them firmly onto the Command hook base as instructed.
- Attach the hookto the wall, pressing for about 30 seconds to ensure a strong bond.
- Wait one hourbefore hanging your mirror. This waiting time allows the adhesive to set fully.
- Hang your mirror carefully, making sure the hook supports the hanging hardware securely.
Have you ever tried hanging something heavy with just adhesive strips? It might surprise you how well they hold—just follow these steps carefully, and your mirror will stay put without a single nail hole.
Utilizing Mirror Mounting Putty
Utilizing mirror mounting putty offers a simple, damage-free way to hang mirrors. This sticky, reusable putty holds mirrors firmly without nails or screws. It works well on smooth, clean walls and is perfect for renters or those avoiding wall damage.
Mirror mounting putty provides a strong grip while allowing easy removal. It also absorbs small vibrations and prevents the mirror from slipping. This method suits lightweight and medium-weight mirrors.
Best Putty Products
- Loctite Fun-Tak Mounting Putty – Easy to mold and reusable.
- Scotch Restickable Mounting Putty – Good hold, leaves no residue.
- UHU Tac Reusable Adhesive Putty – Strong grip, suitable for various surfaces.
- Duck Brand Poster Putty – Affordable and effective for light mirrors.
How To Apply Putty Effectively
- Clean the wall and mirror back with rubbing alcohol.
- Take small pieces of putty and roll them into balls.
- Press putty balls firmly on the mirror’s corners and edges.
- Gently press the mirror against the wall, holding for 30 seconds.
- Check the mirror is level and adjust if needed.
- Use extra putty for heavier mirrors or uneven surfaces.
- Remove by gently peeling the mirror and putty off the wall.
Safety And Maintenance Tips
Attaching a mirror to your wall without nails is a clever way to keep things damage-free, but it requires care to keep the mirror secure and your walls safe. Paying attention to safety and maintenance ensures your mirror stays put and looks great over time.
Checking Adhesive Strength Periodically
Adhesives can weaken over time, especially in humid areas like bathrooms. Make it a habit to gently press around the edges of your mirror every few months. If you notice any wobbling or loose spots, it’s time to refresh the adhesive.
Keep an eye out for peeling or discoloration of the adhesive strip. This could be a warning sign that the bond is failing. A small investment in new adhesive strips can save you from a costly fall or wall damage later.
Removing Mirrors Without Damage
Removing a mirror without nails can be tricky but doable with the right approach. Start by softening the adhesive with a hairdryer set on low heat. Warmth loosens the glue, making it easier to peel the mirror off slowly and safely.
Use a thin, flexible tool like a plastic putty knife to gently separate the mirror from the wall. Avoid sharp tools that can scratch or crack the glass. Taking your time here prevents damage to both your mirror and your wall.
Frequently Asked Questions
What Materials Can I Use To Hang A Mirror Without Nails?
You can use adhesive strips, mounting tape, or hooks designed for walls. These options hold mirrors securely without damaging surfaces. Choose products rated for your mirror’s weight for safety and durability. Avoid cheap adhesives to prevent falls and wall marks.
How Strong Is Adhesive Tape For Hanging Mirrors?
High-quality mounting tape can support mirrors up to several pounds. Strength depends on tape type and mirror weight. Always check product specifications before use. For heavier mirrors, consider additional support or alternative methods to ensure safety.
Can I Use Command Strips On All Wall Types?
Command strips work well on painted drywall, glass, and tiles. Avoid using them on wallpaper, textured surfaces, or rough walls. These surfaces may prevent proper adhesion, causing strips to fail. Always test a small area before full application.
How Do I Prepare The Wall Before Attaching A Mirror?
Clean the wall with rubbing alcohol to remove dust and grease. Ensure the surface is dry before applying adhesive. Proper preparation increases adhesive strength and prevents mirror falls. Avoid using cleaning agents that leave residue.
Conclusion
Attaching a mirror without nails is simple and safe. Use strong adhesive strips or hooks made for walls. They hold mirrors firmly without damage. Measure carefully and clean the wall first. This way, your mirror stays in place longer. No holes, no mess.
A great choice for renters or anyone avoiding nails. Try these easy steps to decorate your space quickly. Enjoy a neat, stylish wall without any fuss.


