
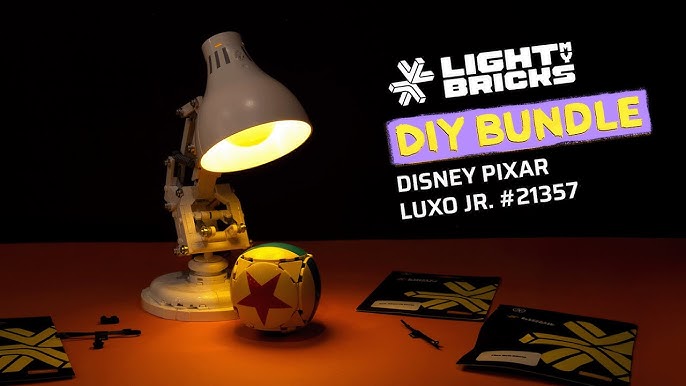
Imagine lighting up your workspace with something you built yourself—something fun, creative, and totally unique. Building a Lego desk lamp is not just a cool project; it’s a way to add personality to your room while sharpening your creativity.
If you’ve ever wanted a lamp that stands out and shows off your style, this guide is made for you. Keep reading, and you’ll discover simple steps to turn ordinary Lego bricks into a bright, eye-catching desk lamp that’s all yours.
Ready to get started? Let’s dive in!
Materials Needed
Building a Lego desk lamp requires gathering the right materials first. This ensures your project goes smoothly. You need specific Lego pieces, lighting parts, and tools. Each plays a key role in creating a sturdy and functional lamp. Below is a detailed list to prepare you for the build.
Lego Pieces Selection
Choose Lego pieces that fit together well and support weight. Use bricks, plates, and hinges for structure and flexibility. Consider colors that match your style or room decor. Include transparent pieces for a cool lighting effect. Make sure pieces are clean and undamaged for best results.
- Standard bricks (2×4, 2×2)
- Flat plates for the base and shade
- Hinges or joints for adjustable parts
- Transparent or translucent pieces for light diffusion
- Small decorative elements for style
Lighting Components
Select lighting parts that fit inside Lego bricks easily. LED lights are ideal because they produce little heat. Use a small bulb or strip light with wires. A battery pack or USB power source works well for power. Include a switch to turn the lamp on and off.
- LED light module or strip
- Battery pack or USB power adapter
- On/off switch
- Wires and connectors
- Light diffuser (optional)
Tools Required
Prepare simple tools to assemble and wire the lamp. A small screwdriver helps with electrical parts. Wire cutters and strippers are useful for adjusting wires. A hot glue gun or tape can secure loose parts. Have a soft cloth ready to clean Lego pieces after assembly.
- Small screwdriver set
- Wire cutters and strippers
- Hot glue gun or double-sided tape
- Multimeter (optional for testing)
- Soft cleaning cloth
Design Planning
Design planning sets the foundation for your Lego desk lamp project. It’s where creativity meets practicality, guiding your choices from style to safety. Taking the time to plan carefully saves you frustration and ensures your lamp looks great and works well.
Choosing The Lamp Style
Decide the type of lamp you want before you start building. Do you prefer a modern, minimalist look or something playful and colorful? Think about where the lamp will sit—on a work desk, bedside table, or shelf.
Remember, your choice affects the size and shape of the Lego pieces you need. Consider whether you want a simple desk lamp with a single bulb or a more complex design with adjustable arms or shades. What style matches your room’s vibe?
Sketching The Layout
Put your ideas on paper to visualize the final product. Sketch a rough outline of the lamp, focusing on dimensions and structure. This helps you figure out how many Lego bricks and electrical parts you’ll need.
Draw different angles to check stability and aesthetics. It’s easier to spot potential issues on paper than during assembly. Have you thought about how the lamp will stand and where the wires will go?
Considering Electrical Safety
Your lamp must be safe to use, so plan the electrical parts carefully. Choose LED bulbs since they generate less heat and are more energy-efficient. Make sure your wiring is insulated and fits neatly within the Lego structure.
Think about how you’ll connect the power source—battery pack or plug-in cord—and keep all electrical components away from moving parts. Could you create a separate compartment inside the Lego base to house the wiring securely?
Building The Base
Begin by selecting a sturdy base for your Lego desk lamp. Choose large, flat pieces to ensure stability. Securely connect these pieces to form a solid foundation. This will support the lamp structure and prevent it from toppling over during use.
Building the base for your Lego desk lamp is a crucial step that ensures both stability and functionality. A solid foundation will support your creative design, while also accommodating the necessary components for illumination. Let’s dive into the essentials of crafting a reliable base that will make your Lego lamp both stylish and practical.Creating A Stable Foundation
The first step in constructing a dependable base is selecting the right Lego pieces. Opt for larger, flat bricks that provide a broad surface area. These will help distribute weight evenly and prevent tipping. Consider using a square or rectangular shape for added balance. Experiment with different combinations to find a design that feels sturdy. You might be surprised at how a simple rearrangement can enhance stability. Make sure to interlock the bricks tightly. This ensures that your base won’t fall apart easily if nudged. A solid connection between the bricks is key to maintaining the integrity of your lamp.Incorporating Power Supply
Integrating the power supply into your Lego lamp can be both fun and challenging. Choose a power source that fits within your design, like a USB cable or battery pack. Ensure it’s easily accessible for future maintenance. Route the wiring through the base, concealing it with additional Lego bricks. This keeps the design sleek while preventing any accidental tugs on the wires. A tidy setup also enhances the overall aesthetic of your lamp. Reflect on how you’ll switch your lamp on and off. Consider integrating a small switch or button within the base. This not only adds convenience but also a playful touch to your creation. By focusing on a stable foundation and thoughtful integration of power, you’re setting the stage for a Lego desk lamp that’s both functional and fun. What unique twist will you bring to your design?
Credit: www.youtube.com
Constructing The Lamp Neck
Constructing the lamp neck is a crucial part of your Lego desk lamp project. It needs to be both flexible and sturdy to hold the light source at the right angle. Getting this balance right means your lamp will be functional and long-lasting.
Building Adjustable Joints
Adjustable joints give your lamp neck the ability to move and hold different positions. Use Lego hinge pieces or ball-and-socket connectors to create these joints. These allow you to tilt or swivel the lamp head easily.
Try combining different joint types for smoother movement. For example, a hinge joint can bend up and down, while a ball joint can rotate in multiple directions. Think about how you want to adjust the lamp when you’re working or reading.
Have you tested how tight or loose the joints feel? Too loose, and the lamp droops; too tight, and it’s hard to adjust. Play with the tension until it holds position without effort.
Ensuring Structural Support
The lamp neck must support the weight of the lamp head and light bulb without sagging. Use longer Lego beams or plates stacked together to build a strong spine. Reinforce weak spots with extra bricks.
Don’t forget to check the connection points. Secure joints with additional bricks around them to prevent wobbling. Sometimes adding a small Lego Technic pin can lock pieces firmly in place.
Ask yourself: Is the neck stable enough to hold the lamp steady? If it wobbles, try adding cross braces or doubling up beams. Your goal is a lamp neck that stays put, no matter how you adjust it.
Assembling The Lamp Shade
Assembling the lamp shade is a key part of building your Lego desk lamp. This step sets the mood and controls how light spreads across your workspace. Focusing on the right design and secure attachment will make your lamp both functional and stylish.
Designing Light Diffusion
Think about how you want the light to shine through your Lego shade. Using translucent or lighter-colored bricks helps soften the light. You can mix clear and frosted pieces to create a warm glow instead of harsh brightness.
Try adding small gaps or using bricks with holes to let some light escape in interesting patterns. This not only diffuses the light but adds a creative touch to your lamp. What effect do you want—soft ambient light or focused brightness?
Attaching To The Neck
Secure the lamp shade firmly to the neck to keep it stable. Use sturdy bricks that click tightly and avoid loose connections that might cause the shade to wobble. You might want to test different attachment points to find the best balance.
Think about ease of removal too, in case you want to change the bulb or adjust the shade later. Building a simple hinge or clip system with Lego pieces can add flexibility. How will you make sure your shade stays in place but remains easy to adjust?
Wiring And Installation
Wiring and installation are crucial parts of building your Lego desk lamp. This stage ensures your lamp not only looks great but also works safely and efficiently. Paying close attention to how you connect and secure the electrical components can save you from headaches later.
Connecting The Bulb Holder
Start by attaching the bulb holder to the Lego structure. Make sure the holder fits snugly without forcing it, as this prevents damage to both the Lego pieces and the holder.
Next, connect the wires to the bulb holder terminals. Usually, one wire goes to the positive terminal and the other to the negative terminal. Double-check the polarity to avoid flickering or short circuits.
Securing The Wiring
Once the wires are connected, secure them along the Lego frame. Use small zip ties or twist ties to keep wires tidy and out of the way. This not only improves the lamp’s appearance but also reduces the risk of accidental disconnections.
Think about where your lamp will be placed. Is the cord long enough? If not, you might need to extend the wire or reposition the power source. Always leave some slack to prevent strain on the connections.
Testing The Electrical Setup
Before finalizing the assembly, test your lamp’s electrical setup. Plug it in and switch it on to see if the bulb lights up consistently. If it doesn’t, check your wiring connections carefully.
Have you ever had a lamp that flickered unexpectedly? That’s usually a loose wire or incorrect polarity. Fix these issues now to ensure your Lego desk lamp shines brightly and safely every time you use it.
Customization Tips
Customizing your Lego desk lamp is where the fun truly begins. You get to make it reflect your personality and style, turning a simple project into a unique creation. Think about how you want your lamp to look and function — this is your chance to make it one-of-a-kind.
Adding Color Themes
Choosing a color theme can transform the vibe of your lamp instantly. Pick colors that match your room or workspace to create harmony. You might want bold reds and yellows for a playful look or calming blues and whites for a more relaxed feel.
Try grouping Lego bricks by color before building. This speeds up the process and helps maintain consistency. Have you ever noticed how a splash of unexpected color can make a design pop? Don’t hesitate to add a few bright pieces to catch the eye.
Incorporating Decorative Elements
Adding small decorative pieces can make your lamp stand out. Use transparent or patterned Lego bricks to mimic glass or add texture. Mini figurines or unique Lego accessories can also give your lamp a personal touch.
Think about what inspires you daily—maybe a tiny Lego plant or a favorite character perched on the base. These little details make your desk lamp more than just a light source; they make it a conversation starter. What small touches would make your workspace feel more like you?
Using Led Options
Choosing the right LED can change how your lamp performs and looks. Warm white LEDs create a cozy atmosphere, while cool white offers brighter, more focused light. Some LEDs come with color-changing features, perfect if you want to switch moods.
Consider battery-powered LEDs if you want flexibility in placement. USB-powered options work well if your desk has limited outlets. Have you tried diffusing the light with translucent Lego pieces? It softens harsh glare and adds a professional finish to your build.

Credit: www.youtube.com
Safety Precautions
Safety is key when building a Lego desk lamp. This project mixes small bricks with electricity. Careful handling helps avoid accidents and damage. Follow these safety tips to keep your lamp safe and functional.
Handling Electrical Components
Use insulated tools to work with wires and sockets. Never touch live wires with bare hands. Check all connections are tight and secure. Avoid using damaged cords or bulbs. Test the circuit before final assembly to ensure safety.
Heat Management
Choose LED bulbs that emit low heat. Keep Lego pieces away from direct contact with bulbs. Allow space inside the lamp for air to flow. Avoid enclosing the bulb tightly to prevent overheating. Monitor the lamp after use for any heat build-up.
Preventing Overloading
Use bulbs with the right wattage for your lamp. Avoid plugging multiple devices into one outlet. Check the power source can handle the lamp’s electrical load. Replace fuses or circuit breakers if needed. Overloading can cause fires or damage the lamp.
Maintenance And Upgrades
Keeping your Lego desk lamp in top shape means paying attention to both maintenance and upgrades. Regular care ensures it stays bright and functional, while thoughtful enhancements can make it smarter and more convenient. Let’s look at some easy ways to keep your lamp shining and evolving over time.
Cleaning The Lamp
Dust can quickly settle between Lego pieces, dulling the lamp’s appearance and affecting the light. Use a soft brush or a microfiber cloth to gently remove dust from the surface and crevices.
If the lamp gets sticky or grimy, wipe it carefully with a slightly damp cloth—avoid soaking the bricks to prevent damage. Regular cleaning keeps your Lego lamp looking fresh and helps maintain good light quality.
Replacing Bulbs
Even the best bulbs eventually burn out or dim. Make sure you know what type of bulb your Lego lamp uses before buying a replacement. LED bulbs are a great choice because they last longer and use less energy.
When changing the bulb, handle it with care to avoid breaking delicate Lego parts around the socket. Have you noticed your lamp flickering or dimming? That’s usually a sign it’s time for a new bulb.
Enhancing With Smart Features
Adding smart features can transform your Lego desk lamp into a modern gadget. Consider installing a smart LED bulb that you can control via your phone or voice commands.
You can also add a small motion sensor or a touch switch, making your lamp more interactive and convenient. What smart feature would make your desk lamp fit better into your daily routine?

Credit: www.reddit.com
Frequently Asked Questions
What Materials Are Needed To Build A Lego Desk Lamp?
You need Lego bricks, a small LED light, a battery pack, wires, and a switch. These materials are essential for building a functional Lego desk lamp.
How Do I Safely Connect Electrical Components In The Lego Lamp?
Use low-voltage LED lights and securely connect wires with electrical tape. Ensure all connections are insulated to prevent short circuits or shocks.
Can I Customize The Lego Desk Lamp Design?
Yes, you can customize colors, shapes, and sizes using different Lego bricks. This allows you to create a unique and personalized desk lamp.
How Long Does It Take To Build A Lego Desk Lamp?
Building a Lego desk lamp typically takes 1 to 2 hours. Time depends on your design complexity and familiarity with Lego assembly.
Conclusion
Building a Lego desk lamp is a fun and creative project. It lets you combine play with practical use. You can customize the lamp to fit your style. The steps are simple and easy to follow. This project helps improve your building skills.
It also gives you a unique lamp for your desk. Try different Lego pieces to make it special. Enjoy the process and light up your space with your creation. Keep experimenting and have fun with your Lego builds!


