
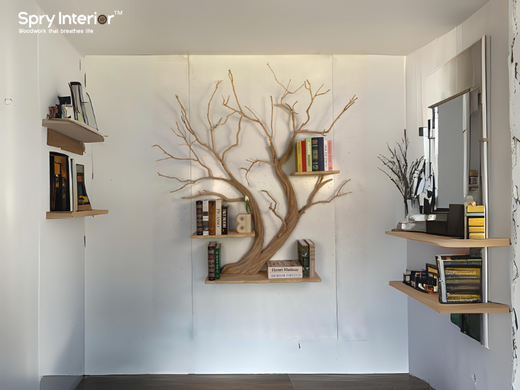
Are you tired of cluttered spaces and empty walls? Imagine turning those bare walls into beautiful, functional shelves that hold your books, decorations, and essentials—all within easy reach.
Building wall-to-wall shelves might sound like a big project, but with the right steps, you can create sturdy, stylish storage that fits your space perfectly. In this guide, you’ll discover simple tips and clear instructions that make the process easy, even if you’ve never built shelves before.
Ready to transform your room and maximize your space? Let’s get started!
Credit: www.familyhandyman.com
Planning Your Wall To Wall Shelves
Planning your wall to wall shelves is the first step to a successful project. Careful preparation helps you avoid mistakes and ensures the shelves fit perfectly. Understanding your space and needs makes a big difference in the final look and function.
Measuring Your Space
Start by measuring the width and height of the wall. Use a tape measure for accuracy. Note any obstacles like windows, doors, or electrical outlets. Check the wall surface for uneven spots or damage. Record all measurements on paper for easy reference.
Choosing Shelf Materials
Select materials that match your room style and shelf use. Wood offers a classic look and strong support. MDF is budget-friendly and smooth but less durable. Metal brackets add strength and a modern touch. Consider moisture levels if shelves are in kitchens or bathrooms.
Designing Shelf Layout
Sketch your shelf design before buying materials. Decide on the number of shelves and their spacing. Mix tall and short spaces for books and decor. Leave space for larger items if needed. Use graph paper or digital tools to visualize your layout.
Gathering Tools And Supplies
Before you start building wall to wall shelves, gathering the right tools and supplies is crucial. The right equipment not only makes the job easier but also ensures your shelves are sturdy and safe. Think about the last time you tried a home project without the proper tools—frustrating, right? Avoid that by preparing well in advance.
Essential Tools List
Having the right tools on hand sets the foundation for your project. You’ll need a reliable power drill for making holes and driving screws quickly. A level is indispensable for ensuring your shelves are perfectly horizontal.
- Measuring tape – accurate measurements prevent costly mistakes
- Stud finder – to locate wall studs for secure mounting
- Saw (circular or hand saw) – for cutting your shelving material
- Screwdriver set – for manual adjustments and smaller screws
- Hammer – useful for minor adjustments and nail installations
- Clamps – to hold pieces steady while assembling
Having these tools ready will save you time and headaches during installation. Can you imagine trying to hold shelves level without a good level? It’s nearly impossible.
Selecting Hardware
Your choice of hardware affects the strength and durability of your shelves. Heavy-duty brackets or metal shelf supports work well for weight-bearing shelves. For a cleaner look, consider hidden shelf supports or floating shelf brackets.
Don’t overlook the importance of screws and anchors. If your shelves will hold heavy items, make sure you use wall anchors that match your wall type—drywall, plaster, or brick. Using the wrong hardware could cause your shelves to fall.
Safety Gear Tips
Safety should always be a priority during any DIY project. Protect your eyes with safety glasses to avoid injury from flying debris or dust. A dust mask helps prevent inhaling sawdust, especially if you’re cutting wood indoors.
Wear sturdy gloves to protect your hands from splinters and sharp edges. Consider ear protection if you’ll be using loud power tools for extended periods. Remember, staying safe means you can enjoy your new shelves without any setbacks.
Preparing The Wall
Clear the wall surface by removing nails, hooks, or dust. Check for any damage and repair holes or cracks to ensure a smooth base. Use a level to mark where shelves will attach for accurate placement.
Preparing the Wall Before you can enjoy the aesthetic and functional benefits of wall-to-wall shelves, it’s crucial to prepare your wall meticulously. Proper preparation ensures your shelves are secure and stable. A little patience and careful planning in this step can save you from future headaches.Checking Wall Structure
First, evaluate the wall’s structure. This step is vital to ensure it can support the weight of the shelves and their contents. If your wall is made of drywall, you’ll need to find the studs. Brick or concrete walls may require specific anchors for stability. By understanding your wall’s composition, you can choose the right tools and materials. This can prevent unnecessary damage and ensure a seamless installation.Locating Studs
Finding studs is a critical task for stability. Use a stud finder for accuracy. It’s a handy tool that detects the edges of wooden beams behind your wall. Mark each stud location with a pencil. This ensures you know exactly where to drill for maximum support. If you’ve never used a stud finder before, it might surprise you how simple it is. Just slide it across the wall and listen for the beep.Marking Shelf Positions
Decide on the height and placement of each shelf. This is where personal preference and practical needs intersect. Use a measuring tape and level to mark the positions. Ensure they’re straight, or you’ll end up with crooked shelves. Think about what you’ll store on the shelves. Will you need more space for books or display items? This consideration will guide your positioning. Consider stepping back and envisioning the final look before drilling. This visual check can prevent any last-minute changes. Preparing your wall might seem tedious, but it’s the backbone of your shelf project. Wouldn’t you want your hard work to stand the test of time?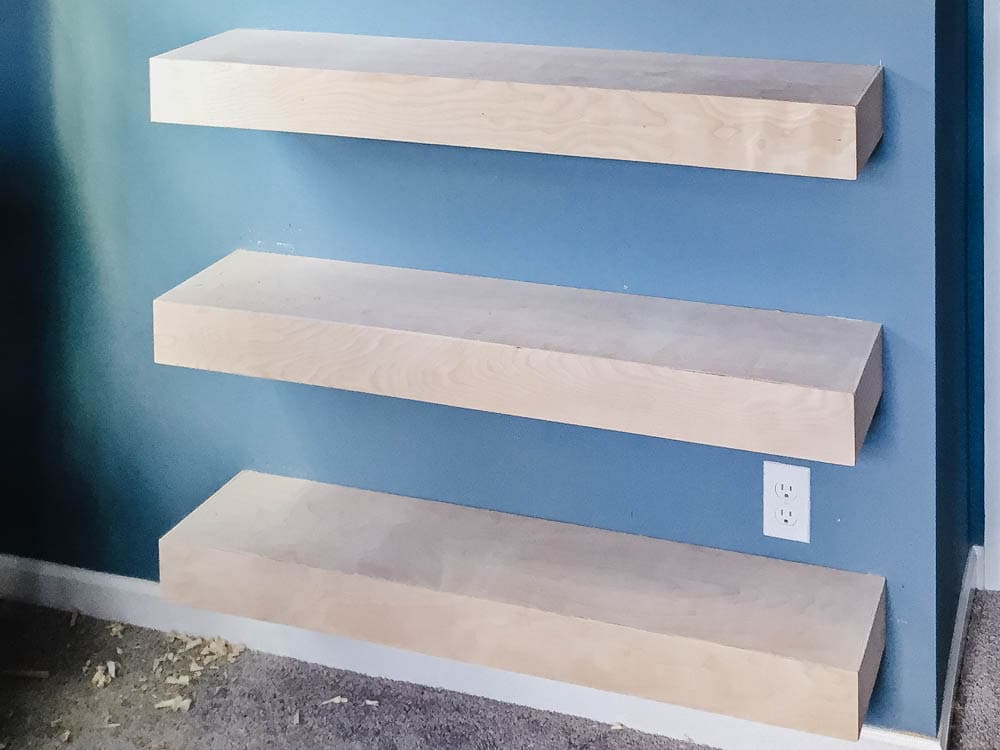
Credit: www.christeneholderhome.com
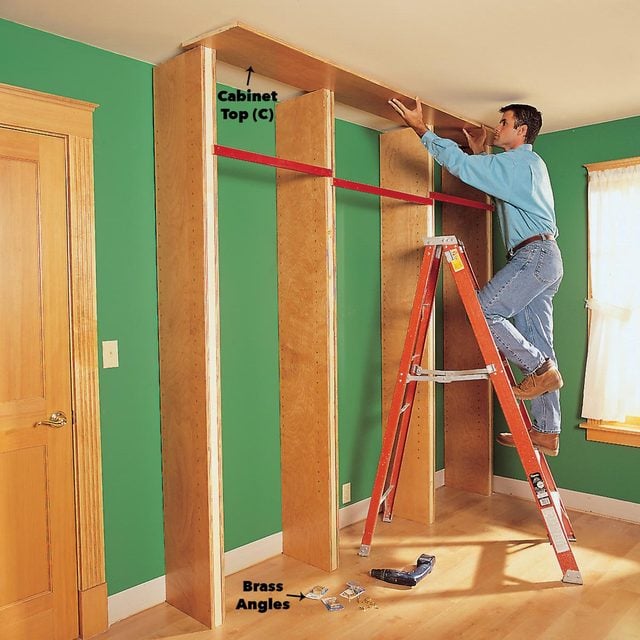
Building The Shelf Frames
Building the shelf frames is a crucial part of creating sturdy wall-to-wall shelves that last. This step shapes the foundation, so precision and care here will save you time and frustration later. Let’s look closely at how you can cut, assemble, and check your frames to make sure they fit perfectly.
Cutting Wood Pieces
Start by measuring your wall space carefully. Write down the exact lengths you need for vertical and horizontal frame pieces. Using a miter saw or circular saw, cut the wood to size, making sure each cut is straight and clean.
Keep your blades sharp to avoid splintering. If you’re working with plywood, clamp it down before cutting to prevent any movement. Have you ever rushed a cut only to regret it? Taking your time now pays off big when assembling.
Assembling Frames
Lay your cut pieces flat on a large workspace. Begin joining the vertical supports to the horizontal shelves using wood screws or nails. Pre-drill holes to prevent the wood from splitting, especially near edges.
Use wood glue along with screws for extra strength. Don’t tighten screws fully until all pieces are in place; this allows minor adjustments. Think about how the frame will bear weight—reinforce corners with brackets if needed.
Ensuring Level And Square
Once assembled, check that your frame is perfectly square by measuring diagonally from corner to corner. The two diagonal measurements should match exactly or be very close. Adjust by gently tapping the frame until it lines up.
Next, place a level on top of the frame to confirm it’s flat. If you spot any unevenness, use shims or sand down high spots. Would you want your shelves to lean or wobble? Taking these extra steps ensures stability and a professional finish.
Installing Wall Anchors And Supports
Installing wall anchors and supports is a critical part of building wall to wall shelves that are both secure and durable. Without the right anchors, your shelves might not hold the weight of your books, decor, or kitchenware. Proper supports ensure the structure remains stable over time, preventing accidents and damage to your walls.
Choosing The Right Anchors
Not all wall anchors are created equal. Your choice depends on the wall type—drywall, plaster, or masonry. For drywall, toggle bolts or molly bolts offer strong grip, while masonry walls need sleeve anchors or concrete screws.
Think about the load your shelves will carry. Heavy loads require heavy-duty anchors designed to spread weight evenly. I once used plastic anchors for heavy kitchen shelves; they failed quickly, teaching me to always match anchors to expected weight.
Securing Frames To Wall
Once you have the right anchors, mark the frame’s position carefully. Use a level to ensure your shelves will be straight. Drill pilot holes into the studs or anchors, then fasten the frames tightly with screws.
Don’t overtighten screws; it can strip the anchors or damage the wall. Instead, aim for firm, snug placement to keep the frame flush against the wall. This small attention to detail prevents wobbling later.
Reinforcing For Stability
Adding extra support brackets beneath shelves increases their load capacity. Metal L-brackets or wooden cleats are great options. Place them evenly along the length of the shelf to distribute weight effectively.
Consider adding a back rail where the shelf meets the wall. This simple reinforcement stops shelves from tipping forward. Have you checked if your shelves feel solid after installation? If not, adding reinforcement might save you from a future collapse.
Attaching Shelves And Finishing Touches
Attaching shelves and adding the finishing touches is where your wall-to-wall shelving project truly comes together. This stage transforms raw materials into a functional and stylish storage solution. Paying attention to detail now ensures your shelves are sturdy, look great, and fit perfectly with your room’s decor.
Fixing Shelf Boards
Start by securing each shelf board firmly to the brackets or supports you’ve installed. Use screws that are long enough to hold the weight but not so long they pierce through the shelf surface. A drill with a countersink bit helps to keep screw heads flush with the wood, creating a smooth, professional finish.
Check each shelf with a level before fully tightening the screws. Small adjustments now save you from uneven shelves later. If you want extra strength, consider using wood glue along with screws to hold the boards in place.
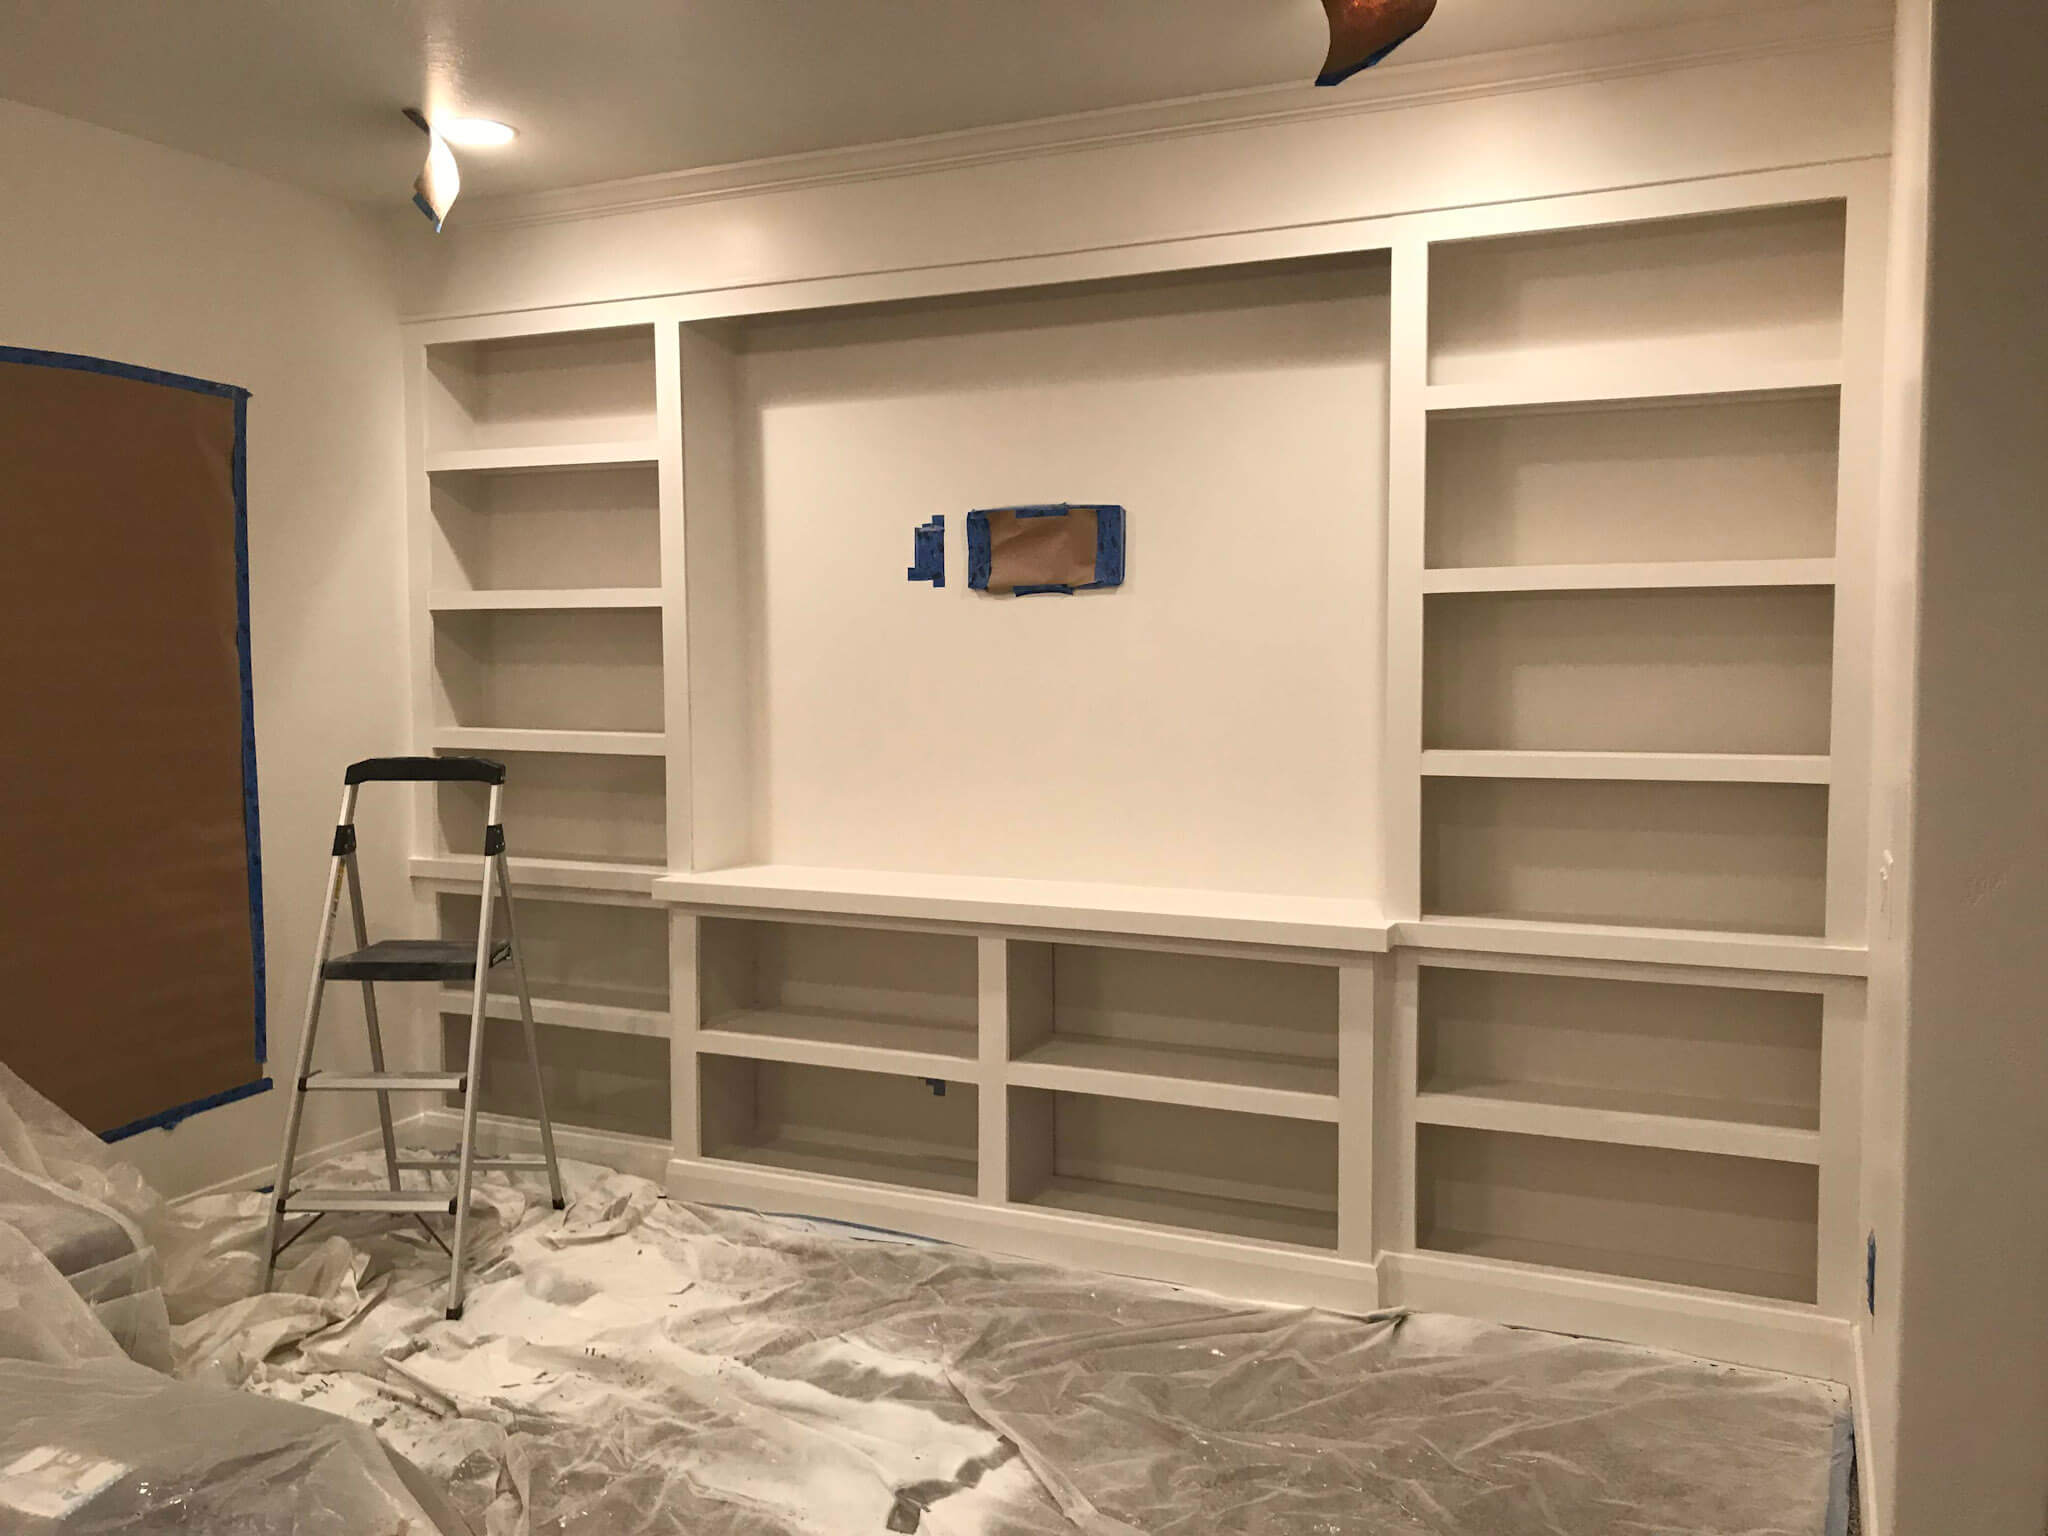
Sanding And Painting
Once your shelves are fixed, sanding smooths out rough edges and surfaces. Use fine-grit sandpaper and sand along the wood grain to avoid scratches. This step not only improves the look but also helps paint or stain adhere better.
Choose paint or stain based on your room’s style and the wood type. A semi-gloss paint adds durability and is easy to clean, perfect for shelves that will hold everyday items. Don’t rush the drying process—multiple thin coats offer a cleaner finish than one thick layer.
Adding Decorative Elements
Think about how you want your shelves to blend with or stand out in your space. Adding trim or molding around the edges can give your shelves a built-in look. Decorative brackets or corbels not only support the shelves but also add character.
Personal touches like wallpaper on the back panel or LED strip lights under each shelf can make a big impact. What small detail could make your shelves uniquely yours? Experiment with ideas that reflect your style while enhancing functionality.
Maintaining Your Wall To Wall Shelves
Maintaining your wall to wall shelves keeps them sturdy and looking great. Regular care prevents damage and extends their life. Simple steps help you protect your investment and keep your space organized.
Cleaning Tips
Dust shelves often using a soft cloth or microfiber duster. Avoid using harsh chemicals that damage the finish. A mild soap solution works well for sticky spots. Wipe surfaces dry to prevent moisture damage. Clean corners and edges where dust gathers.
Checking For Wear
Inspect shelves monthly for cracks or loose fittings. Look for warping or sagging under heavy loads. Check wall brackets and screws to ensure they are tight. Examine the surface for scratches or stains. Early detection prevents bigger problems later.
Making Repairs
Tighten loose screws with a screwdriver to stabilize shelves. Fill small cracks with wood filler and sand smooth once dry. Replace damaged brackets or supports immediately. Touch up scratches with matching paint or stain. Repairing quickly keeps shelves safe and attractive.
Credit: crystelmontenegrohome.com
Frequently Asked Questions
How Do I Measure Space For Wall To Wall Shelves?
Measure the wall’s full width and height accurately. Account for baseboards and any obstacles. Use a tape measure for precise dimensions. This ensures shelves fit perfectly and maximize storage space efficiently.
What Materials Are Best For Wall To Wall Shelves?
Use sturdy wood like plywood or MDF for durability. Opt for high-quality brackets or metal supports for stability. Choose finishes that match your room décor. These materials ensure long-lasting, attractive shelves that hold weight well.
How Do I Ensure Wall To Wall Shelves Are Level?
Use a spirit level during installation to maintain evenness. Mark shelf positions with a pencil before mounting. Check each shelf’s level as you fix it to the wall. This prevents uneven shelves and improves appearance and safety.
Can I Install Wall To Wall Shelves Myself?
Yes, with basic tools and DIY skills, you can. Follow step-by-step instructions and safety precautions carefully. Ensure walls can support the shelves’ weight. DIY installation saves cost and allows customization to your needs.
Conclusion
Building wall to wall shelves adds space and style to any room. It helps keep things organized and easy to find. Careful measuring and planning make the process smooth. Using the right tools ensures strong and safe shelves. Take your time with each step for the best results.
You can change the shelves to fit your needs later. Enjoy the extra storage and the neat look it brings. A simple project that makes a big difference in your home.


