
Your entryway is the first thing guests see when they walk into your home. Imagine having a stylish, functional table there—one you built yourself.
It’s easier than you think, and it gives your space a personal touch that store-bought tables just can’t match. You’ll discover simple steps to create your own entryway table, even if you’re new to woodworking. Ready to impress your visitors and organize your space?
Let’s get started.
Choosing The Right Materials
Choosing the right materials is key to building a sturdy and attractive entryway table. The materials affect the table’s look, strength, and how long it lasts. Picking quality wood and the right tools makes the project easier and more enjoyable. Preparing all hardware supplies beforehand saves time and effort during assembly.
Selecting Wood Types
Wood choice impacts the table’s style and durability. Hardwoods like oak, maple, and cherry are strong and look great. Softwoods such as pine are easier to work with and budget-friendly. Consider the wood’s grain, color, and finish options. Avoid wood that is too thin or weak for heavy use.
Essential Tools Needed
- Saw (circular or handsaw) for cutting wood pieces
- Drill for making holes and driving screws
- Sander or sandpaper to smooth surfaces
- Measuring tape and square for accurate dimensions
- Clamps to hold pieces together while gluing or screwing
- Wood glue for extra strength in joints
Gathering Hardware Supplies
Hardware holds your table firmly and adds finishing touches. Common supplies include screws, nails, and brackets. Choose screws that fit your wood thickness. Drawer slides or knobs may be needed if your table has drawers. Pick hardware that matches your table’s style and color.
Designing Your Entryway Table
Designing your entryway table is a crucial step. It sets the tone for the entire space. A well-designed table fits perfectly and serves your needs. Start by understanding the space where the table will go. Then, create a simple plan to visualize your ideas. Finally, decide on the features that suit your style and function.
Measuring Your Space
Begin by measuring the width, depth, and height of your entryway. Note any nearby doors, windows, or vents. Keep in mind the walking path around the table. Leave enough room for easy movement. Write down your measurements for reference.
Sketching Simple Plans
Draw a basic outline of your table on paper. Use your measurements to keep proportions accurate. Include the top surface and legs in your sketch. Mark where drawers or shelves might go. This plan helps guide your building process.
Deciding On Table Features
Think about what you want the table to do. Do you need storage like drawers or shelves? Would a mirror or hooks add value? Choose materials that match your home’s style. Select finishes that are easy to clean. Focus on functionality and aesthetics together.
Cutting And Preparing Wood
Start by measuring and marking wood pieces carefully for accurate cuts. Use a saw to cut the wood smoothly and sand edges for a clean finish. Preparing wood properly ensures your entryway table fits together well and looks polished.
Building your own entryway table can be a rewarding project that adds a personal touch to your home. The first crucial step is cutting and preparing the wood. This stage demands precision and care to ensure your table comes together perfectly. Let’s dive into the key elements of this process.Marking Cut Lines
Accurate marking is essential for making precise cuts. Use a pencil and a carpenter’s square to draw your lines clearly. Double-check your measurements before you cut—measure twice, cut once. A personal tip: I often use masking tape along the cut line to prevent wood splinters. This small step can significantly improve the final look of your cuts.Safe Cutting Techniques
Safety is paramount when cutting wood. Always wear safety goggles and gloves to protect yourself from wood chips and sharp tools. Use a saw appropriate for your wood type and thickness. For most entryway tables, a circular saw or miter saw will work well. Keep your hands clear of the blade and maintain a steady pace while cutting. Ask yourself: Are you taking the necessary precautions to ensure your safety?Sanding For Smooth Surfaces
Sanding transforms rough cuts into smooth surfaces ready for finishing. Begin with a coarse grit sandpaper and gradually move to finer grits for a polished feel. Use a sanding block or an electric sander for even results. Remember, the smoother the surface, the better the final finish will look. Consider this: Have you ever noticed how a beautifully sanded piece of wood feels almost inviting to the touch? Embrace the satisfaction that comes with creating such a finish. By following these insights on cutting and preparing wood, you will be well on your way to crafting a stunning entryway table that you’ll be proud to display in your home.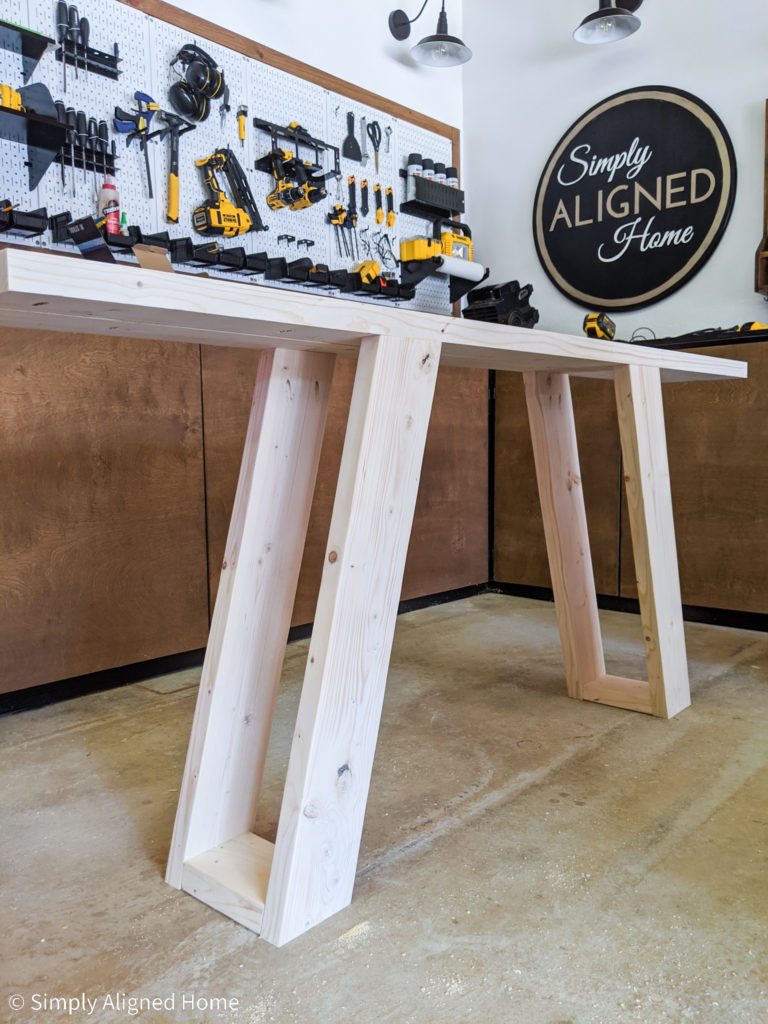
Credit: simplyalignedhome.com
Assembling The Table Frame
Assembling the table frame is a crucial stage in building your entryway table. This step transforms raw wood pieces into a sturdy foundation that will support the tabletop and everything you place on it. Taking your time here ensures your table lasts and looks great.
Joining Legs And Supports
Start by positioning the legs and supports exactly where they should connect. Make sure each leg is straight and aligned with the support beams. Clamps can help hold everything steady while you work, preventing any shifting that might throw off your measurements.
Think about the style of your table—do you want a simple, clean look or a bit more detail? The way you join the legs and supports affects both appearance and strength. Solid joints mean your table won’t wobble under daily use.
Using Screws And Glue
Combine screws and wood glue for the strongest frame. Apply glue along the edges before screwing pieces together to create a bond that lasts. Use screws long enough to securely hold the wood but not so long that they poke through the other side.
Pre-drill holes to avoid splitting the wood. This small extra step saves you from cracks that can weaken the frame. It also helps screws go in straighter, which improves overall stability.
Checking For Stability
Once assembled, give your frame a gentle shake to test its sturdiness. Does it feel solid or wobble? If you notice any movement, tighten screws and add more glue at loose joints.
Place the frame on a flat surface and check for uneven legs. Adjust as needed by sanding or trimming slight differences. A stable frame not only supports the tabletop but also ensures safety when placing heavier items.
Attaching The Tabletop
Attaching the tabletop is a critical part of building your entryway table. It transforms the frame into a functional piece of furniture ready to hold your keys, mail, and decor. Taking time to align and secure the surface properly ensures durability and a polished look.
Aligning The Surface
Start by placing the tabletop on the base frame carefully. Check that all edges line up evenly with the legs and supports. Use clamps or have a helper hold the tabletop steady while you make adjustments.
Is the tabletop perfectly centered? Even a small misalignment can affect the table’s balance and appearance. Double-check from different angles and adjust until it feels just right.
Securing With Fasteners
Choose screws or brackets designed for wood to attach the tabletop firmly. Pre-drill holes to avoid splitting the wood, especially near edges. This step makes your table stronger and ready to handle everyday use.
Consider using corner braces underneath for extra support. They don’t show from the top but add stability that lasts. Have you tested the table’s sturdiness after fastening? If it wobbles, tighten the screws or add more fasteners.
Finishing Touches
Once secured, sand the tabletop edges to remove rough spots or splinters. This step is essential for safety and gives a smooth finish. Then, apply your choice of stain or paint to match your decor and protect the wood.
Do you want a glossy or matte finish? Adding a clear sealant can enhance durability and make cleaning easier. Remember, these small details elevate your entryway table from simple to standout.
Finishing And Painting
Finishing and painting your entryway table is where your project really takes shape. This stage not only enhances the look but also protects your work from wear and tear. Taking the time to finish your table properly ensures it stays beautiful and functional for years to come.
Applying Primer
Primer creates a smooth base for your paint or stain, helping it stick better and last longer. Choose a primer suited to the material of your table—wood primers for raw wood and stain-blocking primers if the wood has knots or imperfections.
Apply a thin, even coat using a brush or roller. Let it dry completely before moving on. Skipping primer might save time now, but you’ll likely see peeling or uneven color later.
Choosing Paint Or Stain
Your choice between paint and stain depends on the look you want and how much wood grain you want to show. Paint offers a wide range of colors and a solid finish, ideal if you want a bold or modern style.
Stain enhances the natural beauty of the wood, giving it a warm, rich tone. It also penetrates the wood, offering protection while allowing the grain to shine through. Have you thought about how your table’s color will fit with your entryway’s overall design?
Sealing For Durability
Sealing your table is crucial for durability. A good sealant protects against scratches, moisture, and daily use. Polyurethane is a popular choice—it comes in satin, semi-gloss, and gloss finishes, so you can pick the level of shine you prefer.
Apply at least two coats, allowing proper drying time between each. Don’t rush this step; a well-sealed surface means your table will keep looking great even with heavy use. What kind of wear do you expect your table to face?
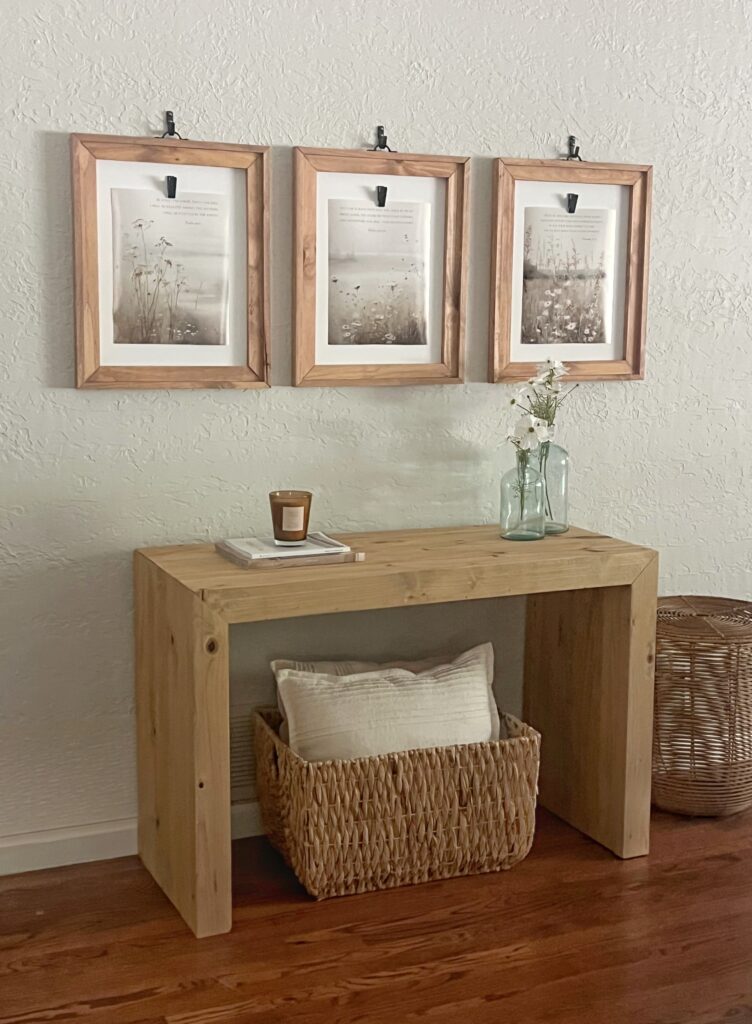
Placing And Styling Your Table
Placing and styling your entryway table is just as important as building it. The right placement ensures it welcomes guests without cluttering your space. Styling adds personality and function, making your entryway both beautiful and practical.
Positioning In Entryway
Think about how much space you have and how people move through your entryway. Your table should sit where it’s easy to access but not block the doorway or walkway.
Try placing it against a wall near the door or opposite a mirror to open up the space visually. Have you noticed how a well-placed table can make your entryway feel more inviting without feeling cramped?
Adding Decorative Items
Decorate with items that are both attractive and useful. A small bowl or tray for keys, a stylish lamp for soft lighting, and a few framed photos or a plant can add warmth.
Balance is key—too many items make the table look cluttered, but too few can feel empty. What personal touches make your space feel uniquely yours?
Maintaining Your Table
Keep your entryway table tidy by regularly clearing out old mail and unnecessary items. Dust it weekly to maintain its finish and keep it looking fresh.
Use coasters or mats to protect the surface from scratches or water rings. How often do you pause to refresh this small but important part of your home?

Credit: www.youtube.com

Credit: www.youtube.com
Frequently Asked Questions
What Materials Are Best For Building An Entryway Table?
Wood like pine, oak, or walnut is ideal for durability and look. Use quality screws and wood glue for stability. Finishing with paint or stain enhances protection and style. Choose materials based on your budget and design preference for best results.
How Much Time Does It Take To Build An Entryway Table?
Building a basic entryway table typically takes 4 to 6 hours. This includes measuring, cutting, assembling, and finishing. Time may vary depending on your skill level and the complexity of the design. Planning ahead helps streamline the process.
What Tools Do I Need To Build An Entryway Table?
Essential tools include a saw, drill, measuring tape, screwdriver, and clamps. Sandpaper or a sander helps smooth surfaces before finishing. A level ensures your table is even. Having the right tools makes construction easier and more precise.
Can I Customize The Entryway Table Design Easily?
Yes, you can customize dimensions, shape, and finish to fit your space. Adding shelves or drawers increases functionality. Choose colors and hardware that match your home décor. Customization allows you to create a unique and practical piece.
Conclusion
Building your own entryway table can bring warmth and style to your home. It allows you to create a piece that fits perfectly in your space. You control the design, size, and finish. The process can be simple and fun, even for beginners.
Use the tips shared to guide your work step-by-step. Enjoy the satisfaction of making something useful and beautiful. Your entryway will feel welcoming and organized. Start your project today and see how rewarding it can be.


