
Are your Christmas lights suddenly not shining as bright? It might be a simple fuse issue that’s stopping your festive glow.
Knowing how to change the fuse in your Christmas light string can save you time, money, and frustration. Imagine getting your lights back on quickly, without needing to buy a whole new set. In this guide, you’ll learn easy steps to fix your lights and keep your holiday spirit sparkling.
Keep reading—you’re just moments away from bringing your decorations back to life!

Credit: www.youtube.com
Safety Precautions
Handling Christmas light strings involves dealing with electricity, so safety should always come first. Ignoring simple precautions can lead to shocks or damage to your lights. Taking a few careful steps helps you replace the fuse without risk.
Unplugging The Lights
Always unplug your Christmas lights before you start working on them. Even if the lights are off, they can still carry electrical current. This simple action removes any chance of electric shock while you’re changing the fuse.
Have you ever tried fixing something while it was still plugged in? It’s a common mistake that can turn a small job into an emergency. Make unplugging a non-negotiable habit for your safety.
Using The Right Tools
Using the correct tools makes the job easier and safer. A small screwdriver or a fuse puller designed for electronics helps you avoid slipping or damaging the fuse holder. Never use metal objects like knives or scissors, as they can cause shorts or injuries.
Think about how a proper tool feels in your hand compared to an improvised one. The right tool gives you control and precision, reducing accidents and frustration during the process.
Working In A Dry Area
Always change the fuse in a dry, well-lit area. Moisture increases the risk of electrical shock and can damage the light string. If your hands are wet or the area is damp, wait until everything is completely dry before you begin.
Have you noticed how even a small drop of water can make electrical work risky? Avoid this by choosing a safe, dry spot to work. This simple step protects both you and your decorations.
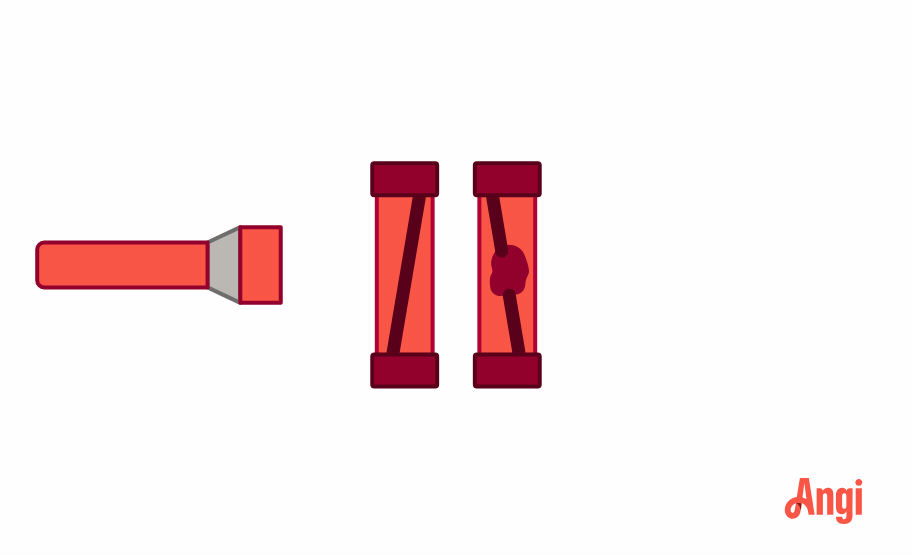
Identifying The Fuse Location
Finding the fuse in a Christmas light string is the first step to fixing a blown fuse. The fuse protects the lights from electrical problems. Knowing where the fuse sits helps you replace it safely and quickly. Usually, the fuse is in the plug or close to it. Let’s explore how to spot it.
Checking The Plug
Look closely at the plug of your Christmas light string. Most fuses are inside the plug itself. The plug might feel a bit thicker or heavier than a normal plug. This extra space holds the fuse and keeps it safe from damage. If the plug is clear or has a small door, that is where the fuse is.
Opening The Fuse Compartment
Find a small tab or sliding cover on the plug. This cover hides the fuse compartment. Use your fingernail or a small flat tool to open it gently. The fuse usually looks like a small glass or plastic tube with metal ends. Be careful not to break the fuse or lose the cover. Once open, you can see the fuse and check if it needs replacement.
Removing The Old Fuse
Removing the old fuse is an essential part of fixing your Christmas light string. It helps restore power and keeps your lights shining bright. This process is simple and safe if done carefully.
First, locate the fuse holder on the plug end of the light string. This small compartment protects the lights from electrical damage. Opening it correctly prevents any harm to you or the lights.
Next, take out the old fuse gently. Inspecting the fuse can tell you if it is blown or damaged. Replacing it with a new fuse will get your lights working again.
Opening The Fuse Holder
Find the fuse holder on the plug of your Christmas lights. It usually looks like a small door or sliding cover. Use your fingernail or a small flat tool to open it carefully.
Do not force it open. The holder should slide or pop open easily. If it feels stuck, check for any locks or latches and press them gently.
Taking Out The Fuse
Once the holder is open, you will see one or two small glass or plastic fuses inside. Use your fingers or a pair of tweezers to lift the fuse out slowly.
Look closely at the fuse. A broken wire or dark marks inside mean the fuse is blown. Keep the old fuse to match the size and rating when buying a replacement.
Choosing The Correct Replacement Fuse
Choosing the correct replacement fuse is vital for safe Christmas light operation. A wrong fuse can cause electrical issues or damage the lights. Selecting the right fuse ensures the string works properly and prevents hazards. Understanding fuse ratings and compatibility helps pick the perfect match.
Reading Fuse Ratings
Every fuse has specific ratings. These ratings show the fuse’s current and voltage limits. Look at the original fuse for numbers like “3A” or “250V.” The “A” stands for amperes, which is the current the fuse can handle. The “V” means volts, the maximum voltage the fuse can take. Match these numbers exactly to avoid problems.
Sometimes, the fuse ratings are printed on the fuse body or in the light string manual. Use a magnifier if the print is small. Never guess or replace a fuse with higher ratings. It can cause overheating or fire risks.
Buying Compatible Fuses
Purchase fuses that match your light string’s brand and model. Some manufacturers use special fuse types. Standard automotive or household fuses may not fit properly. Check the size and shape of the fuse holder before buying.
Buy fuses from reliable stores or online shops with good reviews. Avoid cheap, unbranded fuses as they may fail quickly or cause damage. Keep spare fuses handy for quick replacement during the holiday season.
Installing The New Fuse
Installing the new fuse in your Christmas light string is a simple task that can save you from holiday headaches and ensure your decorations shine brightly all season long. Having dealt with a blown fuse during the peak of holiday festivities myself, I know the frustration it can bring. But fear not, with a little patience and the right steps, you’ll have your lights back up and glowing in no time.
Placing The Fuse Properly
Start by locating the fuse compartment, usually found in the plug of your light string. It typically requires a small tool or your fingers to open. Once open, ensure the new fuse is the correct size and rating, matching the one you just removed.
Insert the new fuse into the designated slot, making sure it fits snugly. A loose fit could cause connection issues. Double-check that the fuse is seated correctly, as misalignment can prevent the lights from functioning.
Securing The Fuse Holder
Close the fuse compartment securely, ensuring there are no gaps. A securely closed compartment protects the fuse from moisture and other external elements that could cause damage.
Press the compartment shut until you hear a click or feel it snap into place. This sound indicates the fuse holder is locked and ready for use. Now, test your lights to see the fruits of your labor—did they light up?
Remember, taking a few extra moments to ensure everything is properly aligned and secured can make all the difference. What’s your favorite Christmas memory that involves festive lights? Share it with us!
Testing The Light String
Testing your Christmas light string before changing the fuse saves time and frustration. It helps you identify if the problem lies with the fuse or somewhere else. Let’s look at how to effectively check your light string to avoid unnecessary replacements.
Plugging In And Checking
Start by plugging your light string into a working outlet. Observe if any bulbs light up or if the entire string stays dark.
If some bulbs flicker or light partially, the fuse might still be fine. But if nothing lights up at all, the fuse could be blown or there might be a break in the wire.
Try gently shaking or slightly bending the string near the plug end—sometimes a loose connection causes the problem. Did you notice any change? This simple test can reveal hidden issues.
Troubleshooting Common Issues
If the lights don’t turn on, check the fuse compartment located near the plug. Often, small transparent covers hide it—you might need a small screwdriver or coin to open.
Look for a broken or blackened fuse inside. Replacing a blown fuse with the exact type recommended by the manufacturer usually fixes the problem.
Still no light? Examine the bulbs for damage or loose sockets. A single faulty bulb can sometimes prevent the entire string from working. Have you tried swapping bulbs with ones that are known to work?
Remember, testing is about isolating the issue. By carefully checking each component, you avoid guessing and save money on unnecessary replacements.
Maintaining Your Christmas Lights
Maintaining your Christmas lights is key to keeping your holiday decorations shining bright year after year. Simple care routines can prevent common issues like blown fuses and broken bulbs. Taking time to maintain your lights also saves you money and frustration during the busy holiday season.
Regular Inspections
Check your Christmas light strings regularly for any damaged wires or loose bulbs. Look closely at the plug and fuse area for signs of wear or corrosion. Catching these issues early can stop small problems from turning into bigger electrical hazards.
Try plugging in your lights before hanging them to ensure every bulb works. If you spot any dark bulbs, replace them immediately to keep the circuit intact. Have you ever had a strand where one bulb outage caused the entire string to go dark? This simple check can prevent that.
Safe Storage Tips
Proper storage is just as important as regular checks. Avoid tangling your light strings by wrapping them around a piece of cardboard or a storage reel. This keeps wires from bending and breaking over time.
Store your lights in a cool, dry place away from direct sunlight or moisture. Dampness can corrode wiring and cause fuse failures. Do you store your lights in the original box or do you have a special container? Choosing the right storage can extend the life of your lights significantly.

Credit: www.familyhandyman.com

Credit: www.youtube.com
Frequently Asked Questions
How Do I Know If A Fuse In Christmas Lights Is Blown?
A blown fuse usually causes the entire string to stop working. Check for visible burn marks or a broken wire inside the fuse. Use a multimeter to test for continuity if unsure.
Where Is The Fuse Located In Christmas Light Strings?
The fuse is typically inside the plug of the light string. Look for a small compartment that can be opened with a screwdriver or by sliding.
Can I Replace A Christmas Light Fuse Myself Safely?
Yes, replacing the fuse is simple and safe if you unplug the lights first. Use the exact fuse type recommended by the manufacturer to avoid damage.
What Type Of Fuse Do Christmas Light Strings Use?
Most Christmas light strings use a 3-amp or 5-amp glass fuse. Check the packaging or plug compartment for the exact fuse rating.
Conclusion
Changing a fuse in your Christmas light string is simple and quick. Always unplug the lights before starting. Use the right replacement fuse to avoid problems. Check the fuse holder carefully and place the new fuse securely. Test the lights after fixing the fuse to see if they work.
This small fix can save your holiday decorations. Keep these steps in mind next time your lights go out. Bright, sparkling lights are just a fuse change away. Easy and safe.


