
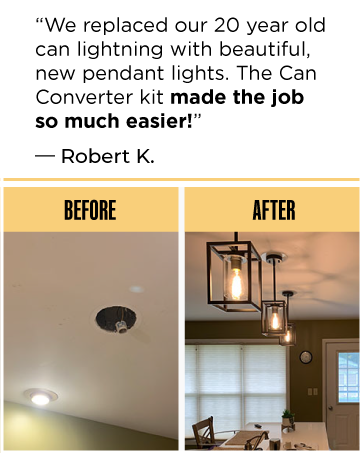
Are you tired of the plain look that recessed lighting gives your room? Changing recessed lighting to pendant lights can completely transform your space, adding style and personality.
But you might wonder, “Can I do this myself? Is it complicated or expensive? ” Don’t worry—this guide will walk you through simple steps to upgrade your lighting easily and confidently. By the end, you’ll know exactly how to make your home feel warmer and more inviting with just a few changes.
Ready to brighten up your space in a whole new way? Keep reading!
Tools And Materials Needed
Changing recessed lighting to pendant fixtures is a smart way to add style and personality to your space. Before you start, gathering the right tools and materials is crucial. Having everything ready not only makes the process smoother but also safer and more efficient.
Basic Electrical Tools
You’ll need a reliable set of electrical tools to handle wiring and installation. Essential items include a voltage tester to check for live wires, wire strippers for removing insulation, and a screwdriver set to remove and attach fixtures. A drill with bits can help if you need to create new holes or anchors for the pendant.
Don’t overlook needle-nose pliers for bending wires and electrical tape for securing connections. Having these tools on hand keeps you prepared for any wiring challenge that comes up.
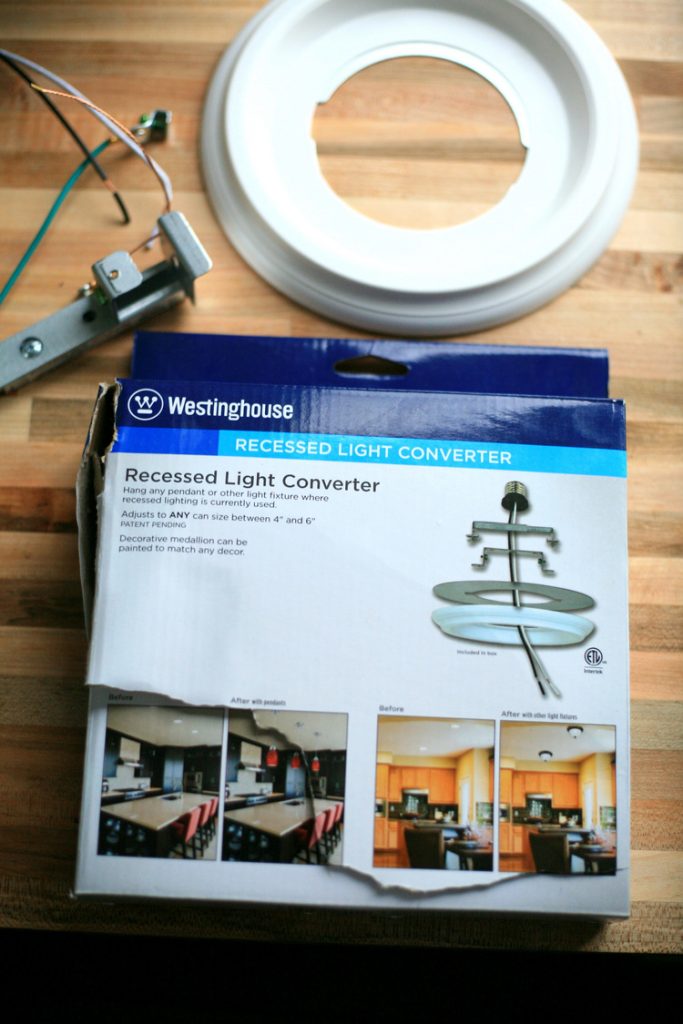
Pendant Light Components
Choosing the right pendant light is more than just picking a style you like. Your kit should include the pendant shade, a mounting bracket, and an adjustable cord or chain to set the height perfectly. Make sure the fixture comes with a compatible bulb socket and the necessary hardware like screws and wire nuts.
Sometimes, you might need extra parts like an extension cord or a new ceiling box if the old one isn’t suitable for a hanging fixture. Double-check what’s included to avoid last-minute trips to the store.
Safety Gear
Safety isn’t optional when working with electricity. Equip yourself with insulated gloves and safety goggles to protect your hands and eyes. A sturdy step ladder will keep you steady while working overhead.
Consider turning off the power at the breaker box and using a voltage tester before touching any wires. These small steps can prevent serious accidents and give you peace of mind throughout the project.
Preparing The Workspace
Clear the area around the light fixture and switch off the power to avoid accidents. Gather all tools and materials needed for the installation before starting the work.
Changing recessed lighting to pendant lights can transform a room’s ambiance. Before diving into the actual installation, preparing the workspace is crucial. This ensures a smooth process and enhances safety. Follow these steps to set up your workspace effectively.Turning Off Power
Always prioritize safety. Locate your home’s breaker box. Turn off the circuit connected to the light fixture. Double-check with a voltage tester. Ensure no electricity flows to the fixture. This step prevents accidents.Clearing The Area
Create ample space to work. Move furniture away from the fixture area. Protect surfaces with drop cloths. This keeps your items safe from dust or debris. A clean area provides an unobstructed working space.Gathering Supplies
Assemble all necessary tools and materials. You’ll need a screwdriver, wire nuts, and a pendant light kit. A ladder will help you reach the ceiling. Having everything ready minimizes disruptions during installation.Removing Recessed Lighting
Removing recessed lighting is the first important task before installing pendant lights. This process requires careful attention to safety and detail. Taking out recessed fixtures prepares the space for the new lighting style.
It involves accessing the fixture, disconnecting the wiring, and removing the housing. Each step ensures the old setup is fully cleared without damaging the ceiling or electrical system.
Accessing The Fixture
Start by turning off the power at the circuit breaker. This prevents electrical shocks during the process.
Remove the trim or cover around the recessed light. Some trims twist off, while others may have clips or screws.
Use a ladder to reach the fixture safely. Make sure the ladder is stable and positioned correctly under the light.
Disconnecting Wiring
Once the trim is off, gently pull the fixture down to expose the wiring.
Locate the wire connectors holding the fixture wires to the house wiring.
- Use a screwdriver or your hands to loosen the wire nuts.
- Carefully separate the fixture wires from the house wires.
- Wrap the exposed house wires with electrical tape for safety.
Never pull on the wires themselves; always handle connectors.
Taking Out The Housing
The housing is the metal can inside the ceiling.
Check how it is secured—some housings have clips or screws holding them in place.
- Release any clips by pushing or pulling as needed.
- Unscrew any screws that attach the housing to the ceiling structure.
- Carefully lower the housing out of the ceiling opening.
Keep the housing and parts in case you want to reuse or recycle them.
Credit: www.amazon.com
Installing Pendant Light Fixture
Installing a pendant light fixture transforms your space instantly. It adds style and directs light where you need it. The process is straightforward and involves a few key steps. Safety and precision are important throughout the installation.
Mounting The Bracket
Start by turning off the power at the breaker. Remove the old recessed light trim and housing. Locate the electrical box in the ceiling. Attach the mounting bracket to the box using screws. Ensure the bracket is secure and level. This bracket will support the pendant’s weight.
Wiring The Pendant
Carefully pull the electrical wires through the bracket. Match the wires from the pendant to the house wires: black to black, white to white, and green or copper to ground. Use wire nuts to connect them tightly. Wrap electrical tape around the wire nuts for extra security. Gently push the wires into the electrical box to avoid damage.
Securing The Fixture
Raise the pendant fixture to the bracket. Align the fixture’s mounting holes with the bracket screws. Tighten the screws to hold the fixture firmly in place. Attach the pendant shade or cover as per the manufacturer’s instructions. Restore power and test the light to confirm proper operation.
Adjusting Pendant Height
Adjusting the height of your new pendant light is key for both style and function. The right drop length ensures good lighting and complements your room’s design. This section explains how to measure, adjust, and test the pendant height for a perfect fit.
Measuring Drop Length
Start by measuring the distance from the ceiling to where the pendant should hang. Consider the room’s size and ceiling height. The pendant should not hang too low or too high. A common rule is to leave 30 to 36 inches above tables or countertops.
Use a tape measure for accuracy. Mark the ideal length on the cord before making any adjustments.
Shortening Or Lengthening Cord
Adjust the cord length to match your measurement. To shorten, cut the excess cord carefully. Strip the wire ends before reconnecting. For lengthening, use extra cord if available. Ensure the wires connect securely and safely inside the canopy.
Always turn off the power before handling electrical wires. Use wire nuts to secure connections and prevent shorts.
Testing Placement
After adjusting, hang the pendant temporarily. Check the light’s position from different angles. Walk around the room to see if the height feels right. Make sure the light does not block views or hit heads.
Adjust again if needed until the pendant hangs perfectly. Test the light with the power on to confirm everything works well.

Credit: www.amazon.com
Testing And Finishing Touches
After swapping your recessed lights for stylish pendants, the final phase involves making sure everything works perfectly and your space looks polished. Testing and finishing touches are crucial to avoid any electrical mishaps and to enhance the overall appeal of your new lighting setup. Let’s walk through the key steps to wrap up your project smoothly.
Restoring Power
Before turning the power back on, double-check all your wiring connections to ensure they’re secure and properly insulated. A loose wire can cause flickering or even pose a fire risk, so take your time here.
Once you’re confident everything is in place, switch the circuit breaker back on. If you’re working alone, keep a flashlight handy just in case the power doesn’t come back on immediately.
Checking Light Function
Turn on your new pendant lights and observe how they illuminate the room. Are they casting the right amount of light? If the bulbs don’t light up, recheck the connections and the bulb itself.
Also, pay attention to any humming sounds or flickering, which can indicate electrical issues. This simple test can save you from future headaches and ensure your lighting looks as good as it should.
Cleaning Up Workspace
After confirming the lights work, clear away all tools, wires, and debris from the area. A tidy workspace not only feels good but also reduces the risk of accidents.
Wipe down surfaces to remove dust and fingerprints from your new fixtures. This final touch makes your pendants shine and helps you appreciate the transformation you’ve just accomplished.
Troubleshooting Common Issues
Changing recessed lighting to pendant fixtures can breathe new life into a room, but sometimes issues pop up that stop your new lights from working perfectly. Troubleshooting these common problems will save you time and frustration. Let’s dive into some straightforward solutions to keep your lighting shining bright.
Fixture Not Lighting
If your pendant fixture doesn’t light up, start by checking the power source. Is the circuit breaker on, and is the switch functioning properly? Often, the issue is as simple as a tripped breaker or a faulty switch.
Next, confirm that the bulb is screwed in tightly and is the correct type for the fixture. Sometimes, bulbs aren’t compatible with dimmer switches or specific fixtures, so double-check the specifications.
If the fixture still won’t light, test the wiring connections inside the junction box. A loose or disconnected wire can stop power from reaching the pendant.
Flickering Or Dim Light
Flickering or dim lighting is usually a sign of an electrical problem or a bulb issue. Start by replacing the bulb with a new, compatible one to rule out a faulty bulb.
Dim light can also mean your bulb wattage is too low for the space or fixture. Try a higher wattage bulb within the fixture’s allowed limits and see if that brightens things up.
Another common cause is a loose connection or wiring issue. Flickering often happens when the electrical current is inconsistent, so check the wiring at the fixture and switch.
Loose Connections
Loose connections can cause flickering, no light, or even sparks. Turn off the power at the breaker and inspect all wire nuts and terminals in the fixture and switch box.
Look for wires that are not tightly twisted together or wire nuts that have slipped off. Secure any loose wires by twisting them tightly and covering them with a new wire nut if necessary.
Have you ever ignored a flickering light only to find it was a loose connection that could have caused bigger issues? Take the time to double-check these connections for safety and peace of mind.
Safety Tips And Precautions
Changing recessed lighting to pendant fixtures can refresh any room’s look. Safety is key during this process. Taking the right precautions helps avoid accidents and damage. This section covers essential safety tips you must follow.
Working With Electricity
Always turn off the power at the breaker box before starting. Use a voltage tester to ensure no electricity flows to the fixture. Avoid working in wet or damp conditions to reduce shock risk. Handle wires carefully and do not touch bare copper wires.
Using Proper Tools
Use insulated tools designed for electrical work. A wire stripper, screwdriver, and voltage tester are crucial. Avoid makeshift tools that can slip or cause injury. Keep tools organized and within reach to prevent accidents. Wear safety goggles to protect your eyes from debris.
When To Call A Professional
Call an electrician if you see damaged wiring or unusual electrical components. Complex wiring or older homes often require expert help. Seek professional advice if unsure about local electrical codes. A licensed electrician ensures the installation is safe and up to code.

Credit: www.xhlux.com
Frequently Asked Questions
How Do I Convert Recessed Lighting To Pendant Lights?
To convert recessed lighting to pendant lights, turn off power, remove old fixtures, install a junction box, and hang the pendant. Ensure wiring matches and supports the new fixture weight. Consult an electrician for safety and code compliance.
What Tools Are Needed To Change Recessed Lights?
You’ll need a voltage tester, screwdriver, wire stripper, drill, junction box, and pendant light fixture. Safety gear like gloves and goggles is also recommended. These tools help safely remove recessed lights and install pendant fixtures.
Can I Install Pendant Lights Without Rewiring?
Sometimes yes, if existing wiring supports the new fixture. However, pendant lights often require new wiring or junction boxes. Always check electrical codes and consider hiring an electrician to ensure safe installation.
How Much Does Changing Recessed To Pendant Lighting Cost?
Costs vary between $100 to $500 depending on fixture price and labor. DIY can lower costs but professional installation ensures safety. Additional wiring or ceiling modifications may increase expenses.
Conclusion
Changing recessed lighting to pendant lights can refresh any room’s look. It allows for better style and more focused light. The process is simple with the right tools and safety steps. Choose a pendant that fits your space and personal taste.
Take your time to measure and install carefully. This small update can make a big difference in your home’s feel. Enjoy the new light and atmosphere you create.


