
Are you looking to add a fresh, personal touch to your space without spending a fortune? Putting stickers on your wall is a simple and fun way to transform any room instantly.
But if you want your stickers to look perfect and last long, there are some easy steps you should follow. In this guide, you’ll discover how to place stickers on your wall the right way, avoiding common mistakes that can ruin the look.
Keep reading, and you’ll learn how to make your walls stand out exactly the way you want.

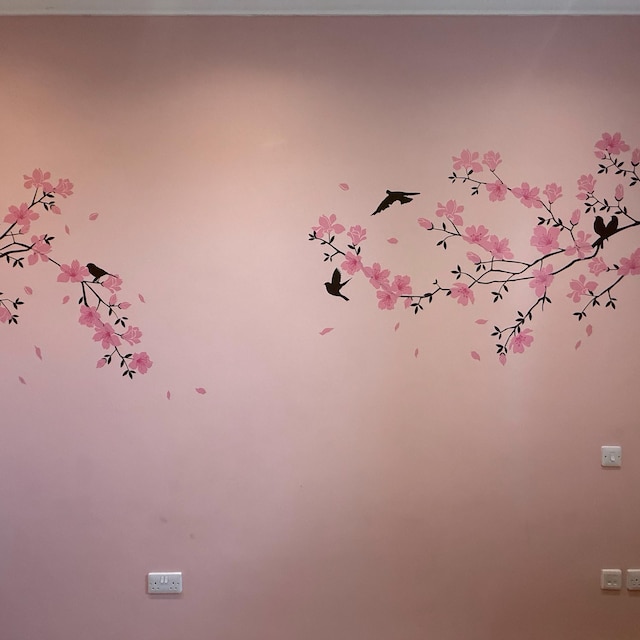
Credit: www.amazon.com.au
Choose The Right Stickers
Choosing the right stickers for your wall is more important than you might think. The material, size, and design all play a big role in how well the stickers will stick, how they will look, and how easy they are to remove later. Picking the right ones can save you time, money, and frustration.
Material Types
Sticker materials affect durability and ease of application. Vinyl stickers are popular because they are waterproof and easy to clean. They work well in kitchens and bathrooms where moisture is common.
Paper stickers are cheaper but less durable. They might peel off faster, especially on textured or painted walls. If you want something temporary or for smooth surfaces, paper can be a good choice.
Another option is fabric stickers, which add texture and are gentle on walls. They don’t leave residue but might not last as long outdoors or in humid areas. Think about where you want to place your stickers before choosing material.
Size And Design Selection
Size matters for impact and balance. Large stickers can become focal points, but they need enough wall space to avoid clutter. Smaller stickers work well for patterns or accents, but too many can overwhelm a room.
Consider your room’s style before selecting a design. Bold, colorful stickers can brighten a dull space, but if your walls already have patterns, simpler designs might work better. Do you want your stickers to blend in or stand out?
Also, think about the theme—nature, geometric shapes, quotes, or cartoons. Choosing designs that reflect your personality or the room’s purpose makes the space feel more inviting and personal.

Credit: www.etsy.com
Prepare The Wall Surface
Preparing the wall surface is a crucial step before placing stickers. It ensures the stickers stick well and last longer. Skipping this step can cause peeling or bubbles, which ruins the look you want.
Clean The Wall
Start by removing any dust, dirt, or grease from the wall. Use a mild soap solution and a soft cloth to wipe the surface gently. Avoid harsh chemicals that might damage the paint or wallpaper.
After wiping, let the wall dry completely. Moisture can prevent the sticker from sticking properly. Think about the last time you tried sticking something on a damp surface—did it hold?
Smooth Out Imperfections
Look closely for bumps, cracks, or peeling paint. These imperfections can create air pockets under the sticker and cause it to peel off early. Fill small holes or cracks with a lightweight spackle and sand it smooth once dry.
If your wall has rough texture, consider lightly sanding the area where you plan to place the sticker. A smooth surface gives your sticker a better grip and a cleaner finish. Have you noticed how stickers on textured walls rarely stay flat?
Plan Your Layout
Decide where each sticker will go before you stick it on the wall. Arrange them on the floor to see how they look together. This helps avoid mistakes and creates a balanced design.
Planning your layout is the key to a successful wall sticker project. Rushing in without a plan can lead to a mismatched design or wasted stickers. By taking the time to thoughtfully arrange your stickers, you ensure a cohesive and visually appealing look.Measure And Mark
Start by measuring the wall space where you want to place the stickers. Use a tape measure to get accurate dimensions. Once measured, lightly mark the areas with a pencil. This will give you a visual guide and help you maintain balance and symmetry. Consider the height of the stickers, especially if they’re meant to be at eye level. This small detail can make a big difference in how they’re perceived.Use Templates Or Guides
Templates or guides can be incredibly helpful, especially for complex designs. Cut out paper shapes that match the size of your stickers. Tape these paper templates to the wall to experiment with different layouts. This allows you to move elements around without committing, giving you the freedom to explore various arrangements. Do you want a neat grid pattern or a more scattered, playful look? By using templates, you can visualize and adjust until the layout feels just right.
Credit: www.amazon.ca
Apply Stickers With Precision
Applying stickers on a wall requires care and attention. Precision ensures the sticker looks neat and lasts longer. Small mistakes can cause wrinkles or bubbles, ruining the look. Follow simple tips to place stickers smoothly and perfectly.
Peeling Techniques
Start by peeling the sticker slowly from the backing paper. Pull at a sharp angle to avoid tearing. Use one hand to hold the sticker steady. Avoid touching the sticky side with fingers. If the sticker is large, peel a small section first. Stick that section on the wall, then peel more as you go.
Smooth Application Tips
- Clean the wall surface before applying the sticker. Dirt or dust can stop the sticker from sticking well.
- Use a soft cloth or a plastic card to press the sticker down. Move from the center outwards to push out air bubbles.
- Work slowly and gently to avoid wrinkles.
- If bubbles form, gently lift the sticker and reapply it.
- For best results, apply stickers at room temperature.
Fix Common Issues
Fixing common issues while placing stickers on walls makes your project look neat. Small mistakes happen but correcting them is simple. Quick fixes improve the sticker’s appearance and durability.
Removing Air Bubbles
Air bubbles appear when trapped air stays under the sticker. They create bumps and distort the design. Gently push the bubbles toward the edges using a soft cloth or credit card. Work slowly to avoid tearing the sticker. For stubborn bubbles, use a pin to prick a tiny hole. Press the air out carefully afterward.
Realigning Misplaced Stickers
Stickers may not stick straight at first try. Carefully peel the sticker off the wall. Do this slowly to avoid damage. Clean the wall surface if needed before reapplying. Align the sticker using a level or guide marks. Press firmly from the center outwards to remove air pockets.
Maintain Your Wall Stickers
Maintaining your wall stickers is key to keeping your space vibrant and fresh. Proper care helps your stickers last longer and stay firmly attached. Let’s look at how you can clean and protect them without causing damage.
Cleaning Without Damage
Cleaning wall stickers requires a gentle touch. Avoid harsh chemicals or abrasive tools that can ruin the design or adhesive.
Use a soft, damp cloth to wipe away dust and dirt. If needed, add a mild soap diluted in water for stubborn spots. Always blot gently instead of scrubbing to prevent peeling or fading.
Have you noticed how some stickers start to look dull after a rough clean? That’s a sign you might be using the wrong method.
Preventing Peeling Over Time
Peeling happens when the adhesive weakens or the wall surface isn’t ideal. Keep your stickers stuck by avoiding moisture and extreme temperature changes.
Try to place stickers on smooth, clean, and dry walls. If you live in a humid area, consider using a sealant spray designed for decals to protect edges.
Small edges lifting? Press them down with a credit card or flat object to re-adhere. If peeling persists, you might need to replace the sticker before it damages your wall.
Frequently Asked Questions
How Do I Prepare The Wall For Sticker Placement?
Clean the wall surface thoroughly with a damp cloth. Remove dust, grease, and moisture for better sticker adhesion. Let the wall dry completely before applying stickers.
What Is The Best Technique To Apply Wall Stickers?
Peel the sticker backing slowly and place the top edge on the wall. Smooth it down using a squeegee or credit card to avoid air bubbles.
Can I Reposition Stickers After Placing Them?
Yes, gently peel off the sticker and reposition it within a few minutes. Avoid stretching or tearing for successful repositioning.
How Do I Remove Wall Stickers Without Damage?
Peel the sticker slowly from one corner. Use warm soapy water or a hairdryer to loosen adhesive if needed, preventing wall damage.
Conclusion
Placing stickers on your wall can change any room quickly. Choose the right spot with a clean, dry surface. Peel carefully and press firmly to avoid bubbles. Take your time to adjust the sticker’s position. Enjoy your new wall design that reflects your style.
Small steps lead to great results. Try different stickers to see what suits you best. Decorating is simple, fun, and affordable. Your walls can tell your story with just a few stickers. Give it a try today!


