
Are you tired of fumbling for the light switch in the dark? Imagine walking into a room, and the lights turn on automatically.
Sounds convenient, right? Connecting a motion sensor light switch can make this your everyday reality. It not only saves energy but also adds a layer of safety and comfort to your home. In this guide, you’ll learn exactly how to install one yourself—step by step, with simple instructions you can follow easily.
Keep reading, and you’ll discover how to transform your space with just a few tools and a bit of know-how.
Tools And Materials Needed
Getting your motion sensor light switch installed is easier when you have the right tools and materials ready. Missing one essential item can slow you down or cause frustration. Let’s look at exactly what you’ll need to make your installation smooth and safe.
Essential Tools For Installing A Motion Sensor Light Switch
- Voltage Tester:This helps ensure the power is off before you start working. Safety first!
- Screwdrivers:Both flathead and Phillips are useful for removing the existing switch and securing the new one.
- Wire Strippers:You’ll need these to prepare the wires for connection without damaging them.
- Needle-Nose Pliers:These make twisting wires together easier and help with tight spaces.
- Electrical Tape:Use this to secure wire connections and add an extra layer of safety.
- Flashlight or Headlamp:Working in dimly lit areas is common, so good lighting is a must.
Materials Needed For Your Motion Sensor Light Switch Installation
- Motion Sensor Light Switch:Choose one compatible with your home’s wiring and lighting setup.
- Wire Connectors (Wire Nuts):These keep your wire connections tight and safe.
- Electrical Box:Sometimes you might need a new or replacement box, especially if the current one is damaged or too small.
- Wall Plate:A matching plate keeps everything looking neat once the switch is installed.
Why Having The Right Tools And Materials Matters
Think about a time you tried to fix something without the proper tool. Frustration builds, and mistakes happen fast. I once attempted to install a new light switch without a voltage tester and nearly shocked myself. Having each tool and material ready ahead of time saves you from surprises and speeds up the process.
Do you already have these tools at home, or will you need to pick up a few items? Planning ahead can make the difference between a quick job and an all-day hassle.

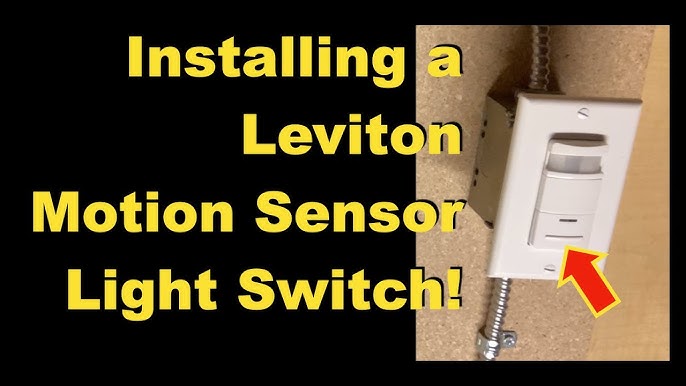
Credit: www.youtube.com
Safety Precautions
Safety is the top priority when installing a motion sensor light switch. It protects you and your home from electrical hazards. Taking the right precautions ensures a smooth and secure installation process.
Always prepare your workspace carefully. Turn off the power at the circuit breaker to avoid electric shocks. Use a voltage tester to confirm the power is off before touching any wires.
Wear insulated gloves and use tools with insulated handles. Keep the area dry to prevent slips and electrical shorts. Follow the manufacturer’s instructions closely to avoid mistakes.
Turn Off The Power
Switch off the circuit breaker linked to the light switch. Do not rely on just the wall switch to cut power. Use a voltage tester on the wires to check for electricity.
Use Proper Tools And Gear
- Wear insulated gloves for protection.
- Use screwdrivers with insulated handles.
- Keep tools dry and in good condition.
Check The Wiring Carefully
Identify each wire by its color and function. Match wires exactly as per the motion sensor switch guide. Do not force connections or mix wires.
Work In A Safe Environment
- Ensure the workspace is dry and well-lit.
- Clear away clutter that can cause accidents.
- Keep children and pets away while working.
Choosing The Right Motion Sensor Switch
Choosing the right motion sensor switch makes installation easier and improves light control. Connecting it involves turning off power, identifying wires, and following simple wiring steps. Proper setup ensures efficient lighting and energy savings.
Choosing the right motion sensor switch is crucial to ensuring your lighting is both efficient and convenient. With so many options available, making the right choice can feel overwhelming. But understanding a few key features can simplify the decision-making process.Consider The Type Of Sensor
Motion sensor switches come with different sensing technologies. Passive Infrared (PIR) sensors detect body heat and are ideal for spaces like bedrooms or living rooms. Ultrasonic sensors emit sound waves and detect movement, perfect for bathrooms or laundry rooms where there might be obstructions.Evaluate Sensitivity And Range
It’s important to choose a switch that suits the specific area of installation. A sensor with a wide range is suitable for larger rooms, while a more focused sensor is better for smaller spaces. High sensitivity is great for detecting even the slightest movements, but it might lead to frequent unnecessary activations.Think About The Aesthetics
Aesthetics might not be the first thing that comes to mind, but it’s worth considering. You want a motion sensor switch that blends seamlessly with your room’s decor. Many switches come in various colors and styles, so you can find one that fits your taste.Check For Additional Features
Some motion sensor switches offer features like adjustable time delays, daylight sensors, and manual override options. These can be particularly useful if you want more control over the lighting. Imagine having a light that only turns on when it’s dark, saving even more energy.Assess Power Requirements
Before purchasing, check if the switch requires a neutral wire. Most modern homes have them, but older homes might not. This can impact installation ease and compatibility, so it’s a crucial detail to verify beforehand. Selecting the right motion sensor switch can significantly enhance your home’s functionality. Remember, the right choice will not only save energy but also add a layer of convenience to your daily life. What features do you think would benefit your home the most?Turning Off Power
Before you start connecting a motion sensor light switch, the very first and most important step is to turn off the power. This step protects you from electrical shocks and prevents any damage to your electrical system. Taking a moment to ensure the power is off can save you from costly mistakes and serious injuries.
Locate Your Circuit Breaker
Head to your home’s electrical panel and find the circuit breaker that controls the room where you’ll install the motion sensor switch. It’s usually labeled, but if not, you can flip breakers off one by one while testing the light to see which one controls it.
Do you have multiple circuits for one room? Make sure you turn off all relevant breakers to avoid surprises. Safety first is always a good rule.
Use A Voltage Tester To Confirm Power Is Off
Don’t rely just on the breaker switch position. Grab a voltage tester to double-check the wires in your switch box. Touch the tester to the wires to ensure no current is flowing.
This small step has saved many DIYers from shocks. If the tester shows power, go back and switch off the correct breaker or call a professional.
Inform Others And Post A Reminder
It’s easy to forget the power is off and someone might try to turn it back on. Put a note on your breaker panel or a visible spot near the work area to alert others. This prevents accidental power restoration during your work.
Have you ever had someone turn the lights on while you were working? A simple sign can avoid that headache.
Removing The Old Switch
Removing the old switch is the first step to install a motion sensor light switch. It involves turning off power and safely taking out the existing switch. This process prepares the wall box for the new device. Take your time and follow safety rules to avoid accidents.
Before touching the switch, make sure the power is off. This prevents electric shocks and keeps you safe. Use a voltage tester to confirm no current flows to the wires. Never skip this crucial safety step.
Turn Off Power At The Circuit Breaker
Locate the main electrical panel in your home. Find the breaker that controls the switch you want to replace. Flip the breaker to the off position. This stops electricity from reaching the switch.
Test the switch by turning on the light or using a voltage tester. Confirm no power is present before continuing.
Remove The Switch Cover Plate
Use a screwdriver to remove the screws holding the cover plate. Take off the cover carefully. Set it aside where it will not get damaged.
Unscrew The Old Switch
Remove the screws that attach the switch to the wall box. Gently pull the switch out to expose the wiring. Do not pull too hard to avoid damaging the wires.
Identify And Label The Wires
Look at the wires connected to the switch. Usually, there are black (hot), white (neutral), and green or bare (ground) wires. Use masking tape or labels to mark each wire. This helps with correct connections later.
Disconnect The Wires From The Old Switch
Loosen the screws holding the wires or remove them from push-in connectors. Keep the wires separated and away from each other. This prevents accidental contact.

Credit: www.youtube.com
Identifying Wires
Identifying wires correctly is essential before you connect a motion sensor light switch. Mistaking wires can cause the switch to malfunction or even create safety hazards. Understanding the role of each wire helps you make confident and secure connections.
Understanding Common Wire Colors
Most homes use standard wire colors, but these can vary, so don’t assume. Typically, black wiresare hot, carrying current to the switch. White wiresusually serve as neutral, completing the circuit.
Green or bare copper wires are grounding wires for safety. If your wires don’t match these colors, it’s critical to test them before proceeding. Have you ever encountered a wire color that didn’t fit the norm?
Using A Voltage Tester To Identify Hot Wires
A voltage tester is a simple tool that can save you from guesswork. Touch the tester to each wire while the power is on—only the hot wire will make the tester light up or beep. This step protects you from connecting wires incorrectly.
Make sure to turn off the power before handling wires after testing. Have you tried using a voltage tester before? It’s often easier than you expect and gives peace of mind.
Locating The Load And Line Wires
The line wire brings power from the breaker to the switch, while the load wire sends power to the light fixture. Identifying which is which is crucial for the sensor switch to operate properly.
You can determine this by turning off the breaker, disconnecting the wires, then turning the breaker back on and testing each wire with a voltage tester. The wire showing voltage is the line. This simple trick ensures you won’t mix up connections.
Recognizing The Ground Wire
The ground wire is often overlooked but plays a vital role in safety. It’s either green or bare copper and connects the switch to the house’s grounding system.
Always connect the ground wire from your motion sensor switch to this wire. Missing this connection can cause electrical shocks or damage over time. Have you checked your ground wire connections before?
Wiring The Motion Sensor Switch
Wiring the motion sensor switch correctly ensures it functions safely and efficiently. This task involves connecting four key wires: load, line, neutral, and ground. Each wire has a specific role in powering and controlling the light fixture. Follow these wiring steps carefully for a smooth installation.
Connecting The Load Wire
The load wire carries electricity to the light bulb. Locate the load wire in your wall box; it often has black or red insulation. Connect this wire to the load terminal on the motion sensor switch. Secure the connection tightly with a wire nut or screw terminal. This connection allows the switch to control the light power.
Connecting The Line Wire
The line wire brings power from the electrical panel. It usually has black insulation. Attach the line wire to the line terminal on the sensor switch. This connection supplies the switch with electricity to operate. Confirm the wire is firmly connected and no copper shows outside the connector.
Connecting The Neutral Wire
The neutral wire completes the electrical circuit. It usually has white insulation. Connect the neutral wire to the neutral terminal on the sensor switch. Some older switches do not require this wire, but most modern motion switches do. Make sure the connection is secure and insulated properly.
Connecting The Ground Wire
The ground wire ensures safety by preventing electrical shocks. It is usually green or bare copper. Attach the ground wire to the green grounding screw or terminal on the switch. Connect the other end to the metal box or ground wire in the wall. Proper grounding is crucial for safe operation.
Mounting The Switch
Mounting the motion sensor light switch correctly is key for its proper function. A well-mounted switch detects movement accurately and lasts longer. Careful placement ensures the sensor covers the desired area effectively. Follow these simple steps to mount your switch with ease.
Choose The Right Location
Select a spot on the wall near the light fixture. Avoid places with direct sunlight or heat sources. The sensor should have a clear view of the area to detect movement.
Prepare The Wall Surface
Clean the wall surface to remove dust and grease. A clean surface helps the switch stick firmly if using adhesive. For screws, make sure the wall is smooth and ready for drilling.
Use The Mounting Plate
Attach the mounting plate to the wall first. Align it with the electrical box for a secure fit. Use a level to keep the plate straight.
Secure The Switch
Connect the wires according to the instructions. Push the switch into the mounting plate gently. Tighten the screws until the switch feels stable but do not over-tighten.
Test The Sensor Position
- Turn on the power and test the sensor detection.
- Adjust the angle of the sensor if needed.
- Make sure the sensor covers the desired area fully.
Restoring Power And Testing
After wiring your motion sensor light switch, restoring power and testing are crucial to ensure everything works safely and correctly. This stage lets you confirm your installation is successful and your switch responds as expected. Taking the time to carefully restore power and test prevents potential hazards and saves you from troubleshooting later.
Restore Power Safely
Before you flip the circuit breaker back on, double-check that all wires are securely connected and tucked neatly inside the switch box. Loose wires can cause short circuits or flickering lights.
Turn the breaker back on and be ready to switch off immediately if you notice sparks, smoke, or unusual smells. Safety is your top priority.
Initial Testing Of The Motion Sensor
Once the power is restored, activate your motion sensor light switch by moving in front of it. The light should turn on promptly.
If it doesn’t, check the sensor’s sensitivity settings or the wiring connections again. Sometimes, adjusting the sensor angle helps improve detection.
Adjusting Settings For Optimal Performance
Most motion sensor switches allow you to adjust the time delay and sensitivity. Experiment with these settings to fit your room’s lighting needs and traffic patterns.
For example, if the light stays on too long, shorten the delay time. If it doesn’t turn on reliably, increase sensitivity.
Final Safety Check
Test the switch multiple times during different lighting conditions to ensure consistent operation. Check if the light turns off automatically after the set time.
Ask yourself: Is the switch responding quickly and accurately every time? If yes, you’ve completed the installation successfully.
Adjusting Sensor Settings
Adjusting sensor settings helps control how long the light stays on after motion is detected. You can also set the detection range to avoid false triggers. Proper adjustments save energy and improve convenience.
Adjusting sensor settings on your motion sensor light switch is crucial for optimal functionality. You want your lights to respond accurately to movement without being overly sensitive. Fine-tuning these settings ensures that your lights operate efficiently and economically, enhancing both convenience and security.Sensitivity Adjustment
Sensitivity determines how much movement is needed to trigger the light. If your lights are turning on too easily, try reducing the sensitivity. This prevents them from reacting to minor movements, like leaves rustling or small animals. Conversely, if the lights aren’t activating when they should, increase the sensitivity. This ensures the lights respond to necessary movements, such as someone walking up the driveway. Think about your environment and what kinds of movement you want the sensor to detect. Adjusting this setting might require some trial and error, but it pays off in the long run.Time Delay Settings
Time delay refers to how long the light stays on after motion stops. A shorter delay saves energy, while a longer delay ensures the area remains illuminated for a more extended period. Consider when you use the space most. For a backyard where you entertain guests, a longer delay might be helpful. Try setting a few different delays and observe the outcomes. You might find the perfect balance that keeps your space lit without wasting energy.Light Level Settings
Light level settings determine when the sensor activates based on the ambient light. If your light comes on during the day, lower the light level setting. This ensures that the light only turns on when it’s genuinely needed, like at dusk or during overcast days. Take note of your usual lighting conditions. Adjusting this setting can prevent unnecessary usage and extend the life of your bulbs. By customizing your motion sensor light switch’s settings, you create a more responsive and efficient lighting system. Have you adjusted yours yet? It’s a simple task with significant benefits.Troubleshooting Common Issues
Troubleshooting your motion sensor light switch can feel tricky, but many issues have simple fixes. Identifying the problem quickly saves you time and frustration. Let’s look at common issues you might face and how to resolve them effectively.
Checking The Power Supply
Is your motion sensor light switch completely unresponsive? Often, the root cause is a power supply problem. Double-check your circuit breaker to ensure the switch has power.
Also, verify the wiring connections behind the switch. Loose or incorrect wiring can stop the switch from working. If you’re unsure, using a voltage tester can help you confirm power flow safely.
Adjusting The Sensor Sensitivity
Sometimes your light might turn on too often or not at all. This usually means the sensor sensitivity needs tweaking. Most switches have a dial or button to adjust sensitivity—try lowering or raising it to match your room’s activity level.
Have you noticed your light stays on during the day? Check if the light sensor setting is blocking activation when there’s enough ambient light. Adjusting this feature can fix false triggers.
Ensuring Proper Placement Of The Sensor
Where you install the motion sensor matters a lot. If it faces windows or heat sources, it might misread movements or temperature changes. Move the sensor away from direct sunlight, air vents, or heating appliances for better accuracy.
Think about the sensor’s range, too. Is it covering the area you want to monitor? Sometimes, simply repositioning the switch improves its performance significantly.
Testing The Load Compatibility
Your motion sensor switch must be compatible with the type of bulbs you use. LED, CFL, and incandescent bulbs behave differently with these switches. Using incompatible bulbs can cause flickering or the light not turning on.
If you experience flickering, try switching to bulbs recommended by the manufacturer. This step often solves the problem without needing complex adjustments.
Resetting The Motion Sensor Switch
If nothing else works, a reset might clear hidden glitches. Unplug the switch or turn off the breaker for a minute, then restore power. This simple action often resolves temporary errors.
Have you tried resetting your switch before calling for help? It’s surprising how often this quick fix restores normal function.

Credit: www.doityourself.com
Frequently Asked Questions
What Tools Are Needed To Connect A Motion Sensor Light Switch?
You need a screwdriver, wire stripper, voltage tester, and electrical tape. Turn off power before starting. These tools ensure safe and proper installation of your motion sensor switch.
How Do I Identify Wires For Motion Sensor Switch?
Look for line (power), load (light), neutral, and ground wires. Use a voltage tester to confirm live wires. Proper identification prevents wiring mistakes and ensures correct switch operation.
Can I Install A Motion Sensor Switch Myself?
Yes, if you follow safety steps and instructions carefully. Turn off the circuit breaker before wiring. If unsure, consult a professional electrician to avoid hazards.
How To Test A Motion Sensor Switch After Installation?
Restore power and cover the sensor to test it. Walk in front to see if light activates. Adjust sensitivity and timer settings as needed for optimal performance.
Conclusion
Connecting a motion sensor light switch is simple and practical. It saves energy and adds convenience to your home. Follow each step carefully for safety. Double-check your wiring before turning the power back on. Enjoy automatic lighting that reacts to your movement.
This small change can make a big difference in daily life. Stay safe and take your time during installation. A motion sensor light switch offers smart, easy lighting control.


