
Are you tired of your wall stickers peeling off or losing their charm after just a few days? You’ve picked the perfect design, but somehow it just won’t stick the way you want.
Getting wall stickers to stay isn’t always as simple as it seems, but with the right tips and tricks, you can make sure they look great and last longer. You’ll discover easy, effective ways to keep your wall stickers firmly in place, so your space stays stylish and fresh without the frustration.
Keep reading, because your walls deserve the best!

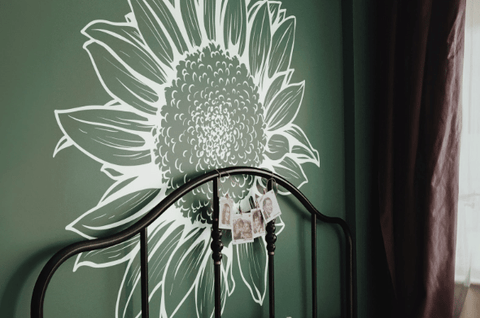
Credit: www.designcafe.com
Choosing The Right Wall Stickers
Choosing the right wall stickers plays a big role in how well they stick. The material and design affect adhesion and appearance. Picking the correct type helps the stickers last longer and look better on your walls.
Material Types And Their Adhesion
Wall stickers come in several materials, each with different stickiness levels. Vinyl stickers have strong adhesive and resist moisture well. Paper stickers are less sticky and may peel faster. Fabric stickers offer a soft look but can lose grip over time.
Check the adhesive type too. Removable glue is easy to peel off but may not hold for long periods. Permanent glue sticks strongly but can damage paint when removed. Choose materials that fit your wall surface and how long you want the sticker to stay.
Size And Design Considerations
Large stickers need stronger adhesion to stay put. Small stickers can use lighter glue and still stick well. Complex designs with many edges may lift easier than simple shapes.
Think about the wall texture. Smooth walls help stickers stick better than rough or bumpy surfaces. Also, choose designs that complement your room style and fit well in the space. Proper size and design improve both look and durability.
Preparing Wall Surfaces
Getting wall stickers to stick properly starts long before you peel off their backing. The secret lies in how well you prepare your wall surfaces. Proper preparation creates the perfect canvas for your stickers to cling tightly and last longer.
Cleaning Techniques For Better Grip
Dust, grease, and dirt are your wall sticker’s worst enemies. Even tiny particles can create a barrier that prevents stickers from sticking well.
Use a mild soap solution with warm water to wipe down the wall. Avoid harsh chemicals that might leave a residue behind. After cleaning, dry the surface completely with a lint-free cloth.
If your wall has stubborn grease spots, a small amount of rubbing alcohol on a cotton pad can help. But test it on a hidden spot first to ensure it doesn’t damage your paint.
Have you ever noticed how a dusty surface makes tape lose grip? The same applies to wall stickers. Clean walls mean better adhesion and fewer bubbles.
Handling Different Wall Textures
Not all walls are created equal. Smooth walls offer the best surface for stickers, but textured walls can be tricky.
For lightly textured walls, gently sanding the area where you want to apply the sticker can help create a smoother spot. Be careful not to damage the paint.
Highly textured walls like brick or popcorn ceilings often won’t hold stickers well. In these cases, consider applying the stickers to a smooth backing board and then mounting that on the wall.
Ask yourself: How rough is your wall? This question will guide whether you need extra preparation or an alternative method.
Applying Wall Stickers Correctly
Applying wall stickers correctly is essential for a clean, lasting look. Proper application prevents peeling and ensures the stickers stay in place. Follow these steps for smooth application.
Positioning And Alignment Tips
Choose a clean, dry surface for your wall stickers. Avoid applying on textured or dusty walls. Mark the desired position using a pencil or masking tape. Ensure the sticker is level by using a spirit level or ruler. Adjust the placement as needed before sticking.
Using Tools For Smooth Application
A squeegee or a credit card helps smooth out air bubbles. Start applying from one corner and gradually press down. Use gentle strokes to apply pressure evenly across the sticker. This prevents wrinkles and ensures a firm grip. If bubbles appear, gently lift the sticker and reapply. For large stickers, consider having an extra pair of hands.

Credit: www.designcafe.com
Enhancing Sticker Adhesion
Enhancing sticker adhesion is key to making wall stickers last longer. The right conditions and tools help stickers stick firmly without peeling. Small adjustments can improve how well stickers stay on your walls.
Temperature And Humidity Effects
Temperature changes affect sticker glue strength. Cold walls make adhesive stiff and less sticky. Warm walls keep glue soft and more flexible. Aim for room temperature when applying stickers.
Humidity also plays a big role. High humidity can weaken adhesives and cause stickers to peel. Dry air helps glue bond better to surfaces. Choose a dry day for the best results.
Using Additional Adhesives Safely
Extra glue can help stickers stay longer on tricky surfaces. Use adhesives designed for wall stickers or safe for paint. Avoid strong glues that can damage paint or wallpaper.
- Apply a thin layer of glue on the back of the sticker.
- Press sticker firmly to the wall after applying glue.
- Let it dry completely to secure the bond.
Test glue on a small wall area first to check for damage. This keeps your walls safe and your stickers stuck tight.
Maintaining Wall Stickers Over Time
Keeping your wall stickers looking fresh and firmly in place over time requires a bit of care. Without the right maintenance, they can peel, bubble, or lose their vibrant colors. But with simple habits, you can enjoy your wall art for months or even years.
Cleaning Without Damage
Cleaning wall stickers is delicate work. Harsh chemicals or rough scrubbing can ruin the design or make the sticker peel away.
Use a soft, damp cloth to gently wipe away dust or dirt. Avoid soaking the sticker; a little moisture goes a long way.
If you need a cleaner, choose mild soap mixed with water. Test it on a small corner first to make sure it doesn’t affect the color or adhesive.
Preventing Peeling And Bubbling
Have you noticed your stickers starting to peel at the edges or develop bubbles underneath? This usually happens because of moisture or air trapped during application.
To stop peeling, avoid placing stickers on damp or textured walls. Smooth, dry surfaces are best.
If bubbling appears, gently press the sticker from the center outwards to push air out. For stubborn bubbles, a pin can help release trapped air carefully.
Also, control room humidity. High moisture levels weaken the glue, so using a dehumidifier or keeping windows open can make a big difference.

Credit: rockymountaindecals.com
Removing Wall Stickers Without Damage
Removing wall stickers without causing damage to your walls takes patience and care. The right methods keep your paint and surface intact. Avoid rushing the process to prevent peeling paint or leaving sticky residue. Gentle techniques help maintain your wall’s appearance while removing stickers cleanly.
Gentle Peeling Techniques
Start by slowly lifting the edge of the sticker. Use your fingernail or a plastic card to ease it away from the wall. Pull the sticker back at a low angle to reduce stress on the paint. Stretching the sticker gently can help it release more easily.
Work in small sections instead of pulling the whole sticker at once. If the sticker resists, pause and try another spot. Avoid sharp tools that can scratch or gouge the wall.
Using Heat And Solvents
Warmth softens the adhesive, making stickers easier to remove. Use a hairdryer on low heat and move it back and forth over the sticker. Keep the dryer about 6 inches away to avoid overheating.
After warming, try peeling the sticker again. For stubborn residue, apply a small amount of mild solvent like rubbing alcohol or a citrus-based cleaner. Dab the solvent on a cloth first, then gently rub the sticky area.
Test solvents on a small hidden spot before applying broadly. Always wipe the area with a damp cloth after removal to clean any leftover residue.
Frequently Asked Questions
How Do I Prepare Walls For Wall Stickers?
Clean the wall thoroughly using mild soap and water. Ensure the surface is dry and smooth. Avoid textured or dusty walls for better adhesion.
What Surfaces Work Best For Wall Stickers?
Smooth, clean, and dry surfaces like painted drywall, glass, or metal work best. Avoid rough or porous surfaces as stickers may peel off.
How Can I Make Wall Stickers Stick Longer?
Apply stickers to a clean surface and press firmly. Avoid humidity and direct sunlight. Use a heat gun or hairdryer to improve adhesion.
Can I Reuse Wall Stickers After Removal?
Most wall stickers lose their adhesive after removal. Carefully peel them off to avoid damage, but reusing is usually not recommended.
Conclusion
Wall stickers can brighten any room with little effort. Clean and dry walls help stickers stick better. Press firmly and avoid touching the sticky side too much. Use a hairdryer on low heat for stubborn edges. Removing old residue keeps surfaces smooth for new stickers.
Small steps make a big difference in staying power. Enjoy your decorated space longer with these simple tips. Stickers stay put, and your walls look great. Easy, quick, and effective ways to keep stickers in place.


