
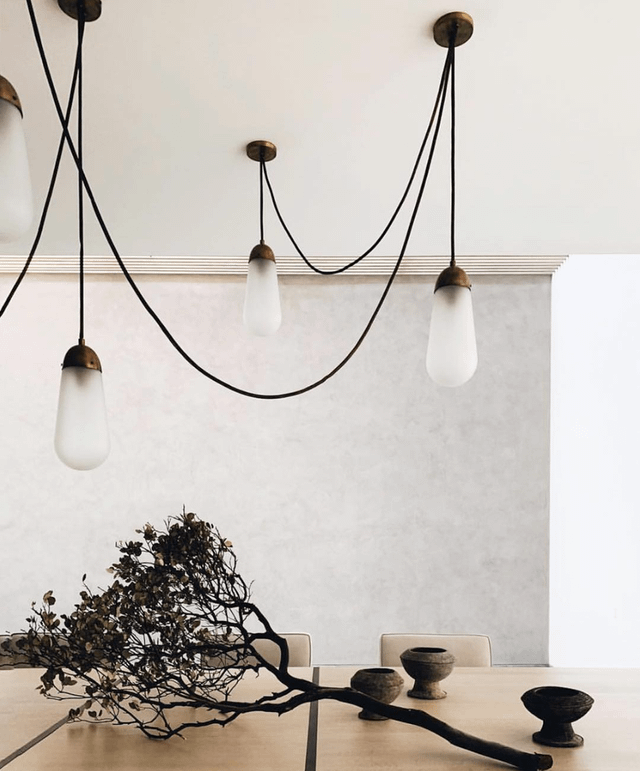
Hanging a chandelier with a chain might seem tricky, but it doesn’t have to be. If you want to add a touch of elegance to your room, this guide is made just for you.
Imagine your space glowing with the perfect light, creating the atmosphere you’ve always wanted. By the end of this article, you’ll know exactly how to hang your chandelier safely and stylishly, even if you’ve never done it before. Ready to transform your room with a stunning chandelier?
Let’s get started!
Tools And Materials Needed
Before you start hanging your chandelier with a chain, gathering the right tools and materials is crucial. Having everything ready not only speeds up the process but also ensures safety and a polished finish. Missing a key item can turn a simple task into a frustrating experience.
Essential Tools
Make sure you have these tools on hand to make your installation smooth and safe:
- Voltage tester:Double-check that the power is off before you touch any wires.
- Screwdriver set:Both flathead and Phillips screwdrivers will be needed for mounting and securing parts.
- Wire stripper:This tool helps you prepare the wires for connection without damaging them.
- Pliers:Useful for twisting wires and adjusting small parts.
- Drill with bits:You might need to drill holes for mounting brackets or anchors.
- Measuring tape:Ensures your chandelier hangs at the perfect height.
- Step ladder:Provides safe access to ceiling fixtures.
Do you have all these ready? Skipping even one can complicate your project.
Choosing The Right Chain
The chain isn’t just decorative; it supports your chandelier’s weight. Select a chain rated for the weight of your chandelier to avoid accidents.
Consider the chain’s length and style. Longer chains offer flexibility in hanging height, but too long can look awkward. Match the chain’s finish with your chandelier for a cohesive look.
Think about durability too. Steel chains with a protective coating resist rust and wear better than cheaper alternatives.
Selecting The Chandelier
Pick a chandelier that fits the size and style of your space. A bulky chandelier in a small room can overwhelm the area, while a tiny fixture might get lost in a large space.
Check the weight and ensure your ceiling’s electrical box can handle it. Some heavier models require reinforced support.
Also, consider the lighting needs. How bright do you want the room? Does the chandelier support the right type and number of bulbs?
What style speaks to your taste and complements your décor? Your choice will set the tone for the entire room.
Preparing The Installation Area
Preparing the installation area is crucial before you hang your chandelier with a chain. It sets the stage for a safe and smooth process. Skipping this step can lead to frustration or even hazards during installation.
Turning Off Power
Safety should be your top priority. Locate the circuit breaker that controls the power to the room where you’ll install the chandelier and switch it off. Double-check by flipping the light switch to ensure no electricity is flowing.
Have you ever tried to install a fixture only to get a shock? Turning off the power eliminates that risk entirely. It’s a small step that protects you and your home.
Removing Existing Fixture
Before hanging the new chandelier, you need to carefully take down any old fixture. Use a screwdriver to remove screws and gently lower the fixture while supporting its weight. Be mindful of the wiring behind it.
If the old fixture is stuck or hard to remove, don’t force it. Instead, check for hidden screws or clips. This prevents damage to your ceiling or electrical box.
Inspecting Ceiling Support
Your ceiling must support the chandelier’s weight. Look for a sturdy electrical box rated for ceiling fans or heavy fixtures. If the box is plastic or loose, it won’t hold the chandelier safely.
Consider this: a chandelier with a chain can be heavy. If your ceiling support looks weak, add a ceiling brace or install a fan-rated electrical box. This step prevents accidents and keeps your chandelier securely in place.
Installing The Mounting Bracket
Secure the mounting bracket firmly to the ceiling joist for strong support. Ensure it aligns with the electrical box for easy wiring. Tighten screws to keep the bracket stable before hanging the chandelier.
Installing the mounting bracket is a critical step in hanging your chandelier with a chain. This component acts as the backbone, ensuring your chandelier is securely attached to the ceiling. Whether you’re a first-timer or a seasoned DIY enthusiast, getting this step right is crucial for both safety and aesthetics.Locating Ceiling Joists
Before you begin, you need to find the ceiling joists, as they are the sturdiest part of your ceiling. Use a stud finder to locate these joists. If you skip this step, you risk hanging your chandelier on drywall, which is not strong enough to support its weight. To mark the spot, once you’ve found a joist, lightly pencil a small ‘X’ on the ceiling. Double-check your measurements to ensure accuracy. This will save you the hassle of unnecessary holes and potential damage.Securing The Bracket
With the joist located, align the mounting bracket accordingly. Use screws that are long enough to penetrate the joist securely. This will provide the necessary support for your chandelier. Tighten the screws firmly but be cautious not to over-tighten and damage the ceiling. A well-secured bracket sets the foundation for the rest of the installation process.Ensuring Stability
Stability is key to a long-lasting chandelier installation. Once the bracket is secured, give it a gentle tug. Does it feel stable and solid? If there’s any wobble, it might be wise to reassess your screw placement or switch to longer screws for added security. Consider the weight of your chandelier. Will the bracket hold over time? Answering these questions now prevents future mishaps and ensures your chandelier remains a beautiful centerpiece in your room.Adjusting The Chain Length
Adjusting the chain length is a crucial step to ensure your chandelier hangs perfectly in your space. Too long, and it might block sightlines or feel overwhelming; too short, and it might not provide the right ambiance or fit the room’s scale. Getting this right takes a bit of measuring, trimming, and reattaching—but it’s easier than you might think.
Measuring Desired Height
Start by determining the ideal height for your chandelier. A good rule is to hang it about 30 to 36 inches above a dining table or 7 feet from the floor in open areas. Use a tape measure or a friend’s help to hold the chain while you check the height.
Think about the room’s function and how people will move underneath. Will the chandelier interfere with sightlines or head clearance? Taking time here saves you from awkward adjustments later.
Removing Excess Links
If the chain is too long, you’ll need to remove some links. Use pliers to open the chain links gently—avoid forcing them to prevent damage. Keep the removed links; you might need them again if you want to adjust later.
Try to remove links evenly so the chain hangs straight without twisting. If your chandelier has wiring inside the chain, be extra careful not to pinch or cut the wires.
Attaching Chain To Chandelier
Once the chain is the right length, it’s time to attach it to your chandelier. Most fixtures have a loop or hook at the top where the chain connects. Open the last link of the chain with pliers, hook it securely around the chandelier’s loop, and close the link tightly.
Double-check the connection by gently tugging the chain to ensure it holds firmly. A secure attachment prevents accidents and keeps your chandelier hanging beautifully for years.
Wiring The Chandelier
Wiring a chandelier is a key step when hanging it with a chain. Proper wiring ensures the light works safely and reliably. It requires careful handling of wires and connections to avoid electrical problems. Taking time to wire correctly prevents hazards and keeps the chandelier stable.
Connecting Wires Safely
Turn off the power at the circuit breaker before touching any wires. Identify the wires coming from the ceiling and the chandelier. Usually, black or red is the hot wire, white is neutral, and green or bare copper is ground. Connect matching wires together: hot to hot, neutral to neutral, and ground to ground.
Strip about half an inch of insulation from each wire end. Twist the exposed copper wires gently before joining. Avoid loose connections to prevent sparks or shorts. Use electrical tape around wire splices for extra protection.
Using Wire Connectors
Wire connectors, also called wire nuts, secure the wire connections firmly. Choose the right size connector based on the wire thickness and number of wires. Insert twisted wires into the connector and turn clockwise until tight.
Make sure no bare wire is visible outside the connector. Test the strength by gently pulling on the wires. Replace any loose connectors with a larger size. Good connectors stop wires from moving and causing faults.
Double Checking Connections
Review all wire joins before restoring power. Confirm each wire matches the correct color pairing. Look for any exposed copper or damaged insulation. Tug lightly on each wire to test firmness. Check that wire connectors are tight and secure.
Use a voltage tester to verify no current flows while wires are disconnected. After wiring, turn on power and test the chandelier. A stable, flicker-free light means the wiring is solid and safe.

Credit: www.1800lighting.com
Hanging The Chandelier
Hanging a chandelier with a chain requires careful handling to ensure safety and style. This part focuses on attaching the chain, securing the fixture, and testing its stability. Each step helps you set up your chandelier firmly and beautifully.
Attaching Chain To Ceiling Hook
Start by connecting the chain to the ceiling hook. Use a strong hook rated for the chandelier’s weight. Open the chain link slightly with pliers to slide it onto the hook. Close the link securely to prevent slipping. Ensure the chain hangs straight and even.
Securing The Fixture
Lift the chandelier carefully and attach the chain’s other end to the fixture. Use the fixture’s mounting loop or ring to connect the chain. Tighten all connections to avoid movement. Check that the chandelier hangs at the desired height. Make sure wires inside the chain are not pinched or twisted.
Testing Stability
Gently shake the chandelier to test its stability. It should not wobble or sway excessively. Check all hooks and links for tightness again. Confirm that the chandelier feels safe and balanced. Adjust the chain length or hook if needed to improve steadiness.
Final Adjustments And Safety Checks
After you’ve securely hung your chandelier with the chain, it’s time to focus on the crucial final touches. These adjustments not only enhance the chandelier’s appearance but also ensure your safety and proper function. Skipping these steps can lead to an uneven fixture or electrical hazards, so don’t rush through them.
Leveling The Chandelier
Look at your chandelier from different angles to see if it’s hanging straight. Even a slight tilt can be distracting and affect the light distribution. Adjust the length of the chain on either side until the chandelier hangs perfectly level.
Use a small level tool or a smartphone app for precision. Don’t hesitate to tweak the chain links or the fixture’s mounting bracket to get that perfect balance. Have someone assist you by holding the level while you make adjustments; it’s much easier that way.
Restoring Power
Before you turn the power back on, double-check all your wiring connections are tight and secure. Loose wires can cause flickering or even short circuits. Make sure the chandelier’s mounting bracket and chain are firmly installed and not interfering with the wiring.
Once you’re confident everything is safe, go ahead and restore power at your circuit breaker. This simple step can save you from unexpected shocks or damage. Have your tools ready in case you need to quickly switch off the power again.
Testing The Light
Switch on your chandelier and watch closely. Does every bulb light up evenly? If you notice any flickering or dim bulbs, check the bulb sockets and wiring again. Sometimes a bulb may be loose or incompatible with your fixture.
Pay attention to the overall brightness and the effect it creates in your room. Is the chandelier casting the light where you want it? If not, consider swapping bulbs or adjusting the height for better illumination. Your perfect chandelier setup is just a few tweaks away.

Credit: www.thegritandpolish.com
Tips For Maintenance
Maintaining your chandelier with a chain is key to keeping it both beautiful and safe. Regular care ensures it shines brightly and functions properly for years. Let’s look at practical tips that make upkeep simple and effective.
Cleaning The Fixture
Dust and dirt can dull your chandelier’s sparkle quickly. Use a soft cloth or a feather duster to gently remove dust weekly. For deeper cleaning, turn off the power and wipe each crystal or glass piece with a damp cloth mixed with mild soap.
Have you tried using a spray cleaner made for delicate lighting? It can save time by cleaning multiple parts at once, but always test it on a small area first to avoid damage.
Inspecting Chain And Wiring
Look closely at the chain for any signs of rust, wear, or loose links. These issues can affect the chandelier’s stability and safety. Check wiring for cracks or fraying; faulty wiring is a fire hazard and needs immediate attention.
If you spot anything unusual, don’t wait to call an electrician. Keeping your chandelier securely hung and electrically sound protects your home and loved ones.
Replacing Bulbs Safely
Always switch off the power before changing bulbs to avoid shocks. Use a sturdy ladder or step stool to reach the chandelier comfortably. Handle bulbs with a cloth or gloves to prevent oils from your skin shortening their lifespan.
Have you noticed some bulbs burn out faster? Try switching to LED bulbs—they last longer and use less energy, which is better for your wallet and the environment.

Credit: www.seuslighting.com
Frequently Asked Questions
How Do I Hang A Chandelier With A Chain Safely?
To hang a chandelier safely, first turn off power. Use a secure ceiling hook or bracket. Attach the chain to the fixture and hook. Ensure the electrical box supports the chandelier’s weight. Follow manufacturer instructions and test stability before use.
What Tools Are Needed To Hang A Chandelier With Chain?
You need a ladder, screwdriver, wire stripper, voltage tester, pliers, and adjustable wrench. Also, use a sturdy ceiling hook or mounting bracket. These tools help secure the chain and connect electrical wires safely.
How To Adjust Chandelier Height Using A Chain?
Adjust height by shortening or lengthening the chain links. Remove excess links with pliers. Ensure the chandelier hangs at a comfortable eye level. Reattach the chain securely to the ceiling hook.
Can I Hang A Chandelier With A Chain On Drywall?
No, drywall alone can’t support chandelier weight. Use a ceiling joist or install a brace. Secure the mounting bracket to a stud or joist for safety. This prevents damage and ensures stability.
Conclusion
Hanging a chandelier with a chain can brighten any room nicely. Follow each step carefully to keep the fixture safe. Check all connections and support before turning on the power. Take your time and work patiently for the best results.
Enjoy the warm glow and elegant style it adds to your space. Small efforts can make a big difference in home lighting. You now have what you need to hang your chandelier right.


