
Looking to add a stylish touch to your room without a complicated install? Hanging a swag light might be just what you need.
It’s an easy way to brighten your space and create a cozy atmosphere. But if you’re unsure where to start or worried about making mistakes, don’t worry—you’re in the right place. By the end of this guide, you’ll know exactly how to hang your swag light safely and beautifully, even if you’ve never done it before.
Ready to transform your room with a simple, elegant lighting solution? Let’s dive in!
Choosing The Right Swag Light
Choosing the right swag light can transform your space, making it cozy, stylish, and functional. It’s not just about picking any light fixture; it’s about finding one that fits your room’s personality and needs. Let’s dive into what you should consider before making that choice.
Types Of Swag Lights
Swag lights come in a variety of styles to match different tastes and purposes. You can find classic pendant swag lights, multi-arm chandeliers, and even industrial-style cage lights. Each type creates a different vibe—do you want something simple and elegant or bold and eye-catching?
Think about how the light hangs too. Some swag lights have long adjustable chains or cords, which give you flexibility in placement. If your ceiling is high, a longer drop might work better, while a shorter swag can suit cozier spaces.
Considering Room Size And Style
The size of your room plays a big role in choosing the right swag light. Large rooms can handle bigger, more dramatic fixtures, while smaller rooms need something less overpowering. You don’t want a swag light that dominates the space or feels lost in a vast room.
Your room’s style matters just as much. A modern living room might look best with sleek metal or glass swag lights, while a rustic kitchen could benefit from a warm-toned, vintage-style fixture. Ask yourself what mood you want the light to create—is it bright and energetic or soft and relaxing?
Selecting The Perfect Bulb
The bulb you choose affects both the look and feel of your swag light. LED bulbs save energy and last longer, but warm incandescent bulbs offer a cozy glow that’s hard to beat. Consider the bulb’s color temperature—warm white for a relaxed atmosphere or cool white for task lighting.
Also, check the bulb’s wattage and brightness to match your room’s needs. Dimmable bulbs give you control over the lighting mood, which can be a game-changer. Have you thought about how your choice of bulb impacts your daily activities in the space?
Gathering Essential Tools
Hanging a swag light requires the right tools to ensure a safe and smooth installation. Preparing all necessary items before starting saves time and avoids interruptions. This section helps identify essential equipment for the job.
Basic Tools Needed
- Screwdriver (flathead and Phillips)
- Drill with bits
- Measuring tape
- Stud finder
- Pencil for marking
- Wire stripper
- Level
Safety Equipment
- Safety goggles to protect eyes
- Work gloves to avoid cuts
- Step ladder for reaching high spots
- Dust mask if drilling into plaster or drywall
Optional Accessories
- Anchor bolts for extra support
- Wire connectors for secure wiring
- Light bulb suited for your swag light
- Extension cords if the outlet is far
Planning The Placement
Hanging a swag light needs careful planning. Proper placement enhances room ambiance. Consider your space and lighting needs.
Think about where the light will be most useful. Avoid crowded or hazardous spots. Let’s explore some essential steps.
Measuring For Height And Reach
Measure the height from the ceiling to the floor. This helps in determining the ideal drop length. Use a tape measure for accuracy.
Consider how far the light will reach. Ensure it covers the desired area effectively. This prevents dark spots in the room.
Finding The Ideal Anchor Point
Identify a strong anchor point on the ceiling. This supports the swag light’s weight. Choose a spot that aligns with your room’s layout.
Use a stud finder to locate ceiling joists. This ensures a secure installation. Avoid weak or hollow areas.
Avoiding Obstacles And Hazards
Check for obstacles like ceiling fans or beams. Ensure the swag light’s path is clear. This prevents potential accidents.
Avoid hanging near water sources. Keep it away from areas prone to splashes. Safety should always be a priority.

Credit: www.amazon.ca
Installing The Swag Hook
Installing the swag hook is a crucial part of hanging your swag light securely and safely. The right hook ensures your light stays in place without damaging your ceiling or wall. Let’s look at how you can choose, secure, and test the perfect hook for your swag light.
Choosing The Right Hook Type
Not all hooks are created equal. You want a hook that matches the weight and style of your swag light. For lighter fixtures, a simple cup hook might work. Heavier lights require a more robust option, such as a screw-in hook with a wall anchor or a toggle bolt.
Consider the surface too—drywall, plaster, or wood all need different hooks. If you’re unsure, ask at your local hardware store or check product labels for weight limits. Have you checked your swag light’s weight before buying a hook?
Securing The Hook Properly
Once you pick the right hook, proper installation is key. Start by locating a stud or solid support in your ceiling or wall for maximum strength. If you can’t find one, use wall anchors designed for your surface type.
Use a drill to create a pilot hole. This makes screwing in the hook easier and reduces the chance of cracking your ceiling. Screw the hook in tightly but avoid over-tightening, which can strip the hole or weaken the anchor.
Testing The Hook Strength
After installation, test the hook before hanging your swag light. Gently pull down on the hook or apply pressure to simulate the light’s weight. If it feels loose or shifts, tighten it or switch to a stronger anchor.
Testing prevents accidents and saves you from having to redo the work later. Would you trust a hook that moves under light pressure? Taking a moment here protects your space and your swag light.
Hanging The Swag Light
Hanging a swag light can instantly change the vibe of any room. It’s a practical way to add style without hardwiring, making it perfect for renters or anyone wanting a quick upgrade. Let’s walk through the key steps to get your swag light safely and beautifully in place.
Attaching The Chain Or Cord
Start by securing the chain or cord to your swag light’s mounting hook. Make sure the connection is tight to avoid any slipping or swinging once it’s hung. If your light came with a chain, use the links to adjust the length before attaching it to the ceiling hook.
Check that the cord or chain matches the weight of your light. Thinner cords might look nice but could strain or break under heavy fixtures. Have you ever underestimated a chain’s strength and ended up with a light swinging dangerously? Avoid that by choosing strong hardware.
Connecting To Power Source
Next, plug the swag light into a nearby outlet, or if it has bare wires, connect them to a ceiling power source using a plug-in adapter or a junction box. Always turn off the power before handling electrical connections to keep yourself safe.
If you don’t have a convenient outlet, consider using an extension cord designed for lighting. Look for cords with built-in switches for easy control. Can you imagine the hassle of unplugging every time you want to turn the light off?
Adjusting Length And Position
Adjust the length of the chain or cord to suit your room’s height and the light’s purpose. Lower it for reading nooks or higher for general ambient lighting. Don’t hesitate to move the hook or use additional ceiling hooks to position the light exactly where you want it.
Experiment with placement before finalizing. Sometimes, a few inches make all the difference in how a room feels. Are you making the most of your swag light’s flexibility?

Credit: www.amazon.com
Ensuring Safety And Stability
Ensuring safety and stability is crucial when hanging a swag light. You want your fixture to look great and stay secure without risking electrical hazards or damage. Taking a few extra moments to check connections and maintain your setup can save you trouble down the line.
Checking Electrical Connections
Start by inspecting the plug, socket, and any extension cords you plan to use. Look for frayed wires, loose fittings, or any discoloration that might indicate overheating. Never use damaged cords, as they can cause shorts or fires.
Make sure the outlet can handle the light’s wattage. If you’re unsure, test the outlet with a voltage tester or consult an electrician. A solid electrical connection is the backbone of a safe swag light installation.
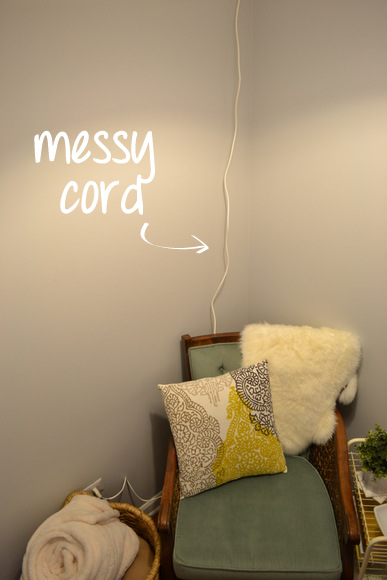
Securing Loose Cords
Loose cords not only look messy but can also be a tripping hazard. Use cord clips or adhesive hooks along walls to keep cords neatly tucked away. This simple step prevents accidental yanks that might loosen connections or damage the fixture.
Consider the path of your cord—is it stretched tight or hanging slack? Both can cause problems. Adjust the cord length to avoid tension and keep your swag light stable and secure.
Regular Maintenance Tips
Check your swag light setup every few months to catch issues early. Dust the fixture and look for any wear on cords or mounting hardware. A quick visual check can reveal hidden problems before they become dangerous.
Replace bulbs promptly to avoid overheating or electrical strain. If your swag light uses dimmers or switches, test them regularly to ensure smooth operation. How often do you inspect your lighting setups at home? Making it a habit can protect your space and peace of mind.
Styling Tips For Swag Lights
Styling your swag light can transform any room from ordinary to inviting. These lights offer more than just illumination—they add character and warmth to your space. With a few smart styling choices, your swag light can become a standout feature that complements your decor and mood perfectly.
Combining With Other Decor
Think about the overall look of your room before hanging your swag light. Pair it with minimalist furniture to let the light become the focal point. Or, match it with rustic elements like wood and metal for a cozy vibe.
Try grouping swag lights with wall art or plants to create a layered look. This adds depth and interest to your walls without overcrowding. Have you tried mixing textures in one area? It can make your space feel more dynamic and personalized.
Using Dimmer Switches
Adding a dimmer switch to your swag light lets you control the brightness easily. This flexibility helps you set the right mood for different occasions, from bright working hours to relaxed evenings.
Dimmer switches also save energy and extend the life of your bulbs. Don’t underestimate how much a simple dimmer can improve your daily comfort. Have you noticed how lighting affects your mood during the day?
Seasonal Decoration Ideas
Swag lights are perfect for seasonal updates. Wrap a strand of fairy lights around the cord during the holidays for extra sparkle. Or hang small ornaments and greenery to add festive touches without clutter.
Change your swag light’s look by swapping lampshades or adding colored bulbs that reflect seasonal themes. This quick update keeps your decor fresh and exciting year-round. What seasonal twist will you try next?

Credit: www.hangoutlighting.com
Frequently Asked Questions
How Do I Install A Swag Light Without Wiring?
To install a swag light without wiring, use a plug-in chain or cord. Hang the light from a ceiling hook and plug it into an outlet. This method avoids electrical work and offers flexibility for placement and easy removal.
What Tools Are Needed To Hang A Swag Light?
You need a ceiling hook, drill, screwdriver, measuring tape, and possibly anchors. These tools ensure secure installation and proper placement. Having the right tools makes the process faster and safer.
Can I Hang A Swag Light On Drywall?
Yes, you can hang a swag light on drywall using anchors or toggle bolts. These support the light’s weight and prevent damage. Always check the light’s weight and use appropriate hardware for safety.
How High Should I Hang A Swag Light?
Hang a swag light about 7 feet above the floor. This height provides good lighting and clearance. Adjust based on room size and ceiling height for optimal effect.
Conclusion
Hanging a swag light is simple with the right steps. Take time to measure and choose a strong hook. Always check the weight limits to keep things safe. Use a ladder carefully and work slowly. This way, your swag light will hang neatly and brighten your space.
Enjoy the new look and cozy feel it brings. Small effort, big change. You can do it!


