
Are you looking to add a magical glow to your room without spending a fortune? Hanging fairy lights on your ceiling is one of the easiest and most beautiful ways to transform any space.
Whether you want to create a cozy reading nook, set a romantic mood, or simply brighten up your room, the right setup can make all the difference. But how do you hang them so they look perfect and stay secure?
In this guide, you’ll discover simple, step-by-step tips to get your fairy lights up safely and stylishly. Keep reading, and soon your ceiling will sparkle just the way you’ve imagined.
Credit: www.koopower.com
Choosing The Right Fairy Lights
Choosing the right fairy lights is key to creating a beautiful ceiling display. The perfect lights match your room’s style and lighting needs. Consider the size of your space and the mood you want to set. A few simple choices can make your setup look stunning and last longer.
Types Of Fairy Lights
Fairy lights come in many styles. Classic string lights have small bulbs on a thin wire. LED fairy lights use less energy and stay cool. Curtain lights hang vertically, perfect for covering large areas. Cluster lights gather many bulbs close together, creating a bright effect. Pick a style that fits your room’s look and your personal taste.
Length And Brightness
Measure your ceiling space to choose the right length. Too short means not enough coverage. Too long can look messy and waste power. Brightness depends on bulb size and type. Soft, warm white bulbs create a cozy feel. Bright white bulbs offer clear, crisp light. Balance length and brightness for a perfect glow.
Power Sources
Fairy lights can be powered in different ways. Battery-operated lights are flexible and easy to install anywhere. USB-powered lights work well with adapters or power banks. Plug-in lights need a nearby outlet but shine brighter for longer. Choose a power source that fits your room layout and convenience needs.
Preparing Your Ceiling
Preparing your ceiling is a key step before hanging fairy lights. It helps the lights stay secure and look neat. A clean and safe surface ensures your lights last longer. Take time to get the ceiling ready for the best results.
Cleaning The Surface
Clear dust and dirt from the ceiling area. Use a soft cloth or a duster. For stubborn spots, a damp cloth works well. Avoid soaking the ceiling to prevent damage. A clean surface helps tape or hooks stick better. This step improves the hold of your fairy lights.
Identifying Safe Attachment Points
Look for sturdy areas to attach the lights. Avoid weak spots like loose paint or cracks. Ceiling beams or molding edges are good choices. Use a stud finder to locate solid wood beams. Avoid attaching lights near vents or ceiling fans. Safe points keep your lights stable and secure.
Tools And Materials Needed
Fairy lights, hooks or adhesive clips, and a ladder are essential for hanging lights on the ceiling. A tape measure and a pencil help mark spots for even placement. Choose tools that suit your ceiling type for safe installation.
To create a magical ambiance with fairy lights on your ceiling, gathering the right tools and materials is essential. Having everything you need at your fingertips will make the process smoother and more enjoyable. This section will guide you through the essentials for this enchanting DIY project.Hooks And Clips
Hooks and clips are your best friends when it comes to hanging fairy lights securely. Consider using Command hooks or adhesive clips, which are perfect for lightweight installations and won’t damage your walls or ceiling. If you’re working with a heavier string of lights, opt for screw-in hooks for added security. Always have a variety of sizes on hand to accommodate different light strings and ceiling types.Adhesive Options
For those who prefer not to drill holes or leave marks, adhesives are a great option. Double-sided tape can be a simple solution for lightweight fairy lights. Alternatively, clear adhesive strips are invisible and provide a strong hold. Remember, not all adhesives are created equal, so ensure they are rated for the weight of your lights and the type of surface you’re working with.Extension Cords And Timers
Extension cords ensure your fairy lights reach the perfect spot without being constrained by outlet locations. Choose extension cords that blend with your wall or floor colors for a seamless look. Timers are another essential tool for fairy lights, allowing you to set your lights to turn on and off at specific times. This not only saves energy but also ensures your lights are always on when you want them to be, creating a hassle-free experience. As you embark on this journey to illuminate your space, ask yourself: Are these tools and materials suited to your specific needs and space? Having the right items can transform your fairy light project from a simple task to a delightful experience.
Credit: www.threads.com
Step-by-step Hanging Process
Hanging fairy lights on the ceiling creates a magical atmosphere in any room. The process is simple when broken down into clear steps. Following a good plan helps avoid mistakes and ensures the lights look great.
Planning The Layout
Start by deciding how you want the lights to look. Think about shapes, patterns, or straight lines. Measure the ceiling space to know how many lights you need. Mark spots where hooks or clips will go. This saves time and keeps the lights even.
Attaching Hooks Or Clips
Use small hooks or adhesive clips designed for walls and ceilings. Clean the surface before attaching to help them stick better. Space hooks evenly based on your layout marks. Press firmly and wait a few minutes for them to set. Avoid heavy hooks that might damage the ceiling.
Stringing The Lights
Carefully drape the fairy lights across the hooks or clips. Keep the string tight but not too stretched. Plug in the lights to test before fixing completely. Adjust the position for a balanced look. Use gentle movements to avoid breaking the bulbs or wires.
Securing Loose Ends
Secure any hanging cords or extra wire with twist ties or small clips. Tuck plugs and cables out of sight to keep the area tidy. Check all connections for safety. Make sure the lights do not hang too low or block walkways. This keeps your space safe and beautiful.
Safety Tips For Ceiling Installation
Hanging fairy lights on your ceiling can instantly transform a room’s atmosphere. However, safety should always come first to prevent accidents and ensure your lights stay beautiful for a long time. Let’s dive into some essential safety tips that protect both you and your home during installation.
Avoiding Electrical Hazards
Before you start, check the voltage and wattage of your fairy lights to make sure they match your power source. Avoid overloading electrical outlets by plugging too many strings into one socket. If you’re unsure about the wiring or feel uncomfortable handling electricity, consider asking a professional for help.
Have you ever experienced a flickering light or sudden sparks? That’s a clear sign to stop and inspect your setup immediately. Using lights with a certification mark like UL or CE adds an extra layer of safety assurance.
Using Proper Supports
Ceilings aren’t made to hold heavy objects without the right support. Use hooks, adhesive clips, or mounting strips designed specifically for ceiling use. These options prevent damage to your ceiling and keep your lights securely in place.
A common mistake is using nails or staples that can pierce wires and cause shorts. Instead, choose supports that distribute weight evenly and avoid sharp edges. Have you tested how strong your chosen support feels before hanging the entire string?
Checking For Damage
Before installation, carefully inspect each strand of fairy lights. Look for frayed wires, broken bulbs, or loose connections that could cause electrical problems. Never use damaged lights, even if only a small section looks affected.
Taking a few minutes to check your lights saves you from potential hazards later. Remember, a small crack in a bulb might seem harmless but can lead to overheating or fire. How often do you take the time to inspect your decorations before hanging them up?
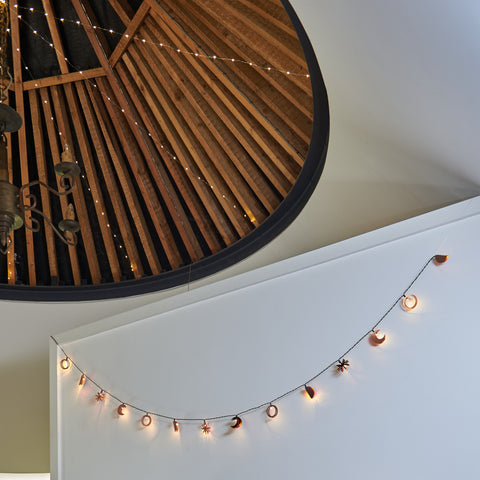
Creative Ideas For Fairy Light Arrangements
Fairy lights bring a magical glow to any room. They create warmth and charm with soft, twinkling light. Arranging these lights on the ceiling opens many creative possibilities. Simple stringing can turn into stunning art with some imagination.
Try different patterns and shapes to fit your style. Combine fairy lights with other decor to enhance the mood. The ceiling becomes a canvas for your creativity. Brighten your space with unique light designs.
Draping Patterns
Drape fairy lights to add texture and flow to your ceiling. Create gentle curves by hanging lights in swoops across the room. Use hooks or adhesive clips to hold the strands in place. Zigzag patterns add a dynamic feel and fill large spaces well. Overlapping drapes give a layered, cozy look. Soft, loose draping feels casual and inviting. Tight, neat lines look modern and elegant.
Creating Light Canopies
Make a canopy by hanging fairy lights close together. Start from one central point and stretch lights outwards to edges. This creates a starburst or tent-like effect. Light canopies add focus and drama to a room. Perfect for bedrooms, parties, or cozy reading corners. Combine with sheer fabrics to soften the glow. Secure fabrics and lights firmly for safety. The canopy turns your ceiling into a dreamy retreat.
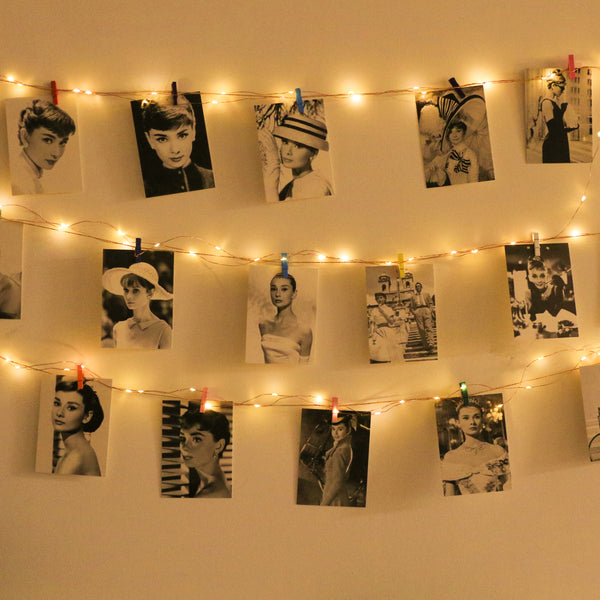
Incorporating Other Decor Elements
Mix fairy lights with other ceiling decorations for extra charm. Hang paper lanterns or pom-poms along the light strands. Add greenery or artificial vines for a natural touch. Combine with lightweight mobiles or hanging crystals to catch light. Use fairy lights to highlight ceiling beams or architectural features. This blend creates depth and interest. Keep elements light to avoid damage or safety risks. Let creativity guide your unique ceiling design.
Maintaining And Storing Fairy Lights
Keeping your fairy lights in great shape makes a big difference in how long they last and how well they shine. Proper maintenance and storage not only protect the delicate bulbs and wiring but also save you time and frustration when you want to decorate again. Let’s look at how you can care for your fairy lights to keep them glowing bright season after season.
Cleaning Tips
Dust and dirt can dim your fairy lights, so it’s important to clean them gently. Use a soft cloth or a microfiber duster to wipe down each bulb carefully. Avoid using water or cleaning sprays directly on the lights, as moisture can damage the wiring or cause short circuits.
If your lights are especially dirty, unplug them and use a slightly damp cloth to clean the bulbs, then dry them immediately with a dry cloth. This keeps the lights safe and ready to sparkle.
Safe Storage Practices
How you store your fairy lights affects their lifespan. Wrap them loosely around a piece of cardboard or a spool to prevent tangling and avoid putting pressure on the bulbs. Tight coils can break wires or damage bulbs over time.
Store the lights in a cool, dry place away from direct sunlight and extreme temperatures. Using a plastic storage box or a sealed bag keeps dust and pests away. Label your storage container so you can quickly find your lights next time without unpacking everything.
Troubleshooting Common Issues
Have you ever plugged in your fairy lights only to find some bulbs aren’t lighting up? First, check if the bulbs are securely connected. Loose bulbs often cause sections to go dark.
If some bulbs are burnt out, replace them with the exact type recommended by the manufacturer. Also, inspect the wiring for any visible damage or frays. Damaged wiring can be a safety hazard and should be repaired or replaced promptly.
Sometimes, resetting the fuse in the plug can fix the issue if the lights suddenly stop working. Don’t ignore small problems, as they can lead to bigger ones if left unchecked.

Credit: sparkle.lighting
Frequently Asked Questions
How Do I Hang Fairy Lights On A Ceiling Safely?
To hang fairy lights safely, use adhesive hooks or clips designed for ceilings. Avoid nails or staples that damage wires. Ensure the lights are rated for indoor use and check for any frayed wires before installation to prevent hazards.
What Materials Are Best For Ceiling Fairy Light Installation?
Use lightweight hooks, adhesive clips, or clear tape to hang fairy lights. Command hooks work well without damaging paint. Avoid heavy materials that can fall or damage the ceiling. Choose materials that hold the lights securely and are easy to remove.
Can I Hang Fairy Lights On Popcorn Ceilings?
Yes, you can hang fairy lights on popcorn ceilings using adhesive hooks or ceiling clips. Avoid nails or screws that can damage the texture. Use gentle removal methods to prevent peeling or damage when taking down the lights.
How Do I Arrange Fairy Lights For The Best Ceiling Effect?
Create patterns like zigzags, waves, or grids for a visually appealing ceiling display. Use evenly spaced hooks to keep lights taut. Combine warm or cool tones for ambiance. Experiment with layering for depth and a cozy atmosphere.
Conclusion
Hanging fairy lights on the ceiling adds warmth and charm to any room. Start with a clear plan and use the right tools for safety. Take your time to place the lights evenly for the best look. Small steps make the job easier and more fun.
Enjoy the soft glow that creates a cozy and magical space. Now, your room feels bright and inviting all year round. Simple tips can make a big difference in your decorating. Give your ceiling a touch of sparkle today.


