
Are you looking to add extra storage or a stylish touch to your room? Installing a shelf on the wall is a simple way to organize your space and showcase your favorite items.
But if you’ve never done it before, the process can feel tricky or overwhelming. Don’t worry—you can do this yourself, even if you’re not a DIY expert. In this guide, you’ll discover easy, step-by-step instructions that make the job quick and stress-free.
By the end, you’ll have a sturdy, perfectly placed shelf that brings both function and beauty to your home. Keep reading to find out how!
Choosing The Right Shelf
Choosing the right shelf is a crucial step before you start drilling into your wall. The shelf you pick affects not only the look of your space but also its functionality and durability. Think about what you want to place on the shelf and where it will go—this will guide your decision.
Types Of Shelves
Shelves come in many styles to fit different needs and aesthetics. Floating shelves offer a clean, modern look without visible brackets, perfect for light items like picture frames or small plants. Bracket shelves provide strong support and work well for heavier objects like books or kitchenware.
Wire shelves are a good choice for ventilation and storage in closets or garages, while corner shelves maximize space in tight areas. Which style fits your room and purpose best?
Material Considerations
The material of your shelf affects its strength and style. Wood shelves bring warmth and can be stained or painted to match your decor. Metal shelves are sturdy and industrial, great for holding heavy tools or equipment.
Glass shelves add elegance but require careful handling and usually hold lighter items. Think about durability and how the shelf material complements your room’s design.
Size And Weight Capacity
Measure the wall space to ensure your shelf fits perfectly without overcrowding. A shelf too small won’t be practical, while one too large can overwhelm the room. Don’t forget to check the weight capacity—overloading a shelf can cause damage to your wall and belongings.
Are you planning to display heavy books or lightweight decor? Match the shelf size and strength to what you need to store for safety and style.
Gathering Tools And Materials
Before installing a shelf on the wall, gather all necessary tools and materials. This preparation saves time and prevents interruptions. Having everything ready ensures a smooth and safe installation process.
Essential Tools
- Drill with drill bits
- Screwdriver (manual or electric)
- Level to check shelf alignment
- Tape measure for accurate spacing
- Pencil for marking spots
- Stud finder to locate wall studs
Fixings And Hardware
- Wall anchors suitable for your wall type
- Screws matching the anchors and shelf brackets
- Shelf brackets or mounting plates
- Optional: decorative caps for screw heads
Safety Equipment
- Safety goggles to protect eyes from dust
- Work gloves for hand protection
- Dust mask if drilling creates dust
- Hearing protection if using loud power tools
Preparing The Wall
Preparing the wall is a crucial step before installing a shelf. It sets the foundation for a secure and lasting fixture. Taking time here saves you from future hassles like wobbly shelves or damaged walls.
Finding Studs
Studs are the wooden beams behind your drywall that provide strong support for shelves. You can find them using a stud finder, a simple tool that detects changes in density behind the wall.
If you don’t have a stud finder, try tapping the wall gently with a hammer and listen for a solid sound instead of a hollow one. Another trick is to look for electrical outlets or switches—they are usually attached to studs.
Pinpointing studs accurately means your shelf will hold more weight and stay secure over time. Would you trust a shelf hanging only by drywall anchors?
Marking The Placement
Once you locate the studs, it’s time to mark where the shelf brackets will go. Use a pencil to make small, visible marks at the desired height and width.
Measure twice to ensure your shelf will be level and centered. A crooked shelf can ruin the look and cause items to slide off.
Think about the shelf’s purpose—will it hold heavy books or lightweight decor? Marking carefully helps you plan the right spacing for brackets that match the load.
Checking For Obstacles
Before drilling, check for hidden obstacles inside the wall. Pipes, electrical wiring, and cables can cause serious damage or safety hazards if hit.
A deep wall scanner or an advanced stud finder can detect these obstacles. If you don’t have one, avoid drilling near switches or outlets where wires usually run.
Taking this precaution protects you from costly repairs and keeps you safe. Have you ever wondered what’s behind your walls before starting a project?
Installing Wall Anchors
Installing wall anchors is a crucial step when you want your shelf to hold weight securely without damaging your wall. Anchors provide extra support by gripping the wall material firmly, especially when you’re dealing with drywall or plaster instead of solid wood or studs. Knowing how and when to use the right anchors can save you from shelves that sag, tilt, or even fall off.
When To Use Anchors
You should use wall anchors whenever you’re not drilling directly into a wall stud. Studs are the wooden beams behind your drywall that can support heavy loads. If your shelf screws only go into drywall, the shelf might not hold up under weight.
Think about the weight of the items you want to place on the shelf. Light decorations or small picture frames may not need anchors, but books, plants, or kitchen supplies definitely do. If you’re unsure whether you’ve hit a stud, using anchors is a safe bet.
Types Of Anchors
There are several types of wall anchors, each suited for different wall materials and weight capacities:
- Plastic expansion anchors:Best for light loads and easy to install in drywall.
- Self-drilling anchors:Screw directly into drywall, no pre-drilling needed, good for medium loads.
- Toggle bolts:Ideal for heavy loads; they spread the weight over a larger area behind the wall.
- Molly bolts:Expand inside the wall cavity when the screw is tightened, offering strong support.
Choosing the right anchor depends on your wall type and the weight of your shelf. Have you checked your wall’s material before buying anchors?
Proper Installation
Start by marking where you want to install the shelf. Use a level to ensure your marks are straight. If you’re using plastic or self-drilling anchors, drill a pilot hole matching the anchor size.
Insert the anchor flush with the wall surface. If you’re using toggle bolts, push the folded wings through the hole and tighten the screw slowly, allowing the wings to open and grip behind the wall. Make sure not to overtighten—it can damage the wall or the anchor’s hold.
After anchors are securely in place, attach the shelf brackets using screws that fit your anchors. Double-check the shelf’s stability by gently applying pressure. Have you ever experienced a shelf that wobbled or gave way? Correct installation of anchors will prevent that problem.
Mounting The Shelf Brackets
Mounting the shelf brackets is a crucial part of installing a shelf that will hold your items securely and look great on your wall. If the brackets aren’t positioned or fastened properly, the shelf can become unstable or even fall. Paying close attention to alignment, securing, and level placement will save you from future headaches and keep your shelf sturdy.
Aligning The Brackets
Start by deciding exactly where you want your shelf to sit on the wall. Mark the positions for the brackets with a pencil. Make sure the distance between the brackets matches the length of your shelf to provide even support.
Use a stud finder to locate wall studs—attaching brackets to studs makes the shelf much stronger. If studs aren’t available where you want to place the brackets, consider using wall anchors designed for your wall type. Have you checked if your shelf will be holding heavy items? This step matters especially then.
Securing With Screws
Choose screws that fit the brackets and are long enough to go deep into the wall studs or anchors. Using the right screws ensures your shelf won’t wobble or fall under weight.
Before screwing in completely, drill pilot holes to prevent the wall or bracket from cracking. Tighten screws firmly but avoid overtightening, which could strip the hole or damage the bracket.
Ensuring Level Placement
Use a spirit level to check that each bracket is perfectly horizontal before fully securing it. Even a slight tilt can cause your shelf to look off or items to slide off.
After mounting both brackets, place the shelf on top and double-check the level from side to side. If it’s not level, adjust the brackets slightly by loosening screws and repositioning them.

Credit: www.youtube.com
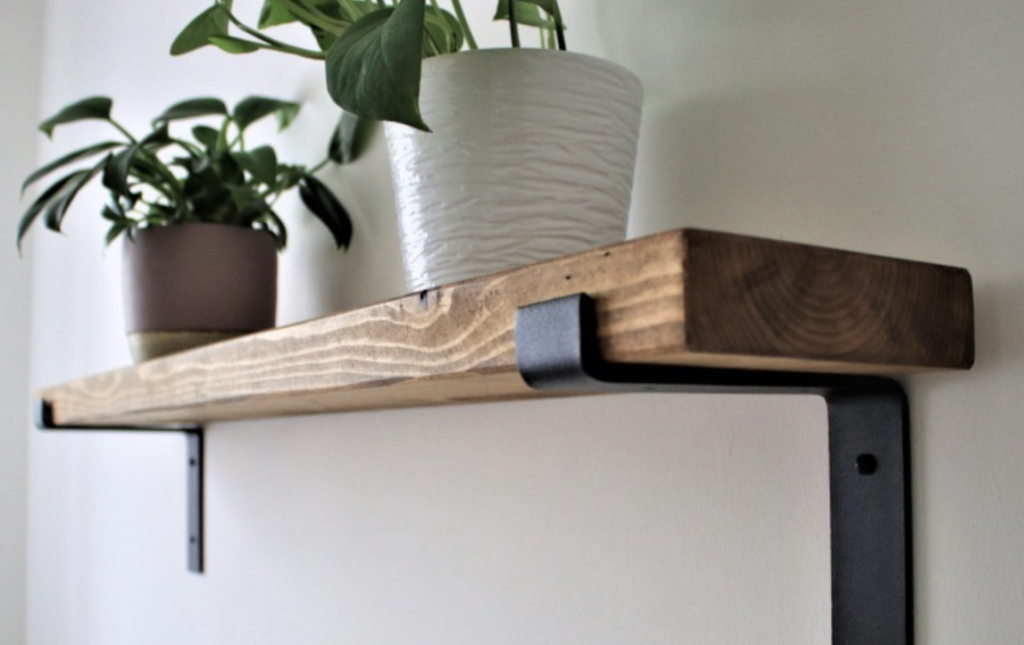
Attaching The Shelf
Choose the right wall anchors and brackets for your shelf. Securely attach brackets to the wall, then place the shelf on top and fasten it. Check that the shelf is level and sturdy before use.
Attaching a shelf to your wall can transform any room by adding both functionality and style. Whether it’s to display your favorite books, hold your treasured knick-knacks, or simply add more storage space, proper installation is key. Imagine the pride you’ll feel when you step back and admire your handiwork. Ready to dive in? Let’s break it down.Positioning The Shelf
Before you drill any holes, decide where you want your shelf to live. Consider the height for easy access and whether it aligns with other elements in the room. Use a spirit level to ensure it’s perfectly horizontal. It’s a good idea to mark the spots where the brackets will go with a pencil. This way, you can step back, evaluate, and make any necessary adjustments. Remember, measuring twice will save you from drilling twice.Fixing The Shelf To Brackets
With your spots marked, it’s time to secure the brackets to the wall. Drill holes where your marks are and insert wall plugs if necessary. This will provide a sturdy anchor for your screws. Attach the brackets to the wall using screws, making sure they are tightly secured. Once the brackets are in place, position your shelf on top. Use screws to attach the shelf to the brackets, ensuring it’s stable and doesn’t wobble.Final Adjustments
Now that your shelf is up, make those final tweaks. Check the level one last time; sometimes the slightest adjustment can make all the difference. Tighten any screws that may have loosened during installation. Consider what you’ll place on your new shelf. Start with lighter items to test its strength. Does it hold firm? If so, you’re ready to style it to your heart’s content. Did you ever think installing a shelf could be this straightforward? With your skills, what’s next on your DIY list?Tips For Long-lasting Installation
Ensuring your shelf stays sturdy and safe requires thoughtful steps during installation. Paying attention to details helps avoid damage and keeps the shelf strong over time. Focus on how weight spreads, upkeep routines, and steering clear of errors.
Weight Distribution
Place heavy items near the wall bracket or support points. Evenly spread weight to prevent strain on any one spot. Use shelves with strong brackets made for your shelf’s expected load. Avoid overloading beyond the bracket’s weight limit. Proper weight balance helps maintain shelf stability and safety.
Regular Maintenance
Check screws and brackets often for looseness or damage. Tighten any loose screws to keep the shelf firm. Look for cracks or signs of wear on the shelf and supports. Clean the shelf regularly to avoid dust buildup that can hide problems. Timely upkeep extends the shelf’s life and prevents accidents.
Avoiding Common Mistakes
- Do not ignore wall type when choosing anchors.
- Use the correct drill size for screws and plugs.
- Never install a shelf without using a level tool.
- Avoid placing heavy objects on weak or improper supports.
- Don’t rush the installation; take time to measure carefully.
Careful planning and attention to these details lead to a long-lasting shelf installation.

Credit: shelfology.com

Credit: www.youtube.com
Frequently Asked Questions
How Do I Find Studs For Shelf Installation?
Use a stud finder to locate studs behind drywall. Mark their position with a pencil for secure shelf mounting. Studs provide strong support and prevent shelves from falling.
What Tools Are Needed To Install A Wall Shelf?
You need a drill, level, screwdriver, tape measure, and screws. These tools help ensure accurate and secure shelf installation on the wall.
How High Should I Install A Wall Shelf?
Install shelves between 48 to 60 inches from the floor. This height is practical and visually appealing for most rooms.
Can I Install A Shelf On Drywall Without Studs?
Yes, use wall anchors designed for drywall. They provide strong support when studs are unavailable.
Conclusion
Installing a shelf on the wall is simple and useful. Follow the steps carefully for a strong hold. Use the right tools to make the job easier. Check the wall type before drilling to avoid damage. Take your time to measure and level the shelf.
A well-installed shelf adds space and style to any room. Now, enjoy your new shelf and keep things tidy. With practice, this task will feel quick and easy. Give it a try and see the difference yourself.


