
Are you tired of dealing with a steamy, stuffy bathroom that never feels fresh? Installing a ventilation fan can be the simple fix you need to keep your bathroom dry, mold-free, and smelling clean.
But maybe you’re worried it’s too complicated or expensive. Don’t worry—you can do this yourself, even if you’ve never handled electrical work before. In this guide, you’ll learn step-by-step how to install a ventilation fan in your bathroom quickly and safely.
By the end, you’ll have a fresh, comfortable space you’ll enjoy every day. Ready to get started? Let’s dive in!
Choosing The Right Fan
Choosing the right bathroom ventilation fan is more important than many realize. It affects not only air quality but also energy costs and noise levels. Picking a fan that fits your bathroom’s size, style, and needs makes a huge difference in comfort and durability.
Types Of Bathroom Fans
There are several types of bathroom fans designed for different needs:
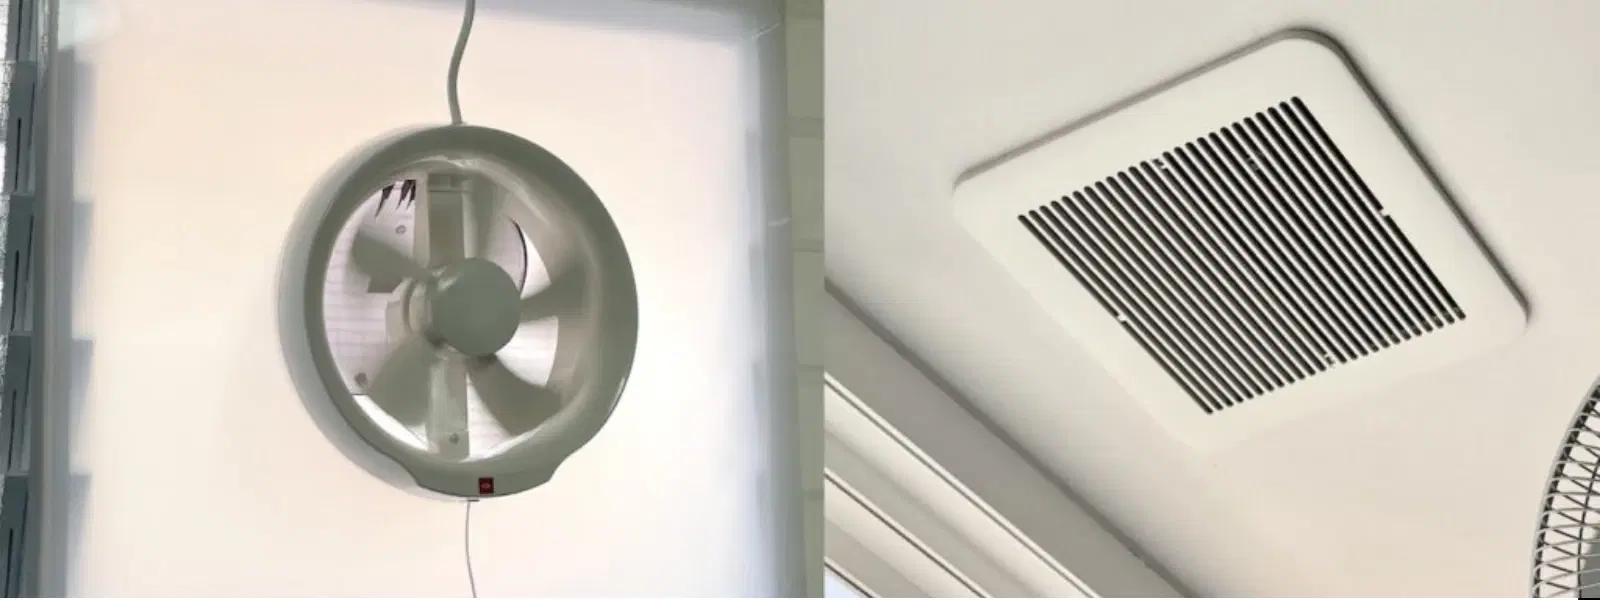
- Ceiling-mounted fans:The most common type, installed directly into the ceiling. They efficiently remove moisture and odors.
- Inline fans:These sit in the attic or between walls, offering quieter operation since the motor is away from the bathroom.
- Wall-mounted fans:Installed on an exterior wall, ideal if you don’t have attic access.
- Combination fans:Include added features like lights or heaters, perfect if you want multiple functions in one unit.
Think about your bathroom layout and noise preferences when choosing the type. Have you noticed how some fans are louder than others during your last home visit? That noise level could be a deal-breaker.
Sizing The Fan Correctly
Choosing the right size fan is crucial for effective ventilation. A fan that’s too small won’t remove moisture properly, leading to mold and mildew.
Measure your bathroom’s square footage and multiply by 1 CFM (cubic feet per minute) per square foot. For example, a 70-square-foot bathroom needs a fan rated for at least 70 CFM.
Don’t forget to add extra capacity if your bathroom has a jetted tub or shower that produces more steam. Would you rather save a few dollars now or avoid costly repairs later?
Energy Efficiency Ratings
Energy-efficient fans save money on your electricity bill and reduce environmental impact. Look for models with the ENERGY STAR® label, which meet strict efficiency guidelines.
These fans use advanced motors and designs to move air effectively with less power. Some also have adjustable speeds, so you can use only what’s needed.
Choosing an energy-efficient fan doesn’t just help your wallet—it also supports a greener home. How much could you save over the fan’s lifetime by picking a better model?
Gathering Tools And Materials
Before you dive into installing your bathroom ventilation fan, gathering the right tools and materials is crucial. Having everything at hand can save you time and prevent frustration during the project. It also ensures the installation is done safely and efficiently.
Essential Tools List
- Drillwith various bits – for making holes and securing screws.
- Screwdrivers(both flathead and Phillips) – for fastening components.
- Measuring tape– to get precise dimensions for fitting the fan.
- Utility knife– handy for cutting drywall or insulation.
- Wire stripper– to safely prepare electrical wires.
- Caulking gun– to seal gaps and prevent moisture leaks.
- Step ladder– to reach ceiling areas comfortably.
Think about whether your drill has enough power for the job. If not, renting a more powerful one might be worth it.
Materials Needed
- Ventilation fan kit– including the fan, grille, and mounting hardware.
- Vent ducting– usually flexible aluminum or rigid plastic ducts to channel air outside.
- Exterior vent cover– protects the outside opening from weather and pests.
- Electrical wiring– appropriate gauge wires to connect the fan to your home’s power.
- Wire nuts– for secure electrical connections.
- Caulk or foam sealant– to seal around the fan and duct connections.
Check the specifications of your fan to match duct size and electrical requirements exactly. Using mismatched parts can cause poor performance or safety hazards.
Safety Equipment
- Safety goggles– protect your eyes from dust and debris.
- Work gloves– prevent cuts and scrapes when handling sharp or rough materials.
- Dust mask– keeps you from inhaling drywall dust or insulation particles.
- Hearing protection– useful if you’re using power tools for extended periods.
Have you thought about how you will stay safe during the installation? Taking safety seriously is not just smart—it’s essential. I once skipped gloves and ended up with a nasty cut that set me back days.
Preparing The Installation Area
Preparing the installation area is a crucial step that sets the foundation for a smooth and effective ventilation fan setup. Taking the time to carefully evaluate your bathroom space ensures that the fan will work efficiently and meet your ventilation needs. You’ll avoid costly mistakes by planning thoroughly before cutting or wiring.
Locating The Fan Position
Choose a spot on the ceiling or wall that allows the fan to vent directly outside. Avoid placing the fan near obstacles like light fixtures or beams that could block airflow. Think about where moisture tends to build up most—usually near the shower or bathtub—and aim to install the fan close to that area.
Have you noticed where your bathroom fogs up the most? That’s your best guide for positioning the fan.
Checking Electrical Wiring
Before you start, make sure there’s a power source near your chosen fan location. Check the existing wiring for compatibility with your new fan’s voltage and amperage requirements. If you’re unsure about the wiring, it’s safer to consult a licensed electrician to avoid hazards.
Did you know that some fans require a dedicated circuit? Confirm this detail in your fan’s manual to prevent electrical overload.
Marking Cutout Dimensions
Use the fan’s installation template to mark the exact size and shape of the hole you need to cut. Double-check the measurements with a tape measure before making any cuts. Marking clearly on the ceiling or wall helps keep your work precise and clean.
Try using a pencil for easy adjustments and a level to keep your markings straight. Accuracy now saves you from patching up mistakes later.
Credit: www.tataneu.com
Cutting The Ceiling Or Wall
Cutting the ceiling or wall is a critical part of installing a ventilation fan in your bathroom. It requires precision and the right tools to ensure a perfect fit without damaging your home. Getting this step right saves you time, effort, and the frustration of fixing mistakes later.
Using The Right Saw
Choosing the correct saw makes all the difference. A drywall saw or a keyhole saw is ideal for cutting through drywall cleanly. If you’re working on a ceiling with plaster or a thicker material, a jigsaw with a fine blade might be necessary.
Always check the blade’s sharpness before starting. A dull blade will tear the material instead of cutting smoothly, leading to rough edges and extra sanding. Do you have the right saw on hand, or is it time for a quick trip to the hardware store?
Creating A Clean Cut
Mark your cutout carefully using the fan’s template or measurements. Use a pencil and a level to draw straight lines on the ceiling or wall. It helps to score the outline first before cutting to reduce chipping.
Cut slowly and steadily, applying gentle pressure. Rushing often causes uneven cuts and splintered edges. A clean cut not only looks better but also ensures the fan fits snugly without gaps or the need for patching.
Avoiding Obstructions
Before you start cutting, check for wires, pipes, or joists behind the surface. Use a stud finder or wire detector to locate these hidden obstacles. Cutting into electrical wires or plumbing can create dangerous hazards and expensive repairs.
If you find any obstructions, adjust your cut location or consult a professional. Being cautious now prevents serious problems later. Have you inspected the area thoroughly to avoid surprises?
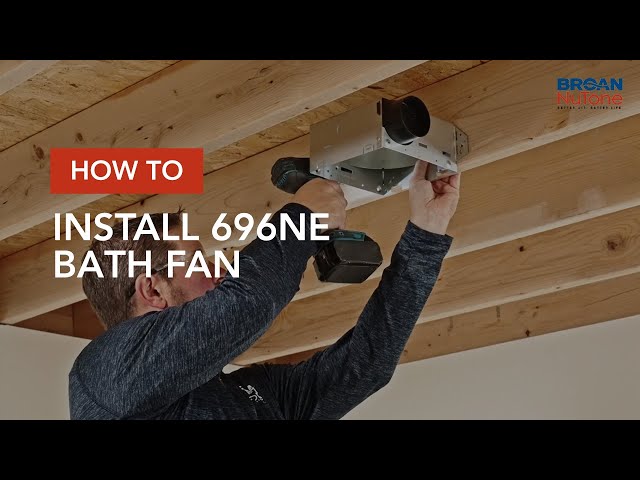
Installing The Ventilation Fan
Choose a spot near the ceiling to mount the ventilation fan for better air flow. Connect the wiring carefully and secure the fan to the ceiling joists. Finally, attach the vent duct to guide moist air outside the bathroom.
Installing a ventilation fan in a bathroom improves air quality. It helps remove moisture and prevents mold growth. Follow these steps to install the fan effectively.Mounting The Fan Housing
First, locate the spot on the ceiling for the fan. Ensure it’s away from water fixtures. Use a pencil to mark the area. Cut an opening according to the fan housing size. Be cautious to avoid wires or pipes. Slide the fan housing into the opening. Secure it with screws or brackets provided in the kit.Securing The Fan In Place
Position the fan securely in the housing. Align it properly to reduce noise. Use screws to fasten the fan. Check for a snug fit to prevent vibrations. Ensure the fan blades spin freely. Double-check all screws are tight.Connecting The Ductwork
Attach the ductwork to the fan’s exhaust port. Use duct tape for a tight seal. Connect the other end to the vent on the roof or wall. Ensure the ducts are straight without sharp bends. This aids in efficient airflow. Secure all connections with clamps.
Credit: www.youtube.com
Wiring The Fan
Wiring the ventilation fan is a crucial part of bathroom fan installation. Proper wiring ensures the fan works safely and efficiently. It involves handling electrical connections carefully. Follow clear steps to connect the wires and test the fan’s function.
Turning Off Power
Cut the power supply before starting any wiring work. Use the circuit breaker to switch off the bathroom’s power. Double-check by trying to turn on the bathroom light or fan switch. This step prevents electrical shocks and accidents during installation.
Connecting Electrical Wires
Match the wires from the fan to the house wiring. Usually, black connects to black (live wire), white to white (neutral wire), and green or bare copper to ground wire. Use wire nuts to secure each connection tightly. Wrap connections with electrical tape for extra safety.
Testing The Fan Operation
Restore power at the circuit breaker. Turn on the bathroom fan switch. Listen for the fan motor running smoothly. Check for proper airflow and no strange noises. If the fan does not work, turn off power and recheck all wire connections carefully.
Finishing Touches
Finishing touches make your bathroom ventilation fan look neat and work well. These small steps protect your installation and keep your bathroom fresh. Take time to carefully complete each task for best results.
Installing The Fan Cover
Place the fan cover gently over the fan unit. Align it so screw holes match perfectly. Use the screws provided to secure the cover tightly. Avoid over-tightening to prevent cracking the cover. The cover hides the fan parts and gives a clean look.
Sealing Around The Fan
Apply a thin bead of silicone caulk around the fan edges. This stops air leaks and moisture from entering the wall. Smooth the caulk with a damp finger or tool. Check for gaps and fill them properly. Proper sealing improves fan efficiency and protects your bathroom walls.
Cleaning The Work Area
Remove all dust and debris from the fan and surrounding area. Use a vacuum or soft brush to clean vents and fan blades. Wipe down surfaces with a damp cloth to remove fingerprints and smudges. A clean area ensures your fan runs quietly and lasts longer.
Maintaining Your Bathroom Fan
Keeping your bathroom fan clean improves air flow and reduces moisture. Regularly check and replace the fan filter for better performance. Proper installation ensures efficient ventilation and prevents mold buildup.
Maintaining your bathroom fan is crucial for ensuring it operates efficiently and extends its lifespan. A well-maintained fan prevents moisture buildup, reducing the risk of mold and mildew in your bathroom. Regular attention to your fan can keep it running smoothly, saving you from costly repairs or replacements.Regular Cleaning Tips
Keeping your bathroom fan clean is simpler than you might think. Begin by turning off the power to avoid any accidents. Use a vacuum cleaner with a brush attachment to remove dust from the fan blades and motor housing. For a deeper clean, gently remove the fan cover and wash it with warm, soapy water. Allow it to dry completely before reattaching. This simple routine, performed every few months, can significantly enhance your fan’s performance.Troubleshooting Common Issues
Is your fan making unusual noises or not functioning as it should? Check for loose screws or debris caught in the blades. Tightening screws can often eliminate vibrations causing noise. If the fan isn’t working, ensure the power supply is intact and the switch is functioning. Sometimes, the problem may be as simple as a tripped circuit breaker. Always consider safety first and consult a professional if you’re unsure.When To Replace The Fan
Even with diligent maintenance, bathroom fans don’t last forever. If you notice persistent issues despite regular care, it might be time to replace your fan. Look out for signs like reduced airflow or excessive noise that won’t resolve with cleaning. Newer models are often more energy-efficient and quieter, making replacement a worthwhile investment. By keeping these maintenance tips in mind, you’ll ensure your bathroom remains fresh and free of moisture-related issues. Is your fan due for a check-up? Don’t wait for problems to arise—take action today for a healthier bathroom environment.
Credit: www.youtube.com
Frequently Asked Questions
How Do I Choose The Right Bathroom Ventilation Fan?
Choose a fan based on bathroom size and airflow needs. Look for a fan with sufficient CFM rating. Also, consider noise levels and energy efficiency for comfort and savings.
What Tools Are Needed To Install A Bathroom Fan?
You will need a drill, screwdriver, wire stripper, drywall saw, voltage tester, and ladder. Safety gear like gloves and goggles is also important for protection.
Can I Install A Ventilation Fan Myself?
Yes, if you have basic electrical and carpentry skills. Follow instructions carefully and turn off power before starting. Otherwise, hire a professional to ensure safety and code compliance.
Where Should The Bathroom Fan Vent Outside?
Vent the fan directly outside through a wall or roof. Avoid venting into the attic or crawl space to prevent moisture damage and mold growth.
Conclusion
Installing a bathroom ventilation fan helps keep air fresh and dry. It prevents mold and bad smells from building up. You only need a few tools and basic steps to get it done. Take your time and follow safety rules carefully.
A good fan makes your bathroom more comfortable and healthier. Now, enjoy a fresher space with less moisture and better air. Simple changes can make a big difference in your home’s comfort.


