
Are you tired of dealing with foggy mirrors, lingering odors, or stubborn mold in your bathroom? Proper ventilation is the simple fix you need.
Installing a bathroom ventilation system not only keeps your space fresh but also protects your walls and ceiling from moisture damage. If you’re wondering how to do it yourself without hiring a pro, you’re in the right place. This guide will walk you through easy, step-by-step instructions so you can breathe easier and enjoy a cleaner, healthier bathroom.
Keep reading to find out how to install bathroom ventilation quickly and effectively.
Credit: www.jlconline.com
Why Bathroom Ventilation Matters
Bathroom ventilation plays a crucial role in maintaining a healthy and comfortable space. Without proper airflow, your bathroom can quickly become a breeding ground for problems that affect both your home and your wellbeing. Understanding why ventilation matters will help you appreciate the importance of installing an effective system.
Preventing Mold And Mildew
Have you ever noticed dark spots appearing on your bathroom walls or ceiling? These are often signs of mold and mildew caused by excess moisture. Proper ventilation removes this moisture before it settles, stopping mold spores from growing and spreading.
Mold doesn’t just look bad; it can cause health issues like allergies and respiratory problems. By ensuring your bathroom has good airflow, you protect your family from these risks and keep your space clean and safe.
Reducing Moisture Damage
Moisture in the bathroom doesn’t just disappear—it soaks into walls, ceilings, and fixtures. Over time, this can lead to peeling paint, warped wood, and even structural damage. Ventilation helps control humidity levels, preventing moisture from causing expensive damage.
Think about how many times you’ve seen bathroom fixtures rust or tiles loosen. Proper venting can extend the life of your bathroom materials and reduce costly repairs. Wouldn’t you prefer to avoid these problems before they start?
Improving Air Quality
Bathrooms often hold unpleasant odors and airborne contaminants from cleaning products and personal care items. Without ventilation, these pollutants linger in the air, making the room uncomfortable and unhealthy. Good ventilation circulates fresh air, removing odors and harmful particles.
Imagine stepping into a bathroom that smells fresh every time. That’s the difference a well-ventilated space makes for your comfort and health. How often do you think about the air you breathe in your bathroom?
Credit: www.tataneu.com
Types Of Bathroom Ventilation
Choosing the right bathroom ventilation type is essential for a fresh, dry space. Proper ventilation helps stop mold, mildew, and odors. Several options fit different bathroom sizes and layouts.
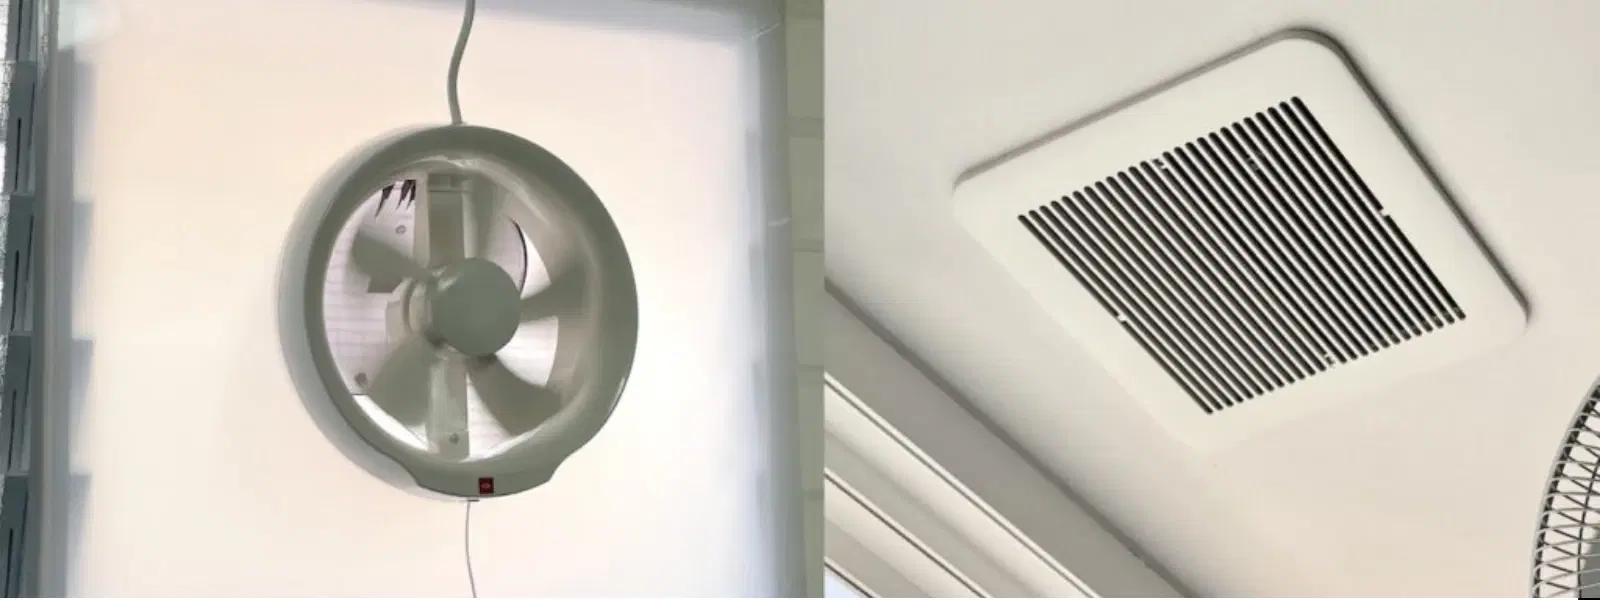
Exhaust Fans
Exhaust fans remove moist air directly from the bathroom. They install in the ceiling or wall and vent outside. These fans come in many sizes and power levels. A good exhaust fan runs quietly and efficiently. It helps keep walls and ceilings dry and clean.
Window Ventilation
Windows provide natural ventilation without electricity. Opening a window lets fresh air in and moist air out. This method works best for bathrooms with large, operable windows. It saves energy but depends on weather and outdoor air quality. Window ventilation may not be enough for small or windowless bathrooms.
Inline Fans
Inline fans fit inside the ductwork, away from the bathroom. They connect to vents in the ceiling or wall. These fans are quieter than standard exhaust fans. Inline fans suit homes with long duct runs or multiple vent points. They improve airflow and reduce noise in living spaces.
Choosing The Right Ventilation Fan
Choosing the right ventilation fan is key to keeping your bathroom fresh and free from moisture damage. A fan that’s too small won’t clear the air effectively, while one that’s too big might waste energy and create unnecessary noise. Let’s look at what really matters when picking your bathroom fan.
Sizing Your Fan
Size matters when it comes to ventilation fans. You need a fan that matches your bathroom’s square footage to work efficiently.
- Measure your bathroom’s length and width to find the area in square feet.
- A general rule is 1 CFM (cubic feet per minute) per square foot of bathroom space.
- For example, a 100 sq. ft. bathroom needs a fan rated for at least 100 CFM.
Don’t forget to add extra power if your bathroom has a separate toilet or if the ceiling is taller than 8 feet. Would you want a fan that struggles to clear steam or one that blows too harshly? Getting the right size strikes the perfect balance.
Noise Levels
Noise can make or break your bathroom experience. A loud fan can feel like an annoyance rather than a help.
Look for the sone rating on the fan box. The lower the sone, the quieter the fan.
- 1.0 sone or less is considered very quiet.
- 2.0 sones or more might be distracting during use.
I once installed a fan that was rated 3 sones, and I instantly regretted it. The constant hum was distracting, especially during early mornings. Would you want your bathroom to feel like a noisy machine room? Choosing a quiet fan makes your bathroom a more relaxing space.
Energy Efficiency
Energy-efficient fans save you money and help the environment. Look for models with the ENERGY STAR label—they use less power without sacrificing performance.
Some fans come with additional features like motion sensors or humidity sensors that turn the fan on and off automatically. This can prevent the fan from running longer than needed.
Think about your daily habits. Do you leave the fan running for long periods? An energy-efficient fan with smart controls can cut down your electric bill and reduce unnecessary energy use.
Tools And Materials Needed
Getting your bathroom ventilation installed right starts with having the correct tools and materials at hand. Missing even one essential item can slow you down or lead to mistakes. Before you begin, check your supplies to make sure you’re fully prepared to tackle the job smoothly.
Basic Tools
These are the everyday tools you will rely on for most parts of the installation.
- Drill and drill bits:Needed for making holes in walls or ceilings.
- Screwdrivers:Both Phillips and flathead types will come in handy.
- Measuring tape:Accurate measurements prevent costly errors.
- Utility knife:Useful for trimming ducting or insulation.
- Level:Ensures your vent and fan are mounted straight.
- Pencil:For marking spots before you cut or drill.
Don’t underestimate the power of a good drill. I once struggled with a dull drill bit, which slowed me down dramatically. Investing in quality basic tools saves time and frustration.
Electrical Supplies
Since bathroom fans usually require wiring, having the right electrical materials is crucial for safety and functionality.
- Wire:Typically 14/2 or 12/2 gauge depending on your circuit requirements.
- Wire nuts:For safely connecting wires together.
- Electrical tape:Adds extra security to wire joints.
- Switch:A dedicated wall switch or a humidity sensor switch is common.
- Electrical box:To house switch or fan wiring neatly.
- Circuit tester:To confirm power is off before working.
Handling electrical work might feel intimidating, but having these supplies ready helps you work confidently. Have you double-checked that your circuit is off before starting?
Vent Ducting
The ducting moves moist air from your bathroom to the outside. Choosing the right type and size affects performance.
- Rigid metal duct:Preferred for its durability and smooth airflow.
- Flexible duct:Easier to install but less efficient if stretched or kinked.
- Vent cap:Installed on the exterior wall or roof to prevent pests and rain from entering.
- Clamps or foil tape:To secure duct connections tightly.
Don’t cut corners on ducting quality. I once used cheap flexible ducting that collapsed, reducing airflow drastically. How will you ensure your vent ducting stays clear and efficient?
Preparing The Installation Site
Preparing the installation site for your bathroom ventilation fan is a crucial step that sets the foundation for a successful installation. Taking the time to carefully assess and prepare the area can save you from potential headaches later. Let’s dive into the specifics of what you need to do to ensure a smooth installation process.
Locating The Fan Spot
First, decide where the fan will be most effective. Generally, this is near the shower or bathtub where moisture accumulates. Ensure the spot allows for proper ventilation to the outside.
Consider accessibility for maintenance and repairs. A fan placed in a convenient location can make future upkeep much easier. Is the spot you’re eyeing easy to reach?
Checking Existing Wiring
Before you proceed, inspect the existing electrical wiring in the bathroom. This ensures that the fan can be easily integrated without major electrical work. Look for nearby power sources or light fixtures that can be tapped into.
If you’re unsure about the wiring, consult a professional. Safety should be your top priority, and incorrect wiring can be a hazard. Have you checked if your current electrical setup can handle the new addition?
Measuring And Marking
Accurate measurements are your best friend when installing a ventilation fan. Measure the dimensions of the fan and mark the ceiling accordingly. Use a pencil and a straightedge for precision.
Double-check your measurements before making any cuts. Mistakes can be costly and may require patching up the ceiling. Do you have all the necessary tools for precise marking?
Step-by-step Installation Guide
Installing bathroom ventilation might seem tricky, but breaking it down makes the process manageable. This guide walks you through each essential task, helping you install your fan safely and effectively. Ready to improve your bathroom’s air quality? Let’s get started.
Cutting The Ceiling Hole
First, mark the exact spot on your ceiling where the fan will go. Use the fan’s template or measure the housing to draw a precise outline. Double-check for any wires or pipes behind the ceiling before cutting to avoid surprises.
Use a drywall saw to cut along the outline carefully. Keep your movements steady to prevent jagged edges. A clean hole makes installation easier and ensures a snug fit for the fan.
Wiring The Fan
Turn off the power at the circuit breaker before touching any wires. Connect the fan’s wiring to your home’s electrical system, matching colors: black to black (hot), white to white (neutral), and green or bare wire to ground.
Use wire nuts to secure connections and wrap them with electrical tape for extra safety. If you feel unsure, consider consulting an electrician—proper wiring is crucial for safety and functionality.
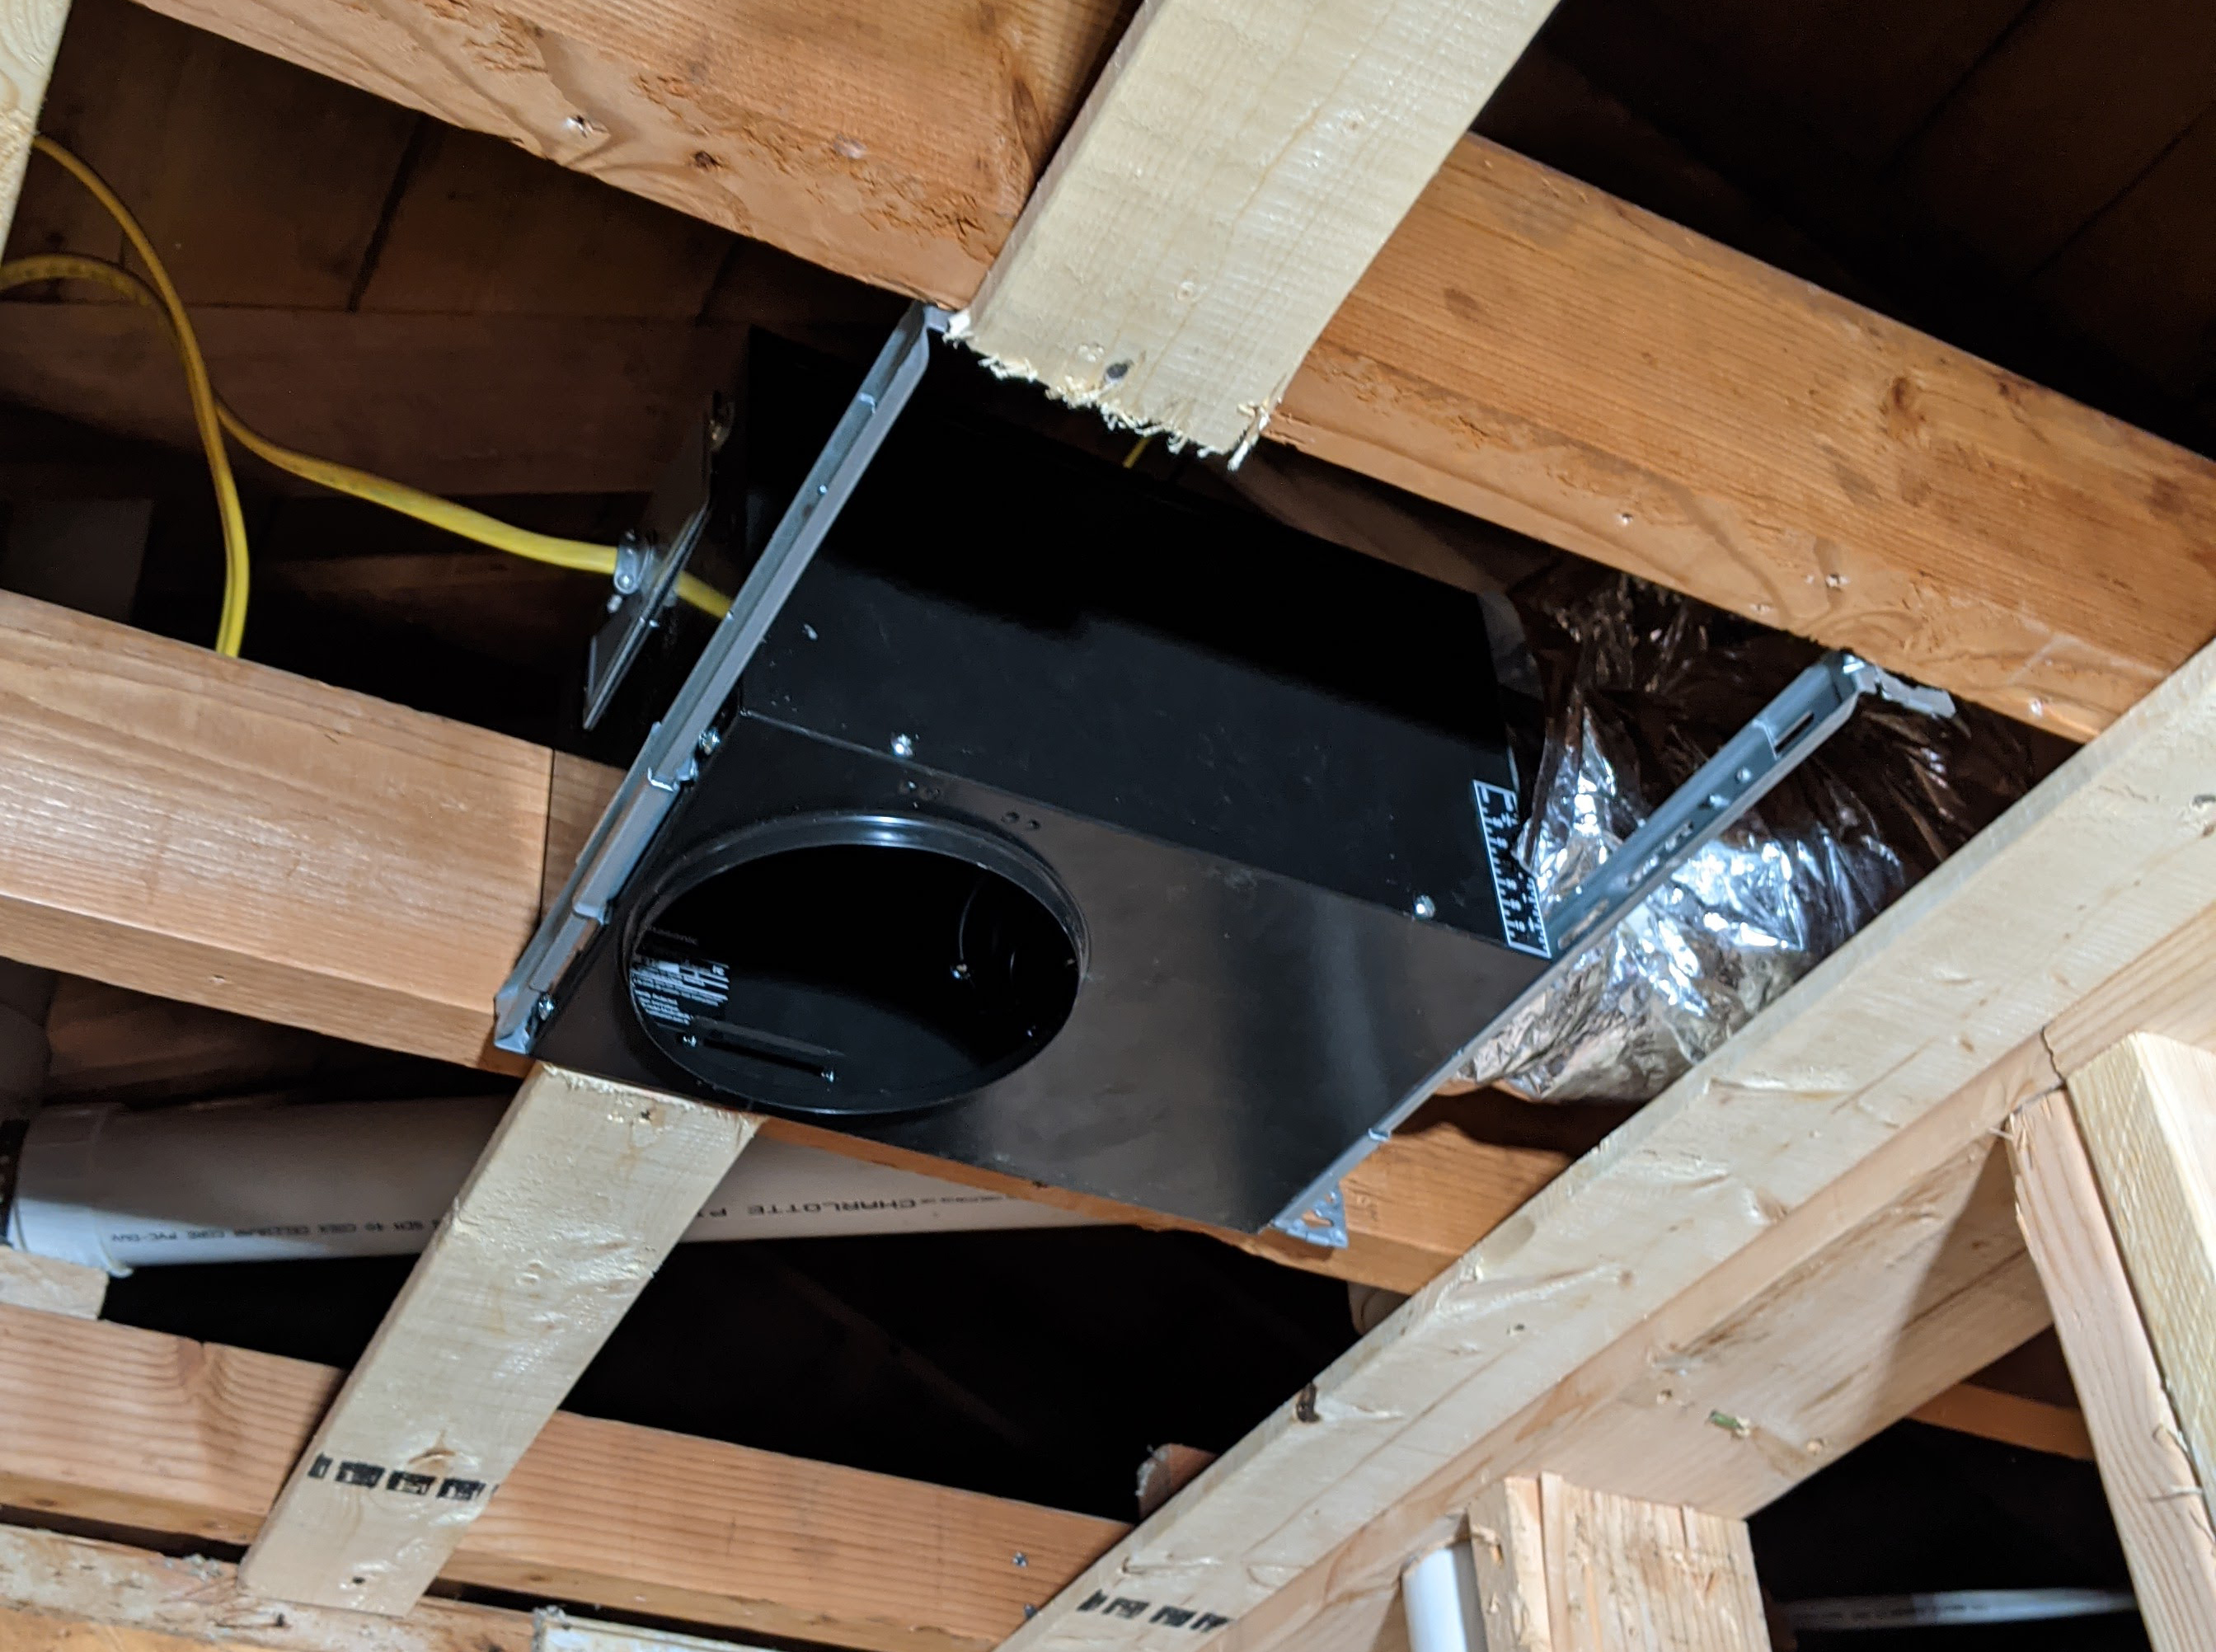
Securing The Fan
Slide the fan housing into the ceiling hole and align it properly. Use screws or mounting brackets provided with the fan to attach it firmly to the ceiling joists.
Check that the fan sits flush with the ceiling and doesn’t wobble. A secure installation prevents noise and ensures the fan operates efficiently.
Connecting The Ductwork
Attach the duct to the fan’s exhaust port using foil tape or clamps to ensure a tight seal. Run the duct to the exterior vent, avoiding sharp bends that can restrict airflow.
Consider insulating the duct if it passes through unheated spaces to prevent condensation buildup. A well-connected duct system maximizes ventilation and keeps your bathroom dry.
Finishing Touches
Install the fan cover or grille by snapping or screwing it into place. Restore power and test the fan to confirm it runs quietly and pulls air effectively.
Clean up any debris and touch up the ceiling if needed. How much difference do you think good ventilation will make in your daily comfort?
Testing And Maintenance Tips
Regular testing and maintenance keep your bathroom ventilation working well. Proper care prevents mold and moisture buildup. It also extends the fan’s life and improves air quality.
Checking Fan Operation
Turn on the fan and listen for unusual noises. The fan should run smoothly without rattling or grinding sounds. Feel the airflow at the vent to ensure it is strong. Weak airflow may mean a blockage or motor issue. Test the fan switch and timer controls to confirm they work properly.
Cleaning The Fan
Dust and dirt reduce fan efficiency. Remove the fan cover carefully. Use a vacuum or a soft brush to clean the fan blades and motor. Wipe the cover with a damp cloth. Avoid using water on electrical parts. Clean the vent duct to remove any buildup that blocks airflow.
Replacing Filters
Some bathroom fans have filters to trap dust and particles. Check the filter condition regularly. Replace filters every 3 to 6 months or as needed. Use the correct filter size and type recommended by the manufacturer. Clean reusable filters with warm, soapy water before reinstalling.

Credit: www.youtube.com
Common Installation Mistakes To Avoid
Installing bathroom ventilation might seem simple, yet common mistakes can occur. Avoiding these errors ensures efficiency and safety. Let’s explore mistakes to watch out for during installation.
Improper Vent Placement
Placing the vent too far from moisture sources is a mistake. The vent should be near the shower or bathtub. This placement ensures effective moisture removal. Avoid placing vents near doors or windows. Such positions reduce their effectiveness.
Ignoring Building Codes
Building codes set safety and functionality standards. Ignoring them can lead to serious issues. Always check local regulations before starting. Following codes prevents legal and safety problems. It ensures your installation is up to standard.
Poor Wiring Practices
Incorrect wiring can cause electrical hazards. Always use the correct gauge wire. Ensure all connections are secure. Avoid overloading circuits with multiple devices. If unsure, consult a professional electrician. Safety should always be the priority.
Frequently Asked Questions
How Do I Choose The Right Bathroom Vent Fan?
Select a fan based on your bathroom size and humidity level. Check the fan’s airflow rating (CFM) to match room dimensions for effective ventilation.
Where Should Bathroom Vent Fans Be Installed?
Install vent fans on the ceiling near the shower or tub. This location captures steam and moisture efficiently, preventing mold and mildew buildup.
Can I Install A Bathroom Vent Fan Myself?
Yes, DIY installation is possible with basic tools and electrical knowledge. Follow manufacturer instructions carefully and ensure proper wiring and ducting for safety.
How Often Should Bathroom Vent Fans Be Cleaned?
Clean the fan every six months to maintain efficiency. Remove dust and debris from the grille and motor to ensure optimal airflow and prolong fan life.
Conclusion
Installing bathroom ventilation helps keep your space fresh and dry. It stops mold and mildew from growing on walls and ceilings. Proper ventilation also removes bad smells quickly. Following simple steps makes the process easier than you think. Good airflow improves air quality and comfort in your bathroom.
A well-ventilated bathroom stays cleaner and healthier for everyone. Take your time and choose the right fan for your needs. Small effort now saves big problems later. Enjoy a fresher, safer bathroom every day.


