

Are you ready to transform your room with stylish pendant lights but worried about tackling the installation on your finished ceiling? You don’t have to be an expert electrician to get it right.
With the right steps and a little patience, you can add that perfect touch of light and style to your space. In this guide, you’ll discover simple, clear instructions that make installing pendant lights easy and safe. Keep reading, and you’ll soon enjoy a beautifully lit room that reflects your personal taste.
Tools And Materials Needed
Installing pendant lights in a finished ceiling requires more than just the light fixture itself. Having the right tools and materials on hand makes the process smoother and safer. Before you start, gather everything you need so you don’t get stuck halfway through the project.
Essential Tools
Make sure you have these tools ready:
- Drill with various bits– to create holes in the ceiling
- Screwdriver– for securing the mounting bracket and fixture
- Wire stripper– to strip the electrical wires safely
- Voltage tester– to check that the power is off before you touch any wires
- Measuring tape– to position the pendant light accurately
- Ladder or step stool– to reach the ceiling comfortably
Having these tools ready will save you time and frustration. Have you ever started a project only to realize you’re missing a crucial tool halfway through? Avoid that by double-checking your toolkit first.
Choosing The Right Pendant Light
Pick a pendant light that fits both your space and your ceiling type. Some pendant lights are heavier and need extra support, while others are lightweight and easier to install. Consider the length of the cord or chain too, so it hangs at the perfect height.
Think about the style and bulb type as well. Do you want a dimmable light? Does it match your room’s decor? Your choice here affects not just the look but also the installation process.
Safety Equipment
Never skip safety gear. Always wear insulated gloveswhen working with electrical wires to prevent shocks. Safety goggles protect your eyes from dust or debris when drilling or stripping wires.
Also, switch off the circuit breaker before starting any electrical work. Have you tested the wires with a voltage tester? This simple step can prevent serious accidents.
Preparing The Ceiling
Preparing the ceiling is a crucial step before installing pendant lights in a finished ceiling. It ensures safety, proper placement, and a smooth installation process. Taking time to prepare the ceiling can save you from costly mistakes and frustrating rework.
Locating The Electrical Box
First, find the existing electrical box where your pendant light will hang. This box should be securely attached to a ceiling joist or support beam. If you can’t find it easily, use a stud finder to locate ceiling joists and look for a cover plate or a small hole in the ceiling.
Remember, the electrical box must be rated to support the weight of a pendant light. If it’s not, you’ll need to replace it with one designed for lighting fixtures. Have you checked if your current box is strong enough to hold your new light?
Turning Off Power
Safety comes first—always turn off the power at the circuit breaker before working on any electrical component. Confirm the power is off by using a non-contact voltage tester on the wires inside the electrical box. This step prevents shocks and accidents, even if you think the switch is off.
Many people skip this and pay the price later. Taking a few extra minutes to double-check can protect you and anyone else in your home. Do you have your voltage tester ready before starting?
Checking Ceiling Structure
After ensuring the power is off, inspect the ceiling structure around the electrical box. Look for any damage, cracks, or weak spots that might affect the pendant light’s stability. A solid ceiling structure is essential for a safe and lasting installation.
If you notice any issues, reinforce the area with additional support, such as adding a cross brace between joists. This step might seem extra, but it prevents your pendant light from loosening or falling over time. Have you ever installed a fixture that wasn’t properly supported?
Removing The Old Fixture
Removing the old fixture is a crucial step when installing pendant lights in a finished ceiling. This process requires attention to detail and safety precautions, as it involves handling electrical components. Let’s break down the steps to ensure you safely and effectively remove the old fixture.
Unscrewing Existing Light
Begin by turning off the power to the light fixture at the circuit breaker to avoid any electrical mishaps. Once you’re sure the power is off, use a screwdriver to carefully remove the screws holding the fixture in place. Keep a hand beneath the fixture as you unscrew it to prevent it from falling.
As you work, consider how the fixture is attached. Is it directly screwed into the ceiling, or does it have a mounting bracket? Knowing this will help you with the next steps in the installation process.
Disconnecting Wiring
With the fixture unscrewed, gently lower it to expose the wiring. You’ll typically see three wires: black, white, and green or bare copper. Use wire nuts to disconnect these safely, making sure to note which wires were connected together for future reference.
Have you ever thought about how these wires connect electricity to your everyday life? It’s a fascinating process, and understanding it can empower you to tackle more DIY projects confidently.
Inspecting Wiring Condition
Once the fixture is removed, inspect the wiring condition. Look for any frayed or damaged wires, which could indicate a need for repair before proceeding. Ensure the electrical box is sturdy and securely attached to the ceiling.
If you spot any issues, it might be time to call in a professional electrician. It’s always better to be safe and ensure everything is up to code, especially when dealing with electricity.
By taking these steps to remove the old fixture, you’re setting a solid foundation for your new pendant lights. The process not only prepares the space but also provides you with a deeper understanding of your home’s electrical system. So, are you ready to transform your room with stunning new lighting?
Wiring The Pendant Light
Wiring a pendant light in a finished ceiling can seem tricky, but careful attention to detail makes the process much smoother. The key lies in connecting the wires correctly, ensuring a solid and safe electrical link, and securing everything so it stays put. Let’s break down these crucial steps to help you wire your pendant light with confidence.
Matching Wires Correctly
Start by identifying the wires in your ceiling and the pendant light. Typically, you’ll find a black (hot), white (neutral), and green or bare copper (ground) wire. Matching these wires correctly is essential for safety and functionality.
Remember, black wires connect to black, white to white, and the green or bare copper wire connects to the ground screw or green wire on the fixture. If colors don’t match exactly, use a voltage tester to confirm which is hot and which is neutral before proceeding.
Using Wire Connectors
Once wires are matched, twist their ends together neatly and cap them with wire connectors. Wire connectors, often called wire nuts, ensure that the connection is tight and insulated.
Choose the right size connector based on the number and thickness of wires. If the connector feels loose, the connection may be unstable, leading to flickering lights or worse.
Securing The Connections
After capping the wires, gently tuck them into the electrical box. Avoid forcing or cramming wires, as this can cause damage or loosen the connections.
Use electrical tape around wire connectors for extra security, especially if you notice any exposed wire. Finally, double-check every connection before attaching the pendant light to the ceiling.
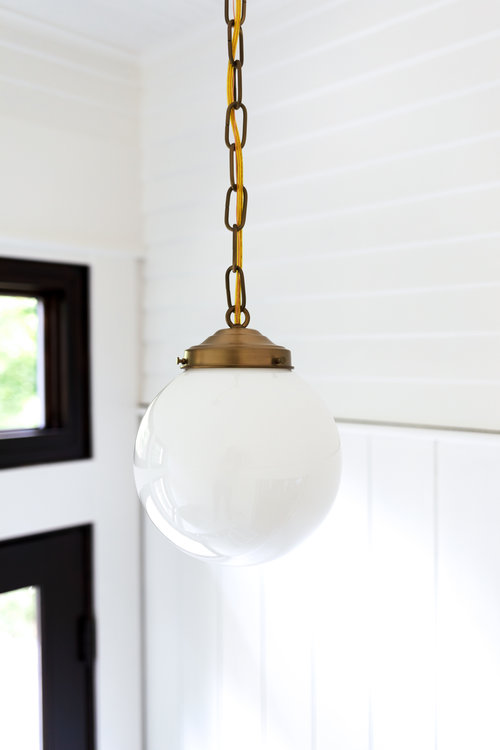
Mounting The Pendant Light
Mounting the pendant light is a key step in your installation process. Proper mounting ensures the light stays secure and looks great. It involves fixing the mounting bracket, hanging the pendant, and adjusting its height. Each part is simple but important for a safe, stylish finish.
Attaching The Mounting Bracket
Start by turning off the power at the breaker. Remove the existing fixture if needed. Locate the electrical box in the ceiling and align the mounting bracket. Use screws to secure the bracket tightly. Check if it is stable before moving on. A solid bracket supports the pendant’s weight safely.
Hanging The Pendant
Connect the pendant wires to the house wires carefully. Match colors: black to black, white to white, and green or copper to ground. Use wire nuts to secure connections. Push the wires into the electrical box neatly. Attach the pendant canopy to the mounting bracket. Tighten screws to hold it firmly in place.
Adjusting The Height
Decide on the pendant height based on room size and purpose. Most pendants have adjustable cords or rods. Shorten or lengthen by pulling or loosening the cord. Ensure the pendant hangs straight and at the desired level. Tighten any locking screws to keep the height fixed. Check clearance around the light for safety.

Credit: trubuildconstruction.com
Final Checks And Power On
After carefully installing your pendant lights, the final moments before turning on the power are crucial. These last checks ensure safety and functionality, preventing any loose parts or electrical issues. Taking a bit of extra time now can save you from headaches later.
Tightening All Screws
Go over every screw and bolt holding your pendant light in place. Even if they feel snug, give them a final check with a screwdriver. Loose screws can cause the fixture to wobble or, worse, fall.
Pay close attention to the mounting bracket and the screws attaching the canopy to the ceiling. A steady fixture not only looks better but also keeps your wiring safe from damage.
Restoring Power
Before you restore electricity, double-check that all connections are secure and insulated. Safety is your top priority here—never rush this step.
Once confident, switch the breaker back on or flip the corresponding fuse. Have you ever experienced a breaker tripping right after installation? It’s often a sign something isn’t connected correctly.
Testing The Light
Flip your pendant light’s switch to see if it glows as expected. If it doesn’t, re-examine your wiring and connections carefully.
Try adjusting the height or angle if your fixture allows it—this is your chance to make sure it shines perfectly over your space. How does the new lighting change the room’s vibe? Sometimes, small tweaks can make a big difference.
Troubleshooting Common Issues
Troubleshooting common issues while installing pendant lights in a finished ceiling can save you time and frustration. Problems like lights not turning on or fixtures feeling loose are often simple fixes. Understanding these issues helps you avoid unnecessary calls to an electrician.
Light Not Turning On
If your pendant light doesn’t turn on, start by checking the power source. Make sure the circuit breaker is on and the wall switch works properly.
Next, inspect the bulb. Sometimes, a bulb may look fine but is actually burnt out or loose. Try replacing it with a new one to see if that solves the problem.
Also, confirm that all wiring connections inside the ceiling box are secure. A loose wire can easily stop the light from working.
Flickering Or Dim Light
Flickering or dim lights often point to a poor electrical connection or incompatible dimmer switch. Are you using the right kind of bulb for your dimmer? LED bulbs, for instance, don’t always work well with older dimmers.
Check if the bulb is screwed in tightly. Even a slightly loose bulb can cause flickering.
Another common cause is voltage fluctuations. If you notice flickering in multiple lights in your home, it might be time to consult an electrician for a deeper look at your electrical system.
Loose Fixtures
Loose pendant light fixtures can be dangerous and annoying. If your fixture wobbles or tilts, first check the mounting bracket. Is it firmly attached to the ceiling box?
Sometimes, the screws may have loosened over time or were not tightened enough during installation. Tighten all screws securely, but be careful not to overtighten and damage the fixture.
Also, verify that the canopy (the part that covers the ceiling box) fits snugly against the ceiling. Gaps here can cause movement and make the fixture unstable.
Credit: www.thegritandpolish.com
Maintenance Tips
Maintaining pendant lights keeps them bright and safe. Regular care extends their life and appearance. Simple tasks help avoid bigger problems later. Focus on cleaning, bulb replacement, and inspection.
Cleaning Pendant Lights
Turn off the power before cleaning. Use a soft cloth or microfiber duster. Avoid harsh chemicals that can damage finishes. For glass shades, use mild soap and water. Dry with a clean cloth to prevent streaks.
Replacing Bulbs Safely
Switch off the light and wait for bulbs to cool. Use a ladder or step stool for high fixtures. Handle bulbs gently to avoid breaking. Match the bulb type and wattage recommended by the manufacturer.
Regular Inspection
Check for loose parts or wiring issues often. Look for signs of wear on cords and sockets. Tighten screws and fasteners to prevent wobbling. Replace damaged components promptly to ensure safety.

Credit: www.amazon.com
Frequently Asked Questions
How Do You Safely Install Pendant Lights In Finished Ceilings?
Turn off the power at the circuit breaker before starting. Use a voltage tester to confirm no live wires. Securely mount the light bracket to a ceiling joist or use a support brace. Follow the wiring instructions carefully to ensure safety and functionality.
What Tools Are Needed For Installing Pendant Lights?
You need a drill, screwdriver, wire stripper, voltage tester, and pliers. A ladder and electrical tape are also essential. Having all tools ready ensures a smooth installation process and prevents interruptions.
Can Pendant Lights Be Installed Without Ceiling Joists?
Yes, use a ceiling fan brace or toggle bolts for support. These options provide sturdy mounting points in finished ceilings without direct joist access. Always ensure the fixture is securely anchored to avoid accidents.
How High Should Pendant Lights Hang From The Ceiling?
Pendant lights should hang 28 to 34 inches above a table or countertop. For general ceiling lighting, maintain 7 feet clearance from the floor. Proper height ensures optimal lighting and prevents obstruction.
Conclusion
Installing pendant lights in a finished ceiling is easier than it seems. Take your time and follow the steps carefully. Always turn off the power before starting work. Choose the right tools and materials for safety. Double-check all connections to avoid problems later.
Bright lighting can change the look of any room. Enjoy the new style and cozy atmosphere you create. Small efforts make a big difference in home lighting. You can do this with patience and care.


