
Looking to add style and function to your kitchen? Installing pendant lights over your island is one of the best ways to brighten up the space while creating a warm, inviting atmosphere.
But how do you make sure you hang them just right? You want the perfect balance of light, height, and placement that fits your kitchen’s look and feel. In this guide, you’ll discover simple, step-by-step tips to install pendant lights like a pro—even if you’ve never done electrical work before.
Keep reading to transform your kitchen island into a stunning focal point that everyone will admire.
Credit: anorganizedseason.com
Choosing Pendant Lights
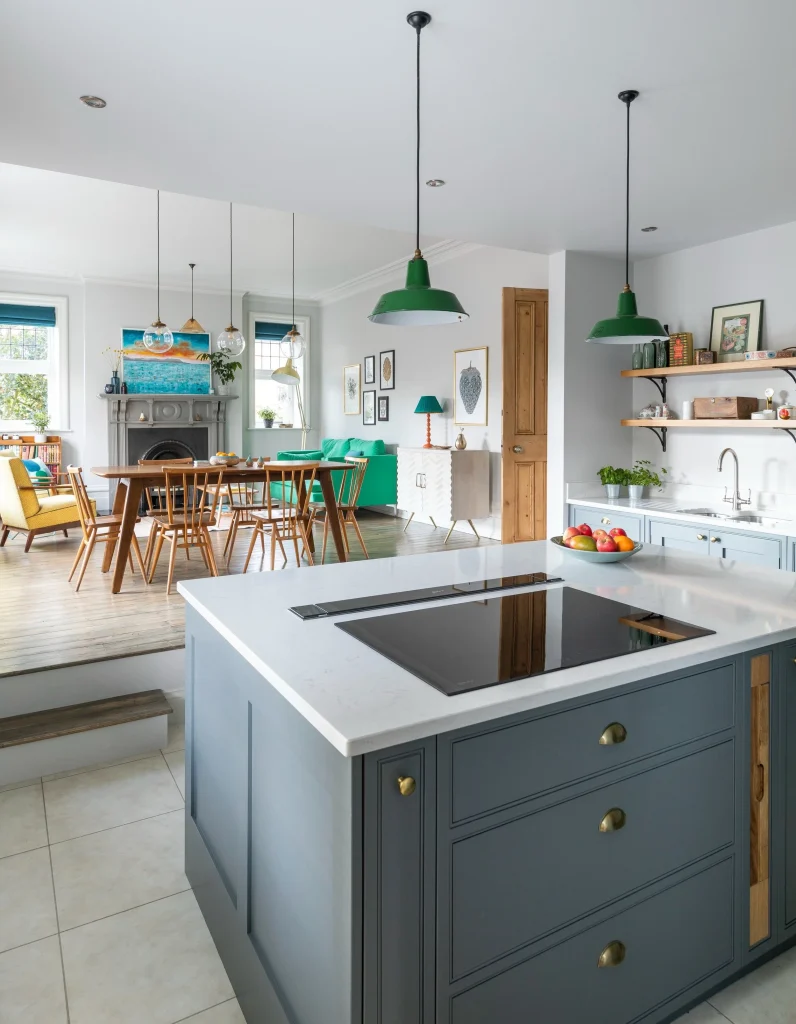
Choosing pendant lights over your island is a chance to add personality and function to your kitchen. The right light fixtures don’t just brighten the space; they set the mood and highlight your design style. Think about how these lights will interact with your daily routine and the overall look you want to achieve.
Selecting The Right Style
Your kitchen’s style guides the pendant light choices you make. Are you drawn to modern minimalism, rustic charm, or industrial edge? Matching the pendant style to your kitchen’s vibe creates a seamless look.
For example, sleek glass pendants work well in contemporary spaces, while wrought iron or metal fixtures suit farmhouse kitchens. Don’t be afraid to mix styles if you want a unique touch, but keep a common theme like color or shape to maintain balance.
Considering Size And Scale
Size matters when choosing pendant lights. Too big, and they overwhelm the island; too small, and they get lost.
Measure your island’s length and width before shopping. A good rule of thumb is to choose pendants that are about one-third the width of your island. If you’re hanging multiple pendants, space them evenly to avoid crowding or gaps.
Have you noticed how pendant size changes the room’s feel? Larger fixtures can become a focal point, while smaller ones offer subtle illumination and style.
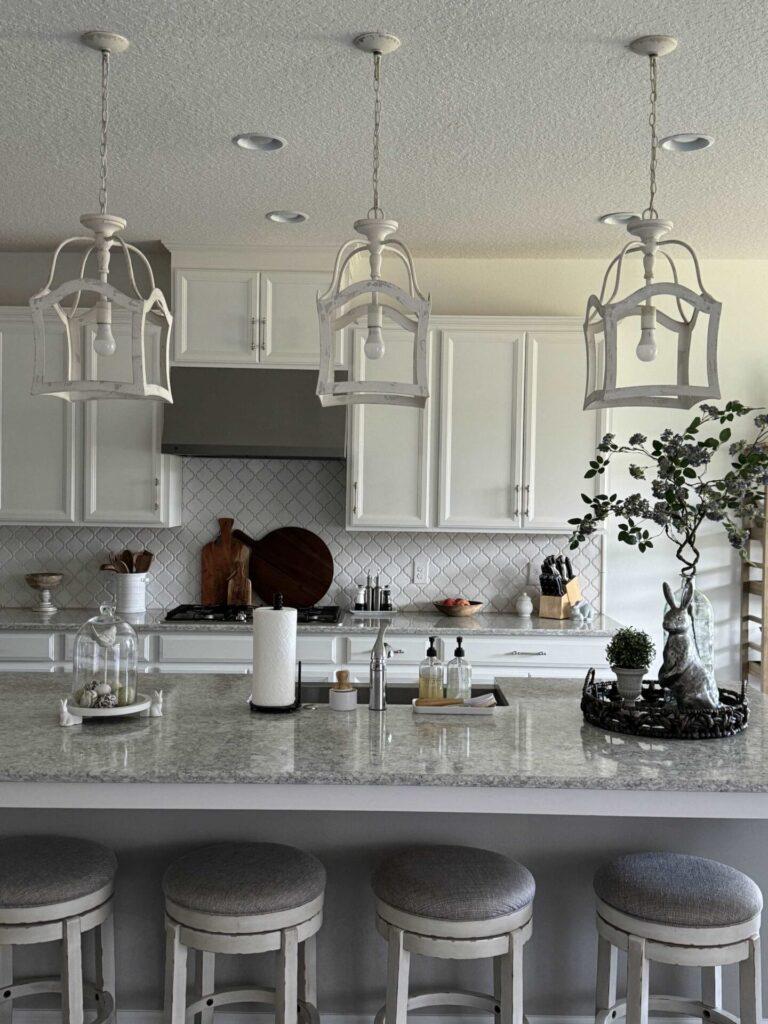
Picking The Perfect Finish
The finish of your pendant lights ties the whole kitchen look together. It’s the detail that pulls other elements into harmony.
Consider finishes that complement your hardware, faucets, or appliances. Popular options include brushed nickel, matte black, brass, and copper. Each finish brings a different character—brass adds warmth, black offers bold contrast, and chrome shines with a modern touch.
Think about how your finish choice will age and how easy it will be to clean. Some finishes show fingerprints or water spots more than others, which is important in a busy kitchen.
Tools And Materials Needed
Installing pendant lights over your island requires the right tools and materials. Having everything ready simplifies the process and ensures safety. Preparation helps you avoid delays and mistakes during installation.
Basic Electrical Tools
- Screwdriver set (flathead and Phillips)
- Wire strippers
- Voltage tester
- Wire nuts
- Electrical tape
- Power drill with bits
- Measuring tape
- Level
Safety Equipment
- Insulated gloves
- Safety goggles
- Dust mask
- Non-slip shoes
- Step ladder or sturdy stool
Additional Supplies
- Pendant light fixtures
- Electrical box (if not existing)
- Mounting brackets
- Light bulbs compatible with fixtures
- Cable connectors
- Wire clamps
Preparing The Installation Site
Clear the area above the island and turn off the power at the circuit breaker. Measure the ceiling height and mark the spot for the light fixture carefully. Ensure the ceiling can support the weight of the pendant light.
Preparing the installation site for pendant lights over your kitchen island is a critical step that sets the foundation for a successful project. Ensuring that everything is in place before you start drilling and wiring can save you time and frustration. It’s all about getting the details right so that your new lighting fixture looks impeccable and functions flawlessly.Measuring And Marking Placement
Start by determining the ideal height for your pendant lights. A common guideline is to hang them 30 to 36 inches above the countertop. This height provides ample lighting while avoiding any head bumps. Use a tape measure for accuracy. Once you’ve determined the height, mark the spot on the ceiling where each pendant light will be installed. A laser level can help ensure that your marks are perfectly aligned. Consider the spacing between multiple pendants. For islands longer than four feet, space the lights about 24 to 30 inches apart for balanced illumination.Turning Off Power
Before handling any electrical components, ensure your safety by turning off the power. Locate your home’s electrical panel and switch off the circuit breaker that controls the kitchen’s power supply. Double-check that the power is off by testing the existing lights or outlets. Use a voltage tester for an extra layer of safety to confirm there’s no electricity flowing. Avoid skipping this step to prevent any risk of electric shock. It’s a simple precaution that keeps you safe while working.Checking Existing Wiring
Inspect the current wiring in the ceiling to ensure it’s capable of supporting your new pendant lights. Look for signs of wear or damage that may need repair. If you’re unsure about the wiring’s condition, consult a professional electrician. They can assess whether additional support or new wiring is necessary. Consider the type of wiring setup you currently have. Some homes may require an upgrade to handle the electrical load of multiple pendant lights. Preparing your installation site with these steps creates a solid groundwork for your project. You’ll find that investing time in this preparation leads to a smoother installation process. Are you ready to transform your kitchen island with stunning pendant lighting?
Credit: 100things2do.ca
Wiring The Pendant Lights
Wiring pendant lights over your kitchen island is a task that demands attention to detail and safety. Proper wiring not only ensures your lights work correctly but also keeps your home safe from electrical hazards. Let’s dive into the key steps to wire your pendant lights confidently and securely.
Connecting Wires Safely
Start by turning off the power at the breaker to avoid any electrical shocks. Carefully strip about half an inch of insulation from the ends of each wire using a wire stripper. Match the wires by color—usually black to black (hot), white to white (neutral), and green or bare copper to ground.
Hold the matching wires together and twist them clockwise. This simple step ensures a tight connection before securing them with wire nuts. Have you ever felt unsure whether the wires were connected properly? Twisting them first helps prevent loose connections that could cause flickering or shorts.
Using Wire Nuts And Tape
Once the wires are twisted together, screw on a wire nut firmly until it feels snug. The wire nut should cover all exposed copper wire. Wrap the base of the wire nut and the wires with electrical tape for extra security—this prevents the wire nut from loosening over time.
Choosing the right size of wire nut is crucial. Too large, and it won’t hold the wires tightly; too small, and it may damage the wires. Keep several sizes handy to find the perfect fit for your pendant light wiring.
Testing Connections
After securing all connections, restore power at the breaker. Turn on your pendant lights to check if they illuminate properly. If the lights flicker or don’t turn on, double-check your wire connections and ensure no wires are loose or touching incorrectly.
Using a voltage tester before restoring power can add an extra layer of safety. Have you ever wished for a quick way to confirm your wiring is done right? A simple test like this can save you time and potential headaches down the road.
Mounting The Fixtures
Mounting pendant lights over an island requires careful attention to secure the fixtures properly. This step ensures safety and enhances the look of your kitchen. Following precise mounting steps helps the lights hang perfectly and stay fixed for years.
Attaching Mounting Bracket
Start by turning off the power at the circuit breaker. Locate the electrical box above the island. Align the mounting bracket with the box. Use the screws that came with the light fixture to attach the bracket. Tighten the screws until the bracket is stable and flush with the ceiling. Check that it does not move or wobble.
Securing The Pendant Light
Connect the fixture wires to the house wires using wire nuts. Match colors: black to black, white to white, and green or copper to ground. Carefully tuck wires into the electrical box. Lift the pendant light and attach it to the mounting bracket. Use the provided screws or hooks to secure the fixture firmly. Make sure the light does not sway or hang loosely.
Adjusting Height And Alignment
Adjust the pendant cord or chain to the desired length. Hold the light at the correct height above the island surface. Check alignment with the island edges and other pendant lights. Use a level if available to ensure even hanging. Tighten any adjustment screws or locks to keep the height fixed. Make small changes until the fixture looks balanced and straight.

Credit: www.lighting-one.com
Final Checks And Troubleshooting
After installing pendant lights over your island, it is important to perform final checks and troubleshoot any issues. This ensures the lights work safely and look great. Taking time to test and adjust the installation prevents future problems. Follow these steps to restore power, identify common issues, and maintain your pendant lights.
Restoring Power And Testing
Turn the circuit breaker back on to restore power to the pendant lights. Use the wall switch to turn the lights on and off. Check if all bulbs light up evenly. Look for flickering or dim areas. Test the light’s brightness and angle to ensure proper illumination. Confirm that the fixture is secure and not loose.
Fixing Common Issues
If the lights do not turn on, double-check the wiring connections. Tighten any loose wires or screws. Replace any burned-out bulbs. For flickering lights, try replacing the bulb with a compatible one. Make sure the dimmer switch is compatible with LED or other bulbs used. Adjust the height of the pendants if they hang unevenly.
Maintaining Your Pendant Lights
Clean the pendant lights regularly with a soft cloth to remove dust. Avoid harsh chemicals that can damage the finish. Check the wiring and bulbs every few months to ensure safety. Replace bulbs promptly when they burn out. Keep the area around the lights free from moisture and grease buildup. Proper maintenance extends the life of your pendant lights and keeps your kitchen bright.
Frequently Asked Questions
How High Should Pendant Lights Hang Over An Island?
Pendant lights should hang 30 to 36 inches above the island surface. This height provides optimal lighting and avoids glare. Adjust based on ceiling height and fixture size for balanced illumination and aesthetics.
What Size Pendant Lights Suit Kitchen Islands?
Choose pendant lights with a diameter of 8 to 12 inches for small islands. Larger islands may require 12 to 16-inch pendants. Proper sizing ensures proportional lighting and enhances kitchen design.
How Many Pendant Lights Are Ideal Over An Island?
Typically, 2 to 3 pendant lights work well for standard kitchen islands. The number depends on island length and fixture size. Multiple pendants distribute light evenly and add style.
Can I Install Pendant Lights Without An Electrician?
DIY installation is possible if you have electrical knowledge and follow safety codes. Otherwise, hire a licensed electrician to ensure safe, code-compliant installation and avoid hazards.
Conclusion
Installing pendant lights over your island adds style and function. Choose the right size and height for your space. Turn off power before starting any electrical work. Follow the steps carefully for a safe and neat setup. Good lighting makes cooking and dining more enjoyable.
Enjoy your new, bright kitchen centerpiece every day. Simple changes bring fresh looks and better light. Ready to brighten your home?


