
Are you tired of dealing with stubborn moisture and unpleasant odors in your bathroom? Installing a ventilation fan is the simple fix you need to keep your space fresh and mold-free.
But maybe you’re worried it’s too complicated or expensive. The good news is, you can install a ventilation fan yourself with just a few tools and clear steps. In this guide, you’ll discover exactly how to choose the right fan, prepare your bathroom, and complete the installation safely and efficiently.
Keep reading, and you’ll soon enjoy a fresher, healthier bathroom without calling a pro.

Credit: www.youtube.com
Choosing The Right Fan
Choosing the right ventilation fan is key for a fresh bathroom. A good fan removes moisture and prevents mold. It keeps the air clean and comfortable. Picking the best fan depends on bathroom size, noise level, and energy use. Here is what to know before buying a fan.
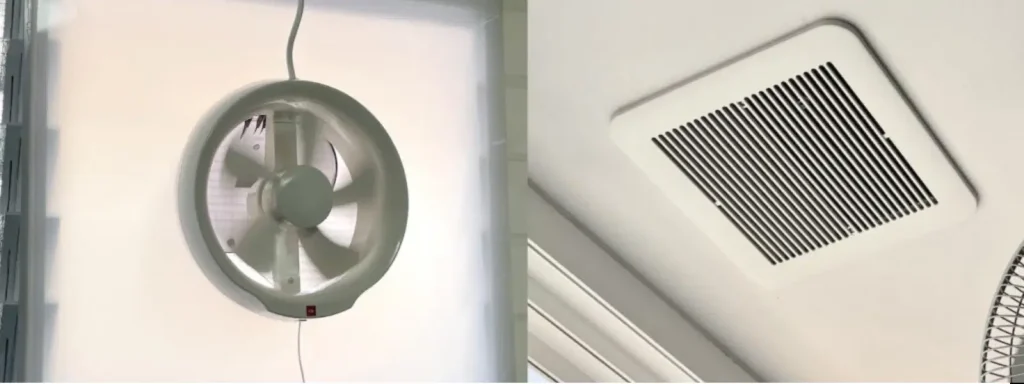
Types Of Bathroom Fans
Bathroom fans come in several types. The most common are ceiling-mounted fans. They vent air outside through ducts. Wall-mounted fans are good for bathrooms without ceiling access. Inline fans install in the attic or crawl space. They connect to vents in the bathroom. Some fans have built-in lights or heaters. Choose a type that fits your bathroom layout and needs.
Fan Size And Capacity
Fan size matters for proper ventilation. It’s measured in cubic feet per minute (CFM). CFM shows how much air the fan moves each minute. Small bathrooms need about 50 CFM. Medium bathrooms need 80 to 110 CFM. Large bathrooms may require 110 CFM or more. Calculate your bathroom square footage first. Use this simple formula: Length × Width × 1 CFM per square foot. This helps pick a fan that works well.
Energy Efficiency Ratings
Energy-efficient fans save electricity and lower bills. Look for fans with the ENERGY STAR label. These fans use less power without losing performance. Some models have variable speeds to adjust airflow. Quiet operation is also important. Energy-efficient fans often run quieter than older models. Choose a fan that balances efficiency and noise level for comfort.
Gathering Tools And Materials
Gathering the right tools and materials is the first step to install a ventilation fan in your bathroom. Preparation saves time and prevents interruptions during installation. Having everything ready helps the process run smoothly and safely.
Essential Tools List
- Screwdriver (Phillips and flathead)
- Power drill with drill bits
- Measuring tape
- Utility knife
- Wire stripper and cutter
- Stud finder
- Level
- Caulking gun
- Step ladder
- Safety goggles
Required Materials
- Bathroom ventilation fan kit
- Electrical wire (usually 14/2 NM cable)
- Wire connectors (wire nuts)
- Vent ducting (flexible or rigid)
- Exterior vent cover
- Caulk or sealant
- Mounting screws and brackets
- Electrical box (if needed)
Safety Gear
- Safety goggles to protect eyes
- Dust mask to avoid inhaling dust
- Work gloves for hand protection
- Non-slip shoes for stability
- Hearing protection if using loud tools
Preparing The Installation Site
Preparing the installation site is a key part of successfully adding a ventilation fan to your bathroom. This phase sets the stage for a smooth installation and ensures the fan will work efficiently. Taking the time to plan carefully can save you from costly mistakes and frustration later on.
Locating The Vent Position
Choosing the right spot for your ventilation fan is crucial. Ideally, place it near the shower or bathtub where most moisture accumulates. Also, consider the shortest path for venting air outside to avoid long duct runs that reduce efficiency.
Think about your ceiling joists and existing electrical wiring. You want a location that doesn’t require major structural changes. Have you checked if there’s an accessible wall or roof area for venting?
Measuring And Marking
Accurate measurements prevent unnecessary holes and ensure the fan fits perfectly. Use a tape measure to mark the dimensions of the fan housing on the ceiling or wall. Double-check your measurements before cutting.
Mark the center point for the fan opening clearly. Use a pencil or painter’s tape for visibility. This step might seem small, but it greatly influences the quality of your installation.
Turning Off Power
Safety always comes first when working with electrical devices. Locate your bathroom’s circuit breaker and switch off the power before starting any work. This simple action protects you from electrical shocks.
Test the power with a voltage tester to confirm everything is off. Have you ever underestimated this step and regretted it? Taking this precaution can keep your project safe and stress-free.
Cutting The Vent Opening
Mark the vent location carefully on the ceiling or wall. Use a suitable saw to cut the opening, ensuring it fits the fan size precisely. Take safety precautions to avoid damaging wires or pipes behind the surface.
Cutting the vent opening is crucial in installing a bathroom ventilation fan. It requires precision and the right tools. A well-executed cut ensures your fan fits snugly and functions efficiently. Follow these steps to achieve a perfect vent opening.Selecting The Right Blade
Choose a blade suitable for your wall material. For drywall, a drywall saw works well. A reciprocating saw is great for tougher materials. Ensure the blade is sharp for clean cuts. Dull blades can cause jagged edges.Cutting Techniques
Mark the vent location accurately using a pencil. Use a level to keep lines straight. Begin cutting slowly to maintain control. Follow the marked lines precisely for the best fit. Always wear safety goggles to protect your eyes.Cleaning The Edges
After cutting, smooth the edges with sandpaper. This prevents snags or rough spots. Remove debris from the cut area. A clean edge ensures a better seal for the vent cover. A tidy finish enhances the overall look and function.Installing The Ventilation Fan
Installing the ventilation fan in your bathroom improves air quality and prevents mold. This process involves carefully placing the fan housing, connecting the ductwork, and securing the fan. Each task must be done correctly to ensure the fan works efficiently and safely.
Mounting The Fan Housing
Start by choosing the right spot on the ceiling for the fan. Cut a hole that fits the fan housing size. Use a pencil to mark the outline before cutting. Secure the housing to the ceiling joists using screws. Make sure it sits flush and does not move.
Connecting The Ductwork
Attach the duct to the fan’s exhaust port. Use duct tape or clamps to seal the connection tightly. Run the duct to the outside vent through the attic or wall. Avoid sharp bends to keep airflow smooth. Check that the duct is properly insulated if it passes through cold spaces.
Securing The Fan
Fasten the fan unit inside the housing with screws. Connect the electrical wires following safety codes. Use wire nuts and electrical tape for secure connections. Attach the fan grille to the housing last. Test the fan by turning it on to check for noise and airflow.
Wiring The Fan
Wiring the ventilation fan is a key part of bathroom fan installation. It connects the fan to your home’s electrical system. Proper wiring ensures the fan works safely and efficiently. Take time to understand the electrical setup before starting.
Understanding Electrical Connections
Identify the power source for the fan circuit. Usually, it connects to a switch or light fixture. The fan has three main wires:
- Black:Hot wire, carries power.
- White:Neutral wire, completes the circuit.
- Green or bare copper:Ground wire, for safety.
Check your home’s wiring colors to match these. Turn off power at the breaker before touching any wires.
Connecting Wires Safely
Strip about half an inch of insulation from each wire end. Twist the matching wires together:
- Black to black (hot to hot)
- White to white (neutral to neutral)
- Green or bare copper to green or bare copper (ground)
Use wire nuts to secure the connections. Wrap electrical tape around the wire nuts for extra safety. Push the wires neatly into the electrical box. Attach the fan’s wiring firmly to prevent loose connections.
Testing The Fan
Restore power at the breaker. Turn on the bathroom fan switch. Listen for the fan motor running smoothly. Check for any unusual noises or vibrations. If the fan does not start, turn off power and recheck wire connections. Confirm all wires are tight and correctly matched before trying again.
Finishing Touches
Finishing touches are what transform a functional bathroom ventilation fan into a neat, efficient, and visually pleasing feature. These last steps ensure your installation looks professional and works effectively without any issues. Paying attention to detail here can prevent problems like drafts, moisture buildup, or noise that could annoy you later.
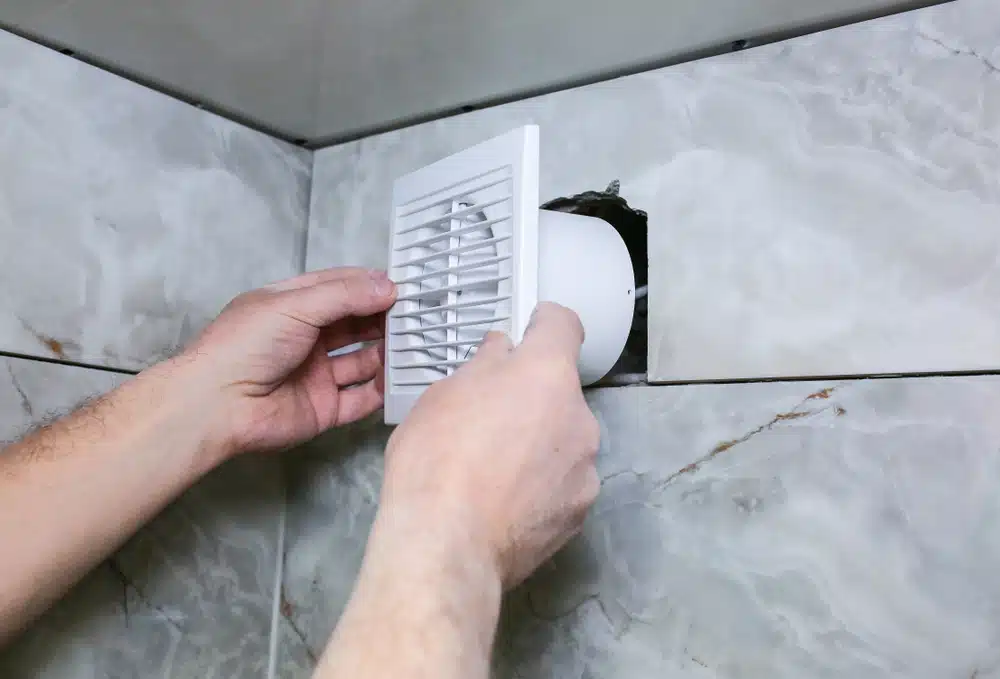
Installing The Fan Cover
The fan cover isn’t just a simple accessory—it’s the face of your ventilation system. Carefully align the cover with the fan housing and gently snap or screw it into place. If your cover has filters, make sure they are clean before installation to maintain good air quality.
Take your time fitting the cover; forcing it can break clips or damage the fan. Once attached, check that it fits flush against the ceiling or wall. A secure cover reduces noise and improves airflow efficiency.
Sealing Gaps
Gaps around the fan can let moist air escape into your walls or attic, causing mold and damage. Use a high-quality caulk or foam sealant to fill any spaces between the fan housing and the ceiling. This step is crucial for maintaining energy efficiency and protecting your home.
After sealing, press gently to smooth the caulk and create a tight barrier. Have you noticed drafts or cold spots near the fan area? Sealing might solve that discomfort immediately.
Cleaning Up
Installation can leave dust, small debris, or packaging scraps behind. Use a vacuum or a damp cloth to clean the fan blades and surrounding area carefully. This prevents dust from circulating every time you run the fan.
Don’t forget to dispose of old materials responsibly and keep your tools organized for future maintenance. A clean workspace after installation not only looks good but also keeps your new fan running smoothly from day one.
Credit: www.i-sells.co.uk
Maintaining Your Bathroom Fan
Installing a bathroom ventilation fan helps reduce moisture and prevent mold. Choose the right spot, connect wiring safely, and secure the fan properly to the ceiling. Proper installation keeps your bathroom fresh and dry.
Maintaining your bathroom fan is crucial for ensuring optimal performance and longevity. A well-maintained fan not only enhances the air quality but also prevents moisture build-up, reducing the risk of mold and mildew. By dedicating a little time to its upkeep, you can ensure it operates efficiently and prolong its lifespan.Regular Cleaning Tips
Regular cleaning of your bathroom fan is essential. Begin by turning off the power to avoid any accidents. Remove the fan cover, which is usually secured with screws or clips, and wash it with warm soapy water. For the fan blades, use a vacuum cleaner with a brush attachment to remove dust and debris. A damp cloth can be used for a more thorough clean. Remember to dry all components before reassembling to prevent electrical issues.Troubleshooting Common Issues
Is your fan making unusual noises? It might be due to loose parts or debris lodged in the fan. Tighten any loose screws and clean around the motor and blades. If the fan isn’t working at all, check if the circuit breaker has tripped or if there’s a blown fuse. Confirm the power supply is intact. Sometimes, a simple reset can resolve the issue.When To Replace The Fan
How do you know when it’s time for a new fan? If your current fan struggles to ventilate the bathroom effectively, it might be underpowered or nearing the end of its life. Unusual noises or constant malfunctions are also signs that replacement is necessary. Consider replacing the fan every 10-15 years, especially if it shows signs of wear and tear. Investing in a new, energy-efficient model can improve ventilation and reduce energy costs.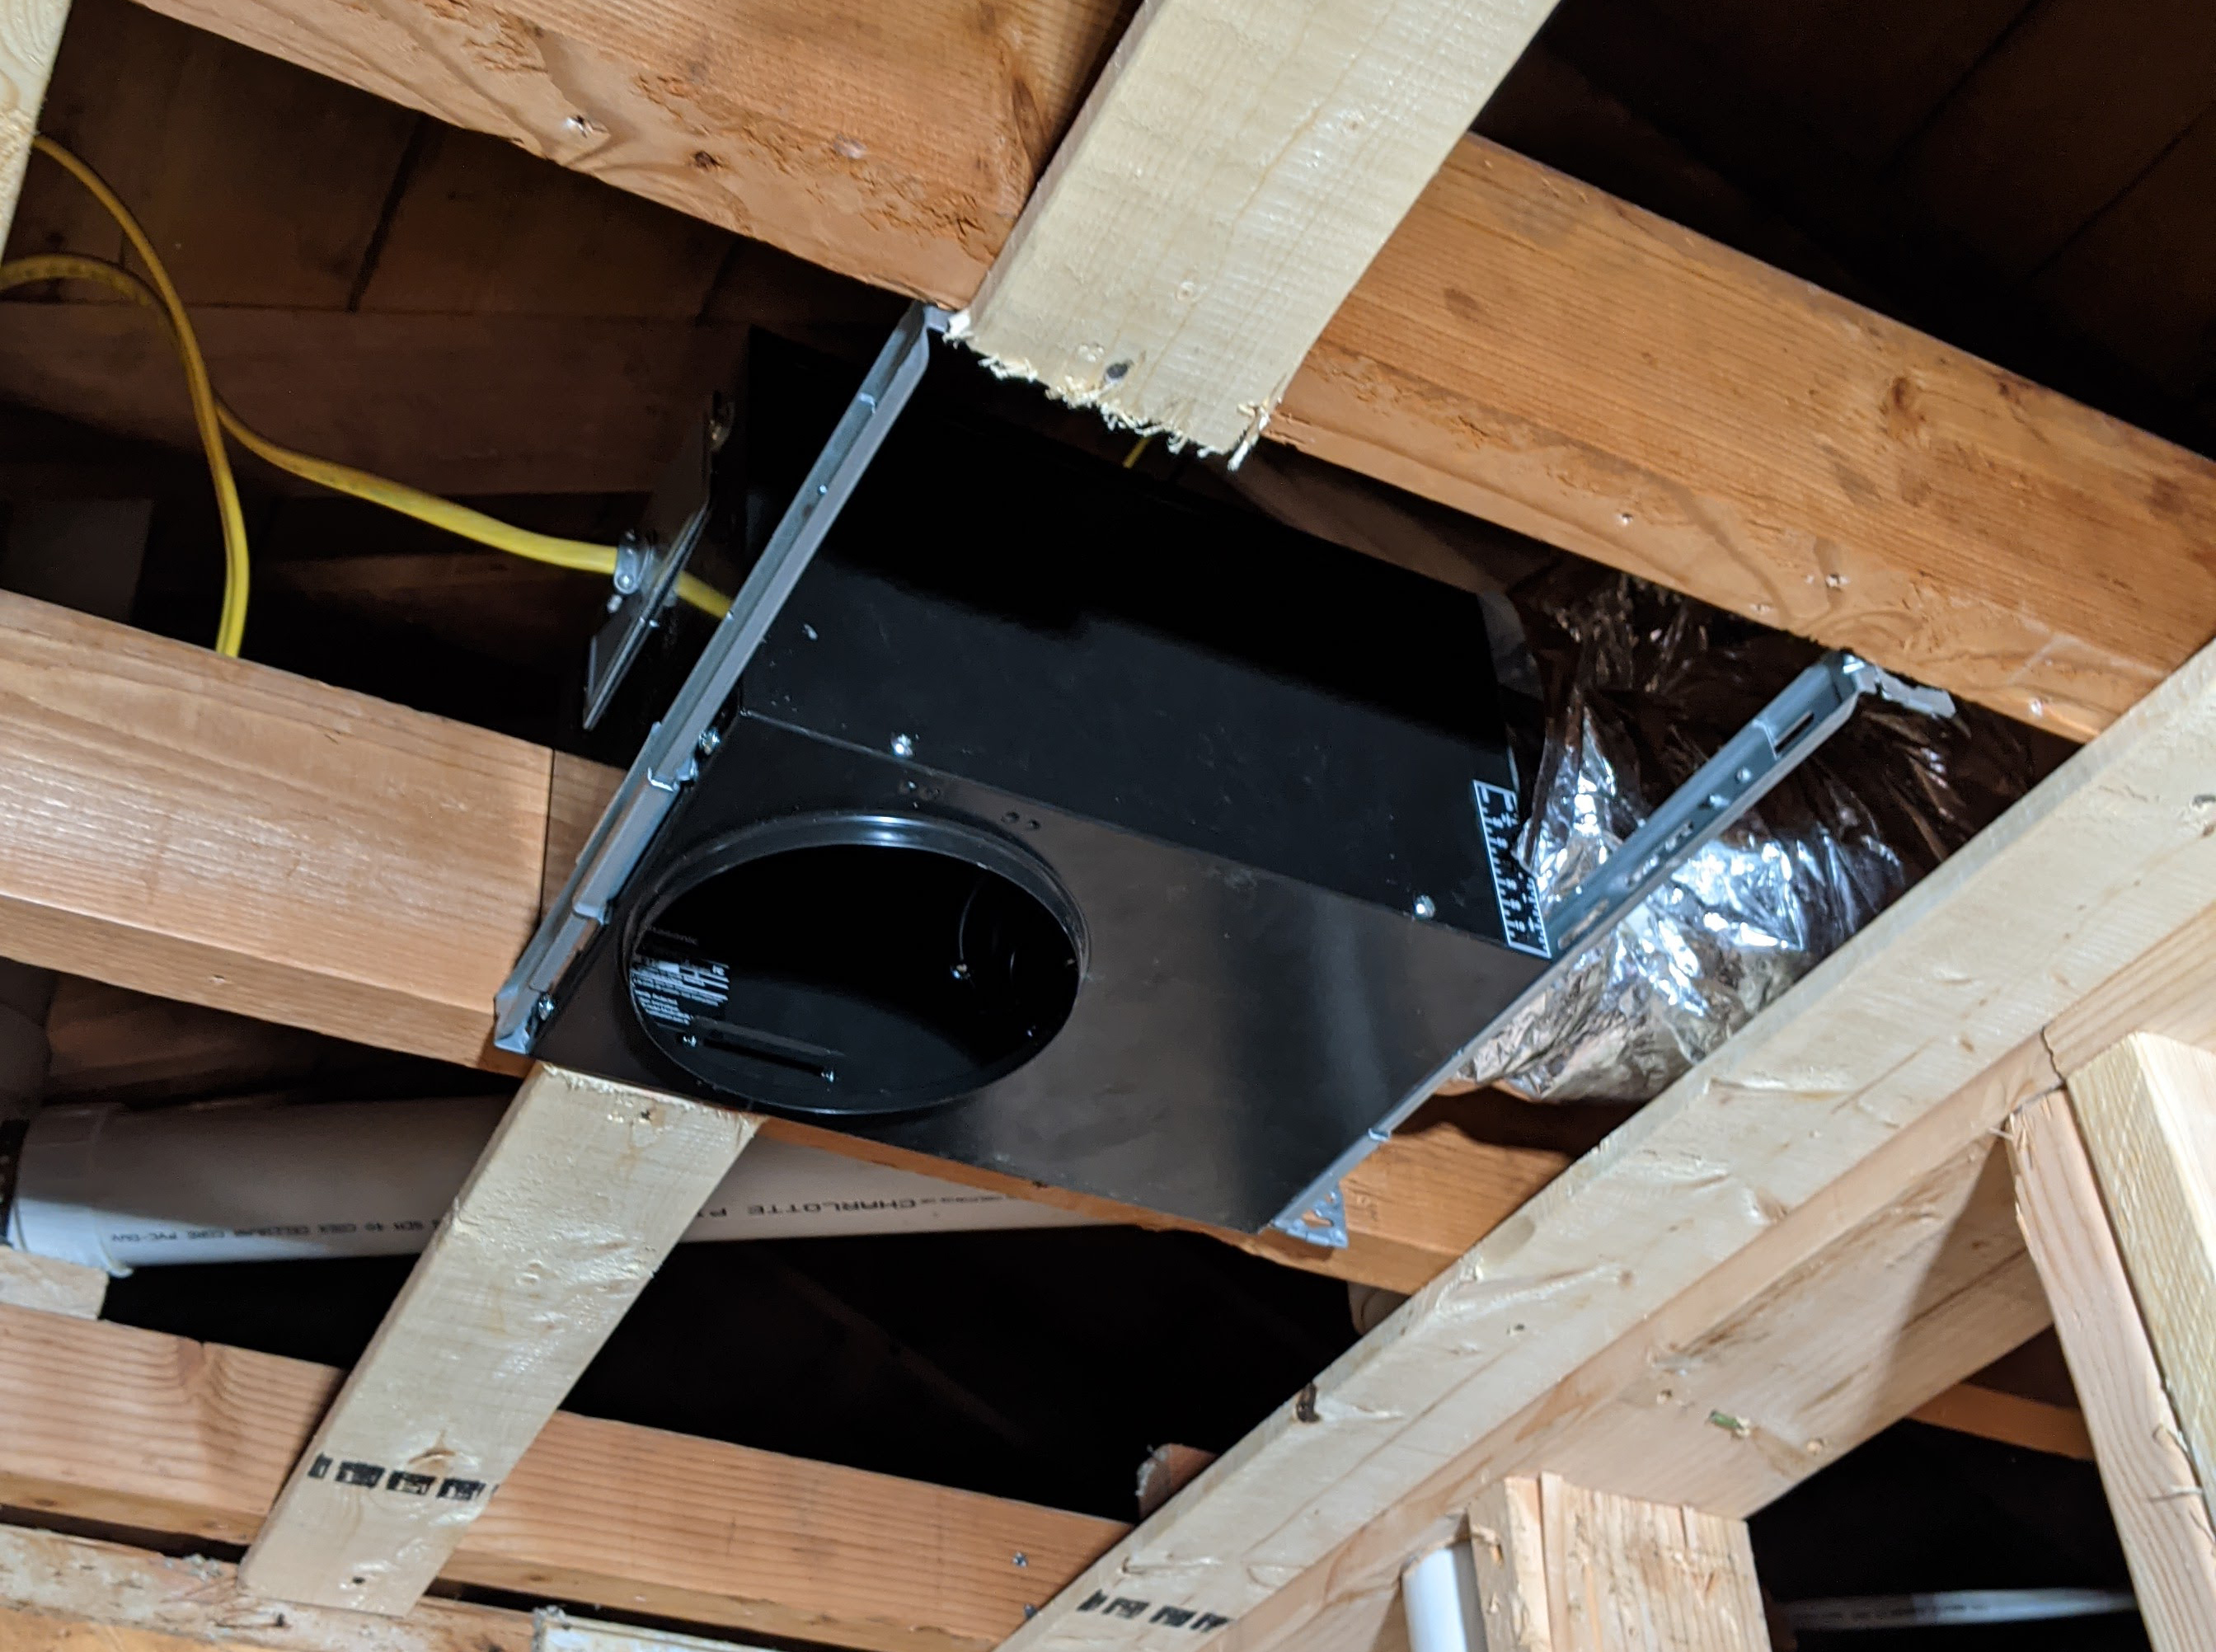
Credit: www.jlconline.com
Frequently Asked Questions
How Do I Choose The Right Bathroom Ventilation Fan?
Choose a fan based on your bathroom size and moisture levels. Check the fan’s CFM rating; higher CFM suits larger spaces. Consider noise level, energy efficiency, and installation type for best performance and comfort.
What Tools Are Needed To Install A Bathroom Fan?
You will need a drill, screwdriver, wire stripper, measuring tape, and a ladder. Also, have a drywall saw or utility knife for ceiling cuts. Safety gear like gloves and goggles is recommended during installation.
Can I Install A Ventilation Fan Myself?
Yes, if you have basic electrical and carpentry skills. Follow manufacturer instructions and local codes carefully. For complex wiring or ductwork, consider hiring a professional to ensure safety and compliance.
How Often Should I Clean Or Replace The Bathroom Fan?
Clean the fan every 6 months to maintain airflow and efficiency. Replace the fan if it becomes noisy or stops working properly, typically every 10-15 years depending on usage and quality.
Conclusion
Installing a bathroom ventilation fan helps keep air fresh and dry. It stops mold and mildew from growing on walls and ceilings. Proper installation ensures the fan works well and lasts long. A good fan also reduces bad smells and moisture quickly.
Follow the steps carefully, and take your time. This small project can improve your bathroom’s comfort and health. Enjoy cleaner air and a fresher space every day.


