
Are you tired of dealing with stuffy rooms and lingering odors? Installing a ventilation fan can be the simple fix your space needs.
But if you’ve never done it before, the idea might feel overwhelming. Don’t worry—you’re about to learn an easy, step-by-step way to install a ventilation fan that will improve your air quality and comfort. Keep reading, and by the end, you’ll have the confidence to tackle this project yourself.
Your home will thank you!

Credit: www.youtube.com
Choosing The Right Fan
Choosing the right ventilation fan is important for a healthy and comfortable space. The right fan moves air well and fits your room size. It also saves energy and lasts longer.
Consider the room’s purpose and size. Check the fan’s noise level and features. This helps find a fan that works quietly and effectively.
Types Of Ventilation Fans
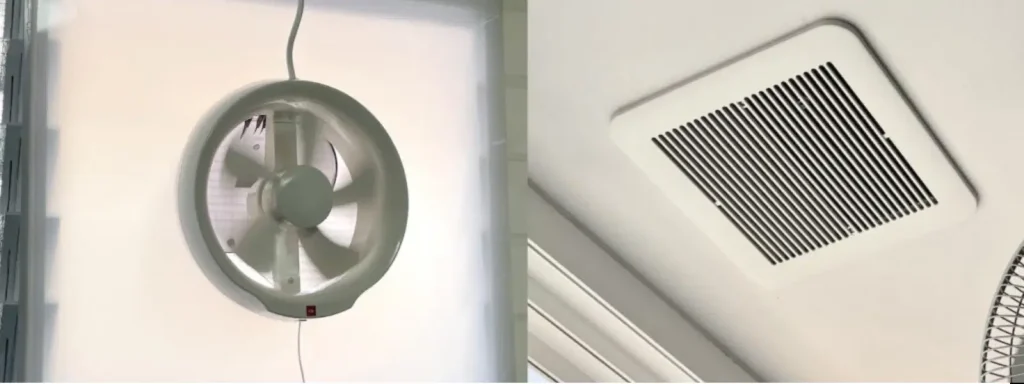
There are different types of ventilation fans for various needs. Exhaust fans remove stale air from kitchens, bathrooms, and laundry rooms. Inline fans work inside walls or ceilings for better airflow. Ceiling fans help circulate air in larger rooms.
- Exhaust Fans: Best for bathrooms and kitchens
- Inline Fans: Installed in ducts for quiet operation
- Ceiling Fans: Circulate air in bigger spaces
Sizing Your Fan
Choosing the right size fan is key to proper ventilation. A fan too small won’t move enough air. A fan too large wastes energy and creates noise.
Measure the room size in square feet. Use this simple guide:
| Room Size (sq ft) | CFM (Cubic Feet per Minute) |
|---|---|
| Up to 50 | 50-80 |
| 50-100 | 80-110 |
| 100-150 | 110-150 |
| 150-200 | 150-200 |
Match your fan’s CFM to the room size for best results.
Energy Efficiency Tips
Energy-efficient fans save money and reduce power use. Look for fans with Energy Star ratings. These fans use less electricity and work well.
- Choose fans with variable speed settings
- Use timers or humidity sensors for automatic control
- Pick models with quiet motors to avoid noise
- Seal ducts properly to avoid air leaks
Proper installation also helps fans run efficiently and last longer.

Credit: www.i-sells.co.uk
Gathering Tools And Materials
Gathering the right tools and materials is the first step to install a ventilation fan smoothly. Having everything prepared saves time and avoids interruptions. It also ensures safety and a professional finish. Below are the essentials you need before starting the installation.
Essential Tools
- Electric drill with drill bits
- Screwdriver set (flathead and Phillips)
- Measuring tape
- Wire stripper and cutter
- Stud finder
- Utility knife
- Level
- Hammer
- Pencil for marking
Materials Checklist
- Ventilation fan unit
- Fan ducting or vent pipe
- Electrical wiring (as per local code)
- Wire connectors
- Mounting brackets or hardware
- Wall or ceiling vent cover
- Caulk or sealant
- Electrical box (if required)
Safety Gear
- Safety goggles to protect your eyes
- Work gloves to avoid cuts and scrapes
- Dust mask to prevent inhaling debris
- Ear protection if drilling loudly
- Non-slip shoes for stable footing
Preparing The Installation Site
Preparing the installation site is the first key step to install a ventilation fan properly. This stage ensures the fan works efficiently and safely. It involves choosing the right spot, measuring accurately, and securing the power supply. These tasks help avoid problems during and after installation.
Selecting The Location
Pick a place that allows good airflow and easy access. Choose a spot near a window or vent for better air circulation. Avoid areas with electrical wires or plumbing behind the wall. The fan should cover the entire room to remove moisture and odors effectively.
Measuring And Marking
Use a tape measure to find the exact size of the fan. Mark the wall or ceiling where the fan will fit. Double-check the measurements to avoid cutting the wrong spot. Draw clear lines to guide your cutting and drilling. Accurate marking makes the installation smooth and neat.
Turning Off Power
Switch off the electricity at the breaker box before starting work. This step prevents electric shocks and accidents. Use a voltage tester to confirm that the power is off. Safety first. Never skip this important precaution when working with electrical devices.
Installing The Fan
Installing the ventilation fan properly is key to ensuring your space stays fresh and free from excess moisture. The process requires precision and care, but with the right approach, you can do it yourself confidently. Let’s break down the critical steps to get your fan installed securely and functioning effectively.
Cutting The Opening
Start by marking the exact spot where the fan will go. Use the template provided with your fan to outline the opening on the wall or ceiling. Double-check measurements to avoid cutting too large or too small.
Use a drywall saw or a jigsaw to cut along the marked lines carefully. Take your time—clean edges make mounting easier and prevent gaps that reduce efficiency. Have a helper hold the template steady if you find it tricky to cut alone.
Mounting The Fan
Once the opening is ready, fit the fan housing into the hole. The housing should sit flush against the surface without any wobble. Secure it using screws through the mounting brackets, ensuring it is firmly attached.
If your fan has vibration dampers or insulation pads, add them now. These reduce noise and improve comfort. Don’t rush this step; a loose fan can cause rattling or fall out over time.
Connecting The Ductwork
Attach the ductwork to the fan’s exhaust port to channel air outside. Use metal or flexible ducting as specified in your fan’s instructions. Secure the connection with duct tape or clamps to prevent leaks.
Make sure the duct runs in as straight a line as possible. Sharp bends reduce airflow efficiency and can cause moisture buildup. Ask yourself: Is the duct path the shortest and most direct route to the outside? If not, consider repositioning it.
Wiring The Fan
Wiring the fan involves connecting the wires of the ventilation fan to the power supply. Ensure you switch off the electricity before beginning. Follow the manufacturer’s instructions carefully for a safe and efficient installation process.
Wiring the fan is a crucial step in installing a ventilation fan. It ensures that the fan operates safely and efficiently. This process can seem daunting, but with a clear understanding and attention to detail, you can complete it successfully.Understanding Electrical Connections
Before you begin connecting wires, it’s essential to understand the basics of electrical connections. Most ventilation fans require a standard 120-volt connection. You’ll typically deal with three wires: a black or red hot wire, a white neutral wire, and a green or bare ground wire. Pay attention to the wiring diagram provided with your fan. It will help you identify which wire connects to which terminal. Do you have a multimeter? It’s a handy tool to verify that your power source is off before you start.Connecting Wires Safely
Safety should be your top priority. Always turn off the power at the circuit breaker before handling any electrical components. Use a voltage tester to double-check that the power is off. When connecting the wires, make sure they are securely fastened. Strip about half an inch of insulation from each wire and twist the exposed ends together. Secure them with wire nuts, and gently tug to ensure they are tight. Have you ever tried using electrical tape? Wrapping it around the wire nuts can add an extra layer of safety, preventing them from loosening over time.Testing The Wiring
Once your wires are securely connected, it’s time to test the setup. Turn the power back on at the circuit breaker and switch on the fan. Does it start smoothly without any noise? Check if the fan operates at different speeds if it has that feature. Is it venting air efficiently? If the fan doesn’t start or operates erratically, it might indicate a wiring issue, requiring a recheck. A small error can lead to bigger problems, so never skip this testing phase. It ensures the longevity and safety of your ventilation fan.
Credit: www.youtube.com
Finishing Touches
Finishing touches are what make your ventilation fan installation not just functional but also neat and efficient. These final steps ensure your fan works well and looks good while saving energy and preventing drafts. Paying attention to these details can make a noticeable difference in how your fan performs over time.
Sealing And Insulating
After mounting the fan, sealing the gaps around the unit is crucial. Use a high-quality caulk or foam sealant to fill any spaces between the fan housing and the ceiling or wall. This step prevents air leaks that can reduce the fan’s efficiency and increase your energy bills.
Insulating around the fan is equally important, especially if it vents to the outside. Adding insulation around the fan housing helps maintain your home’s temperature and stops moisture from entering. Have you checked if your insulation is evenly placed? Uneven insulation can cause cold spots or condensation issues.
Attaching The Cover
The cover is not just a cosmetic feature—it protects the fan blades and keeps dust and debris out. Choose a cover that fits securely and complements the room’s decor. Snap or screw the cover into place carefully to avoid damaging the fan or the mounting surface.
If your cover has a filter, make sure it’s clean and properly installed. A dirty filter can reduce airflow and strain the motor. How often do you think about cleaning or replacing your fan’s filter?
Final Function Test
Testing the fan before finishing up ensures everything runs smoothly. Turn the fan on and listen for unusual noises like rattling or grinding, which could indicate loose parts or improper installation. Check if the fan is effectively pulling air and that the switch operates correctly.
Try running the fan for a few minutes to confirm it doesn’t overheat or shut off unexpectedly. If anything feels off, address it immediately to avoid bigger problems later. How confident are you that your fan is working at its best right now?
Maintaining Your Ventilation Fan
Maintaining your ventilation fan keeps it running smoothly and extends its life. Regular care prevents dust buildup and mechanical issues. Simple checks can save time and money on repairs.
Regular Cleaning
Dust and dirt reduce fan efficiency. Clean the fan blades and grille often. Use a soft brush or cloth for gentle cleaning. Unplug the fan before cleaning. Avoid water on electrical parts. Clean vents to keep air flowing well.
Troubleshooting Common Issues
Fans may make noise or stop working. Check for loose screws or parts. Inspect the power source and switches. Listen for grinding or rattling sounds. Clean or replace clogged filters. Tighten any loose components. Test the fan after each fix.
When To Replace
Fans wear out over time. Replace if it stops working completely. Frequent repairs signal a failing fan. Excessive noise or wobbling means damage. Choose a new fan matching your room size. Proper replacement improves air quality and comfort.
Frequently Asked Questions
What Tools Are Needed To Install A Ventilation Fan?
You need a drill, screwdriver, wire stripper, measuring tape, and ladder. Safety gear like gloves and goggles is also recommended for installation.
How Do I Choose The Right Ventilation Fan Size?
Select a fan size based on the room’s square footage. Check the fan’s airflow capacity, measured in CFM, to match room size.
Can I Install A Ventilation Fan Myself?
Yes, if you have basic electrical and DIY skills. Follow the manufacturer’s instructions and local electrical codes carefully during installation.
Where Should I Place A Ventilation Fan In A Room?
Install the fan near moisture sources like showers or cooking areas. Proper placement ensures effective air circulation and moisture removal.
Conclusion
Installing a ventilation fan can improve air quality in any room. Proper steps make the process easier and safer. Always check the electrical connections before starting work. Use the right tools for a smooth installation. Ventilation fans help reduce moisture and odors effectively.
A well-installed fan keeps your space fresh and comfortable. Follow these tips to complete the job with confidence. Enjoy better airflow and a healthier home environment today.


