

Are you looking to add a personal touch to your home decor? Making your own decorative pillow cover with a zipper is easier than you think—and it gives you full control over the style and fabric.
Imagine having a pillow cover that fits perfectly, looks unique, and is easy to remove for washing. This simple project will save you money and let your creativity shine. Keep reading, and you’ll learn step-by-step how to create a beautiful, functional pillow cover that you’ll be proud to display.
Materials Needed
Gathering the right materials is the first step to creating a beautiful decorative pillow cover with a zipper. Having everything on hand not only makes the sewing process smoother but also ensures your project turns out exactly how you imagine. Let’s look at the essentials you’ll need before you begin.
Fabric
Choose a durable fabric that suits your décor style and feels comfortable. Cotton, linen, or canvas work well for pillow covers. Think about the fabric’s color and pattern—do you want something bold or subtle?
Zipper
Select a zipper that matches the length of your pillow’s side. A nylon zipper is flexible and easy to sew, while a metal zipper adds a bit of style. Have you ever struggled with zippers that are too short or too stiff? Picking the right one saves time and frustration.
Thread
Use a strong, matching thread to ensure your seams hold up over time. Polyester thread is a great choice for durability. Don’t overlook this—using the wrong thread can cause your seams to unravel quickly.
Sewing Tools
- Sharp fabric scissors for clean cuts
- Sewing machine or needle for hand sewing
- Pins or clips to hold fabric pieces together
- Measuring tape for precise sizing
- Seam ripper for fixing mistakes
Having these tools ready makes your workflow efficient and less stressful.
Optional Extras
You might want to add a sewing gauge or tailor’s chalk for marking fabric. These little helpers can make your work more accurate. Have you tried marking your fabric before? It can save you from uneven seams and misaligned zippers.

Credit: sewnikki.com
Choosing Fabric And Zipper
Choosing the right fabric and zipper is key to making a decorative pillow cover that looks great and lasts long. The fabric sets the tone and feel of your pillow, while the zipper ensures easy removal and cleaning. Paying attention to these details can make your DIY project much more satisfying and durable.
Picking The Perfect Fabric
Think about where your pillow will live. Soft cotton or linen works well for cozy living rooms, while durable canvas or denim suits outdoor use. Consider texture too—smooth fabrics show off prints clearly, but textured ones like velvet add a touch of luxury.
Don’t forget to check the fabric’s weight. A heavier fabric can support the zipper better and hold shape, but lighter fabrics offer more flexibility and drape. Have you ever chosen a fabric that was too thin and struggled to sew the zipper in smoothly?
- Natural fibers like cotton breathe well and are easy to sew.
- Synthetic fabrics can be more durable but sometimes tricky to handle.
- Pre-washed fabric avoids shrinkage after your pillow cover is finished.
Selecting The Right Zipper
Choosing a zipper that matches your fabric and pillow style is crucial. A nylon coil zipper is soft and flexible, ideal for lighter fabrics, while metal zippers add a vintage or industrial vibe to thicker materials. Think about zipper length too—make sure it’s long enough for easy pillow insertion but not so long it looks awkward.
Color matters as much as size. You can pick a zipper that blends seamlessly with your fabric or one that stands out as a design feature. Have you tried using a contrasting zipper to add a pop of color? It might surprise you how much it enhances the overall look.
- Invisible zippers create a clean, hidden closure.
- Separating zippers are great if you want a pillow cover that opens fully.
- Check zipper quality—cheap zippers can snag or break quickly.
Measuring And Cutting Fabric
Carefully measure fabric to fit your pillow size plus seam allowances. Use sharp scissors to cut clean, straight edges for a neat finish. Accurate cutting ensures your zipper fits perfectly and the pillow cover looks professional.
Creating a decorative pillow cover with a zipper requires precision. Measuring and cutting the fabric are crucial steps. Accurate measurements ensure a snug fit. Clean cuts give a professional finish. Let’s explore these steps for perfect results.Gather Your Materials
Begin by gathering all necessary materials. You will need fabric, scissors, and a measuring tape. A fabric marker or chalk is helpful for marking. Ensure your fabric is clean and pressed. This makes cutting easier and more accurate.Determine Pillow Dimensions
Measure the pillow insert. Use a measuring tape for accuracy. Record the height and width. Add an inch to each side for seam allowance. This ensures the cover fits well.Mark Your Fabric
Lay the fabric flat on a clean surface. Use a fabric marker to outline the measurements. Double-check measurements before cutting. This prevents mistakes and fabric waste.Cut The Fabric
Use sharp fabric scissors for clean edges. Cut along the marked lines with care. Steady hands help maintain straight lines. Precise cuts enhance the final look.Prepare For Sewing
With fabric pieces cut, prepare for sewing. Align pieces with the right sides facing each other. Pin them in place to prevent shifting. Your fabric is now ready for the next step.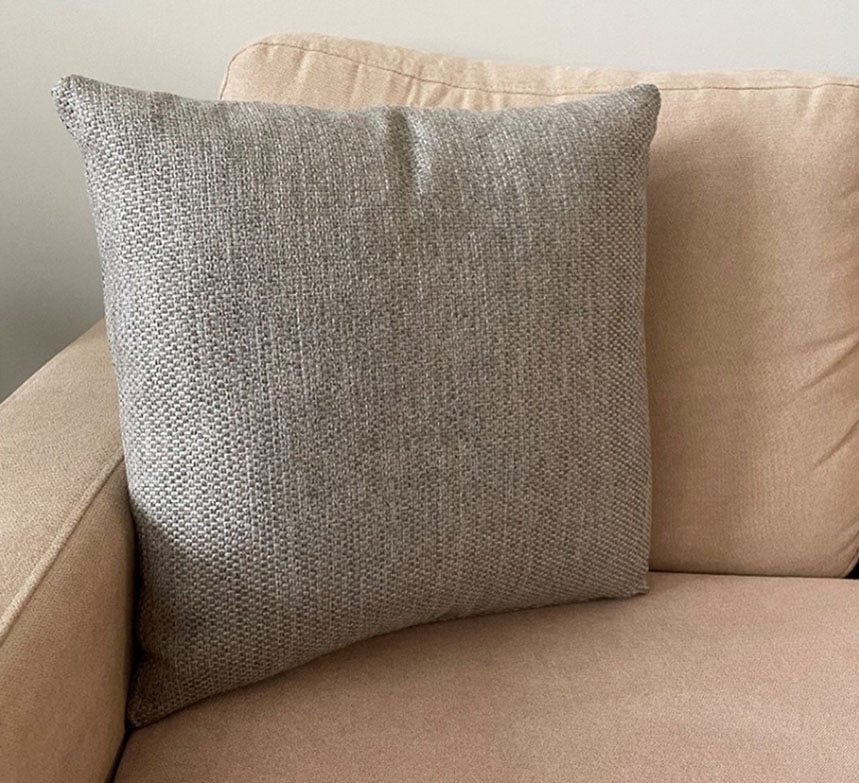
Credit: www.sunbrella.com
Preparing The Zipper
Preparing the zipper is a crucial step to ensure your decorative pillow cover looks neat and functions smoothly. Taking the time to get the zipper ready can save you frustration later on, especially if you’re new to sewing. Let’s focus on simple actions that make a big difference in your sewing experience.
Choosing The Right Zipper Length
Select a zipper that fits the size of your pillow snugly. Too long or too short can make the cover look awkward or be hard to use. Measure your pillow’s opening carefully and pick a zipper just a little shorter than that measurement for a clean finish.
Removing The Zipper Pull
Sometimes, it’s easier to sew the zipper in place without the pull getting in the way. Use pliers to gently remove the zipper pull before attaching the zipper to the fabric. This small step helps you sew closer to the zipper teeth and avoid bumps.
Stabilizing The Zipper Tape
Adding a strip of lightweight fusible interfacing to the zipper tape prevents it from stretching while you sew. This makes your sewing more precise and the zipper stronger. You’ll notice your stitches stay even, and the zipper will glide smoothly once finished.
Marking The Stitching Line
Use a fabric marker or chalk to draw where you’ll sew the zipper onto the fabric. Clear markings help you sew straight and avoid shifting the zipper out of place. This small preparation step makes your pillow cover look professional and tidy.
Sewing The Zipper Onto Fabric
Sewing a zipper onto fabric is a key step in making a decorative pillow cover. It gives your pillow a clean, professional look. The zipper also makes it easy to remove and wash the cover.
Take your time with this part. Precise sewing keeps the zipper smooth and durable. The zipper should lie flat and match the fabric edges.
Preparing The Fabric And Zipper
Start by ironing the fabric pieces to remove wrinkles. This helps with accurate sewing. Place the zipper face down along the edge of the fabric. Align the zipper teeth with the fabric edge. Pin the zipper in place to hold it steady.
Using The Right Sewing Foot
Attach a zipper foot to your sewing machine. This foot allows you to sew close to the zipper teeth. It guides the fabric evenly on both sides. Using the zipper foot prevents the needle from hitting the zipper.
Sewing The Zipper In Place
Set your machine to a straight stitch. Sew slowly along the pinned edge, keeping the stitch close to the zipper teeth. Remove pins as you sew to avoid damage. Backstitch at the start and end to secure the thread.
Press the sewn zipper gently with an iron. This makes the fabric lie flat. Check that the zipper opens and closes smoothly. Trim any loose threads for a neat finish.
Assembling The Pillow Cover
Assembling the pillow cover is where your project takes shape. This part involves putting all pieces together to create a neat, functional cover. Paying close attention to details ensures a smooth zipper and clean edges.
Follow these steps to assemble your pillow cover with precision and ease.
Preparing The Fabric Pieces
Start by laying out your fabric pieces with right sides facing each other. Align the edges carefully. Pin the zipper piece between the two fabric pieces where the opening will be.
Make sure the zipper is centered and the pull tab is facing the right direction.
Sewing The Zipper To The Fabric
Use a zipper foot on your sewing machine for close stitching. Sew one side of the zipper tape to the fabric edge smoothly. Repeat the same on the opposite side of the zipper.
Check that the zipper opens and closes without snagging fabric.
Joining The Remaining Seams
With the zipper closed, pin the rest of the fabric edges together. Sew along the sides and bottom edges, leaving the zipper side intact. Use a straight stitch and keep seams even.
Trim any excess fabric from the seams to reduce bulk.
Turning The Cover Right Side Out
Pull the fabric through the zipper opening carefully. Push out corners with a blunt tool for sharp edges. Smooth the fabric to remove wrinkles and creases.
Insert your pillow form through the zipper opening once the cover is ready.
Finishing Touches
Finishing touches bring your decorative pillow cover to life. They make your work look clean and professional. Small details create a big impact on the final look.
Trimming Excess Threads
Cut all loose threads close to the fabric. This step prevents unraveling and keeps the pillow cover neat. Use sharp scissors for a clean cut.
Pressing The Seams
Iron the seams flat with a warm iron. Press gently to avoid damaging the fabric. Flat seams give your pillow cover a polished look.
Checking The Zipper Function
Slide the zipper up and down several times. Make sure it moves smoothly without catching fabric. A working zipper makes your pillow easy to use.
Adding Decorative Elements
Consider sewing on buttons, tassels, or trim for extra flair. Choose decorations that match your pillow’s style. Keep embellishments secure to avoid wear and tear.
Final Inspection
Look over your pillow cover carefully. Check for uneven stitches or missed spots. Fix any issues before inserting the pillow form.

Credit: sewnikki.com
Tips For Customizing Designs
Customizing designs for a decorative pillow cover with a zipper adds personality and style. Simple tweaks can make your pillow stand out. Experiment with colors, patterns, and textures. Small changes often create big impacts.
Consider fabric choice carefully. The right fabric affects look and feel. Mix smooth and rough textures for interest. Use bold colors to brighten a room. Soft shades create calm and comfort.
Choosing The Right Fabric Pattern
Select patterns that match your room’s theme. Stripes and polka dots bring a playful touch. Floral or geometric designs offer a classic look. Scale patterns to fit the pillow size. Large prints work well on bigger pillows.
Adding Embellishments
Embellishments make your pillow unique. Try sewing on buttons or beads along the edges. Use fabric paint to create custom shapes. Add lace or ribbons for a delicate finish. Keep embellishments light to avoid bulkiness.
Personalizing With Monograms Or Stencils
Monograms add a personal touch. Use iron-on letters or embroidery for neat results. Stencils help paint clear designs. Choose fonts that match your style. Position names or initials where they are visible.
Playing With Color Combinations
Combine colors to create harmony. Use contrasting colors for bold effects. Match colors with room accents like curtains or rugs. Stick to two or three colors to avoid clutter. Test small fabric pieces before final sewing.
Using Different Zipper Styles
Zippers come in many styles and colors. Invisible zippers create a clean look. Metal zippers add an industrial feel. Choose zipper color to blend or contrast with fabric. Test zipper length to fit pillow size perfectly.
Frequently Asked Questions
How Do I Sew A Zipper Into A Pillow Cover?
To sew a zipper, align it with fabric edges and pin it. Use a zipper foot on your sewing machine for accuracy. Stitch slowly, ensuring the zipper moves freely without catching fabric.
What Fabric Is Best For Decorative Pillow Covers?
Cotton, linen, and velvet are ideal fabrics for decorative pillow covers. They are durable, easy to sew, and provide a stylish finish. Choose fabric based on your decor and comfort preferences.
Can I Use A Hidden Zipper For Pillow Covers?
Yes, a hidden zipper creates a clean, seamless look. It’s sewn into the pillow cover’s seam, making it nearly invisible. This option is perfect for a sleek, professional finish.
How Do I Care For Pillow Covers With Zippers?
Remove the pillow insert before washing. Use gentle cycles and mild detergent to protect fabric and zipper. Close the zipper to avoid damage during washing and drying.
Conclusion
Making a decorative pillow cover with a zipper is simple and fun. You can choose any fabric you like. Sewing the zipper adds a neat, professional look. This project saves money and lets you personalize your home. Try different colors and patterns to match your style.
With practice, your sewing skills will improve quickly. Enjoy creating cozy, stylish pillow covers for any room. Give it a try today!


