
Imagine turning your room into a magical space with a beautiful flower chandelier that you made yourself. It’s easier than you think, and the result will amaze everyone who sees it.
Whether you want to brighten up your home, add a special touch to a party, or create a unique gift, this guide will show you step-by-step how to make a flower chandelier that fits your style perfectly. Ready to bring a fresh burst of color and charm into your life?
Let’s get started!
Credit: www.addicted2decorating.com
Choosing Flowers
Choosing the right flowers sets the tone for your flower chandelier. The flowers you select will influence the style, mood, and longevity of your creation. Think carefully about what fits your space, event, and personal taste.
Fresh Vs Artificial
Fresh flowers offer natural beauty and fragrance that can’t be matched. However, they require careful handling and have a limited lifespan. If you want something long-lasting or reusable, artificial flowers are a great choice.
Artificial options today look incredibly realistic and give you flexibility with colors and shapes. Have you considered how much time you want to spend maintaining your chandelier? Your answer can help decide between fresh and artificial.
Color Combinations
Colors can make or break your chandelier’s impact. You can choose a single color palette for a sleek look or mix contrasting colors for a bold statement. Think about the room’s existing colors and lighting when picking your hues.
- Soft pastels create a romantic and airy feel.
- Bright, vibrant colors bring energy and excitement.
- Neutral tones like whites and greens offer timeless elegance.
Try laying out your chosen flowers side-by-side before assembling. Do the colors feel balanced or overwhelming? This small step can save you from a color clash.
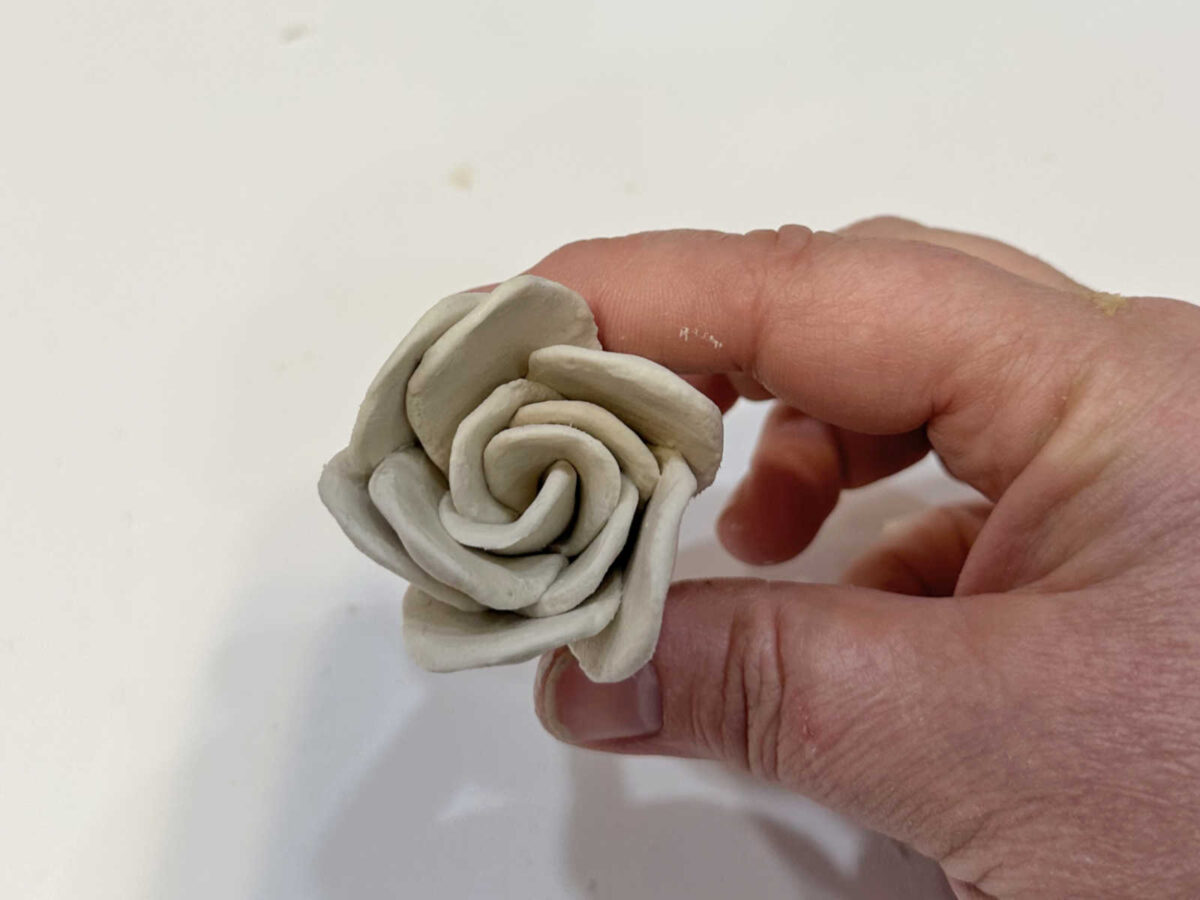
Flower Types
Not all flowers work well hanging upside down or in clusters. Choose sturdy blooms with strong stems like roses, orchids, or dahlias. These hold their shape and look beautiful from every angle.
Mix in smaller filler flowers like baby’s breath or eucalyptus to add texture and depth. Don’t forget to consider the size of each flower relative to your chandelier’s overall design.
Ask yourself: Are the flowers easy to source and affordable? Picking common varieties can keep your project budget-friendly and stress-free.
Gathering Materials
Gathering the right materials is the first key step for making a flower chandelier. This step sets the foundation for a beautiful and safe design. Preparing everything before starting saves time and avoids interruptions. Focus on three main areas: tools, lighting parts, and the support structure. Each plays an important role in the chandelier’s look and function.
Basic Tools Needed
- Wire cutters for trimming floral stems and wires
- Hot glue gun to attach flowers securely
- Scissors to trim ribbons or fabric
- Measuring tape to size the chandelier space
- Pliers for bending and securing wires
- Safety gloves to protect hands during assembly
Lighting Components
- LED string lights or fairy lights for gentle illumination
- Battery pack or plug-in power source
- Light sockets if using bulbs
- Extension cords for easy reach
- Light dimmer switch for adjusting brightness
Support Structure
- Metal or wooden hoop as the chandelier frame
- Floral wire or fishing line to attach flowers
- Chain or sturdy rope for hanging
- Hook or ceiling mount for secure installation
- Floral foam blocks for fresh flower arrangements
Preparing The Base
Preparing the base is a crucial part of making your flower chandelier sturdy and beautiful. Without a solid foundation, your chandelier might sag or fall apart. Paying close attention here ensures your flowers will hang perfectly and your creation will last.
Selecting A Frame
Choose a frame that fits the size and style you want for your chandelier. Wire hoops, embroidery hoops, or even old lampshades work well. Think about the weight your frame needs to hold—heavy flower bunches require stronger frames.
I once tried using a thin wire frame for a large arrangement, and it bent under the weight. That taught me to always pick a frame with enough strength from the start. You want a base that can handle the flowers without warping.
Securing The Frame
Make sure your frame is tightly secured before adding flowers. Use floral tape or strong wire to reinforce any weak spots. Wrapping the frame with green floral tape also helps the flowers stick better and hides unsightly metal parts.
If you’re working with multiple hoops, connect them firmly with wire or zip ties. Loose connections cause wobbling and can break your arrangement. Ask yourself: is the frame steady when I shake it gently?
Adding Support Wires
Support wires distribute the weight and keep the chandelier balanced. Attach several wires evenly around the frame, extending upwards to a central point where you’ll hang the chandelier. This prevents the frame from tilting or twisting once loaded with flowers.
Use galvanized or coated wire to avoid rusting over time. Twist wires tightly but not so tight that they cut into the frame. Once your support wires are in place, test the hanging point by lifting the frame to feel its balance.
Credit: www.addicted2decorating.com
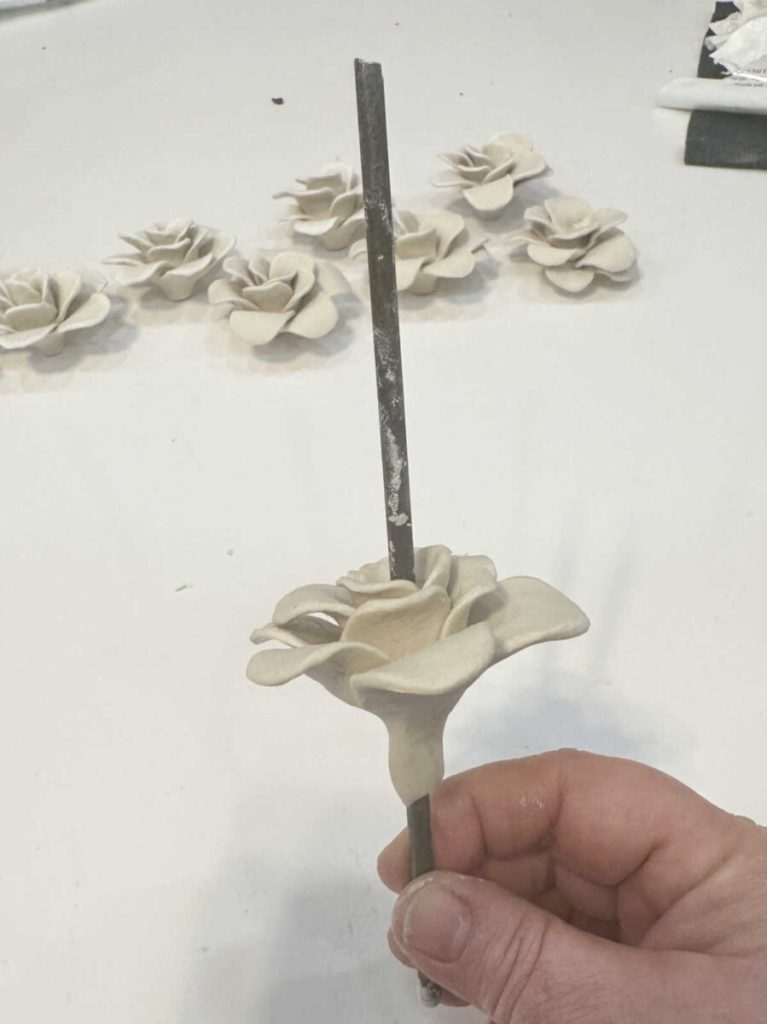
Arranging Flowers
Arranging flowers for a chandelier needs care and patience. Each flower must fit perfectly to create a beautiful look. The right techniques help keep flowers secure and fresh. Color and size balance adds charm and style. This section guides you through key steps for stunning flower arrangements.
Wiring And Taping Techniques
Use thin floral wire to attach flowers to the frame. Wrap wire around the stem tightly but gently. Cover wire with floral tape for a neat look. Tape also protects the stems from damage. Secure each flower firmly to avoid slipping. Repeat the process for all flowers, ensuring stability.
Layering Flowers
Start with larger flowers as the base layer. Place smaller flowers on top to add depth. Mix open blooms and buds for texture. Overlap petals slightly for a natural flow. Keep layers even to avoid gaps or clumps. This method creates fullness and volume in the chandelier.
Balancing Colors And Sizes
Distribute colors evenly around the chandelier frame. Avoid grouping the same color in one spot. Mix bright and soft hues for visual interest. Alternate large and small flowers for balance. Check from all sides to maintain symmetry. Balanced arrangements look harmonious and pleasing to the eye.
Integrating Lights
Integrating lights into a flower chandelier brings a magical glow to your creation. Lights highlight the colors and shapes of the flowers. They create a warm and inviting atmosphere. Choosing the right lights and placing them carefully is key. Safety and neatness are also important to keep your chandelier beautiful and functional.
Choosing Light Types
LED string lights work best for flower chandeliers. They stay cool, so flowers don’t get damaged. Battery-powered lights offer flexibility without visible wires. Fairy lights provide a delicate sparkle, perfect for smaller chandeliers. Choose warm white or soft yellow tones for a cozy feel. Avoid lights that are too bright or harsh.
Attaching Lights Safely
Wrap lights gently around the frame or flowers. Use clear floral tape or thin wire to secure them. Avoid pinching wires or bending bulbs. Keep all electrical connections outside the flower area. Check that batteries or plugs do not strain the structure. Test lights before final placement to ensure they work well.
Hiding Wires
Conceal wires inside flower stems or greenery. Use green floral tape to blend wires with leaves. Tuck wires along the frame edges or behind flowers. Avoid bulky wire bundles that spoil the look. Hide battery packs inside decorative elements or behind leaves. Keep wires tidy for a clean, elegant finish.

Credit: www.youtube.com
Final Assembly
The final assembly of your flower chandelier is an exciting step. It’s where your creation truly comes to life. Careful attention ensures a stunning and stable piece. You’ll want each flower and element to be perfectly placed.
Securing All Elements
Ensure every flower is securely attached. Check each wire and string. Reinforce with floral tape if needed. This prevents pieces from falling. A secure chandelier lasts longer.
Adjusting Shape And Balance
Look at the overall shape. Adjust the flowers for a balanced look. Move any heavy flowers to even out weight. The right balance keeps the chandelier hanging straight.
Testing Stability
Gently shake the chandelier. Check for any loose parts. Secure anything that moves. This ensures your chandelier is stable. A stable chandelier is safe and beautiful.
Hanging The Chandelier
Hanging the flower chandelier gives life to your creation. It sets the mood and brings beauty to any room. Proper hanging ensures your chandelier stays secure and looks stunning. Follow these steps for a safe and elegant display.
Selecting The Location
Choose a spot where the chandelier will be the center of attention. Consider places like dining rooms, living rooms, or entryways. Ensure the area has enough space for the chandelier to hang freely without hitting walls or furniture.
Check the ceiling height. The chandelier should hang at eye level or slightly above. Avoid areas with strong drafts or direct sunlight, which can damage the flowers.
Installing Hooks
Use strong hooks designed to hold the chandelier’s weight. Find a ceiling joist to anchor the hook securely. Use a stud finder for accuracy.
- Mark the spot on the ceiling.
- Drill a pilot hole for easier installation.
- Screw in the hook tightly.
Double-check the hook’s strength before hanging the chandelier.
Ensuring Safety
Safety comes first. Make sure the chandelier is balanced and does not sway. Use additional supports if the chandelier is heavy.
Inspect the hook and ceiling regularly for wear or damage. Avoid hanging the chandelier near heat sources or places where children can reach it.
Secure electrical components, if any, following safety rules. This prevents fire hazards and accidents.
Maintenance Tips
Keeping your flower chandelier looking stunning over time requires some care and attention. Regular maintenance not only preserves its beauty but also ensures safety and longevity. Here are practical tips to help you maintain your floral centerpiece effectively.
Cleaning Artificial Flowers
Dust and dirt can dull the vibrant colors of artificial flowers quickly. Use a soft brush or a hairdryer on a cool setting to gently remove dust without damaging the petals.
For deeper cleaning, lightly wipe the flowers with a damp cloth mixed with mild soap. Avoid soaking them, as excess moisture can loosen glue or damage the frame.
Replacing Lights
Your chandelier’s lighting adds charm and ambiance, but bulbs don’t last forever. Check your lights regularly for flickering or dimming and replace them promptly to maintain a warm glow.
Choose LED bulbs for energy efficiency and less heat, which helps protect the flowers. Always turn off the power before handling bulbs to keep yourself safe.
Refreshing Fresh Flowers
If your chandelier includes fresh flowers, their lifespan is limited but can be extended with simple care. Trim stems every few days and replace water in any attached vials to keep blooms hydrated and vibrant.
Consider rotating fresh flowers with artificial ones to balance freshness and durability. Have you tried mixing both to get the best of both worlds?
Frequently Asked Questions
What Materials Are Needed To Make A Flower Chandelier?
You need a metal hoop, floral wire, fresh or artificial flowers, scissors, and fishing line. These essentials help create a sturdy and beautiful chandelier that holds flowers securely.
How Long Does It Take To Make A Flower Chandelier?
Making a flower chandelier usually takes 2 to 4 hours. The time depends on flower type, arrangement complexity, and your crafting experience.
Can I Use Artificial Flowers For A Chandelier?
Yes, artificial flowers work well and last longer. They require less maintenance and are perfect for long-term decoration.
How Do I Hang A Flower Chandelier Safely?
Use strong hooks and secure fishing line or wire. Ensure the ceiling can support the chandelier’s weight for safe hanging.
Conclusion
Creating a flower chandelier adds charm to any space. It brings nature’s beauty indoors with soft light. You only need a few materials and patience. Each step builds your unique, lovely decoration. Enjoy the process and let your style shine.
This project suits beginners and flower lovers alike. Try different flowers and colors for fresh looks. A flower chandelier brightens rooms and lifts moods. Give it a try and see the magic happen. Simple, fun, and beautiful—your space will thank you.


