
Looking to add a cozy and stylish touch to your living space? Making your own pouf ottoman with feet is easier than you think—and it gives you a unique piece that fits perfectly with your style.
Imagine having a comfy spot to rest your feet, extra seating for guests, or even a chic accent that ties your room together. In this guide, you’ll discover simple steps to create a pouf ottoman that’s both functional and fashionable.
Ready to transform your space with a project you’ll be proud of? Let’s get started!

Credit: infrakraft.com
Choosing Materials
Choosing the right materials makes your pouf ottoman both stylish and durable. Each part plays a role in comfort, look, and function. Careful selection ensures your pouf fits your space and needs perfectly.
Selecting The Fabric
Pick fabric that feels good and lasts long. Cotton and linen are soft and breathable. Velvet adds luxury and warmth. Synthetic fabrics resist stains and wear well. Consider the room’s style and how much use the pouf will get. Dark colors hide dirt better. Patterns can add personality to plain rooms.
Picking The Filling
Filling affects comfort and shape. Foam offers firm support and keeps shape well. Polyester fiberfill is soft and fluffy but may flatten over time. Beans or beads create a flexible, cushy feel. Choose filling based on how you want to sit or rest on your pouf. Make sure the filling is safe and non-toxic.
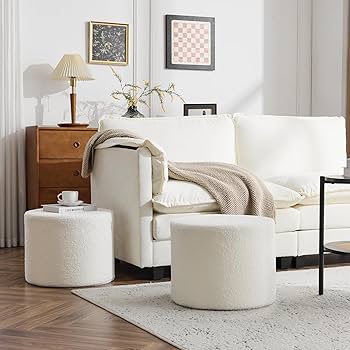
Choosing The Feet
Feet lift the pouf and add style. Wood feet give a classic, warm look. Metal feet offer modern, sleek designs. Plastic feet are budget-friendly and lightweight. Check the height to match your furniture. Make sure feet are strong enough to support weight. Feet should also protect your floor from scratches.
Tools Needed
Gathering the right tools sets a strong foundation for making a pouf ottoman with feet. Having everything ready not only saves time but also makes the process smoother and more enjoyable. Let’s break down what you’ll need to bring your pouf ottoman to life.
Basic Sewing Supplies
You’ll need essential sewing tools to stitch the fabric pieces together. A good quality sewing machine is a big help, but you can also sew by hand if necessary. Don’t forget strong upholstery thread, sharp needles, and pins to hold fabric in place.
Other handy supplies include fabric scissors, a seam ripper for mistakes, and a measuring tape to check your seams. If you’ve ever struggled with uneven stitches, investing in a sewing gauge can make your work neater and more precise.
Cutting And Measuring Tools
Accurate cutting and measuring are key for a perfect pouf shape. A rotary cutter and a self-healing cutting mat speed up fabric cutting and protect your surfaces. You’ll also want a clear ruler or a square ruler to keep your cuts straight.
Marking tools like tailor’s chalk or disappearing ink pens help outline where to cut or sew. Have you ever realized too late that your fabric pieces didn’t match up? Double-checking measurements before cutting avoids that frustration.
Assembly Equipment
Once sewing is done, you’ll assemble the ottoman with feet. Grab a screwdriver or a drill with the right bits to attach the feet securely. Wood glue can add extra strength if the feet are wooden, ensuring they don’t wobble over time.
Depending on your pouf design, you might also need a staple gun to fasten fabric or batting to the base. Having clamps on hand can help hold pieces steady as glue dries or screws go in. Think about how you want your ottoman to stand—solid assembly means it will last through daily use.
Preparing The Pattern
Begin by selecting fabric and measuring dimensions for the pouf’s main sections. Create a clear, simple pattern to guide cutting and sewing accurately. Ensure the pattern includes space for seams and foot placement.
Preparing the pattern for your pouf ottoman is a crucial step. It sets the foundation for your project. A well-prepared pattern ensures your pouf has the right shape and size. Follow these steps to create an accurate pattern.Measuring Dimensions
Start by measuring the desired size of your pouf. Use a tape measure to get the height, width, and depth. Record each measurement carefully. Remember, precision matters here. Check twice to avoid any mistakes. This ensures a perfect fit for your space.Creating A Template
Draw the shape of your pouf on paper. Use your recorded measurements to guide you. Cut out the paper shape. This is your template. It helps visualize the final product. Adjust as needed for symmetry and proportion.Cutting Fabric Pieces
Lay your template on the fabric. Trace around it using chalk or a fabric marker. Cut the fabric carefully. Use sharp scissors for clean edges. Repeat for all sides and sections. Each piece should match the template exactly. This accuracy is key to a neat finish.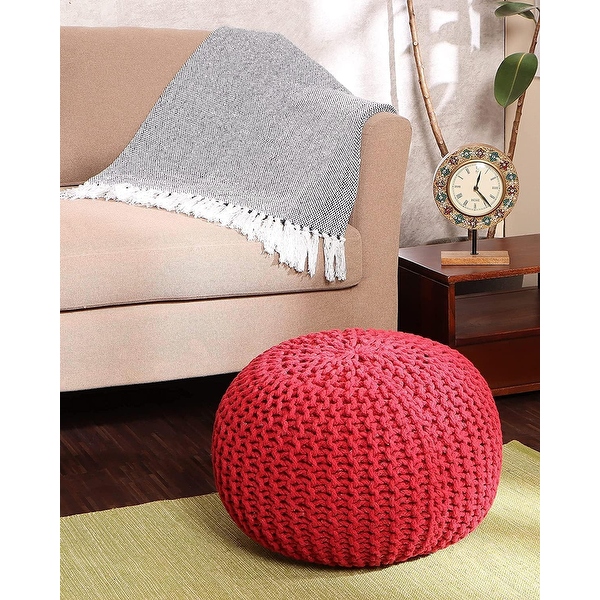
Credit: kmccberwick.ca
Sewing The Pouf Cover
Sewing the pouf cover is where your handmade project starts to take shape. This part requires precision, but it’s also your chance to add personality through fabric choice and stitching style. Let’s break down the sewing process to make sure your pouf not only looks great but lasts a long time.
Stitching The Sides
Begin by aligning your fabric pieces with the right sides facing each other. Use pins to hold the edges in place—this keeps everything neat and prevents shifting as you sew.
Sew along the sides with a straight stitch, leaving one side open for stuffing and adding the feet later. Try sewing slowly to keep your lines even; uneven seams can throw off the pouf’s shape and make it harder to assemble.
Adding A Zipper Or Closure
A zipper or closure is essential for easy access when stuffing your pouf or washing the cover. Choose a zipper that matches your fabric’s color to keep it subtle and stylish.
Attach the zipper carefully along the open edge, sewing it in place with small, tight stitches. If you prefer, you can use Velcro or buttons, but zippers offer the cleanest look and easiest functionality.
Finishing The Edges
Raw edges can fray over time, so finishing them is crucial. Use a zigzag stitch or serger along all seam allowances to secure the fabric.
Press the seams flat with an iron for a professional finish. This small step makes your pouf cover look polished and helps the fabric sit smoothly when stuffed.
Stuffing The Pouf
Stuffing the pouf is a key step to make it comfortable and durable. The right stuffing gives shape and support. It also affects the look and feel of your pouf. Choose materials and techniques that suit your style and use. Keep the filling even for a neat finish.
Choosing The Right Filling Technique
There are several ways to fill a pouf. Loose filling allows soft and cushy support. Tightly packed stuffing makes the pouf firm and stable. Some prefer a mix of both for balance. Consider the size and weight of your pouf. This helps decide the best technique for filling.
Filling For Firmness And Comfort
Use materials that offer both comfort and firmness. Polyester fiberfill is soft and easy to shape. Foam pieces give a firmer feel and last longer. Old clothes or fabric scraps work as eco-friendly stuffing. Add layers of batting for extra softness. Test the feel by pressing the pouf as you fill it.
Securing The Stuffing
Secure the filling so it stays in place. Use a strong inner lining to hold the stuffing. Sew the opening tightly after filling. Add buttons or zippers if you want to adjust stuffing later. Check for lumps and smooth the surface. This keeps the pouf looking good and lasting longer.
Attaching The Feet
Attaching the feet to your pouf ottoman adds both style and stability. This step requires careful attention to ensure the feet hold firmly and align properly. Use the right tools and techniques to create a strong base that supports the ottoman well. The following sections explain how to select the best attachment method, position the feet correctly, and secure them firmly.
Selecting The Attachment Method
Choose an attachment method based on your ottoman’s frame and feet type. Common options include screws, bolts, or wood glue combined with screws. Screws work well for wooden frames and provide a tight hold. Bolts are stronger but need pre-drilled holes. Glue alone is not strong enough for supporting weight. Check the feet’s base to see if it has pre-installed hardware or mounting plates.
Positioning The Feet
Place the feet evenly to balance the ottoman. Measure equal distances from each corner to ensure symmetry. Mark the spots with a pencil or tape. Align the feet so they sit flat on the floor. Avoid positioning too close to the edge to prevent splitting the frame. Keep feet centered on each side for better support and a neat look.
Securing Feet Firmly
Drill pilot holes to prevent wood from cracking. Use screws or bolts that fit the holes and the feet’s base. Tighten all fasteners evenly but avoid overtightening to protect the frame. Check for wobbling after attaching each foot. If loose, add washers or use longer screws for a secure fit. Test the ottoman by pressing down gently to confirm stability.
Styling Tips
Styling your pouf ottoman with feet offers a unique chance to express your personality while enhancing your living space. The way you choose colors, patterns, and decorative touches can either make your pouf a subtle complement or a standout piece. Let’s look at some practical styling tips that can help you create a pouf that feels truly yours and fits perfectly into your home.
Choosing Colors And Patterns
Think about the mood you want your room to have. Do you prefer calm and neutral tones, or do you want your pouf to pop with bright colors? Matching your pouf’s color to existing furniture can create harmony, but don’t shy away from contrasting shades to add excitement.
Patterns can add texture and interest. Stripes or geometric prints often work well with modern décor, while floral or paisley patterns bring a cozy, traditional vibe. Have you considered how your pouf might coordinate with your curtains or rugs? Small touches like this tie the room together effortlessly.
Adding Decorative Elements
Decorative buttons, tassels, or piping can transform a simple pouf into a custom masterpiece. These details invite touch and curiosity, making your pouf more than just a seat. Try adding wooden or metal feet that match other accents in your room for a cohesive look.
Do you enjoy a vintage feel or a sleek, contemporary style? Changing the feet of your pouf can make a big difference. For example, tapered wooden legs evoke mid-century modern charm, while shiny chrome feet add a modern edge.
Maintaining Your Pouf
Keeping your pouf looking fresh is easier than you might think. Regularly vacuum fabric surfaces to remove dust and prevent dirt buildup. Spot clean spills immediately with mild soap and water to avoid stains.
Check the feet periodically to ensure they stay sturdy and secure. Tighten screws if needed, and avoid placing your pouf on damp floors to prevent damage. How often do you inspect your furniture for small issues before they become big problems?

Credit: kmccberwick.ca
Frequently Asked Questions
What Materials Do I Need For A Pouf Ottoman With Feet?
You need fabric, foam padding, wooden feet, a sturdy base, thread, and a sewing kit. These materials ensure durability and comfort.
How Do I Attach Feet To A Pouf Ottoman?
Securely screw wooden feet to the ottoman’s base using brackets or mounting plates. Ensure alignment for stability and balance.
Can I Customize The Size Of My Pouf Ottoman?
Yes, adjust the fabric and foam dimensions to fit your desired ottoman size. Customize height by selecting different feet lengths.
How Do I Sew Fabric For A Pouf Ottoman?
Cut fabric pieces precisely, then sew edges with strong stitches. Use a sewing machine for neat, durable seams and easy assembly.
Conclusion
Making a pouf ottoman with feet is a fun, simple project. You can add style and comfort to any room. Choosing the right materials helps your pouf last longer. Follow each step carefully for the best results. This DIY project lets you create something unique and useful.
Enjoy your new pouf, perfect for resting feet or extra seating. Small efforts bring big changes to your home decor. Give it a try and see how easy crafting can be!


