
Are you looking for a creative project that adds a warm, personal touch to your space? Making a simple wooden desk lamp could be just what you need.
Imagine having a lamp that not only lights up your desk but also reflects your style and effort. In this guide, you’ll discover easy steps to build your own wooden lamp, even if you’re new to DIY. By the end, you’ll have a unique piece that brightens your room and gives you a satisfying sense of accomplishment.
Ready to get started? Let’s dive in!

Credit: medium.com
Materials Needed
Gathering the right materials makes building a wooden desk lamp easier. This section covers the essentials for a smooth project.
Choosing quality materials helps create a sturdy and attractive lamp. Pick items that suit your style and skill level.
Wood Types
- Oak: Strong and durable with a fine grain
- Pine: Soft, easy to shape, and budget-friendly
- Maple: Hard and smooth, ideal for a clean finish
- Walnut: Dark color, adds a rich look
Select wood that matches your lamp design and room decor.
Electrical Components
- Light bulb socket: Fits the bulb size and type
- Electrical cord with plug: Ensure it is long enough
- Switch: Simple on/off switch for easy control
- Light bulb: Choose LED for energy efficiency
- Wire connectors: Secure and safe wiring connections
Use safe and certified parts to prevent electrical hazards.
Tools Required
- Saw: Hand saw or electric for cutting wood
- Drill: For making holes and fixing parts
- Screwdriver: To tighten screws
- Sandpaper: Smooth rough edges and surfaces
- Measuring tape: Accurate measurements are key
- Clamps: Hold pieces firmly while working
Having the right tools speeds up the building process and improves results.
Credit: medium.com
Preparing The Wood
Choose smooth, dry wood to ensure a sturdy desk lamp base. Sand all surfaces carefully to remove rough spots and splinters. Proper preparation helps the wood look neat and last longer.
Preparing the wood is a crucial step in crafting your wooden desk lamp. It sets the foundation for a sturdy and visually appealing piece. Proper preparation ensures the wood is ready for assembly and finishing touches.Measuring And Cutting
Start by gathering your tools and materials. Use a tape measure to mark the wood pieces. Precision is key. Measure twice to ensure accuracy. Use a pencil to lightly outline the dimensions. Once marked, cut the wood using a saw. A hand saw or electric saw works well. Ensure your cuts are straight and clean. This prevents gaps and uneven edges.Sanding And Smoothing
After cutting, it’s time to sand the wood. Use medium-grit sandpaper first. This removes rough edges and splinters. Move the sandpaper in circular motions. Once smooth, switch to fine-grit sandpaper. This gives the wood a polished finish. Ensure all surfaces are even and smooth. It helps the lamp look professional and feel pleasant to touch.Assembling The Lamp Base
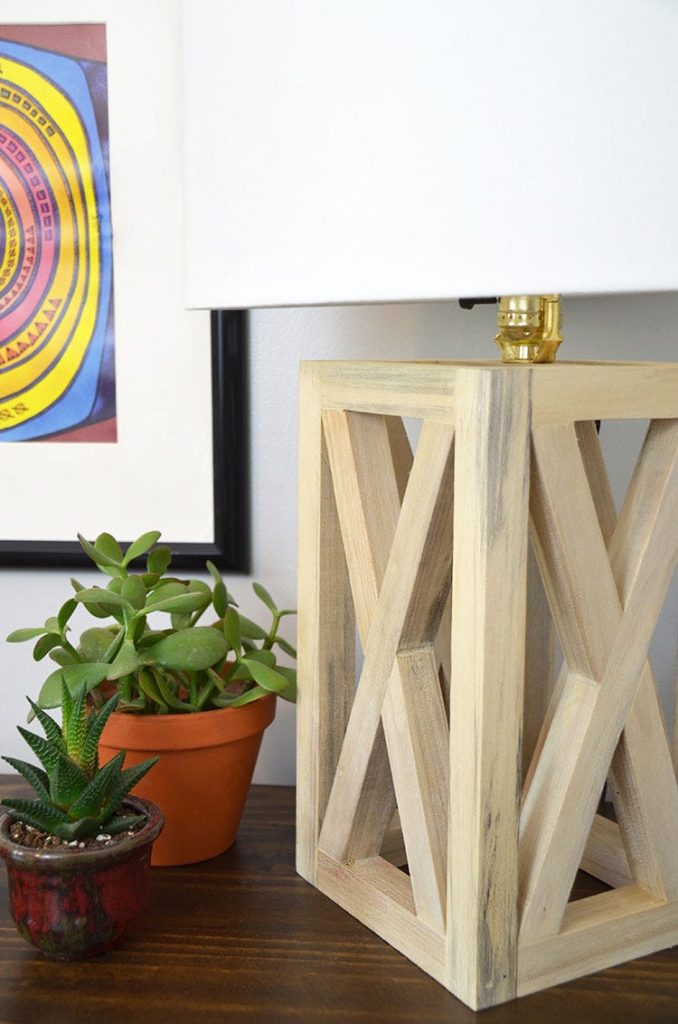
Assembling the lamp base is where your wooden desk lamp starts to take shape. This stage requires precision and patience to ensure stability and a polished look. You’ll handle the wooden pieces carefully, bringing them together to create a solid foundation for your lamp.
Joining The Pieces
Begin by aligning the wooden parts according to your design. Make sure the edges fit snugly without gaps. If you notice any misalignment, gently sand the edges for a better fit.
Use wood glue to bond the pieces together. Apply a thin, even layer to avoid excess squeeze-out. Press the parts firmly and hold them in place with clamps or heavy objects.
Ask yourself: is each joint flush and stable? This step decides how durable your lamp will be. Taking extra time here saves frustration later.
Securing The Base
Once the glue dries, reinforce the base with screws or small nails. Pre-drill holes to prevent the wood from splitting. This added strength is crucial if your lamp will be moved often.
Check for wobbling by placing the base on a flat surface. If it’s uneven, use fine sandpaper to level the bottom. A steady base means your lamp won’t tip over easily.
Think about the weight distribution—does the base feel balanced? A well-secured base not only supports the lamp but also enhances safety and durability.
Wiring The Lamp
Wiring the lamp is a crucial part of building your wooden desk lamp. It connects all electrical parts so the lamp works safely. This section explains how to wire the socket and install the switch properly. Follow these steps carefully to ensure your lamp lights up without any issues.
Connecting The Socket
Start by preparing the lamp socket. Strip about half an inch of insulation from the wires. Identify the live and neutral wires by their colors. Attach the live wire to the brass terminal and the neutral wire to the silver terminal on the socket. Tighten the screws firmly to hold the wires in place. Make sure no wire strands are loose or touching each other. This prevents short circuits and ensures good contact. Once connected, gently push the wires into the socket housing.
Installing The Switch
Choose a switch that matches your lamp’s power rating. Cut the live wire between the power plug and the socket. Strip both ends of this cut wire. Connect one end to one terminal of the switch and the other end to the second terminal. Tighten the screws securely. Test the switch by turning it on and off before final assembly. This step controls the lamp’s power safely. Place the switch in an easy-to-reach spot on the lamp or cord. Secure the switch housing to avoid movement or wire strain.
Final Touches
Final touches bring your wooden desk lamp to life. They enhance both its look and functionality. These last steps are where your creativity and care really shine through.
Adding A Lampshade
Choosing the right lampshade can completely change your lamp’s personality. You want a shade that fits well and complements your desk space. Consider materials like fabric, paper, or even thin wood veneer for a natural look.
Make sure the lampshade size matches your bulb and lamp base. Too big or too small can throw off balance and light distribution. Try holding different shades over the lamp before finalizing your choice.
Think about the kind of light you want. Do you prefer soft, diffused light for a cozy feel? Or bright, direct light for focused work? Your lampshade choice controls how the light interacts with your room.
Applying Finish Or Paint
Applying a finish protects your lamp and highlights the wood’s natural beauty. If you like the wood’s grain, a clear varnish or oil finish works great. It also makes cleaning easier and prevents damage from dust and spills.
Paint can add a splash of color or match your décor perfectly. Use paint designed for wood and apply thin, even coats. Sand lightly between coats for a smooth finish.
Remember, less is more. A few careful strokes create a polished look without hiding your craftsmanship. Have you thought about how your finish choice affects the lamp’s mood and style?

Credit: medium.com
Safety Tips
Safety is the foundation of any DIY project, especially when working with electrical components and tools. Ignoring basic precautions can lead to accidents that are easily avoidable. Taking a few extra moments to follow safety tips can protect you and your workspace.
Use The Right Tools And Equipment
Make sure you have the correct tools before starting your wooden desk lamp project. Using the wrong tool can damage materials or cause injury.
Wear safety goggles and gloves when cutting or sanding wood. This prevents splinters and dust from getting into your eyes or skin.
Check Electrical Components Carefully
Inspect wires, sockets, and bulbs for any signs of damage or wear before installation. Faulty electrical parts increase the risk of short circuits or shocks.
Consider using LED bulbs as they generate less heat, reducing fire hazards in wooden lamps.
Keep Your Workspace Clean And Organized
A cluttered workspace is a breeding ground for accidents. Clear your area of unnecessary objects before you begin.
Place tools in designated spots when not in use to avoid tripping or accidental cuts.
Test The Lamp In A Controlled Environment
Before placing your new lamp on your desk, test it in a safe area away from flammable materials. This allows you to catch any electrical faults early.
Have a fire extinguisher nearby just in case, and never leave the lamp unattended during the first use.
Ask Yourself: Is Every Step Safe?
Are you rushing through the process? Taking shortcuts might save time but can compromise safety. Always pause and ask if what you’re doing is safe.
Have a friend or family member check your work if you’re unsure. A fresh pair of eyes can spot potential hazards you might miss.
Troubleshooting Common Issues
Building a wooden desk lamp is rewarding but may present some challenges. Troubleshooting common issues helps ensure your lamp works well and looks great. This section covers simple fixes for typical problems you might face during assembly or use.
Checking Electrical Connections
Loose wires cause the lamp to flicker or not light up. Carefully inspect all wire connections to confirm they are tight and secure. Use wire nuts or electrical tape to cover exposed wires. Test the switch and plug for damage. Replace any faulty parts to restore power flow.
Fixing Uneven Lamp Base
An uneven base makes the lamp unstable. Place the lamp on a flat surface and observe any wobbling. Sand the bottom of the base gently to level it. Add small felt pads or rubber feet to improve balance and protect your desk from scratches.
Addressing Bulb Compatibility
Using the wrong bulb can cause overheating or poor lighting. Check the lamp socket for the recommended bulb type and wattage. Choose energy-saving LED bulbs for longer life and less heat. Avoid bulbs with higher wattage than specified to prevent damage.
Preventing Wood Cracks And Splits
Wood can crack if exposed to extreme dryness or moisture. Keep the lamp away from direct sunlight and damp areas. Apply a wood finish or sealant to protect the surface. If cracks appear, fill them with wood filler and sand smoothly before refinishing.
Adjusting Lamp Shade Position
A crooked or loose lamp shade affects light direction and appearance. Tighten the shade holder or harp to secure it firmly. Check for bent parts and straighten them carefully. Align the shade so it sits evenly and casts light where needed.
Frequently Asked Questions
What Materials Are Needed For A Wooden Desk Lamp?
You need wood, a lamp kit, a bulb, sandpaper, wood glue, and screws. Choose quality wood for durability and aesthetic appeal. The lamp kit should include a socket, cord, and plug for easy assembly.
How Do I Safely Assemble A Wooden Desk Lamp?
Start by cutting wood pieces accurately and sanding edges smoothly. Follow the lamp kit instructions carefully for wiring. Ensure all electrical connections are secure and insulated. Test the lamp before use to prevent electrical hazards.
Can I Customize The Lamp Design Easily?
Yes, you can customize size, shape, and wood finish. Use different wood stains or paints for unique looks. Adding decorative elements like carvings or engravings enhances personalization. Customization helps match your lamp to your room decor.
How Long Does It Take To Make A Wooden Desk Lamp?
Typically, it takes 2 to 4 hours depending on skill level. Cutting, sanding, assembling, and wiring require careful attention. Beginners may need extra time to ensure safety and precision. Planning ahead can make the process smoother.
Conclusion
Building a simple wooden desk lamp is fun and rewarding. You only need basic tools and materials. Follow each step slowly and carefully. This project adds charm to any room. It also saves money compared to buying one. Plus, you get a unique lamp made by your own hands.
Try different designs to fit your style. Enjoy the warm light and cozy feel it brings. Making your own lamp can boost your confidence. Give it a try and see the difference yourself.


