
Are you looking to transform your plain walls into a stunning centerpiece without spending a fortune? Creating a wall of decorative stickers is an easy and fun way to refresh your space instantly.
Imagine turning a boring corner into a vibrant expression of your style that catches everyone’s eye. In this guide, you’ll discover simple steps to design and apply your own wall of stickers, making your room feel more personal and lively.
Ready to see how small changes can make a big impact? Keep reading, and let’s get started!
Choosing The Right Wall
Choosing the right wall for your decorative stickers can make all the difference between a stunning display and a frustrating experience. Your wall’s condition, texture, and material determine how well the stickers will stick and how easy they will be to remove later. Before you start peeling and sticking, take a moment to evaluate your space carefully.
Assessing Wall Texture And Material
Not all walls are created equal when it comes to applying stickers. Smooth surfaces like painted drywall or glass work best because stickers adhere firmly and lay flat without bubbling.
Rough or porous walls, such as brick or textured plaster, can cause stickers to peel off quickly or look uneven. If your wall has a bumpy texture, you might need to reconsider or test a small sticker patch first.
Also, consider the type of paint on your wall. Glossy finishes can be slippery, while matte or eggshell paints usually offer better grip. Think about how long you want the stickers to stay—some surfaces hold stickers longer than others.
Selecting The Best Wall For Stickers
Look for a wall that gets moderate light but not direct sunlight all day, as UV rays can fade your stickers. The location matters too: high-traffic areas might lead to stickers peeling from accidental touches.
Choose a wall that complements your room’s style and where the stickers can be a focal point. For example, a plain white wall in a living room or bedroom often works great because it lets colorful designs pop.
If you want to change your stickers frequently, pick a wall that won’t be damaged by repeated removal. Walls painted with latex paint usually handle sticker removal better than older or oil-based painted walls.
Have you noticed how some walls instantly grab your attention while others fade into the background? This instinct can guide you to the perfect canvas for your decorative stickers.

Credit: maminka.co.uk
Types Of Decorative Stickers
Creating a wall of decorative stickers offers endless possibilities for personalizing spaces. Choose from vinyl, fabric, or paper stickers to add charm and style. Mix colors, shapes, and themes for a unique wall design.
Creating a wall of decorative stickers can transform any room, adding personality and flair. Choosing the right type of sticker is crucial to achieving the desired effect. Understanding the different kinds of decorative stickers available will help you make the best choice for your space.Vinyl Vs. Paper Stickers
Vinyl stickers are known for their durability and vibrant colors. They are water-resistant, making them an excellent choice for areas prone to moisture, like bathrooms or kitchens. Easy to apply and remove, they leave no residue, which is ideal for those who like to redecorate often. On the other hand, paper stickers offer a more classic, textured feel. They might not withstand moisture as well as vinyl, but their matte finish can bring a unique charm to your walls. If you’re aiming for a vintage or rustic look, paper stickers might be your go-to choice.Custom Vs. Pre-made Designs
Custom stickers allow you to express your personality and creativity. You can design them yourself or hire a professional to bring your vision to life. This option is perfect if you have a specific theme in mind or want to include personal elements like quotes or family photos. Pre-made designs, however, offer convenience and a wide variety of themes and styles. Whether you prefer florals, geometric patterns, or whimsical characters, there’s likely a pre-made option that fits your taste. They are ready to use and often more affordable than custom designs. Choosing between vinyl and paper, or custom and pre-made designs, depends on your personal style and the function of the space. What story do you want your walls to tell?Tools And Materials Needed
Creating a wall covered with decorative stickers is a fun project that transforms any space instantly. Before you start sticking, gather the right tools and materials to make the process smooth and the results long-lasting. Having everything ready prevents frustration and helps you focus on the creative part.
Essential Tools For Application
- Decorative stickers:Choose stickers that match your style and wall size. Vinyl stickers work best because they’re easy to apply and remove.
- Measuring tape:Accuracy is key. Use this to mark where each sticker should go, ensuring a balanced look.
- Level:Avoid crooked designs by checking your stickers’ alignment with a level.
- Squeegee or credit card:Smooth out air bubbles and wrinkles as you apply each sticker.
- Pencil:Lightly mark placement spots on your wall before sticking.
I once skipped the measuring tape and ended up with a wall that looked haphazard. Taking a few extra minutes to measure saved me from redoing half the design.
Additional Supplies For Durability
- Clear acrylic sealer spray:Protect your stickers from peeling or fading, especially in high-traffic areas.
- Masking tape:Use to temporarily hold stickers in place while you adjust their positioning.
- Soft cloth:Clean your wall before applying stickers to remove dust and grease, which can reduce adhesion.
- Painter’s tape:Outline the area you want to cover, helping you stay within your design boundaries.
Have you thought about how long you want your sticker wall to last? Adding a sealer can extend its life, making your effort worthwhile. It’s a small step that makes a big difference when you want your wall to look fresh for months or even years.
Design Planning And Layout
Planning your design and layout is key to a stunning wall of decorative stickers. A clear plan helps you visualize the final look. It also keeps your work neat and balanced. Taking time here saves effort later. This section guides you through creating a theme, sketching a layout, and using digital tools.
Creating A Theme Or Motif
Choose a theme that fits your room style. Themes give your wall a unified look. Examples include nature, animals, geometric shapes, or inspirational quotes. Pick colors that match your decor. Think about the mood you want. Calm blues, bright yellows, or soft pastels each tell a different story. Keep your theme simple to avoid clutter.
Sketching A Wall Map
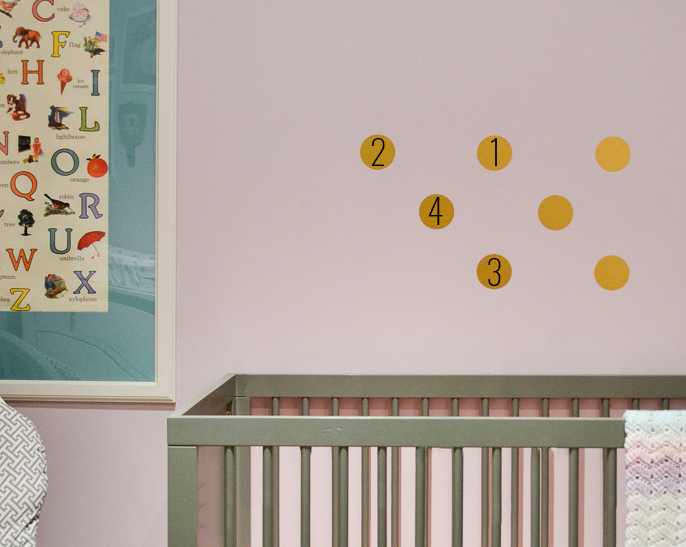
Draw a rough sketch of your wall space. Mark areas where you want to place stickers. Use pencil and paper or a chalkboard. Sketching helps plan sticker size and spacing. You can move elements around before sticking them. It reduces mistakes and uneven gaps. Label your sketch with sticker types or colors. This map acts as your visual guide.
Using Digital Mockups
Digital mockups offer a clear preview of your design. Use free apps or software like Canva or Photoshop. Upload a photo of your wall and add sticker images. Resize and move stickers until you find the best layout. Digital mockups save time and materials. You can try multiple designs without any mess. Save your favorite version to follow during installation.
Preparing The Wall Surface
Preparing the wall surface is key to creating a beautiful wall of decorative stickers. A smooth, clean wall helps stickers stick better. It also makes the final look neat and lasting. Taking time to prepare the wall saves effort later. Follow simple steps to get the wall ready for your stickers.
Cleaning And Drying
Start by removing dust and dirt from the wall. Use a soft cloth or sponge with mild soap and water. Clean the entire area where stickers will go. Avoid harsh chemicals that can damage paint or wallpaper.
After cleaning, dry the wall completely. Use a dry cloth or let it air dry. Moisture can stop stickers from sticking well. Make sure no water spots or dampness remain on the surface.
Priming The Wall If Necessary
Check the wall surface for rough patches or uneven paint. A primer can help stickers stick better on certain walls. Use primer on new drywall or walls with glossy paint.
Choose a primer suitable for your wall type. Apply a thin, even layer with a brush or roller. Let it dry fully before placing stickers. This step improves adhesion and prevents peeling over time.
Applying Decorative Stickers
Applying decorative stickers to your wall can instantly transform any room. This process requires a careful approach to make sure the stickers look neat and last long. Proper application helps avoid wrinkles, bubbles, or peeling over time. Follow simple steps for a clean, smooth finish that highlights your style.
Step-by-step Application Process
Start by cleaning the wall surface with a damp cloth. Let it dry completely. Peel the backing paper from the sticker slowly. Position the sticker gently on the wall without pressing it firmly yet. Adjust the placement until it looks right.
Use a flat tool, like a credit card, to press the sticker from the center outward. This helps remove any trapped air. Continue pressing firmly over the entire sticker. Peel off the transfer tape carefully if your sticker has one. Smooth the sticker again to ensure it sticks well.
Tips For Smooth And Bubble-free Placement
- Work in a dust-free environment to prevent particles under stickers.
- Apply stickers at room temperature for better adhesion.
- Use a squeegee or flat edge to push out air bubbles.
- If bubbles appear, gently lift and reapply the sticker.
- For small bubbles, poke them with a pin and smooth out air.
- Take your time. Rushing causes mistakes and wrinkles.
Creative Diy Ideas
Creative DIY ideas bring life to your wall of decorative stickers. They make your space unique and fun. Using simple tricks, you can create a stunning wall that shows your personality.
Mixing Different Sticker Styles
Combine various sticker shapes and colors for a lively look. Use cartoon stickers with floral patterns to add contrast. Mix matte and glossy finishes for texture. Play with sizes to create a dynamic effect. This mix keeps the wall interesting and eye-catching.
Incorporating Other Wall Art Elements
Bring other art pieces into the design. Frame some stickers or add small shelves. Hang lightweight decorations like paper garlands or photos nearby. This adds depth and variety to the wall. It also makes the space feel more personal and cozy.
Seasonal And Thematic Arrangements
Change your stickers based on seasons or holidays. Use snowflakes and stars for winter. Add flowers and butterflies for spring. Create themes like travel, nature, or space to tell a story. This keeps your wall fresh and exciting all year round.

Credit: www.letsdotherooms.com
Maintaining And Removing Stickers
Maintaining your wall of decorative stickers ensures they look fresh and vibrant for a long time. Proper care also makes removing them easier when you want a change. Let’s explore how to clean around stickers without damage and how to safely remove them without leaving marks or residue.
Cleaning Without Damage
Cleaning near your stickers requires a gentle approach. Avoid harsh chemicals that can fade colors or peel edges. Instead, use a soft, damp cloth with mild soap to wipe dust and dirt carefully.
Try dabbing rather than rubbing. This prevents lifting the sticker’s edges. If you notice any peeling, stop cleaning that area immediately to avoid worsening the damage.
Have you ever wiped too hard and ruined a favorite sticker? A light touch keeps your design intact and your wall looking great.
Safe Sticker Removal Techniques
Removing stickers without damaging the wall or leaving sticky residue can be tricky. Start by gently peeling from one corner; if it resists, don’t force it.
Warm the sticker slightly using a hairdryer on low heat. This softens the adhesive, making it easier to lift off without tearing the sticker or paint.
After removal, clean any leftover adhesive with rubbing alcohol or an adhesive remover safe for your wall type. Test any cleaner on a small, hidden spot first to avoid surprises.
Think about your last sticker removal—did you leave behind a mess or damage? With these techniques, you can keep your walls pristine while updating your décor.
Common Mistakes To Avoid
Creating a wall of decorative stickers can brighten any room. Avoiding common mistakes helps keep the design neat and lasting. These errors often cause frustration and waste materials. Focus on careful planning and preparation for the best results.
Overcrowding The Wall
Putting too many stickers close together makes the wall look messy. Each sticker needs space to stand out. Crowding hides the design and creates visual chaos. Leave enough room between stickers for balance and clarity.
Ignoring Wall Preparation
Not cleaning the wall can stop stickers from sticking well. Dust and grease cause stickers to peel off quickly. Make sure the surface is smooth, clean, and dry before applying. Proper preparation helps stickers stay for a long time.
Choosing Poor Quality Stickers
Cheap stickers often fade or peel after a short time. Low-quality materials do not hold colors well or stick properly. Invest in good-quality stickers that are durable and vibrant. This choice saves time and money in the long run.

Credit: www.temu.com
Frequently Asked Questions
How Do I Prepare The Wall For Decorative Stickers?
Clean the wall thoroughly to remove dust and grease. Ensure the surface is dry and smooth for better sticker adhesion. Use a mild detergent and let the wall dry completely before applying stickers.
What Materials Do I Need For Decorative Sticker Application?
You need decorative stickers, a clean cloth, a ruler, and a squeegee or credit card. Optionally, use painter’s tape to mark positions and a level to keep stickers straight.
Can I Reuse Decorative Stickers On Walls?
Most decorative stickers are designed for one-time use. Removing them may damage the adhesive, reducing their stickiness. For reuse, opt for reusable vinyl stickers specifically made for multiple applications.
How Do I Arrange Stickers For The Best Visual Effect?
Plan your layout beforehand using paper templates or digital mockups. Arrange stickers symmetrically or create a pattern for balance. Consider color coordination and spacing to enhance the wall’s overall look.
Conclusion
Creating a wall of decorative stickers adds charm to any room. Choose stickers that match your style and space. Clean the wall before placing each sticker carefully. Arrange them in patterns or randomly for a unique look. Change or remove stickers easily without damage.
This simple project brings personality and color to your home. Enjoy your new, fun wall every day.


