
Want to transform your space without spending a fortune? Making your own wall stickers at home is easier than you think.
Imagine adding a personal touch to your walls that no store-bought sticker can match. You’ll discover simple steps to create custom designs that fit your style perfectly. Ready to unleash your creativity and give your rooms a fresh new look?
Keep reading to learn how you can make your own wall stickers with just a few materials and some easy techniques.
Materials Needed
Creating your own wall stickers at home is a fun and creative project. It needs some basic materials to get started. Using the right supplies helps you make stickers that look great and last long.
Gathering these materials first makes the process smooth and enjoyable. Below is a list of essential supplies and some optional tools. These will help you customize your wall stickers easily.
Essential Supplies
- Printable adhesive vinyl or sticker paper
- Inkjet or laser printer (compatible with your paper)
- Cutting mat for precise cutting
- Sharp craft knife or scissors
- Clear laminate sheets or spray sealant for protection
- Design software or printable templates
- Ruler or measuring tape
- Clean, dry cloth for surface preparation
Optional Tools
- Cutting machine (like Cricut or Silhouette) for detailed shapes
- Transfer tape to move stickers without damage
- Weeding tools for removing excess vinyl
- Self-healing mat for safer cutting
- Spray adhesive for extra stickiness on tricky surfaces
- Sandpaper for smoothing rough edges
Choosing Designs
Choosing the right design is a key step in making wall stickers at home. The design sets the mood and style of your space. Picking a design that matches your taste and room theme makes your stickers stand out. It also helps keep the project fun and creative. Here are some tips for selecting the perfect design.
Finding Inspiration
Look around your home for colors and shapes you like. Nature offers great ideas like leaves, flowers, or animals. Art books and magazines show many styles. Search online for popular wall sticker designs and trends. Save images that catch your eye. Think about your room’s purpose and what design fits best.
Simple Vs. Complex Patterns
Simple patterns work well for beginners. They are easier to cut and place on the wall. Basic shapes like circles, stars, or stripes create clean looks. Complex patterns need more skill and time. They can include detailed drawings or layered designs. Choose complex patterns only if you feel confident with your tools.
Preparing The Workspace
Clear a flat surface with enough space to work comfortably. Gather all materials like paper, scissors, and adhesive before starting. Ensure good lighting for better cutting and designing.
Preparing the workspace is a crucial step in making your own wall stickers at home. A well-organized area not only enhances creativity but also ensures safety and cleanliness. By setting up your space correctly, you pave the way for a smooth crafting experience.Setting Up A Clean Area
Begin by selecting a well-lit space where you can comfortably work. Ensure the area is free from clutter to avoid distractions and mishaps. You’ll want to have all your tools and materials within arm’s reach. This setup not only saves time but also keeps your creative flow uninterrupted. Consider placing a small table or desk in your chosen spot. This will serve as your primary workspace where you can cut, design, and assemble your stickers. A comfortable chair is also a good idea if you’ll be working for extended periods.Protecting Surfaces
It’s essential to protect your workspace surfaces to prevent damage. Use a large cutting mat or old newspapers to cover the table. This will shield it from scratches, glue, and paint spills. If you’re using paint or other liquids, keep a few rags or paper towels handy. Quick clean-ups will prevent stains and keep your area tidy. Don’t forget the floor—especially if you’re working with scissors or sharp tools. A drop cloth or old sheet can catch any accidental drops, saving you from potential accidents. How do you keep your workspace organized while crafting? Share your tips and tricks in the comments!Creating The Stickers
Creating your own wall stickers at home is an exciting process where your creativity truly comes alive. This stage transforms simple ideas into tangible decorations that can personalize any space. Let’s break down how you can bring your designs to life, cut them perfectly, and get them ready to stick on your walls.
Drawing Or Printing Designs
Start by choosing your design carefully. You can draw by hand using markers or pencils on paper, which adds a personal touch to each sticker. Alternatively, print digital designs on adhesive paper for crisp, professional results.
If you’re drawing, keep your lines bold and clear to make cutting easier. For printing, use high-quality settings to ensure colors are vibrant and edges sharp. What kind of design speaks to you—something bold and graphic, or soft and intricate?
Cutting Techniques
Precision is key when cutting out your stickers. Use sharp scissors or a craft knife to follow your design’s outline closely. If you have access to a cutting machine like a Cricut, it can save time and create flawless edges.
For delicate shapes, small, controlled cuts prevent tearing. Don’t rush this step; clean edges make your stickers look professional and help them stick better. Have you tested your cutting tools on scrap paper to find what works best?
Applying Adhesive
Most printable sticker papers come with adhesive backing, but if yours doesn’t, you can add your own. Spray adhesive or glue sticks work well—just apply a thin, even layer to avoid lumps. Let the adhesive dry slightly before peeling off the backing.
Test the stickiness on a small area of your wall first to ensure it won’t damage the paint or wallpaper. Remember, the goal is for your sticker to stay put but also be removable if you change your mind. What surfaces in your home would benefit most from a customized wall sticker?
Applying Wall Stickers
Applying wall stickers is a fun way to personalize your space. It takes patience and care to get a smooth, neat look. Proper application helps your sticker stick well and last longer. Follow simple steps to place your stickers perfectly on the wall.
Surface Preparation
Clean the wall surface thoroughly. Use a damp cloth to remove dust and dirt. Make sure the wall is dry before applying the sticker. Avoid rough or uneven surfaces. A smooth, flat surface helps the sticker stick better. Remove any old wallpaper or peeling paint. Test the wall texture by touching it. If it feels rough, sand it lightly for smoothness.
Placement Tips
Decide where to place your wall sticker. Mark the position lightly with a pencil. Use a level tool to keep the sticker straight. Peel the backing paper carefully without touching the adhesive side. Start sticking from one edge, then slowly press down. Use your fingers or a soft cloth to press the sticker firmly. Work slowly to avoid mistakes and reposition if needed.
Smoothing Out Bubbles
Air bubbles can spoil the look of your sticker. Use a flat tool, like a credit card, to smooth out bubbles. Start from the center and push bubbles toward the edges. If bubbles remain, gently lift that part and reapply. For small bubbles, use a pin to prick and release air. Press the sticker again to flatten it. Smooth application gives a professional finish.

Credit: www.designcafe.com
Removing And Reusing
Removing and reusing your homemade wall stickers can save you time and money while keeping your walls looking fresh. But peeling off stickers without damaging them or the paint can feel tricky. With the right approach, you can carefully take them down and store them for another day.
Safe Removal Methods
Start by gently warming the sticker with a hairdryer set on low heat. This softens the adhesive, making it easier to peel off without tearing.
Use a plastic card or your fingernail to lift the edge slowly. Avoid sharp tools that might scratch your wall or damage the sticker.
If you notice resistance, warm the area again. Patience is key here; rushing can ruin both your sticker and the wall surface.
Storing For Reuse
Once removed, place your sticker on a clean, flat piece of wax paper to keep the adhesive intact. Avoid sticking it to rough or dusty surfaces.
Store your stickers in a cool, dry place away from direct sunlight to prevent fading or warping. A flat folder or an envelope works well to keep them flat and protected.
Have you tried reusing wall stickers before? How did you keep them looking fresh? Small care in storage makes a big difference for your next decorating project.
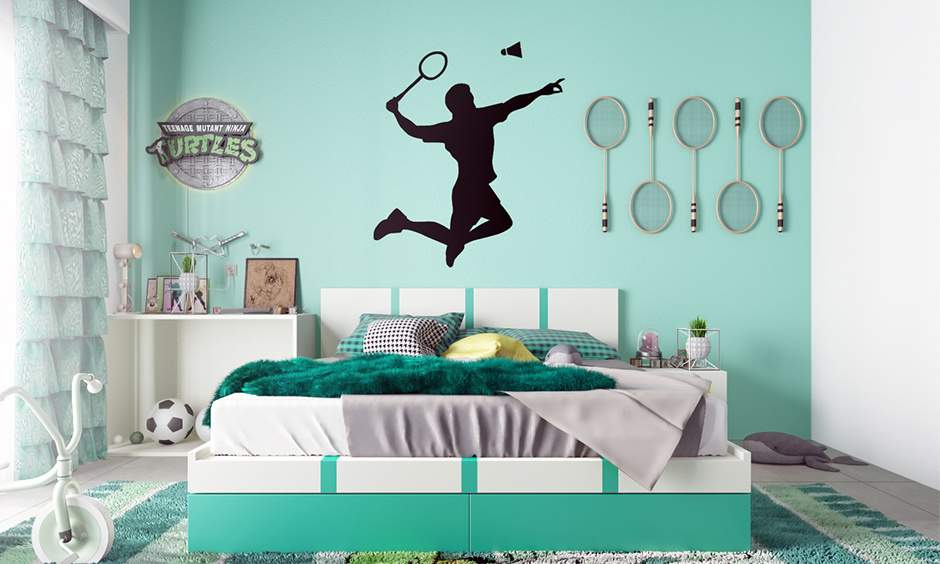
Creative Ideas
Creative ideas make your wall stickers unique and fun to create. They add personality and style to any room. You can explore many themes and designs that suit your taste and space.
Themed Stickers
Choose themes that match the room’s purpose or mood. Kids’ rooms can have animal or cartoon stickers. Kitchens look great with food or fruit designs. Nature lovers might prefer plants, flowers, or trees. Travel themes with landmarks or maps inspire wanderlust. Seasonal themes like snowflakes or beach scenes bring timely charm.
- Animals and cartoons for playful spaces
- Food and kitchen items for cooking areas
- Plants and flowers for natural vibes
- Travel landmarks for adventure lovers
- Seasonal motifs for festive moods
Personalized Touches
Add names, quotes, or special dates to your stickers. Use your favorite colors and fonts. Create stickers that tell a story or share memories. Personal details make the space feel warm and inviting. They also make great gifts for friends and family.
- Custom names or initials
- Inspirational quotes or phrases
- Important dates or milestones
- Favorite colors and styles
- Photo or hand-drawn elements

Credit: www.designcafe.com

Credit: www.designcafe.com
Frequently Asked Questions
How Can I Create Wall Stickers At Home Easily?
You can create wall stickers at home using printable vinyl, scissors, and a clear adhesive sheet. Design your sticker digitally or draw by hand, then cut and apply it to clean walls for a personalized touch.
What Materials Are Best For Homemade Wall Stickers?
Printable vinyl sheets, clear adhesive film, and a cutting tool work best. These materials offer durability, ease of use, and a smooth finish for vibrant, long-lasting wall stickers.
Can I Remove Homemade Wall Stickers Without Damage?
Yes, homemade stickers made with removable adhesive vinyl peel off cleanly. Gently lift the edge and slowly pull; avoid harsh scraping to prevent wall damage.
How To Design Custom Wall Stickers At Home?
Use graphic design software or apps to create your design. Choose simple shapes and bold colors for easy cutting and striking wall art results.
Conclusion
Creating your own wall stickers at home is fun and simple. You only need a few materials and some creativity. This project saves money and lets you personalize your space. Try different shapes, colors, and designs to fit your style.
Enjoy making something unique with your own hands. Start today and see how easy it can be. Your walls will thank you for the fresh, new look. Keep experimenting and have fun decorating!


