
Mounting a clock on your wall might seem simple, but doing it the right way makes all the difference. Imagine your clock hanging perfectly straight, right where you want it, adding style and function to your space.
You don’t want it falling down or leaving ugly marks behind. In this guide, you’ll learn easy steps to mount your clock securely and beautifully, no matter your wall type or clock size. Keep reading, and you’ll have your clock up in no time—looking great and working perfectly.

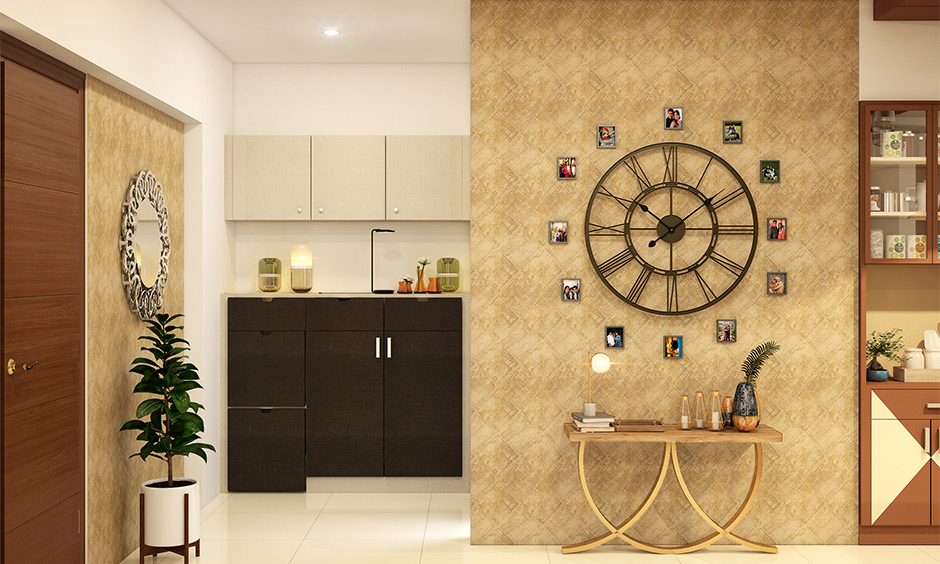
Credit: www.instructables.com
Choosing The Right Clock
Choosing the right clock is more than picking a timepiece; it sets the tone for your space and influences how you interact with time daily. A clock isn’t just functional—it’s part of your decor and reflects your style. Think about what fits your room, your routine, and the statement you want to make.
Types Of Wall Clocks
There are many types of wall clocks, each serving different purposes and styles. Analog clocks offer a classic look with traditional hands and faces. Digital clocks, on the other hand, provide clear, easy-to-read numbers that suit modern spaces.
Consider specialty clocks like cuckoo clocks for a vintage charm or silent sweep clocks if you prefer a quiet environment. Which type helps you check the time without breaking your focus?
Size And Weight Considerations
Size matters more than you might think. A clock too small can get lost on a large wall, while an oversized clock might overwhelm a cozy room. Measure your wall space before buying to find the perfect balance.
Weight is equally important because it affects the mounting method you’ll need. Heavy clocks require sturdy anchors or studs for safety and stability. Have you checked if your wall can support the clock you want?
Style And Room Compatibility
Your clock should match the room’s vibe and your personality. Rustic clocks blend well in farmhouse kitchens, while sleek metal designs suit minimalist offices. Think about colors, materials, and shapes that complement your existing decor.
Ask yourself if the clock enhances the room or clashes with it. A well-chosen clock adds character and keeps your space feeling intentional and welcoming.

Credit: www.amazon.ca
Selecting The Perfect Spot
Choosing the right place for your wall clock is important. It affects how well you see the time and how the clock fits with your room. The perfect spot makes your clock easy to read and adds to the room’s look.
Think about where people usually stand or sit. The clock should be visible from many angles. Also, consider the light and space around it. These factors help your clock look its best and last longer.
Eye-level Placement
Place the clock at eye level for easy reading. This means the center of the clock should be about 57 to 60 inches from the floor. This height works well for most people.
A clock at eye level catches attention and is comfortable to check. Avoid placing it too high or too low, which makes reading the time hard.
Avoiding Direct Sunlight
Keep the clock away from direct sunlight. Sunlight can fade the clock face and damage the materials. It can also make the clock hard to read due to glare.
Choose a spot with soft, indirect light. This keeps your clock clear and looking new for a long time.
Considering Room Layout
Look at the room’s furniture and walls before hanging the clock. The clock should fit well with other items and not crowd the space.
Think about where people gather or pass often. Place the clock there for easy viewing. Make sure it balances with other decorations on the wall.
Gathering Necessary Tools
Essential tools for mounting a clock include a drill, screws, a level, and a pencil. Having these ready makes the process smooth and accurate. Proper tools help secure the clock safely on the wall.
Mounting a clock on your wall might seem like a simple task, but without the right tools, it can quickly become a frustrating experience. Before you begin, it’s crucial to gather all the necessary tools and equipment. This ensures a smooth process and helps you avoid unnecessary trips to the hardware store.Basic Tools Needed
First, you’ll need a measuring tape. This tool helps you find the perfect spot on your wall, ensuring your clock is centered and looks just right. A pencil is essential for marking where to drill or place nails. This small tool prevents mistakes and keeps your wall looking neat. Don’t forget a drill or hammer, depending on your wall type and the hardware you choose. These tools are crucial for securing your clock firmly.Safety Equipment
Always prioritize safety. Protective eyewear shields your eyes from dust and debris while drilling. If you’re using a drill, earplugs can protect your hearing from loud noises. A sturdy step ladder is necessary for reaching high spots. Make sure it’s stable and on a flat surface to prevent accidents.Specialized Hardware
Some clocks require specialized hardware for a secure mount. Consider checking if your clock needs anchors or wall plugs, especially if your walls are made of drywall or plaster. Heavy clocks may need special mounting brackets. These provide extra support and prevent the clock from falling. Have you ever thought about using adhesive strips for lightweight clocks? They are a fantastic option for avoiding holes in your wall, making them an excellent choice for renters. Gathering the right tools not only makes the job easier but also enhances your confidence in completing the task. Have you ever started a project only to realize you’re missing a crucial tool? Share your experiences in the comments!
Credit: www.amazon.ca
Marking The Wall
Marking the wall correctly is key to a neat clock installation. It sets the base for precise drilling and a balanced look. Take your time to mark carefully. This helps avoid unnecessary holes and keeps the clock level.
Measuring For Centering
Find the exact center of the wall or the space where the clock will hang. Use a tape measure to get the width and height. Divide each by two. Mark the center point lightly with a pencil. This spot will guide where the clock’s middle should align.
Using A Level
Place a level horizontally at the center mark. Adjust it until the bubble is in the middle. Draw a faint straight line along the level’s edge. This line ensures the clock will hang straight. Check the level vertically too, if the clock is tall or has multiple points for hanging.
Marking Drill Points
Check the clock’s back for hanging hooks or holes. Measure the distance between them. Transfer these measurements to the wall using the center line as a guide. Mark the spots with a pencil where you will drill. Double-check spacing and alignment before drilling.
Preparing The Wall
Preparing the wall is an important step before mounting a clock. It ensures the clock stays secure and looks good. Taking time to prepare prevents damage to your wall and clock. Follow simple guidelines to get the wall ready for installation.
Checking Wall Material
Identify the type of wall where you want to hang the clock. Common wall materials include drywall, plaster, brick, and concrete. Each material requires different tools and hardware. Use a stud finder to locate studs behind drywall. Studs provide strong support for heavy clocks. For brick or concrete, special anchors are needed.
Installing Anchors
Anchors hold screws securely in the wall. Choose anchors suitable for your wall type. Plastic anchors work well for drywall. Metal or heavy-duty anchors suit brick and concrete. Insert anchors carefully to avoid cracking the wall. Push the anchor flush with the wall surface. This step keeps your clock stable and prevents it from falling.
Drilling Holes Safely
Use the right drill bit for the wall material. Wear safety glasses to protect your eyes. Mark the exact spot for drilling with a pencil. Drill slowly to avoid damage. Keep the drill straight to make clean holes. Clear dust from the holes before inserting anchors or screws. This keeps the installation neat and secure.
Mounting The Clock
Mounting a clock on your wall is more than just placing it up; it’s about making sure it stays secure and looks great. The right mounting approach can enhance your room’s style and keep your clock ticking perfectly. Let’s focus on the key steps to get your clock mounted confidently and safely.
Attaching Hooks Or Brackets
First, identify the type of hook or bracket that came with your clock or suits its weight and design. Use a level to mark where the hooks or brackets will go, ensuring the clock hangs straight. If your wall is drywall, consider using anchors to give extra support and avoid damage.
My experience showed that using the wrong hook led to a clock slipping down after a week. So, don’t skip this step—make sure your hooks or brackets can handle the clock’s weight comfortably.
Hanging The Clock
Once the hooks or brackets are in place, gently hang your clock by aligning it with the mounting points. Hold it firmly and check if it sits flush against the wall without wobbling. If your clock has a pendulum or moving parts, watch for any obstruction as you hang it.
Ask yourself: does the clock feel secure or does it shift with a light touch? Adjust the position or add additional support if it moves too easily.
Ensuring Stability
Stability is key to prevent accidents and keep your clock running smoothly. After hanging, press lightly on different sides to check for any movement. If you notice any looseness, tighten the hooks or add wall anchors.
Sometimes, adding small rubber bumpers behind the clock can reduce shifting and protect the wall. Have you ever found your clock slipping without warning? Taking these small steps can save you from that frustration and potential damage.
Final Adjustments
After securely hanging your clock, the final adjustments ensure it not only looks great but works perfectly. These small tweaks can make a big difference in the clock’s accuracy and appearance on your wall. Let’s focus on leveling the clock, setting the time correctly, and installing the battery for optimal performance.
Leveling The Clock
A crooked clock can ruin the entire look of your wall. Use a small spirit level or even a smartphone app to check if the clock is perfectly horizontal.
If it’s off, gently adjust the hanging point or add a small piece of cardboard behind the side that needs lifting. This step may seem minor, but it helps your clock keep time better, especially if it has a pendulum or mechanical parts.
Setting The Time
Before inserting the battery, set the time by turning the clock hands carefully. Avoid moving the hands backward as it may damage the mechanism; instead, move them forward to the correct time.
Have you ever noticed a clock that loses or gains time quickly? This often happens when the initial time setting wasn’t done carefully. Taking a moment here can save you frustration later.
Battery Installation Tips
Use fresh, high-quality batteries for longer clock life and more accurate timekeeping. Avoid mixing old and new batteries, as this can cause leakage or poor performance.
Insert the battery with the correct polarity, usually marked inside the battery compartment. If your clock has a battery cover, secure it well to prevent dust and moisture from entering.
Troubleshooting Common Issues
Troubleshooting common issues after mounting a clock can save time and frustration. Some problems may seem small but affect the clock’s appearance or function. Fixing these issues ensures your clock looks great and works well on the wall.
Clock Not Hanging Straight
A clock that does not hang straight can spoil the room’s look. Check the hanging hook or nail first. Sometimes, it is not level or firmly fixed. Use a level tool to adjust the hook or nail position. If the clock has a wire hanger, make sure it is centered and tight.
Wall texture can cause the clock to tilt. Try placing small adhesive pads behind the clock’s lower edge. This adds support and keeps the clock steady. Make small adjustments until the clock hangs perfectly straight.
Wall Damage Prevention
Protecting your wall is important when mounting a clock. Use appropriate wall anchors for heavy clocks to avoid holes or cracks. For drywall, use plastic anchors or toggle bolts. For concrete or brick walls, use masonry anchors and drill bits.
Place felt pads or rubber bumpers on the clock back. These prevent scratches and marks on the wall. Avoid sharp hooks or nails that dig into the wall surface. Regularly check the mounting hardware to keep the clock secure and the wall safe.
Clock Not Working Properly
Check the battery first if the clock stops working. Sometimes, the battery may be weak or installed incorrectly. Replace the battery with a fresh one and align it properly. Clean the battery contacts if corroded.
Make sure the clock hands do not touch each other or the glass cover. Bent or stuck hands can stop the clock or cause it to run slow. Gently adjust the hands to create enough space. If the clock uses a quartz movement, consider replacing the movement mechanism if problems continue.
Frequently Asked Questions
How Do I Choose The Right Spot To Mount A Clock?
Select a visible wall area where the clock complements room decor. Ensure the spot is at eye level and free from direct sunlight or moisture.
What Tools Are Needed To Mount A Clock On A Wall?
You need a drill, screwdriver, level, measuring tape, wall anchors, and screws. These tools ensure secure and accurate clock installation.
Can I Mount A Clock On Drywall Without Studs?
Yes, use appropriate wall anchors designed for drywall. These provide extra support and prevent the clock from falling or damaging the wall.
How High Should I Mount A Wall Clock?
Mount the clock at eye level, about 57 to 60 inches from the floor. This height ensures easy readability and aesthetic balance in the room.
Conclusion
Mounting a clock on a wall is simple and quick. Choose the right spot and use proper tools. Measure carefully to keep the clock straight and secure. Check the wall type to pick suitable screws or hooks. A well-mounted clock adds style and function to any room.
Follow these steps, and your clock will stay put. Enjoy the new look and easy timekeeping every day.


