
Have you ever wanted to turn your favorite photo into a beautiful canvas masterpiece? Imagine seeing your most cherished memories not just on a screen, but displayed proudly on your wall, adding warmth and personality to any room.
You might think this is complicated or expensive, but what if you could do it yourself, easily and affordably? In this guide, you’ll discover simple, step-by-step methods to transfer your photos onto canvas. By the end, you’ll have the confidence to create stunning art that’s truly personal.
Ready to transform your photos into lasting keepsakes? Let’s get started!

Credit: www.theshabbycreekcottage.com
Choosing The Right Photo
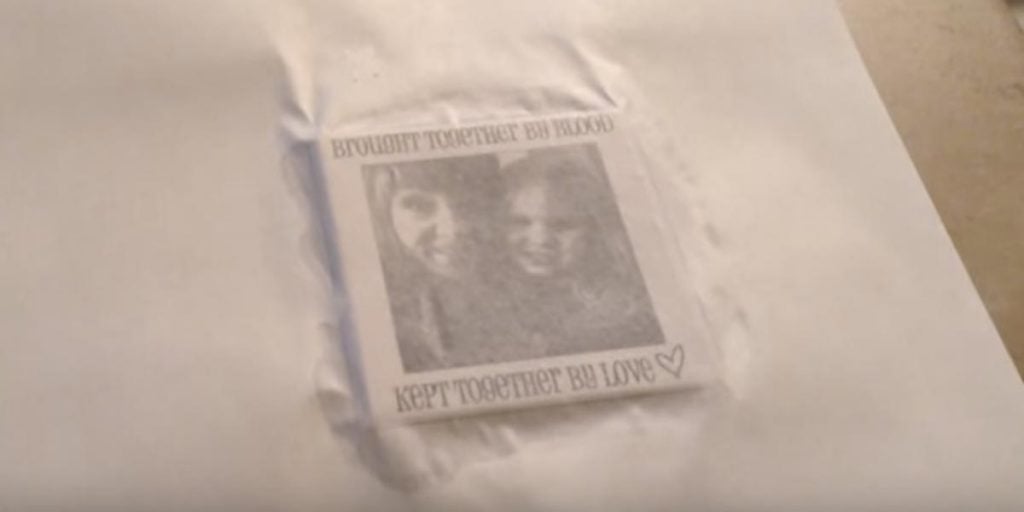
Choosing a clear, high-quality photo ensures the best results when transferring to canvas. Bright images with good contrast work well for sharp, vivid prints. Simple backgrounds help the main subject stand out on the canvas surface.
Choosing the Right Photo The magic of transferring a photo to canvas lies in the image you choose. This decision can make or break the final look. A well-selected photo can transform a plain canvas into a captivating piece of art. So, how do you choose the right photo for your canvas project?Selecting High-quality Images
High-quality images are the backbone of a successful photo transfer. Think about the last time you saw a blurred photo. Did it leave a strong impression? Probably not. A sharp, clear image ensures that every detail is captured beautifully on the canvas. Choose images with good lighting and contrast to make your art piece pop.Considering Image Resolution
Resolution is crucial when transferring photos to canvas. A higher resolution image retains its detail and sharpness even when enlarged. Have you ever printed a low-resolution photo and noticed how pixelated it looked? Avoid this by choosing images that are at least 300 DPI (dots per inch). This ensures your canvas will look crisp and professional.Picking The Best Subject
The subject of your photo is equally important. What story do you want your canvas to tell? Whether it’s a serene landscape, a candid family moment, or your pet’s adorable antics, the subject should resonate with you. Personal experiences often make the best subjects. Remember that the emotion behind the photo can be just as impactful as the image itself. Choosing the right photo is more than just picking a pretty picture. It involves thoughtful consideration of quality, resolution, and subject. What memories do you want to capture on canvas?
Credit: www.youtube.com
Gathering Materials
Before you start transferring your favorite photo onto canvas, gathering the right materials is key to achieving a beautiful and lasting result. The quality of your supplies can make a huge difference in how your image appears and how well it sticks to the canvas. Let’s break down what you’ll need to get started.
Essential Supplies
- Canvas:Choose a smooth, white canvas for best results.
- Laser-printed photo:Use a laser print on regular paper; inkjet prints don’t work well for transfer.
- Photo transfer medium:This special gel or paste helps move the image onto the canvas.
- Brush or sponge:For applying the transfer medium evenly.
- Squeegee or credit card:To smooth out air bubbles and ensure the image sticks flat.
- Water and cloth:To gently rub off the paper backing after drying.
- Protective sealant (optional):To protect your finished artwork.
When I first tried photo transferring, I underestimated the need for a laser print. Inkjet prints blurred and smeared, which was frustrating. Using the right print type saved me time and improved the final look dramatically.
Types Of Canvas
Not all canvases are created equal. You’ll find different textures and weights that affect how your photo transfer looks and lasts.
- Stretched canvas:Pre-stretched on a wooden frame, easy to use and hang.
- Canvas panels:Sturdy and flat, great for smaller projects or practice runs.
- Raw canvas rolls:Allow you to cut custom sizes but need stretching or framing.
Personally, I prefer stretched canvases for transfers because they hold tension well and give a professional finish. What kind of canvas would fit your workspace best?
Photo Transfer Mediums
Choosing the right transfer medium can be confusing with so many options on the market. Each has its own texture, drying time, and finish.
| Medium | Texture | Drying Time | Finish |
|---|---|---|---|
| Gel Medium | Thick and creamy | 24 hours | Matte or glossy |
| Mod Podge Photo Transfer | Smooth and easy to spread | 24–48 hours | Matte finish |
| Decoupage Glue | Thin and watery | 12–24 hours | Glossy |
My favorite is the gel medium because it offers flexibility with finish and allows some working time. Have you tried different mediums before, or are you ready to experiment with your project?
Preparing The Canvas
Preparing the canvas is a vital part of transferring a photo smoothly. A clean, well-prepared surface helps the image stick better and last longer. Taking time to get the canvas ready improves the final look and prevents peeling or fading. This process involves cleaning and priming the canvas, then sizing it for the transfer.
Cleaning And Priming
Start by wiping the canvas with a dry cloth. Remove dust, dirt, or loose fibers carefully. A clean canvas allows the photo transfer medium to bond properly.
Next, apply a thin layer of gesso or primer. Use a flat brush to spread it evenly across the canvas. Let the primer dry completely before moving on. Priming seals the surface and creates a smooth base for your photo.
Sizing The Canvas
Sizing the canvas means applying a protective layer that controls absorption. It prevents the transfer medium from soaking into the fabric too much.
Use acrylic medium or a special sizing product for this step. Spread it evenly with a brush and allow it to dry well. Proper sizing helps maintain the photo’s clarity and sharpness after transfer.
Credit: diyjoy.com
Photo Transfer Methods
Photo transfer to canvas allows you to create unique, personalized art. Several techniques make this process easy and fun. Each method uses different materials and steps. Choose one based on your tools and desired finish.
Gel Medium Transfer
Gel medium transfer uses a thick acrylic gel to lift a printed image. Print your photo on regular paper with a laser printer. Apply gel medium on the canvas and place the photo face down. Let it dry for 24 hours. Then, gently rub the paper with water to reveal the image. This method gives a soft, vintage look.
Mod Podge Technique
Mod Podge is a popular craft glue and sealer. Print your photo with a laser printer. Brush Mod Podge on the canvas and place the photo face down. Press out air bubbles carefully. Let it dry completely. Soak the paper with water and rub it off slowly. The image stays on the canvas with a smooth finish.
Iron-on Transfer
Iron-on transfer paper works well for clear, sharp images. Print your photo in reverse on special transfer paper. Place it face down on the canvas. Use a hot iron to press the image onto the surface. Follow the transfer paper instructions for time and heat. Peel off the paper backing after cooling. The image appears bright and vivid.
Using Transfer Paper
Transfer paper is a simple way to copy photos onto canvas. Print your image normally. Place transfer paper between the photo and canvas. Trace the image using a pen or stylus. The design transfers onto the canvas surface. Paint or color over the lines to finish the artwork. This method is ideal for hand-painted effects.
Step-by-step Transfer Process
Transferring a photo onto canvas can transform your favorite image into a stunning piece of art. The process may seem tricky at first, but breaking it down makes it manageable and even enjoyable. Let’s walk through each step carefully so you get a flawless transfer every time.
Printing And Preparing The Photo
Start with a laser-printed photo, as inkjet prints won’t work well for this technique. Make sure your image is mirrored before printing, especially if it has text or directional elements. Use regular printer paper or a thin sheet that won’t add bulk during transfer.
Trim the photo to fit your canvas size, leaving a small border if needed. Clean your canvas surface with a dry cloth to remove dust and ensure better adhesion. Have everything ready before moving on—this step sets the foundation for a clean transfer.
Applying The Transfer Medium
Choose a gel medium or specialized photo transfer medium for the best results. Using a paintbrush or foam brush, apply a generous, even layer directly onto the printed side of your photo. Be careful to cover every part but avoid puddles that can cause bubbles or smudges.
Think about the texture you want to preserve; smoother layers yield sharper images, while a thicker coat can add an artistic touch. Remember, patience matters here—don’t rush the application or you risk uneven transfers.
Positioning The Photo On Canvas
Place your photo face down carefully on the canvas, starting from one edge to avoid trapping air bubbles. Press firmly and smooth out the photo with your fingers or a soft cloth, ensuring full contact between the paper and canvas. This step is crucial—small wrinkles or gaps can ruin your final image.
Secure the edges with painter’s tape if needed to prevent shifting. Ask yourself, have you checked for any trapped air or loose spots? Taking a moment here saves frustration later.
Drying And Setting Time
Allow the canvas and photo to dry completely, typically 8 to 24 hours depending on your medium and environment. Avoid touching or moving the canvas during this time to keep the transfer intact. The longer it dries, the better the image will set into the canvas fibers.
Once dry, gently dampen the paper with a sponge and rub it off slowly, revealing your transferred photo underneath. This part requires care—too much water or pressure can damage the image. Are you ready to see your photo come to life on canvas?
Finishing Touches
Finishing touches bring your photo transfer on canvas to life. They protect the image and add depth. Small details can make the artwork stand out. These final steps ensure your piece lasts and looks great.
Sealing The Artwork
Sealing locks the image onto the canvas. Use a clear, matte or gloss sealant spray. Hold the can 12 inches away. Spray in light, even layers to avoid drips. Let each coat dry before adding another. This step prevents fading and damage from dust or moisture.
Adding Protective Coats
Protective coats add strength and shine. Acrylic varnish is a good choice. Apply with a soft brush or foam applicator. Use thin layers for smooth coverage. Allow drying time between coats. Protective layers guard against scratches and UV light. They keep colors bright and vibrant for years.
Enhancing With Paint Or Details
Paint or details highlight parts of your photo transfer. Use acrylic paint for easy application. Add small touches to edges or areas that need more color. Fine brushes help with precision. You can also use markers or pens for outlines. These enhancements create depth and a personalized look.
Troubleshooting Common Issues
Photo transferring to canvas is a fun and creative process. Sometimes, issues arise that can affect the final look. Troubleshooting these problems helps keep your artwork sharp and vibrant. Below are solutions for common problems you might face during the transfer process.
Fixing Blurred Images
Blurred images can result from poor photo quality or incorrect transfer technique. Use high-resolution photos for clear results. Avoid moving the paper during transfer. Press firmly and evenly to prevent smudging. Let the transfer dry completely before peeling off the paper.
Handling Peeling Or Cracking
Peeling or cracking often occurs when the canvas is too dry or the transfer medium is applied unevenly. Apply a thin, even layer of gel or medium. Avoid over-saturating the canvas. Allow each layer to dry fully before adding more. Store the canvas in a stable environment to prevent cracking.
Preventing Color Fading
Color fading happens from too much sunlight or improper sealing. Use UV-protective spray or varnish to protect colors. Keep the canvas away from direct sunlight and moisture. Store finished pieces in cool, dry places. Regularly check and reapply protective coatings to maintain brightness.
Creative Ideas For Photo Canvas Art
Photo transfer to canvas offers endless creative possibilities. Transform your photos into unique art pieces with simple techniques. Explore ideas that bring personal touches and artistic flair to your canvas projects. These creative approaches make your photo canvas stand out and add charm to any space.
Collage Techniques
Create dynamic art by combining multiple photos on one canvas. Cut images into different shapes or sizes for a layered look. Use overlapping photos to tell a story or highlight memories. Try arranging photos in grids or freeform patterns for visual interest. Adding textured paper or fabric pieces enhances the collage effect.
Mixed Media Applications
Combine photo transfers with paint, ink, or stencils for rich textures. Add hand-drawn details or calligraphy to personalize your canvas. Use acrylic gels or pastes to build depth and dimension. Incorporate natural elements like dried flowers or leaves for a unique touch. Mixed media techniques make your photo canvas a true work of art.
Personalized Gift Ideas
Photo canvas art makes meaningful gifts for family and friends. Transfer pictures of special moments, pets, or places to celebrate memories. Customize with names, dates, or quotes to add a personal touch. Use themes like birthdays, weddings, or holidays for relevant gifts. Handmade photo canvases show thoughtfulness and care in every detail.
Frequently Asked Questions
What Materials Are Needed For Photo Transfer To Canvas?
You need a printed photo, canvas, gel medium, brush, and a sponge. These materials ensure a smooth and clear transfer of the image onto the canvas.
How Do I Prepare The Photo For Transfer?
Print your photo on regular paper using a laser printer. Mirror the image before printing if it has text. This helps in achieving the correct orientation on the canvas.
Can I Use Any Type Of Canvas For Photo Transfer?
Yes, most standard canvases work well. Choose a clean, dry, and smooth canvas surface for best results. Avoid heavily textured canvases as they may distort the image.
How Long Does The Photo Transfer Process Take?
The transfer usually takes about 24 hours to dry completely. Drying time may vary based on the gel medium and room conditions. Patience is key for a successful transfer.
Conclusion
Transferring photos to canvas creates lasting, personal art pieces. This simple process lets you display memories in a unique way. Follow easy steps, and your canvas will look great. Use the right materials to keep colors bright and sharp. Take your time for the best results.
Enjoy the fun of turning photos into wall art. Try different photos to find what you like most. Canvas prints add a warm, creative touch to any room. Start your project today and bring your photos to life.


