
Are you curious about transforming your photos or artwork into stunning canvas prints? Printing on canvas material can elevate your images, giving them a professional and artistic touch.
But, if you’ve ever felt overwhelmed by the technicalities or choices involved, you’re not alone. Imagine having the power to create a masterpiece, hanging proudly on your wall, capturing the essence of your favorite memories or artistic endeavors. In this guide, you’ll discover simple, straightforward steps to print on canvas material, ensuring your creations are vibrant, durable, and just as you envisioned.
Don’t miss out on unlocking this creative potential—it might just be the artistic outlet you’ve been searching for. Ready to dive in and turn your visions into reality? Let’s get started!
Choosing Canvas Material
Choosing the right canvas material is crucial for achieving the best print quality and durability. Your choice affects the vibrancy of colors, texture, and how the final artwork feels. Let’s look closely at the different types of canvas fabrics, their textures and weights, and the options between pre-stretched and rolled canvas.
Types Of Canvas Fabric
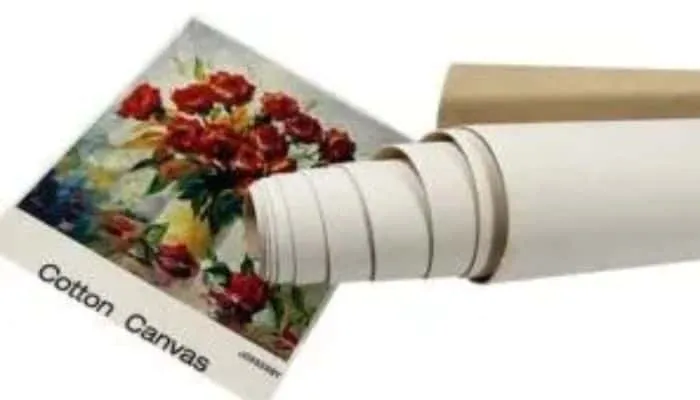
Canvas fabric mainly comes in cotton and polyester. Cotton canvas offers a natural feel and excellent color absorption, making it a favorite for fine art prints. Polyester canvas, on the other hand, is more durable and resistant to moisture, which suits outdoor or high-traffic displays.
Some artists combine cotton and polyester to get the best of both worlds—soft texture with durability. Have you ever noticed how a softer canvas brings out subtle details? That’s the cotton at work.
Canvas Texture And Weight
Texture impacts how the ink settles on the canvas. A smooth canvas produces crisp, clear images, while a rough texture adds depth and character to the print. Consider whether you want a matte or glossy finish, as texture influences this too.
Weight is another key factor. Heavier canvases (around 12 oz or more) feel sturdy and hold paint or ink better without warping. Lighter canvases are easier to handle but may not last as long. Think about where you plan to display your print and how much handling it will get.
Pre-stretched Vs. Rolled Canvas
Pre-stretched canvas comes ready to use, stretched over a wooden frame. It saves time and ensures consistent tension, which helps prevent wrinkles during printing. This option is perfect if you want a quick setup or are new to printing on canvas.
Rolled canvas, however, gives you flexibility. You can cut it to any size and stretch it yourself or send it to a professional framer. This is ideal if you print large formats or want to experiment with different framing styles. Which option fits your workflow better?
Preparing Artwork For Canvas Printing
Preparing your artwork for canvas printing is essential for high-quality results. Proper preparation ensures your image looks sharp and vibrant on canvas. This process involves choosing the right resolution, adjusting colors, and saving files correctly.
Selecting The Right Image Resolution
High resolution is key to clear prints. Aim for at least 300 DPI (dots per inch) for canvas printing. Lower resolution can cause pixelated or blurry images. Check the image size in pixels before printing. Larger dimensions allow better detail and crispness.
If your image is small, avoid stretching it. Stretching lowers quality and creates visible pixels. Use original or high-quality photos for best results.
Color Calibration Tips
Colors on screen differ from printed colors. Calibrate your monitor regularly to match print output. Use color profiles like sRGB or Adobe RGB for accurate colors. Adjust brightness and contrast to avoid washed-out prints.
Soft proofing helps preview colors before printing. This step reduces surprises and improves color accuracy. Remember, canvas texture may soften colors slightly.
File Formats For Printing
Save your artwork in formats that preserve quality. Preferred formats include TIFF, PNG, or high-quality JPEG. Avoid compressed files like low-quality JPEGs. They lose detail and create artifacts.
TIFF files keep all data without compression. PNG supports transparency and sharp colors. JPEGs work if saved at maximum quality.
Printing Techniques For Canvas
Printing on canvas requires special techniques to ensure clear and lasting images. Different methods offer unique qualities for various projects. Choosing the right technique depends on the desired look and budget.
Inkjet Printing
Inkjet printing sprays tiny droplets of ink directly onto the canvas. This method captures detailed images with rich colors. It works well for photos and detailed artwork. The ink soaks into the fibers, making the print durable. It is a popular choice for home and small business use.
Giclée Printing
Giclée printing is a high-quality inkjet process. It uses archival inks that last for decades without fading. This technique produces vibrant colors and smooth gradients. Artists and galleries often prefer giclée for fine art reproductions. The prints have a professional look and feel.
Screen Printing
Screen printing pushes ink through a mesh screen onto the canvas. Each color requires a separate screen, making it ideal for bold designs. This method creates thick, textured prints that stand out. It is cost-effective for large runs of the same design. Screen printing works well for logos and simple images.
Credit: www.gentlepk.com
Setting Up Your Printer
Setting up your printer correctly is crucial before you start printing on canvas material. Canvas requires more careful handling than regular paper, and your printer needs to be ready to manage the unique texture and thickness. Getting the setup right ensures vibrant colors and sharp details, saving you from wasted material and frustration.
Printer Compatibility
Not all printers are made for canvas printing. You need a printer that can handle thicker media without jamming or smudging. Inkjet printers are generally a better choice because they deliver high-quality color output and can work with specialty papers like canvas.
Check your printer’s specifications for the maximum media thickness it supports. Some models have manual feed trays designed for thicker materials, which can be a big help. If you’re unsure, try testing with a small canvas sheet before committing to a full project.
Ink Types For Canvas
Your choice of ink impacts both the durability and color quality on canvas. Pigment-based inks are often preferred because they resist fading and water damage better than dye-based inks. This makes your canvas prints last longer and look more professional.
If you want a glossy finish, dye inks can produce vibrant colors but might not hold up as well over time. Consider the environment where your print will be displayed—if it’s exposed to sunlight or moisture, pigment inks are usually the safer bet.
Adjusting Printer Settings
Fine-tuning your printer settings is essential to match the canvas texture. Start by selecting the media type closest to canvas or a heavy paper option in your printer’s settings menu. This adjusts the ink flow and drying time to prevent smudges and bleeding.
Lower the printing speed if possible. Slower printing allows the ink to absorb properly into the canvas surface. Also, increase the print resolution for sharper images—this is especially important for detailed artwork or photographs.
Have you experimented with custom color profiles? Creating or downloading an ICC profile tailored for your canvas and printer combination can dramatically improve color accuracy. It’s a step many skip but can set your prints apart.
Post-printing Canvas Care
Once your artwork is printed on canvas, proper care is essential to preserve its vibrancy and durability. Post-printing canvas care involves several key steps that ensure your print looks stunning for years. Paying attention to drying, protective coatings, and framing can make a significant difference in the final presentation.
Drying And Curing Process
After printing, the ink on the canvas needs time to dry and cure fully. This process can take anywhere from 24 to 72 hours depending on the type of ink and environmental conditions like humidity and temperature.
Place your canvas in a dust-free, well-ventilated area to avoid smudges or dust particles sticking to the surface. Avoid stacking or rolling the canvas during this time to prevent damage or distortion.
Have you noticed uneven drying in your prints before? Keeping the canvas flat and undisturbed can help maintain consistent ink absorption and color quality.
Applying Protective Coatings
Adding a protective coating is crucial to shield your canvas print from UV rays, moisture, and scratches. You can use varnish sprays designed specifically for canvas prints to enhance longevity.
Choose between matte, satin, or gloss finishes depending on the look you want. Apply the coating in thin, even layers using a spray can or a soft brush, letting each layer dry completely before adding the next.
Protective coatings also make cleaning easier. Have you tried wiping your canvas gently with a damp cloth after applying the coating? It can keep dust at bay without harming the print.
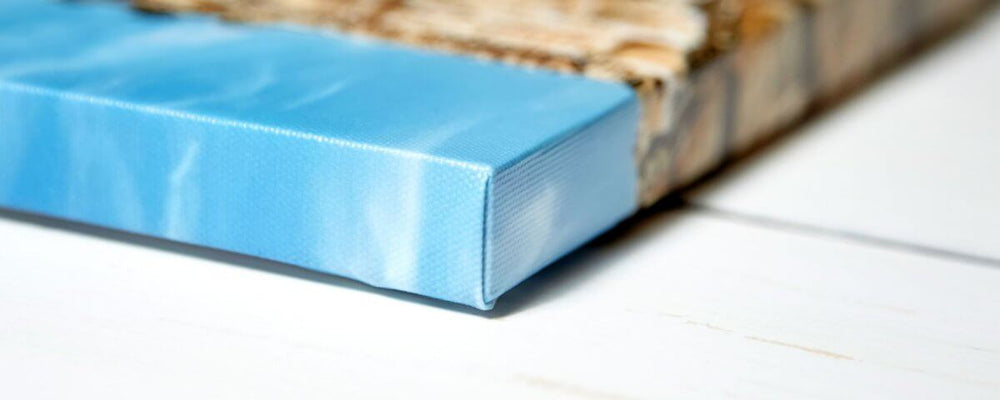
Stretching And Framing Tips
Properly stretching your canvas prevents sagging and maintains a professional appearance. Use a stretcher frame that fits your canvas size and pull the material tight before securing it on the back.
If you’re framing the canvas, consider using a spacer or floater frame. This setup gives the artwork a polished look and protects the edges from damage.
Don’t rush the stretching process—uneven tension can cause wrinkles or warping. Have you ever tried stretching canvas without a tool? Investing in stretcher pliers can make the job much easier and more precise.

Credit: www.houseofu.com
Troubleshooting Common Issues
Printing on canvas can bring art to life. Yet, some issues might appear during the process. Knowing how to fix these problems helps save time and materials. This section covers common issues and easy ways to solve them.
Ink Smudging And Bleeding
Ink smudging happens when the ink stays wet too long. It can blur your image. Bleeding means ink spreads outside the lines. Both can ruin the print.
- Use the right ink made for canvas printing.
- Let the ink dry fully before touching the canvas.
- Check printer settings for canvas material to control ink flow.
- Avoid using too much ink in one pass.
Color Fading Problems
Colors can fade fast if the print is not protected. Sunlight and moisture cause fading. Faded colors make your artwork look old and dull.
- Use UV-resistant inks to keep colors bright.
- Apply a clear protective spray after printing.
- Store prints away from direct sunlight.
- Use high-quality canvas designed for ink retention.
Canvas Wrinkles And Warping
Canvas can wrinkle or warp during printing or drying. This affects print quality and framing. Wrinkles create uneven surfaces and distort images.
- Stretch the canvas tightly before printing.
- Keep humidity low to avoid moisture buildup.
- Use a flat, clean surface for drying.
- Handle the canvas gently to prevent bends or folds.
Creative Ideas For Canvas Art
Creative ideas make canvas art stand out and feel personal. Simple prints become unique with a few artistic touches. Experimenting with textures and materials brings new life to your canvas. Displaying your art thoughtfully enhances its beauty and impact.
Customizing With Textures
Textures add depth and interest to canvas prints. Use materials like sand, fabric, or modeling paste on the canvas surface. These elements create a tactile feel that invites touch and closer look. Try layering textures to build a rich, complex design. Textured canvases catch light differently, adding dynamic shadows and highlights.
Mixed Media Enhancements
Combine paint, ink, and collage for eye-catching effects. Attach small objects like buttons, beads, or paper pieces to the canvas. This mix of materials adds variety and story to your artwork. Use different colors and shapes to create balance and focus. Mixed media allows freedom to express ideas beyond traditional painting.
Displaying Canvas Prints
Proper display boosts the impact of your canvas art. Choose wall space with good lighting and minimal glare. Frames can protect and enhance the look but consider frameless styles too. Group several canvases for a gallery wall effect. Use shelves or easels for flexible and creative arrangements.
Credit: www.macalootextile.com
Frequently Asked Questions
What Types Of Printers Work Best For Canvas Printing?
Inkjet printers are ideal for canvas printing due to their high-quality color output. They handle thick materials well and produce vibrant, detailed images. Ensure your printer supports canvas thickness to avoid jams. Specialized printers designed for art prints offer the best results on canvas material.
How Do I Prepare Canvas For Printing?
Prepare canvas by cleaning it with a soft brush to remove dust. Use a gesso primer to create a smooth, absorbent surface. Allow the primer to dry completely before printing. Proper preparation ensures better ink adhesion and longer-lasting prints.
Can I Use Regular Ink For Printing On Canvas?
Regular ink may not adhere well or last on canvas. Use pigment-based or archival inks designed for canvas printing. These inks offer better color vibrancy and durability. They resist fading and moisture, making prints more professional and long-lasting.
What Settings Should I Use For Printing On Canvas?
Set your printer to the highest quality or photo mode. Select the correct media type, usually “canvas” or “fine art paper. ” Adjust ink density if available for richer colors. Use the printer’s manual feed tray to handle thicker canvas sheets smoothly.
Conclusion
Printing on canvas material is a great way to create lasting art. Choose the right printer and ink for clear, bright colors. Prepare the canvas carefully to avoid wrinkles or smudges. Take your time to align the design perfectly. With practice, your prints will look professional and beautiful.
Enjoy the process and watch your ideas come to life on canvas. Keep experimenting and improving with each print you make. This simple guide helps you start your canvas printing journey today.


