
Have you ever wanted to turn your favorite photos into beautiful canvas prints that brighten up your space? Printing pictures on canvas is a simple way to showcase your memories with a professional touch.
But how do you get started? Whether it’s for your home, a gift, or your art, knowing the right steps can make all the difference. You’ll discover easy, practical tips to print your pictures on canvas like a pro. Keep reading, and you’ll soon have stunning canvas prints that everyone will admire.
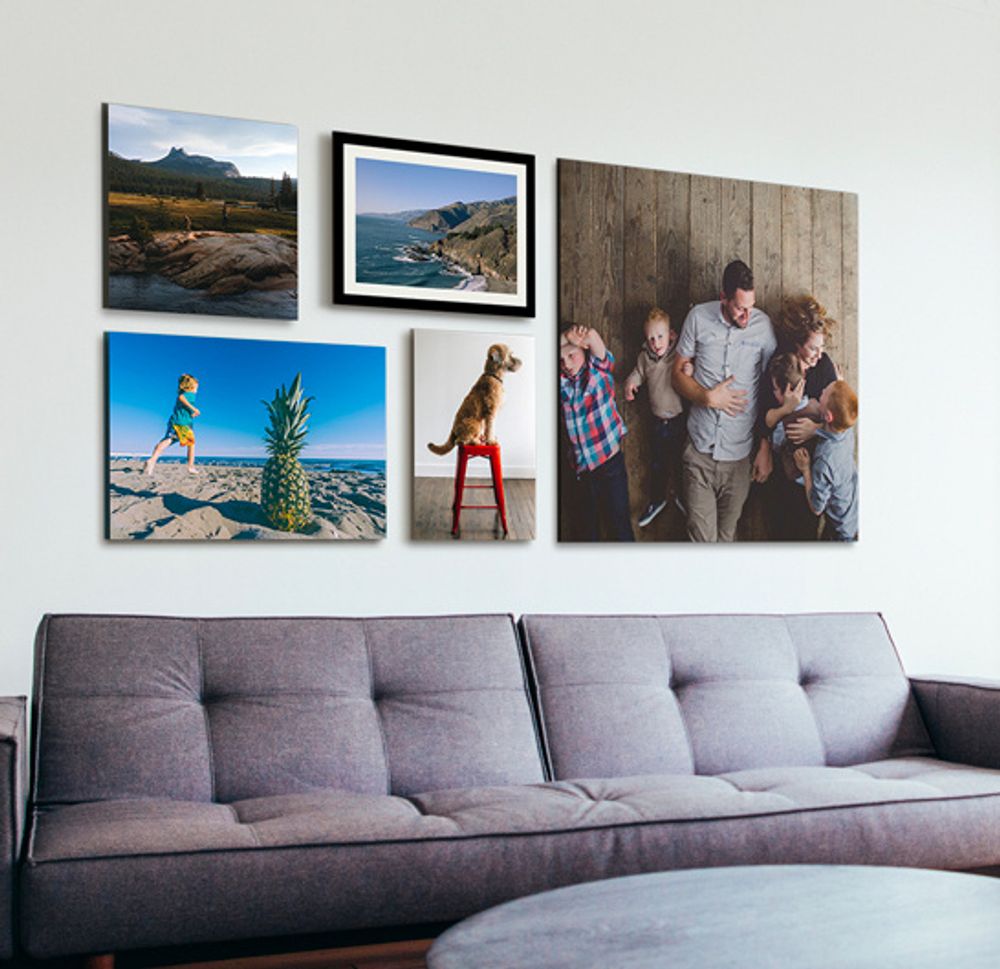
Credit: posterprint.co.uk
Choosing The Right Photo
Choosing a clear and high-quality photo ensures your canvas print looks sharp and vibrant. Focus on images with good lighting and simple backgrounds for best results.
Choosing the right photo is crucial for canvas printing. Not every picture suits this medium. The quality of the final print depends on the photo’s initial attributes. Ensure your selected image meets the requirements for a stunning canvas display.Selecting High-resolution Images
High-resolution images result in sharp prints. Aim for at least 300 DPI. This ensures clarity. Low resolution leads to pixelation. Blurry images on canvas disappoint. Verify your photo’s resolution before proceeding.Considering Composition And Colors
Composition matters for canvas appeal. Choose images with balanced elements. Symmetry can enhance visual interest. Pay attention to colors. Bright, vivid colors pop on canvas. Muted tones can appear dull. Consider how colors will blend with your room’s decor.Editing For Canvas Printing
Editing enhances your photo for canvas. Adjust brightness and contrast. Enhance colors to suit the canvas medium. Cropping may improve composition. Remove any distracting elements. Use editing tools to retouch any imperfections. This step ensures your canvas print looks professional.Preparing Your Image For Print
Preparing your image for canvas print is essential for a clear, vibrant result. The process involves fine-tuning size, resolution, colors, and composition. These adjustments ensure your picture looks great and fits perfectly on the canvas.
Adjusting Image Size And Resolution
Start by checking the image size. Canvas prints need high resolution to avoid blur. Aim for at least 300 pixels per inch (PPI) for sharp details.
Use editing software to resize without losing quality. Avoid stretching the image beyond its original size. Keep the aspect ratio to prevent distortion.
Optimizing Color Profiles
Color profiles control how colors appear on print versus screen. Convert your image to the CMYK color profile for printing. This profile matches printer colors better than RGB.
Calibrate your monitor to see true colors. Adjust brightness and contrast slightly to improve print output. Remember, printed colors may look darker than on screen.
Cropping And Framing Tips
Crop your image to fit the canvas size. Leave extra space around important details to avoid cutting them off. Consider the canvas edges, which may wrap around the frame.
Use simple framing guides to balance the composition. Center the main subject or apply the rule of thirds. This creates a pleasing, professional look on your canvas print.
Types Of Canvas Materials
Choosing the right canvas material is key for quality prints. Different materials affect color, texture, and durability. Understanding these options helps in picking the best canvas for your pictures.
Cotton Vs. Polyester Canvas
Cotton canvas offers a natural feel and soft texture. It absorbs ink well, giving rich colors. Polyester canvas is smoother and more durable. It resists moisture and wrinkles better than cotton. Cotton suits classic artworks, while polyester fits vibrant, long-lasting prints.
Matte Vs. Glossy Finishes
Matte finish has no shine. It reduces glare and looks elegant. Glossy finish is shiny and bright. It enhances colors and details but can reflect light. Matte is good for subtle, soft images. Glossy works best for vivid, sharp pictures.
Durability And Texture Factors
Durability depends on canvas material and coating. Polyester is stronger and lasts longer outdoors. Cotton is more prone to wear but feels authentic. Texture affects how a picture looks and feels. Rough textures add depth, smooth ones highlight details. Choose based on where and how you will display the print.
Printing Methods For Canvas
Printing your pictures on canvas transforms ordinary photos into stunning wall art that lasts. The printing method you choose affects the quality, durability, and overall look of your canvas. Understanding the main printing techniques helps you decide which option fits your vision and budget.
Inkjet Printing Explained
Inkjet printing sprays tiny droplets of ink directly onto the canvas surface. This method allows for vibrant colors and detailed images, making it a popular choice for photo prints. Most home printers use inkjet technology, so you can try it yourself if you have the right setup.
However, inkjet prints can fade faster if exposed to direct sunlight or moisture. You might want to add a protective coating to increase durability. Have you checked if your printer supports canvas material before starting?
Giclée Printing Benefits
Giclée printing is a high-quality inkjet process that uses archival inks and fine art papers or canvas. It produces sharper images with richer colors and longer-lasting prints. Galleries and professional artists often prefer giclée for its museum-grade quality.
This method handles color gradients smoothly, making your pictures look more lifelike. If you want your canvas to stand the test of time, giclée printing is worth considering. Would you invest a bit more for professional-grade results?
Choosing Between Home And Professional Printing
Deciding whether to print at home or use a professional service depends on your priorities. Home printing offers control and convenience but may require trial and error to get the best results. It’s ideal for small projects or when you want to experiment with different images.
Professional printing provides expertise, consistent quality, and access to premium materials. It suits larger prints or when you want a polished finish without hassle. What matters more to you: saving time or having full creative control?
Stretching And Mounting Canvas
Stretching and mounting canvas is a crucial step to turn your printed pictures into stunning wall art. It not only gives your canvas a professional finish but also ensures the image stays taut and vibrant over time. Getting this right can transform a simple print into a gallery-worthy piece that you’ll be proud to display.
Tools And Supplies Needed
- Canvas stretcher bars:These wooden bars form the frame that supports your canvas.
- Staple gun and staples:Essential for securing the canvas tightly to the frame.
- Canvas pliers:These help you grip and pull the canvas evenly without damaging it.
- Measuring tape:Accuracy is key when cutting and stretching your canvas.
- Scissors or utility knife:For trimming excess canvas after stretching.
- Rubber mallet (optional):Useful for assembling stretcher bars tightly.
Having the right tools at hand makes the process smoother and helps avoid frustration. Missing a key supply can slow you down and impact the final quality.
Step-by-step Stretching Guide
Begin by assembling your stretcher bars to form a perfect rectangle. Check that all corners are square to avoid any warping of the canvas.
Lay your printed canvas face down on a clean surface. Center the wooden frame on the back of the canvas, making sure there’s enough fabric to wrap around the edges.
Using canvas pliers, pull the canvas tightly over one side of the frame and staple it in the middle. Move to the opposite side, pull tight again, and staple.
Repeat this process on the remaining sides, working from the center staples towards the corners. This ensures an even stretch and prevents sagging.
When you reach the corners, fold the canvas neatly and secure it with a few staples. Trim any excess canvas for a clean finish.
Ask yourself: Is the canvas smooth and tight without wrinkles? If not, adjust the tension by adding or moving staples.
Framing Options
Once your canvas is stretched, you have several framing choices to enhance its look.
- Gallery Wrap:The image wraps around the edges of the frame, creating a modern, frameless look. This style is popular for its clean presentation.
- Float Frame:A floating frame surrounds the canvas without touching the edges, adding depth and elegance.
- Traditional Frame:Adds a classic border around your canvas and can complement various decor styles.
Which framing style suits your space and personality? Trying out different frames can completely change the vibe of your artwork.

Credit: www.canvasjet.com
Caring For Canvas Prints
Caring for canvas prints keeps them looking fresh and vibrant for years. These prints need gentle handling and simple care. Proper maintenance protects the colors and the canvas fabric. Small efforts extend their beauty and lifespan.
Cleaning Tips
Dust canvas prints regularly with a soft, dry cloth. Use a microfiber cloth for best results. Avoid using water or cleaning sprays directly on the canvas. For stubborn spots, lightly dampen the cloth and gently wipe the area. Never scrub the surface to prevent damage.
Avoiding Sunlight Damage
Keep canvas prints out of direct sunlight to prevent fading. Bright light breaks down ink and canvas fibers over time. Place prints in shaded areas or rooms with indirect light. Use UV-protective glass or acrylic if framing the print. Rotate prints occasionally to balance sun exposure.
Proper Storage Methods
Store canvas prints in a cool, dry place away from moisture. Avoid stacking prints directly on top of each other to prevent warping. Use acid-free paper or cloth to cover prints during storage. Keep prints upright or flat on a clean surface. Proper storage stops mold and keeps prints in good shape.
Common Mistakes To Avoid
Printing pictures on canvas can create beautiful, lasting artwork. Avoiding common mistakes makes the process easier and the results better. Small errors can ruin your canvas print and waste time and money. Pay attention to details for sharp, colorful, and well-mounted pictures.
Using Low-quality Images
Low-resolution images cause blurry, pixelated prints. Always choose high-quality photos with at least 300 dpi for clear results. Enlarging small images reduces sharpness and detail. Check the image size before printing to avoid poor outcomes.
Ignoring Color Calibration
Colors on screen often differ from printed colors. Ignoring color calibration leads to dull or incorrect hues. Use color-calibrated monitors and printers for accurate tones. Test prints help adjust colors to match the original photo closely.
Improper Mounting Techniques
Mounting affects the canvas’s appearance and durability. Poor stretching causes wrinkles, sagging, or uneven tension. Use proper tools and techniques to stretch the canvas firmly. Secure edges neatly to maintain a professional finish and long-lasting print.

Credit: www.youtube.com
Finding Professional Printing Services
Finding the right professional printing service is key to creating beautiful canvas prints. A good printer brings your photos to life with vibrant colors and sharp details. Choosing wisely saves time, money, and disappointment.
Explore several options before deciding. Pay attention to quality, price, and customer feedback. These factors help ensure your canvas print matches your expectations.
Evaluating Print Quality
Check the printer’s sample images or galleries online. Look for clear details and true-to-life colors. Ask if they use high-resolution printing technology. Quality canvas prints should not have pixelation or blurry spots.
Also, consider the type of canvas and ink used. Premium materials last longer and resist fading. A good service often offers different finishes, like matte or glossy.
Comparing Pricing And Turnaround Times
Prices vary based on size, canvas type, and print options. Some companies charge extra for framing or shipping. Compare costs carefully to avoid surprises.
Turnaround time matters if you need prints quickly. Some services offer rush orders for faster delivery. Balance price with speed to find the best fit.
Reading Customer Reviews
Reviews reveal real experiences with print quality and customer service. Look for consistent positive feedback. Watch for comments about delays or damaged goods.
Review sites and social media provide honest opinions. Choose a service with many satisfied customers for peace of mind.
Frequently Asked Questions
How Do I Choose The Best Photo For Canvas Printing?
Select a high-resolution image with clear details and vibrant colors. Avoid blurry or pixelated photos for sharp canvas prints. Choose pictures with good lighting and contrast to enhance the final look on canvas.
What Type Of Canvas Is Ideal For Photo Printing?
Cotton or polyester blend canvases are best for photo prints. They provide a smooth texture and hold colors well. Choose a canvas with a matte or satin finish to reduce glare and improve image clarity.
Can I Print Photos On Canvas At Home?
Yes, if you have a high-quality inkjet printer and canvas sheets. Use specialized photo canvas paper for best results. Home printing requires careful setup and proper drying to avoid smudging.
How Do I Prepare A Photo File For Canvas Printing?
Use a high-resolution JPEG or TIFF file at 300 DPI or higher. Adjust brightness, contrast, and color balance before printing. Crop the image to match the canvas size for perfect alignment.
Conclusion
Printing pictures on canvas brings your photos to life. Choose the right image and size carefully. Use quality materials for best results. Follow each step to avoid mistakes. Enjoy your unique wall art that lasts long. Share your creativity with friends and family.
Canvas prints add warmth to any room. Keep practicing to improve your skills. Your memories deserve this special touch.


