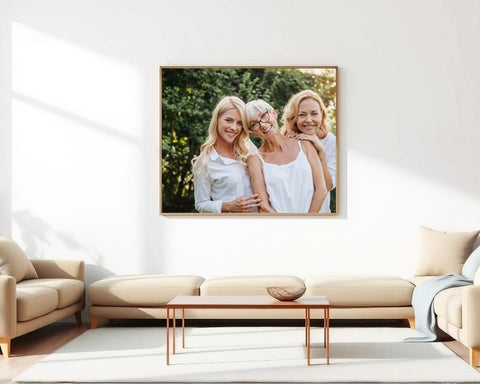
Want to turn your favorite photo into a stunning piece of wall art without spending a fortune? You’re in the right place.
Imagine seeing your special memories or creative shots printed on canvas, adding a personal touch to your home or office. It’s easier than you think, and you can do it yourself with just a few simple steps. Keep reading, and you’ll discover how to transform your photos into beautiful canvas prints that will impress everyone who sees them.
Your walls are waiting for a fresh, unique look—let’s make it happen!
Credit: www.vistaprint.ca
Choosing The Right Photo
Choosing the right photo to put on canvas can make all the difference in the final product. This decision can transform a simple image into a captivating piece of art. It’s not just about picking a favorite picture; it’s about selecting one that will shine when displayed on canvas.
Selecting High-quality Images
Start by ensuring your photo is of high quality. A clear, sharp image will look stunning on canvas, while a blurry one will disappoint. Ask yourself, does this image capture the moment with clarity and detail?
Consider images that have good lighting and contrast. These factors will enhance the depth and vibrancy of your canvas print. A picture with balanced colors and well-defined features always stands out.
Considering Image Resolution
Resolution is crucial when it comes to printing photos on canvas. Aim for a high-resolution image to prevent pixelation. Typically, images should be at least 300 DPI for the best results.
Use a camera with a high megapixel count to ensure you have enough resolution to work with. Have you ever printed a photo only to find it looks grainy? This happens when the resolution is too low for the size of the canvas.
Picking The Best Photo Style
Think about the style of the photo and how it fits with your decor. A black and white image might add a classic touch, while a vibrant, colorful photo could make a bold statement. What mood do you want to convey in your space?
Consider the composition of the photo. Does it have a focal point that will draw the viewer’s eye? A well-composed image can create a striking centerpiece in any room.
Credit: www.canvaspop.com
Gathering Materials
Before you start putting a photo on canvas, gathering the right materials is crucial. The quality of your final piece depends heavily on the tools and supplies you choose. Missing a key item or using the wrong type of canvas can lead to frustrating results.
Essential Tools And Supplies
Make sure you have these basics ready:
- Photo print:Use a high-quality print on photo paper for the best finish.
- Canvas:The base where your photo will be transferred.
- Adhesive:To secure your photo to the canvas.
- Brush or sponge:For applying glue or sealant evenly.
- Scissors or craft knife:To trim the photo edges precisely.
- Squeegee or credit card:To smooth out air bubbles.
- Clear sealant or varnish:To protect the final piece.
Have you checked that you don’t miss any of these before starting? It saves a lot of headaches later.
Types Of Canvases To Use
Choosing the right canvas affects both how your photo looks and how well it sticks. Stretched canvases with a wooden frame offer a professional feel and are easy to handle. You can also find canvas panels, which are flat and less expensive but may be harder to work on if you want a gallery wrap effect.
Consider the texture too—smooth canvases work best for sharp photo transfers, while rough textures might distort details. Would you prefer a canvas that doubles as a ready-to-hang frame, or do you want to customize the edges yourself?
Choosing The Right Adhesive
Not all adhesives work well with photos and canvas. Mod Podge is a favorite because it acts as both glue and sealant. It dries clear and prevents bubbling if applied carefully. Another option is spray adhesive, which can create a thin, even layer but requires good ventilation.
Some artists swear by gel mediums for a smooth finish and extra durability. Whichever you pick, test it on a small area or scrap canvas first. What kind of finish do you want—glossy, matte, or somewhere in between?
Preparing The Canvas
Preparing your canvas is a crucial step before transferring your photo. It sets the foundation for a smooth application and ensures your image stays vibrant and intact over time. Paying attention to this stage saves you from common mistakes that can ruin the final look.
Cleaning And Priming The Surface
Start by thoroughly cleaning your canvas to remove any dust or debris. Use a soft brush or a damp cloth and let it dry completely before moving on. A clean surface helps the photo adhere better and prevents bubbles or wrinkles.
Next, apply a layer of gesso or primer. This seals the canvas fibers and creates a smooth, even surface for your photo. Don’t rush this step—allow the primer to dry fully, usually a few hours, to avoid any peeling later.
Trimming And Sizing The Photo
Carefully measure your canvas and trim your photo to fit perfectly. Use a sharp pair of scissors or a craft knife for clean edges. If your photo is digital, adjust its dimensions before printing to match the canvas size exactly.
Think about adding a small border around the photo if you want it to stand out or have space for framing. This little detail can make a big difference in the finished piece’s appearance. Have you checked your measurements twice? It’s worth the extra moment.
Planning The Layout
Lay your photo on the canvas without attaching it to visualize the final look. Move it around to find the best position—centered, off-center, or even angled for a creative touch. This step avoids surprises once the photo is glued down.
Consider how the canvas edges will frame your photo. Sometimes, leaving a small margin can give a professional feel. Ask yourself: Does the photo’s placement highlight its best features? Take your time to make this decision.
Transferring The Photo
Transferring a photo onto canvas creates a unique and lasting piece of art. The process requires care and patience. The goal is to preserve the image’s detail and colors while embedding it into the canvas texture. Different techniques offer various effects and durability. Understanding each method helps in choosing the best fit for your project.
Using Mod Podge Technique
Mod Podge is a popular craft glue and sealer. It works well for transferring photos onto canvas. First, print your photo using a laser printer. Apply a thick layer of Mod Podge on the canvas surface. Place the photo face down on the canvas while the glue is still wet.
Smooth out any bubbles or wrinkles carefully. Let it dry completely for at least 24 hours. After drying, dampen the paper with water. Gently rub the paper away using your fingers or a soft cloth. The image will remain on the canvas, sealed by Mod Podge.
Applying Photo Transfer Medium
Photo transfer medium is designed specifically for image transfers. Print your image on regular paper. Brush a generous coat of the medium over the image side. Press the photo firmly onto the canvas. Use a burnishing tool or credit card to remove air pockets.
Allow the canvas to dry for 24 hours. Soak the paper with a wet sponge. Carefully rub the paper off to reveal the transferred photo. This method keeps colors bright and details sharp. It works well for both inkjet and laser prints.
Avoiding Common Transfer Mistakes
- Do not skip drying times; it affects transfer quality.
- Use only laser prints or inkjet prints based on medium instructions.
- Avoid moving the photo after placing it on the canvas.
- Remove paper gently to prevent tearing or smudging.
- Protect your work area to avoid mess and damage.
Finishing Touches
After transferring your photo onto the canvas, the final phase is all about adding those finishing touches that make your artwork truly stand out. These steps protect your work and enhance its presentation, giving it a polished, gallery-ready look. Let’s dive into how you can seal, frame, and display your canvas with confidence.
Sealing And Protecting The Canvas
Sealing your canvas preserves the photo and prevents damage from dust, moisture, and sunlight. Use a clear acrylic spray or a brush-on varnish designed for canvas. Choose a matte finish for a subtle look or gloss if you want vibrant colors to pop.
Apply the sealant in thin, even layers. Allow each layer to dry completely before adding another. This avoids streaks and ensures long-lasting protection.
Adding Frames Or Edges
Frames add structure and style to your canvas. You can buy ready-made frames or create simple wooden edges yourself for a rustic touch. Floating frames give a modern, clean look by leaving a gap between the canvas and frame.
Another option is to paint the edges of your canvas to complement your photo. Dark colors often add depth, while white edges can brighten the overall piece. What colors or styles resonate with your space?
Displaying Your Artwork
Where you place your canvas impacts how it’s appreciated. Consider lighting—natural light enhances colors, but avoid direct sunlight to prevent fading. Use picture hooks or a sturdy wire on the back for secure hanging.
Think about your room’s layout. A single canvas can be a focal point, or you can create a gallery wall with multiple pieces. How will your canvas inspire or change the vibe of your space?
Troubleshooting Tips
Problems can happen while putting a photo on canvas. These issues might seem tricky. Fixing them quickly keeps your project looking great. Below are simple tips to solve common problems.
Fixing Bubbles And Wrinkles
Bubbles and wrinkles appear if air or moisture gets trapped. Smooth them out gently with a soft cloth or roller. Press from the center toward the edges to push air out.
For stubborn bubbles, use a small pin to prick and release air. Be careful not to tear the photo or canvas. Work slowly and patiently for the best results.
Dealing With Color Fading
Color fading happens when the photo is exposed to too much sunlight or heat. Keep your canvas away from direct sunlight to protect colors. Use UV-resistant sprays to add a protective layer.
Store your canvas in a cool, dry place. Avoid humid areas that can damage the image. These steps help keep your photo vibrant for a long time.
Repairing Transfer Errors
Transfer errors can cause parts of the photo to shift or not stick well. Gently lift the affected area and reapply adhesive if possible. Use a clean cloth to press the photo back onto the canvas.
If the error is severe, consider redoing that section. Take your time to align the photo perfectly before pressing it down. Patience helps avoid mistakes and keeps the image clear.

Credit: www.canva.com
Frequently Asked Questions
How Do I Transfer A Photo Onto Canvas At Home?
To transfer a photo onto canvas, print the image on transfer paper. Then, place it on the canvas and apply heat using an iron. Peel off the paper carefully to reveal the image. This method is simple and cost-effective for DIY photo canvases.
What Materials Are Needed For Photo Canvas Transfer?
You need photo transfer paper, a blank canvas, a printer, and an iron. Optional items include scissors and a protective sealant. These materials ensure a smooth transfer and protect the image on the canvas.
Can I Use Any Photo For Canvas Printing?
Yes, you can use any high-resolution photo for canvas printing. Clear and sharp images produce the best results. Avoid low-quality or pixelated photos to ensure a professional-looking canvas.
How Do I Protect My Photo Canvas After Transfer?
Apply a clear acrylic sealant or varnish to protect the canvas. This prevents fading and damage from moisture. Allow the sealant to dry completely before displaying or handling the canvas.
Conclusion
Creating your own photo canvas brings joy and pride. It saves money and lets you personalize your space. The steps are simple and fun to follow. Just choose a good photo, prepare the materials, and work carefully. With practice, your skills will improve quickly.
Enjoy the process and display your art proudly. This project fits any home or gift idea nicely. Try it yourself and see the difference. Your creativity will shine through every canvas you make.