
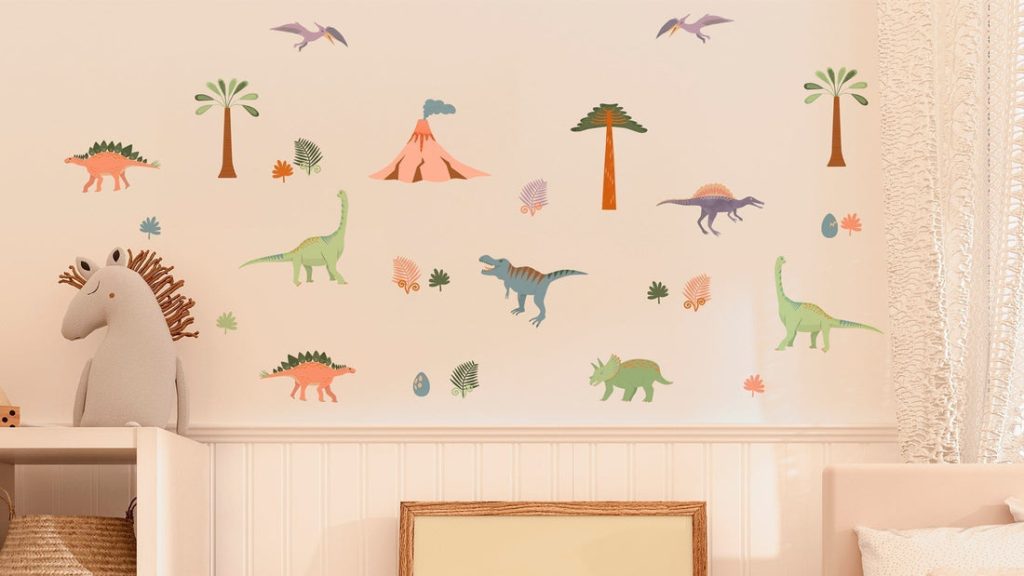
Are you ready to transform your space without the hassle of paint or nails? Putting a wall sticker on your wall is one of the easiest and fastest ways to add personality to any room.
But if you’ve never done it before, you might wonder how to get it right the first time—without bubbles, wrinkles, or crooked edges. In this guide, you’ll discover simple, step-by-step tips that make applying wall stickers a breeze. By the end, you’ll feel confident to give your walls a fresh new look that truly stands out.
Let’s get started!
Choosing The Right Wall Sticker
Choosing the right wall sticker is the foundation of a successful decorating project. The perfect sticker not only fits your space but also reflects your personality and style. Before you start peeling and sticking, consider the types, materials, and design options available to ensure your wall sticker looks great and lasts long.
Types Of Wall Stickers
Wall stickers come in various styles to suit different tastes and spaces. You can find:
- Vinyl decals:Durable and easy to remove, ideal for smooth walls.
- Fabric stickers:Soft texture that doesn’t damage paint, perfect for renters.
- Chalkboard stickers:Great for kitchens or kids’ rooms where you want to write or draw.
- Glow-in-the-dark stickers:Add fun and functionality to bedrooms.
Think about where you want to place your sticker. Will it be a high-traffic area or a cozy nook? The type you choose should match the wall’s condition and your lifestyle.
Material Considerations
Material affects how easy the sticker is to apply and remove, as well as its durability. Vinyl is popular because it sticks well and peels off cleanly without leaving residue.
If you’ve had trouble with paint peeling in the past, fabric stickers might be a safer bet since they are gentler on surfaces. Consider moisture levels too — some materials handle humidity better than others, so bathrooms and kitchens may require special options.
Ask yourself: How long do you want this sticker to last? Temporary or long-term use will guide your material choice significantly.
Design And Size Selection
The design sets the tone of your space, so pick something that resonates with your style and complements existing decor. Large stickers can become a focal point, but smaller ones work well to add subtle charm or fill empty corners.
Measure your wall space carefully before buying. A sticker that’s too big can overwhelm a room; too small, and it might go unnoticed. Visualize how the design will look from different angles and distances.
Have you thought about mixing multiple smaller stickers for a custom look? Sometimes, grouping several designs creates a unique vibe that one big sticker can’t achieve.
Credit: www.amazon.ie
Preparing Your Wall Surface
Preparing your wall surface is a crucial step before applying a wall sticker. A clean, smooth wall ensures the sticker adheres well and looks flawless. Neglecting this preparation can cause bubbles, peeling, or uneven edges that ruin the final look.
Cleaning And Drying The Wall
Start by removing dust, dirt, and grease from the wall. Use a mild detergent mixed with water and a soft cloth to gently wipe the surface. Avoid harsh chemicals that might damage the paint or leave residue behind.
After cleaning, dry the wall completely using a dry cloth or allow it to air dry. Moisture can prevent the sticker from sticking properly. Have you noticed how even slight dampness affects tape or stickers? The same applies here.
Repairing Imperfections
Look closely for any holes, cracks, or dents on your wall. These imperfections will show through the sticker and can cause it to peel off prematurely. Fill small holes or cracks with spackling paste using a putty knife.
Once the filler is dry, sand the area lightly to create an even surface. This step might seem tedious, but a smooth base makes a huge difference in the sticker’s finish and durability. Have you ever had a sticker peel because the wall wasn’t properly fixed?
Ensuring A Smooth Surface
A smooth wall surface is key to a flawless application. Run your hand over the wall to feel for bumps or rough spots you might have missed. Sand down any rough patches gently with fine-grit sandpaper.
If your wall has a glossy or shiny finish, lightly sanding it can help the sticker stick better. You can also test a small corner of the sticker to see if it adheres well before applying the whole design. What’s the point of spending time on a sticker if it’s going to peel away quickly?
Gathering Necessary Tools
Preparing to put up a wall sticker requires gathering the right tools first. Having everything ready makes the process smooth and avoids mistakes. This step saves time and helps achieve a clean finish.
Some tools are necessary for every application. Others improve accuracy and make the job easier. Knowing what to use helps create a perfect look on your wall.
Essential Tools List
- Wall sticker or decal
- Clean cloth or sponge
- Measuring tape or ruler
- Masking tape
- Scissors
- Squeegee or credit card
- Level (optional but helpful)
Optional Accessories For Precision
- Laser level for exact alignment
- Spray bottle with water and soap mix
- Painter’s tape for marking positions
- Pin or needle for removing air bubbles
- Hairdryer to soften sticker edges

Credit: www.designcafe.com
Positioning The Wall Sticker
Positioning the wall sticker correctly is key to making your space look just right. If it’s off even by a little, the whole effect can feel unbalanced or awkward. Taking the time to carefully plan where your sticker will go saves you from frustration and helps you achieve a clean, professional look.
Choosing The Placement
Think about the room’s layout and the wall’s purpose before deciding where to place your sticker. Is it a focal point above a sofa or a subtle accent near a doorway? Consider lighting too—natural light can highlight your sticker beautifully or cause glare that hides details.
Try holding the sticker up in different spots. Step back and ask yourself if it catches your eye naturally or feels out of place. Sometimes a spot that seems perfect up close doesn’t work when you look from across the room.
Marking Guidelines
Once you’ve picked the spot, mark the wall lightly with a pencil to guide your placement. Use small dots or faint lines that you can erase later without damaging the paint. These marks act as your visual checkpoints to keep the sticker aligned during application.
Be careful not to press too hard with the pencil; you want the marks visible enough to follow but easy to remove afterward. If your sticker has a specific shape or pattern, marking key points like corners or the center helps you position it precisely.
Using A Level For Alignment
Even a small tilt can make your sticker look crooked, so use a level to check your markings before you start sticking. Place the level along your pencil lines to ensure they’re perfectly horizontal or vertical. This simple step makes a big difference.
If you don’t have a level, a smartphone app can work just as well. Align the sticker based on the level’s reading, and adjust the marks if necessary. This way, your wall sticker sits straight and looks professionally placed every time.
Applying The Wall Sticker
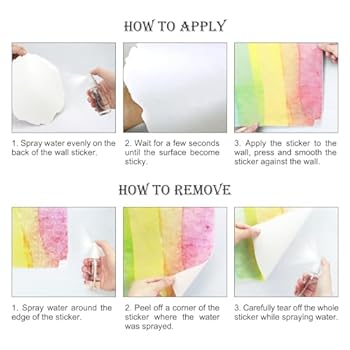
Clean the wall surface thoroughly to remove dust and dirt. Peel the backing slowly and press the sticker onto the wall, smoothing out air bubbles with a flat tool or your hand. Work gently to avoid wrinkles and ensure the sticker sticks well.
Applying a wall sticker can transform your space in mere moments. It’s an art that blends creativity with precision. But how do you ensure that your wall sticker looks picture-perfect? Let’s dive into the step-by-step process of applying a wall sticker, ensuring it adheres smoothly to your wall.Peeling The Backing
Begin by carefully peeling the backing of your wall sticker. Hold the sticker gently to avoid creases or folds. It’s like unwrapping a delicate present—patience is key. Ensure you peel the backing slowly. This prevents the sticker from sticking to itself. If you rush, you might end up with unwanted wrinkles.Sticking From Top To Bottom
Position the top edge of the sticker where you want it on the wall. Allow gravity to guide the rest of the sticker downward. This technique helps maintain alignment. Press down firmly on the top edge. Gradually move your way down, pressing along the way. This ensures even application without bubbles.Smoothing Out Air Bubbles
Once the sticker is in place, use a squeegee or a credit card to smooth out air bubbles. Start from the center and push towards the edges. If bubbles persist, gently lift the sticker and reapply. It’s like smoothing a bedsheet—patience and persistence pay off. Remember, practice makes perfect. Each sticker application is a chance to refine your technique. What’s your go-to tip for a flawless sticker application?
Credit: www.designcafe.com
Finishing Touches
Adding wall stickers is exciting, but the final touches make all the difference between a quick decoration and a polished look. Paying attention to small details ensures your sticker stays put and looks professionally applied. Let’s focus on those crucial finishing touches that seal the deal.
Trimming Excess Material
After placing your wall sticker, check for any parts that extend beyond your desired area. Use a sharp craft knife or scissors to carefully trim away the extra material. Precision is key here—cutting too close might damage the design, while leaving excess can make it look messy.
Think about how a slight overhang could catch dust or peel off sooner. Taking the time to trim neatly protects your sticker’s edges and keeps your wall looking clean.
Pressing Edges Firmly
Once your sticker is in position, press the edges firmly against the wall. Use a flat tool like a credit card or a squeegee to smooth out air bubbles and ensure strong adhesion. Don’t rush this step—firm pressure along the edges helps prevent peeling over time.
Have you noticed how some stickers start to peel at the corners? This often happens because those edges weren’t pressed down well enough. Giving them extra attention now saves you from fixing it later.
Allowing Adhesive To Set
After smoothing out your wall sticker, give the adhesive time to settle. Avoid touching or repositioning the sticker for at least 24 hours. This pause allows the glue to bond fully with the wall surface, improving durability.
Imagine spending time on a perfect application only to lift a corner by accident the next day. Waiting patiently might test your excitement, but it’s essential for a lasting finish.
Tips For Removal And Repositioning
Removing and repositioning wall stickers can be easy with the right approach. Careful handling keeps your walls safe and the sticker reusable. Follow simple tips to make this process smooth and damage-free.
Safe Removal Techniques
Start by gently peeling the sticker from one corner. Pull slowly and steadily to avoid tearing. Use a hairdryer on low heat to warm the adhesive. This softens the glue and helps the sticker come off easily.
Avoid pulling hard or fast. If the sticker resists, warm it more before trying again. Use a plastic scraper or card to lift edges without scratching the wall. Stop if you notice any paint lifting.
Avoiding Damage To Walls
Test removal methods on a small hidden area first. Avoid using sharp tools that may harm the paint or surface. Clean the wall with mild soap and water after removal. This removes any leftover adhesive without harsh chemicals.
Do not use strong solvents or abrasive cleaners. These can damage the wall paint or wallpaper. Keep the room well-ventilated during the process to reduce fumes from cleaning products.
Reapplying Wall Stickers
Check the sticker’s back for any dirt or damaged areas before reapplying. Clean it gently with a soft cloth if needed. Choose a smooth, dry wall surface for the best adhesion.
Align the sticker carefully before pressing it down. Use a flat tool or your hand to smooth out air bubbles. Press firmly from the center outward to secure the sticker evenly.
Frequently Asked Questions
How Do I Prepare The Wall Before Applying A Sticker?
Clean the wall thoroughly using a mild detergent and water. Ensure it is dry and smooth to remove dust or grease. A clean surface helps the sticker adhere better and last longer.
Can I Reposition The Wall Sticker After Applying?
Yes, gently peel off and reposition within a few minutes. Avoid stretching the sticker when moving. After some time, the adhesive bonds stronger, making repositioning difficult.
What Tools Do I Need For Applying A Wall Sticker?
Use a squeegee or credit card to smooth out air bubbles. A measuring tape and level help position the sticker evenly. Clean cloth and mild cleaner prepare the surface properly.
How Long Does A Wall Sticker Last On The Wall?
A good quality wall sticker lasts 3 to 5 years indoors. Longevity depends on surface type, exposure to sunlight, and humidity. Proper application and care extend the sticker’s lifespan.
Conclusion
Applying a wall sticker is simple with the right steps. Clean the surface well for good stickiness. Peel the backing carefully and place the sticker slowly. Use a flat tool to smooth out air bubbles. Take your time to avoid wrinkles or tears.
Enjoy your fresh, new wall look. Small details make a big difference. Try different designs to fit your style. Wall stickers brighten rooms without much effort. Give your space a quick, easy update today.


