
Are you looking to add a touch of magic to your room quickly and easily? Butterfly stickers on your wall can transform any space into a vibrant, cheerful haven.
But how do you make sure they look perfect and stay in place? In this guide, you’ll discover simple steps to apply butterfly stickers flawlessly, making your walls come alive with color and charm. Keep reading, and by the end, you’ll have the confidence to create a stunning butterfly display that everyone will admire.
Choose The Right Stickers
Choosing the right butterfly stickers is key to creating a beautiful wall design. The perfect stickers match your room’s style and last long. Consider the types, materials, size, and colors before buying. This helps ensure the stickers look great and stick well.
Types Of Butterfly Stickers
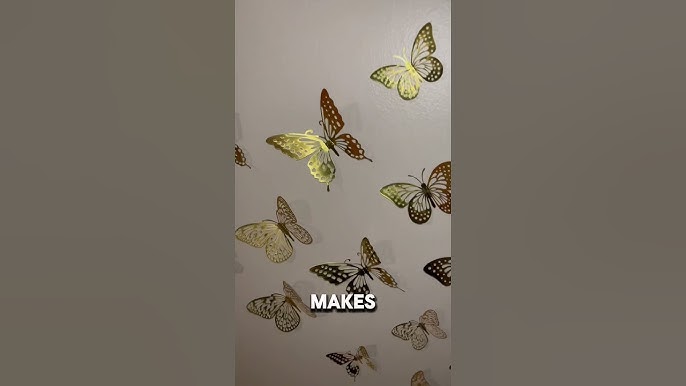
Butterfly stickers come in various styles. Vinyl stickers are popular for smooth walls. They are easy to apply and remove. Paper stickers are cheaper but may peel faster. 3D stickers add texture and depth to the wall. Decals with glitter or metallic finishes create a shiny effect.
Material Considerations
Sticker material affects durability and look. Vinyl is water-resistant and easy to clean. It works well in bedrooms and living rooms. Paper stickers suit dry, clean surfaces only. Avoid stickers with low-quality glue; they can fall off soon. Choose materials that do not damage paint when removed.
Size And Color Selection
Pick sizes that fit your wall space. Small stickers work well in clusters or borders. Large stickers make a bold statement in empty areas. Match colors with your room’s theme. Soft pastels create a calm atmosphere. Bright colors add energy and fun. Mix different sizes and colors for a lively effect.

Credit: www.amazon.in
Prepare Your Wall
Preparing your wall before placing butterfly stickers is essential. It helps the stickers stick well and look great. A clean, smooth surface ensures the butterflies stay in place longer. Picking the right wall area also makes your decoration stand out.
Clean The Surface
Remove dust, dirt, and grease from the wall. Use a soft cloth with mild soap and water. Wipe the surface gently, then dry it completely. Avoid strong cleaners that can damage paint. A clean wall helps stickers stick better and last longer.
Smooth Out Imperfections
Check the wall for bumps, holes, or cracks. Use sandpaper to smooth rough spots. Fill holes with spackle or putty, then let it dry. Sand the patched areas until smooth. A flat surface prevents stickers from peeling or bubbling.
Choose The Best Wall Area
Pick a spot that is visible and flat. Avoid textured walls or areas with wallpaper. Stay away from places with high humidity, like bathrooms. Good light enhances the look of your butterfly stickers. Choose a spot where they can be enjoyed easily.
Plan Your Design
Planning your butterfly sticker design is crucial for a cohesive look. Thoughtful planning ensures your wall becomes a delightful focal point. Consider the space and the effect you want to create.
Layout Ideas
Choose a layout that complements your room’s style. A scattered pattern gives a natural, free-spirited feel. An orderly grid offers a modern, structured look. You can also create trails of butterflies for a dynamic effect.
Using Templates Or Stencils
Templates and stencils help achieve precision in your design. Use a stencil to trace the pattern lightly on the wall. This step makes it easier to place stickers evenly. Templates can guide the placement of stickers in complex shapes or patterns.
Mixing Sticker Sizes And Colors
Mixing sizes and colors adds depth to your wall. Use larger stickers as focal points, with smaller ones around them. Choose colors that complement each other and your room’s palette. Bright colors can add vibrancy, while pastels offer a soft, serene look.
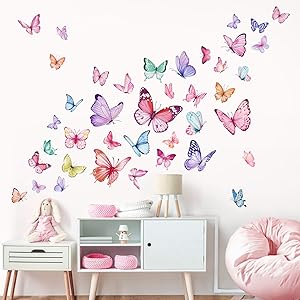
Credit: www.amazon.ca
Apply The Stickers
Applying butterfly stickers to your wall is a simple yet rewarding task that can transform any space instantly. The key is in handling the stickers carefully and placing them thoughtfully. With the right approach, you can avoid wrinkles, air bubbles, and misplaced stickers that might ruin your design.
Peeling Techniques
Start by gently lifting one edge of the butterfly sticker. Avoid pulling too hard, as this can stretch or tear the sticker. Use your fingernail or a plastic card to help separate the sticker from its backing smoothly.
If the sticker is large or delicate, peel it slowly and evenly. Try to keep the adhesive side flat and avoid touching it with your fingers to maintain stickiness. Have a clean surface ready so you can place the sticker immediately after peeling.
Positioning And Placement Tips
Before sticking, hold the butterfly sticker against the wall to visualize its placement. Step back and ask yourself if it complements the room’s flow or if it feels out of place. You can lightly mark the spot with a pencil to guide your placement.
Consider spacing between stickers to create a natural, fluttering effect. Grouping them too closely might look crowded, while spacing them too far can lose the impact. Think about how light and shadows will play on your wall to enhance the 3D effect of the butterflies.
Smoothing Out Air Bubbles
After applying the sticker, use a flat edge like a credit card or a squeegee to smooth out air bubbles. Start from the center and push outward to the edges gently. This technique prevents trapped air and ensures the sticker sticks evenly.
If you spot stubborn bubbles, prick them lightly with a pin and press the air out. This simple trick saves the sticker from peeling later. Don’t rush this step—taking your time here makes a big difference in the final look.
Add Finishing Touches
Adding finishing touches to your butterfly wall stickers can enhance their beauty and make your space truly inviting. Small details bring the design to life and create a stunning visual impact. This section covers simple ways to boost the look with layering, pairing, and protection.
Layering For 3d Effect
Create depth by layering butterfly stickers of different sizes. Place smaller butterflies slightly above larger ones to add dimension. Use foam pads or double-sided tape behind some stickers to raise them off the wall. This technique mimics real butterflies fluttering in the air. It gives the wall a lively and dynamic feel.
Combining With Other Wall Decor
Mix butterfly stickers with other wall elements like framed art, shelves, or fairy lights. Choose decor that complements the butterfly colors and theme. Arrange stickers around these items to create a cohesive display. This mix adds interest and balances the wall design. It makes the butterflies part of a larger, beautiful scene.
Protecting The Stickers
Keep your stickers looking fresh by protecting them from dust and moisture. Use a clear matte spray sealant designed for wall decals. Test the spray on a small area first to avoid damage. Avoid placing stickers in areas with high humidity or direct sunlight. Gentle cleaning with a soft, dry cloth helps maintain their shine and color.
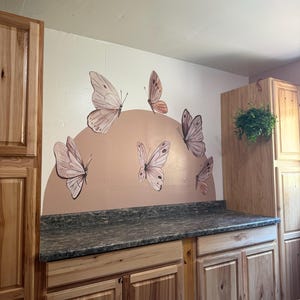
Credit: www.etsy.com
Remove Or Replace Stickers
Removing or replacing butterfly stickers on your wall can be a delicate task. You want to keep your wall looking fresh without damaging the paint or leaving sticky marks behind. Whether you’re updating your decor or just switching things up, knowing how to handle this process carefully makes all the difference.
Safe Removal Techniques
Peeling stickers off too quickly can tear the paint or leave residue. Instead, try gently lifting a corner with your fingernail or a plastic scraper. If the sticker resists, warm it with a hairdryer on low heat to soften the adhesive before peeling.
Patience is key here. Pull slowly and steadily to avoid ripping the sticker or harming your wall. If any sticker bits stay stuck, don’t force them off—use a bit of oil or rubbing alcohol to loosen the adhesive.
Cleaning Residue
After removing stickers, you might notice sticky patches or slight discoloration. Clean these areas with a soft cloth dipped in warm, soapy water to remove leftover glue gently. For tougher residue, rubbing alcohol or adhesive removers made for walls work well but test a small spot first.
Make sure the wall is completely dry before applying any new stickers. This prevents new decals from peeling off prematurely and keeps your design crisp.
Reapplying Or Updating Your Decor
Thinking about adding new butterfly stickers? Choose spots that are clean and smooth for the best adhesion. If you want to reuse old stickers, check that the adhesive side is still sticky; you can reactivate it by pressing firmly or using a little spray adhesive.
Mixing different sizes or colors of butterflies can refresh your wall instantly. What’s your next design idea? Try creating a flight path across a corner or around a light switch for a playful touch.
Frequently Asked Questions
How Do I Prepare The Wall For Butterfly Stickers?
Clean the wall surface thoroughly to remove dust and grease. Use a mild detergent and let it dry completely. A smooth, dry wall ensures better sticker adhesion and prevents peeling over time.
Can Butterfly Stickers Damage My Wall Paint?
High-quality butterfly stickers are usually safe for walls. However, removing them slowly and gently minimizes paint damage. Avoid stickers with very strong adhesives on delicate or freshly painted walls to prevent peeling.
What Is The Best Way To Apply Butterfly Stickers Evenly?
Plan your design by laying stickers on the floor first. Use a level or measuring tape to space them evenly. Start applying from the center and work outward for a balanced look.
How Long Do Butterfly Stickers Typically Last On Walls?
Butterfly stickers can last from several months to years. Longevity depends on wall texture, adhesive quality, and room conditions like humidity and sunlight exposure.
Conclusion
Putting butterfly stickers on your wall can brighten any room. Choose a clean, smooth surface to start. Plan your design before sticking the butterflies. Press each sticker firmly to avoid bubbles. Change or remove them easily without damage. Enjoy a fresh, colorful look in minutes.
Simple steps make decorating fun and quick. Try different colors and sizes for variety. Your wall will feel lively and cheerful. This small project can bring big smiles. Give your space a gentle, natural touch today.


