
Decorating your Christmas tree with lights can transform your home into a warm, magical space. But if you’ve ever felt overwhelmed by tangled wires or unsure where to start, you’re not alone.
You want your tree to shine brightly and look perfect, without spending hours struggling or ending up with uneven lighting. This guide will show you simple, step-by-step tips to put lights on your Xmas tree like a pro. By the end, you’ll have a sparkling tree that brings joy to your holidays—and maybe even a few compliments from your guests.
Ready to make your tree glow beautifully? Let’s dive in!
Choosing The Right Lights
Choosing the right lights for your Christmas tree sets the mood for the entire holiday season. The perfect lights can make your tree sparkle and create a warm, festive atmosphere. Picking the best lights means thinking about the style, color, and size that fit your space and taste. This guide helps you find the right lights to brighten your tree beautifully.
Types Of Christmas Lights
- Incandescent Lights:Classic bulbs that glow warmly but use more energy.
- LED Lights:Energy-saving, long-lasting, and cooler to touch. They come in many styles.
- Fairy Lights:Tiny, delicate bulbs perfect for a subtle, magical look.
- Net Lights:Easy to drape, ideal for covering large areas quickly.
- Battery-Operated Lights:Flexible placement without needing a plug nearby.
Selecting Light Colors
Lights come in many colors, each giving a different feel. White lights create a classic, elegant look. Multicolor lights bring fun and cheer with bright, festive tones. Warm white lights add a cozy glow. Choose colors that match your decorations and room style. Mixing colors can also add a playful touch.
Considering Light Length And Quantity
Measure your tree height before buying lights. A good rule is 100 lights per 1.5 feet of tree. Longer strands reduce the number of plugs needed. More lights mean a brighter tree, but too many can look crowded. Plan the length to wrap around the tree evenly. Balance is key to a stunning display.
Credit: www.wayfair.ca
Preparing The Tree
Preparing your Christmas tree sets the stage for a beautiful lighting display. Taking time to get the tree ready helps your lights shine evenly and keeps everything safe. Here’s how to prepare your tree before you start stringing those lights.
Setting Up The Tree Securely
Start by placing your tree in a sturdy stand that can hold it upright without wobbling. Make sure the stand has enough water capacity to keep the tree fresh longer. Position the tree near a power outlet, but away from heat sources like radiators or direct sunlight.
Have you ever had your tree tip over just as you finished decorating? Securing it well prevents accidents and saves you from redoing your work.
Fluffing Branches For Volume
Before adding lights, take the time to fluff out each branch. Pull individual branches apart and spread needles evenly to fill gaps. This creates a fuller look and gives your lights room to shine through.
I once skipped this step and noticed bare spots where the lights didn’t reach. Proper fluffing ensures your tree looks lush and your lights don’t get hidden.
Ensuring Power Access
Check that your power source is easily reachable and that extension cords, if needed, are rated for indoor use. Avoid overloading outlets by planning how many light strands you’ll connect. Use a power strip with a surge protector to keep your setup safe.
Thinking about your power access beforehand saves you from frustrating tangles and last-minute unplugging during decorating.
Testing The Lights
Testing the lights before placing them on the tree saves time and avoids dead bulbs. Plug them in to check all bulbs glow bright and steady. Replace any faulty strands to ensure a beautiful, safe Christmas display.
Testing the lights on your Christmas tree is crucial. It ensures a bright, festive display. This step can save you from mid-season lighting disasters. Here’s a simple guide to get your tree lights shining bright.Checking For Damaged Bulbs
Start by inspecting each bulb for damage. Look for cracks or missing bulbs. Damaged bulbs can affect the whole strand. Replace any broken ones promptly. Use a bulb tester for quick checks. This tool can identify faulty bulbs efficiently.Ensuring All Lights Work
Plug in each strand before placing it on the tree. Confirm all bulbs light up. Flickering lights may indicate a loose connection. Tighten any loose bulbs carefully. Make sure connections between strands are secure.Replacing Faulty Sections
Identify sections where lights fail. This often occurs due to a single faulty bulb. Replace the problematic bulb with a new one. If the section remains dark, consider replacing that part entirely. Keep spare bulbs and fuses handy for quick fixes.Wrapping Lights Around The Tree
Wrapping lights around your Christmas tree can transform it from ordinary to magical. The way you arrange the lights affects how evenly the tree glows and how stunning it looks in your room. Paying attention to how you wrap the lights can save you time and create a balanced, beautiful display.
Starting From The Base
Begin by plugging in your lights and testing them. Starting at the base of the tree allows you to hide the plug near the tree stand, keeping it out of sight. Wrap the lights around the trunk a few times to secure them before moving outward.
Make sure the lights are snug but not tight. This prevents damage and makes adjustments easier. Have you noticed how starting low helps you avoid tangled cords later on?
Working Upwards Evenly
Move upward in a spiral, wrapping the lights around the branches evenly. Keep the string close to the trunk for a warm, inner glow that shines through the foliage. When you reach the top, gently tuck the end of the string behind the upper branches.
Don’t rush this step. Taking your time ensures you cover all angles and avoid bare spots. How much difference does an evenly wrapped tree make in your holiday mood?
Spacing Lights For Balance
Step back frequently to check how the lights are spaced. Even gaps between bulbs create a balanced and inviting look. If some areas seem sparse, add a few extra loops or adjust the branches to catch more light.
- Focus on both inner and outer branches for depth.
- Use a mix of close and wider spacing for a natural effect.
- Remember, less is more—too many lights can overwhelm the tree.
What if you tried spacing lights differently this year? Small changes can bring a whole new feel to your holiday decorations.
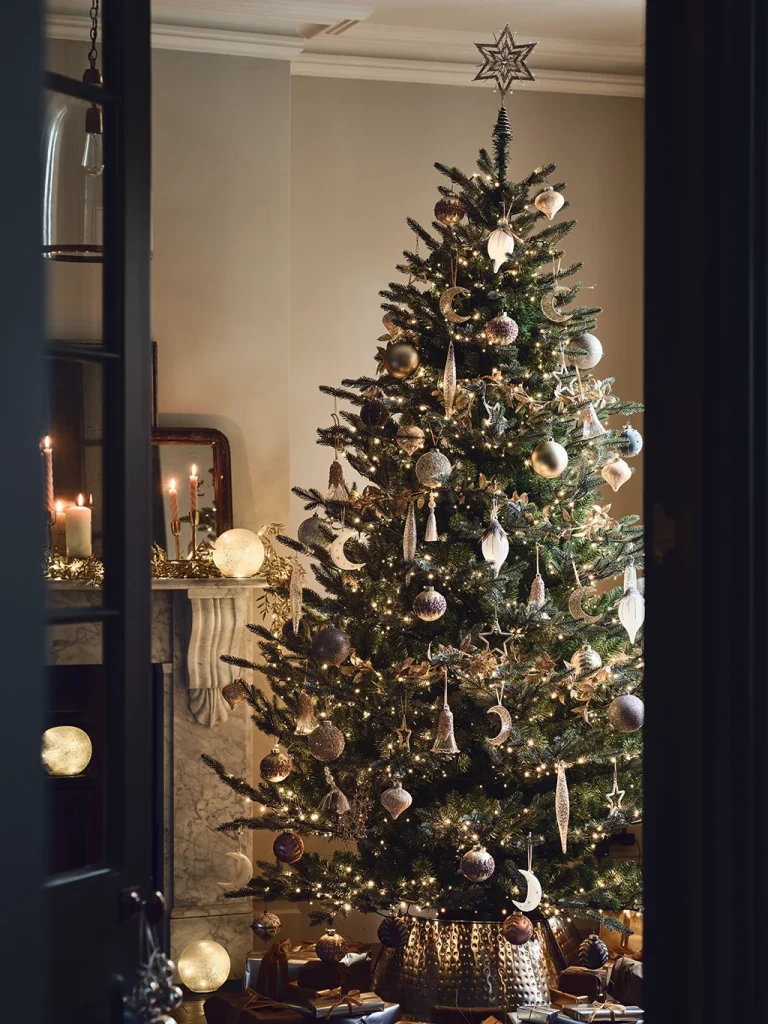
Lighting Tips For Different Tree Types
Lighting your Christmas tree can transform your space into a festive wonderland. But the type of tree you have plays a big role in how you should light it. Different trees react differently to lights, so knowing the right approach can save you time and make your decorations shine brighter.
Real Trees
Real trees have a natural, uneven shape and softer branches, which affect how lights sit on them. Start by testing your lights before putting them on the tree; old or broken bulbs can cause flickering or dark spots.
Wrap lights around the branches, pushing them deeper into the tree to add depth and avoid just lighting the outer edges. This technique helps your tree glow from within, making it look fuller and more vibrant.
Consider the type of bulbs too. Warm white LED lights create a cozy feel on real trees, while colored lights can highlight the natural green beautifully. If your tree is tall, use multiple strands connected in sections to prevent overloading a single outlet.
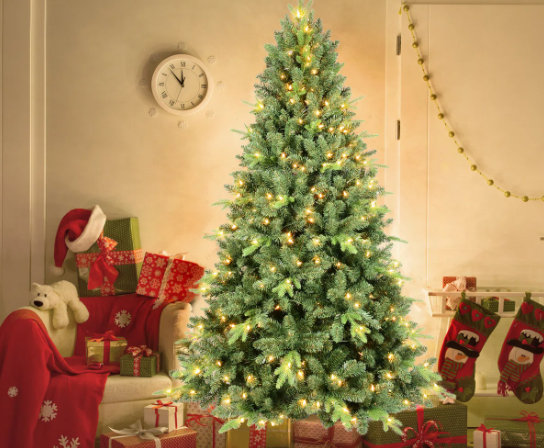
Artificial Trees
Artificial trees often come pre-lit, but adding extra lights can enhance their appearance. These trees have sturdier branches that hold lights better, so you can be more creative with your lighting patterns.
Try wrapping lights around the trunk for a unique look or weaving them through the branches in a spiral to mimic a candy cane effect. Since artificial branches are firmer, you can use clips or twist ties to secure lights neatly.
Don’t forget to choose lights that match your tree’s color tone—cool white lights tend to work well on snowy or frosted artificial trees, while warm lights complement traditional green trees. Have you ever tried mixing different light colors or sizes on your artificial tree? It can add unexpected charm and depth.

Credit: www.blog.bronners.com
Securing And Hiding Wires
Securing and hiding wires is key to a neat Christmas tree. Loose wires can spoil the look and create safety risks. Properly managing wires keeps your tree safe and beautiful. It also helps the lights shine evenly and bright. Simple tools and tricks make this task easy for everyone.
Using Clips And Ties
Clips and ties keep wires tight and in place. Use small plastic clips to attach wires to branches. Cable ties work well for bundling wires together. Choose clear or green clips to blend with the tree. Avoid tight knots that may damage wires.
- Attach clips at regular intervals for even support.
- Bundle excess wire with cable ties to avoid clutter.
- Secure wires near the tree trunk for stability.
Concealing Wires With Branches
Hide wires by tucking them behind branches. Push wires deeper into the tree to keep them out of sight. Spread branches to cover the wires naturally. This method creates a clean look without extra tools. It also helps lights appear to float on the tree.
- Use thicker branches to cover thicker wires.
- Arrange branches carefully after placing lights.
- Check from different angles to ensure wires stay hidden.
Adding Final Touches
Adding final touches to your Christmas tree brings the whole look together. This stage highlights the lights and decorations perfectly. It creates a warm, festive glow. Small details make your tree stand out and feel complete.
Layering With Ornaments
Place larger ornaments first to create a base. Fill gaps with medium and smaller decorations. Use different shapes and colors for balance. Space ornaments evenly to avoid clustering. Hang some ornaments deeper inside for depth. Let the lights reflect off shiny surfaces. This layering adds texture and interest to the tree.
Incorporating Lighted Decorations
Use lighted decorations like garlands or picks to enhance brightness. Tuck them around branches, mixing with string lights. Position lighted pieces where extra glow is needed. Choose warm white lights for a cozy feel. Combine various light sizes for a dynamic look. These elements highlight your tree’s shape and sparkle.
Safety Precautions
Adding lights to your Christmas tree creates a magical atmosphere, but safety must come first. Ignoring simple precautions can lead to electrical hazards or fire risks. Let’s look at some essential steps to keep your home and family safe while enjoying those sparkling lights.
Avoiding Overloading Outlets
Plugging too many light strings into one outlet can cause overheating and tripped breakers. Check the packaging for the maximum number of light sets that can be safely connected. Use power strips with built-in circuit breakers and avoid daisy-chaining multiple extension cords.
Have you ever noticed a warm plug or flickering lights? These are warning signs that you may be overloading your outlets. Take a moment to spread your lights across different circuits to reduce risks.
Using Led Lights For Safety
LED lights use less electricity and generate less heat than traditional incandescent bulbs. This reduces the chance of your tree drying out and catching fire. Plus, LEDs last longer, meaning fewer replacements and less hassle.
Switching to LED lights is a small change that makes a big difference. You get vibrant colors without compromising safety. Have you tried LED lights on your tree yet?
Turning Off Lights When Unattended
It’s tempting to leave your Christmas lights on all night for that cozy glow. However, unattended lights can become a hazard, especially if they malfunction. Make it a habit to turn off your tree lights before going to bed or leaving the house.
Consider using a timer to automate this process. This simple step protects your home and helps save energy. What’s your routine for keeping your decorations safe overnight?

Credit: www.youtube.com
Frequently Asked Questions
How Many Lights Do I Need For My Xmas Tree?
For a full look, use 100 lights per foot of tree height. For example, a 6-foot tree needs about 600 lights. Adjust based on your preference for brightness and decoration style.
Should I Test Lights Before Putting On The Tree?
Yes, always test lights before decorating. Check for burnt-out bulbs or damaged wires. This ensures safety and saves time during setup.
What Is The Best Way To Wrap Lights On A Tree?
Start from the bottom or trunk and wrap lights evenly around branches. Move upward in a spiral, spacing lights for uniform coverage and a balanced appearance.
Can I Use Indoor Lights On An Outdoor Xmas Tree?
No, indoor lights are not safe outdoors. Use lights labeled for outdoor use to prevent electrical hazards and ensure durability in weather.
Conclusion
Putting lights on your Christmas tree can be fun and simple. Start with a good plan and check your lights first. Wrap the lights evenly around the branches for a bright, festive look. Remember to stay safe and avoid overloading electrical outlets.
Take your time and enjoy the process. Soon, your tree will shine warmly in your home. Celebrate the holiday spirit with your beautifully lit tree.


