
Are you looking to add a fresh, personal touch to your walls without the hassle of nails or paint? Wall art stickers are the perfect solution.
They’re easy to apply, remove, and can instantly transform any space. But if you want them to look flawless and last long, knowing the right way to put them on is key. In this guide, you’ll discover simple, step-by-step tips that make applying wall art stickers a breeze—so your walls will look stunning, and you’ll feel proud every time you walk into the room.
Keep reading to unlock the secrets to perfect wall decor!
Credit: reliepharma.com
Choosing The Right Wall Art Stickers
Choosing the right wall art stickers can make a huge difference in how your space feels and looks. The right sticker not only complements your decor but also matches your wall type and personal style. It’s important to consider different options carefully before making a choice that you’ll enjoy every day.
Types Of Wall Stickers
Wall stickers come in many forms, each serving different purposes. Vinyl stickers are popular because they’re durable and easy to remove without damaging paint. Fabric stickers offer a softer texture and can add warmth to a room, while paper-based stickers are budget-friendly but less durable.
Think about whether you want something permanent or temporary. Removable stickers are perfect for renters or those who like to change designs often. On the other hand, permanent stickers work well if you want a long-lasting feature.
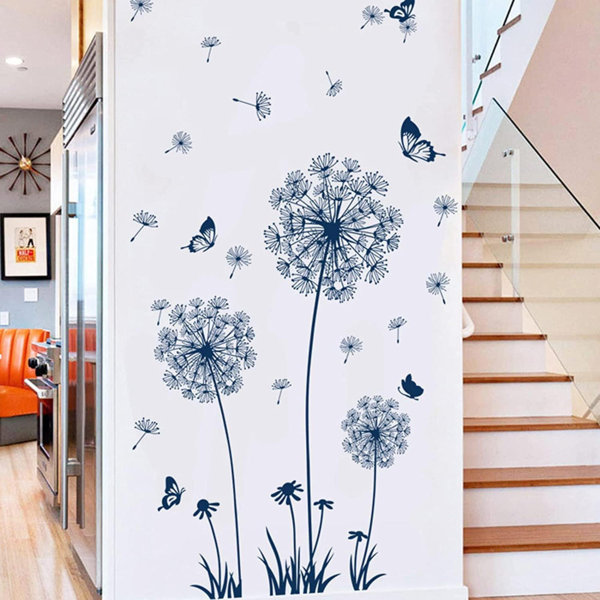
Selecting Designs For Your Space
Your wall art should reflect your personality and fit the room’s function. Bold, colorful designs energize a living room, while soft, minimal patterns suit bedrooms or calming spaces. Ask yourself: What mood do you want to create?
Also, consider the size of the wall and furniture placement. Large, intricate designs can overwhelm a small room, while smaller, repeated patterns might get lost on a large blank wall. It’s about balance and harmony.
Considering Wall Surface And Texture
Not all stickers stick well to every surface. Smooth walls like painted drywall or glass offer the best grip. Rough or textured walls, such as brick or stucco, might cause stickers to peel or not stick at all.
Before buying, test a small sticker on your wall to see how it adheres. Remember, some surfaces might require special adhesives or be better suited for certain types of stickers. What kind of wall do you have, and how does it affect your choice?
Preparing Your Wall
Getting your wall ready is the first crucial step before applying wall art stickers. A well-prepared surface ensures your stickers stick properly and look flawless for a long time. Let’s dive into how to make your wall the perfect canvas for your new decor.
Cleaning The Surface
Start by wiping down the wall with a damp cloth to remove dust and dirt. Even tiny particles can prevent the sticker from sticking well. If you notice grease or stains, use a mild soap solution to clean the area thoroughly.
After cleaning, rinse the wall with plain water and dry it completely. Have you ever applied a sticker on a dusty wall only to watch it peel off? Taking a few extra minutes here saves you from that frustration.
Removing Old Paint And Residue
Check your wall for peeling paint or leftover adhesive from previous decorations. These spots create bumps and gaps under the sticker, ruining the smooth finish. Use a scraper or sandpaper to gently remove any loose paint or residue.
If you encounter stubborn patches, a primer can help create an even surface. Ensuring the wall is free from imperfections will make your wall art sticker look sharp and last longer.
Ensuring A Dry And Smooth Wall
Make sure the wall is completely dry before you start applying the sticker. Moisture can cause the adhesive to weaken and lead to bubbles or peeling. You can test this by touching the wall or using a moisture meter if you have one.
For a perfectly smooth surface, lightly sand the wall with fine-grit sandpaper. This step is especially important for textured walls. Smooth walls allow your art stickers to lay flat and stick better, giving your room a professional touch.
Tools And Materials Needed
A clean, smooth wall surface and the wall art stickers are essential. A soft cloth, a ruler, and a scraper help apply the stickers evenly and remove air bubbles.
Putting wall art stickers on can transform your space easily. Proper tools and materials ensure a smooth application. This section covers essentials for a perfect finish.Essential Tools
To start, gather these basic tools:- Measuring Tape:Measure the area for accurate placement.
- Pencil:Mark positions lightly on the wall.
- Level:Ensure your design is straight and balanced.
- Squeegee or Credit Card:Smooth out bubbles and wrinkles.
- Clean Cloth:Wipe the wall surface clean.
- Scissors:Trim excess sticker material if needed.
Optional Accessories For Precision
For a more precise application, consider these:- Painter’s Tape:Temporarily hold stickers in place.
- Craft Knife:Cut intricate designs with ease.
- Laser Level:For perfectly straight alignment.
- Tweezers:Handle small sticker pieces delicately.
- Spray Bottle with Water:Lightly mist the wall for easy adjustments.
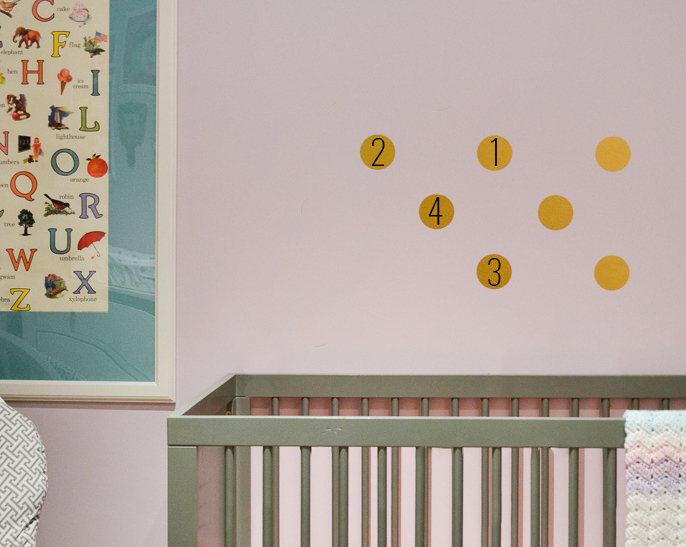
Positioning Your Wall Art Stickers
Positioning your wall art stickers is a crucial step that can transform a plain wall into a captivating visual story. Taking the time to carefully plan and place your stickers ensures they look polished and professionally done. It’s not just about sticking them on; it’s about making sure they fit perfectly with your space and style.
Planning The Layout
Start by visualizing how your stickers will look on the wall. Lay them out on the floor or a large table first to see how the shapes and sizes interact. This hands-on approach helps you avoid surprises and gives you a clear idea of spacing and alignment.
Think about focal points in the room. Are you placing the stickers above a sofa, bed, or shelf? Positioning your art to complement furniture can create a harmonious look. Don’t rush this step—spend time experimenting with different arrangements until something feels right.
Using Tape For Temporary Placement
Once you have a layout in mind, use painter’s tape or masking tape to temporarily hold the stickers on the wall. This lets you step back and see the overall effect without committing. You can move things around easily until you’re confident about the placement.
This simple trick saved me from a costly mistake. I initially placed a large sticker too close to a light switch, but taping it first showed me it looked crowded. Moving it just a few inches made a huge difference in the room’s balance.
Measuring And Leveling
Accurate measurements are key to a professional look. Use a tape measure and a level to ensure your stickers are straight and spaced evenly. Mark light pencil guidelines if necessary—they can be erased later and help keep everything aligned.
Don’t underestimate the power of a level. Even a slight tilt can make your art look off and distract from the beauty of the design. Take your time here; precision pays off in the final result.
Applying The Stickers
Applying wall art stickers can be a fun and satisfying way to transform your space. But the key to a flawless finish lies in how you handle the stickers during application. Paying attention to small details can save you from frustration and ensure your wall art looks professional.
Peeling Off The Backing
Start by gently lifting a corner of the sticker’s backing paper. Avoid pulling too fast or at a sharp angle, as this can cause the sticker to stretch or tear. If the sticker is delicate, try peeling it slowly while pressing the design onto the wall with your other hand to keep it aligned.
Have you noticed that some stickers come with a clear transfer tape on top? This helps keep the design intact while peeling. Keep that tape flat against the wall as you remove the backing underneath.
Smoothing Techniques To Avoid Air Bubbles
Once the sticker is on the wall, smoothing it out is crucial. Use a soft cloth, credit card, or a plastic squeegee to press the sticker from the center outward. This pushes air bubbles toward the edges, preventing any unsightly bumps.
If you spot small bubbles after smoothing, gently lift the nearest edge of the sticker and reapply while smoothing again. Sometimes, a pin can be used to prick stubborn bubbles, allowing air to escape.
Handling Large Or Complex Designs
Large or intricate stickers can be tricky. If your design is big, consider applying it in sections. Align each section carefully before pressing it down.
For complex designs with multiple parts, use masking tape to hold pieces in place temporarily. This keeps everything aligned and prevents shifting while you work.
Have you ever tried to apply a sticker that folds or wrinkles easily? Patience is key. Take your time to smooth each part slowly, and if needed, use a hairdryer on low heat to make the sticker more flexible for easier application.

Credit: www.temu.com
Finishing Touches
Finishing touches make your wall art stickers look neat and last longer. Small details can improve the overall appearance and protect your art from damage. Taking time for these steps ensures your wall looks perfect and the stickers stay in place.
Trimming Excess Edges
Check for any parts of the sticker that hang over the edge. Use sharp scissors or a craft knife for clean cuts. Cut slowly and carefully to avoid damaging the design. Removing extra edges prevents peeling and gives a smooth finish.
Sealing For Durability
Apply a clear sealant to protect the sticker from dirt and moisture. Choose a spray or brush-on sealant safe for your wall type. Use light, even coats and let each dry fully. Sealing helps the sticker last longer and keeps colors bright.
Cleaning Up
Remove any fingerprints, dust, or residue around the sticker. Use a soft, dry cloth or a slightly damp one if needed. Avoid harsh chemicals that may harm the sticker or wall. Clean edges and nearby areas for a fresh, polished look.
Maintaining Wall Art Stickers
Maintaining wall art stickers keeps your space fresh and appealing. Proper care helps the stickers last longer and stay vibrant. A little attention prevents peeling or fading over time. Follow simple steps for cleaning, avoiding damage, and knowing when to replace them.
Cleaning Tips
Use a soft, dry cloth to dust the stickers regularly. Avoid wet cloths or harsh chemicals that can damage the surface. For stubborn dirt, lightly dampen a cloth with water only. Gently wipe without rubbing hard. Let the stickers air dry naturally to avoid moisture buildup.
Avoiding Damage
- Keep stickers away from direct sunlight to prevent fading.
- Avoid placing stickers near heat sources like radiators.
- Do not scratch or peel the edges by accident.
- Handle the walls carefully during cleaning or moving furniture.
When To Replace
Replace wall art stickers if colors fade noticeably. Peeling edges or tears also signal it’s time for new ones. If the design no longer fits your style, change them to refresh your room. Regular checks help spot damage early and keep your walls looking great.

Credit: sonoluna.com
Common Mistakes To Avoid
Applying wall art stickers might seem straightforward, but there are common mistakes that can ruin the look or cause the stickers to peel off prematurely. Avoiding these pitfalls will save you time, effort, and frustration. Let’s look at some key errors to watch out for and how to dodge them.
Applying On Unsuitable Surfaces
Not all walls are sticker-friendly. Surfaces like textured wallpaper, rough brick, or glossy paint often prevent stickers from sticking properly. You might find your beautiful decal peeling off within days if you apply it on these.
Have you checked your wall surface carefully? A smooth, clean, and dry wall is your best bet. If your wall is uneven or dirty, consider a different spot or surface treatment before applying the sticker.
Ignoring Wall Preparation
Skipping wall prep is a common trap. Dust, grease, or moisture can block the adhesive, causing the sticker to lift or bubble. Even a small speck of dirt under the sticker can ruin the finish.
Take a few extra minutes to clean your wall with mild soap and water, then dry it completely. This simple step ensures the sticker will stick firmly and last longer. Have you ever tried sticking something on a dusty surface? The difference is clear once you prep your wall.
Rushing The Application Process
Patience matters when applying wall art stickers. Hurrying through the process often leads to wrinkles, air bubbles, or misalignment. Once a sticker is stuck incorrectly, repositioning it can be tricky and damage the adhesive.
Slow down and apply the sticker bit by bit, smoothing it out as you go with a flat edge like a credit card. Take time to align the sticker properly before pressing it down. Have you experienced frustration from a rushed application? Taking it slow makes all the difference.
Frequently Asked Questions
How Do I Prepare The Wall For Art Stickers?
Clean the wall surface with a damp cloth to remove dust and grease. Ensure the wall is dry and smooth before applying stickers. Avoid textured or uneven walls for better adhesion and longer-lasting results.
What Is The Best Technique To Apply Wall Art Stickers?
Peel the backing slowly, align the sticker carefully, and press firmly from the center outward. Use a squeegee or credit card to remove air bubbles. Apply gentle pressure for a smooth, wrinkle-free finish.
Can Wall Art Stickers Be Removed Without Damage?
Yes, most wall art stickers peel off easily without damaging paint. Remove slowly and gently at a 45-degree angle. If adhesive residue remains, use mild soap and water or adhesive remover.
How Long Do Wall Art Stickers Typically Last?
Wall art stickers usually last between 3 to 5 years indoors. Longevity depends on wall texture, room humidity, and direct sunlight exposure. Proper application and care extend their lifespan.
Conclusion
Wall art stickers bring quick style to any room. Clean the wall well before applying stickers. Peel slowly and press firmly for best results. Take your time to avoid bubbles or wrinkles. You can change designs easily when you want.
Enjoy your fresh, new wall look today. Decorating is simple with these easy steps. Try different styles to find what you like. Wall art stickers make rooms feel lively and fun.


