
Is your pull string light not working like it used to? It can be frustrating when a simple flick of the string doesn’t turn your light on or off.
But before you think about replacing the entire fixture, there’s good news—you can fix it yourself. In this guide, you’ll learn easy steps to repair your pull string light quickly and safely. By the end, you’ll save money and get your light working perfectly again.
Ready to bring your light back to life? Let’s dive in!
Identify Common Issues
Identifying common issues is the first step to fixing a pull string light. Understanding what causes the light to stop working saves time and effort. Many problems come from simple parts that wear out or break.
Check The Pull String Mechanism
The pull string often wears out or gets stuck. Pull the string gently to see if it moves freely. If it feels tight or does not return, the mechanism may be jammed or broken. Look for dirt or debris blocking the movement. A worn spring inside can also cause failure. Replacing or cleaning the mechanism can restore the function.
Inspect The Wiring
Wiring issues are common in pull string lights. Unplug the light before checking wires. Look for loose connections or frayed wires. Damaged wires can cause the light to flicker or not work at all. Use a tester to check if electricity flows properly. Fix any exposed or broken wires by reconnecting or replacing them.
Examine The Bulb And Socket
The bulb or socket can cause problems. Remove the bulb and check if it is burnt out. Try a new bulb to see if the light works. Inspect the socket for corrosion or damage. A dirty socket may prevent proper contact. Clean the socket with a dry cloth. Replace the socket if it shows signs of wear.
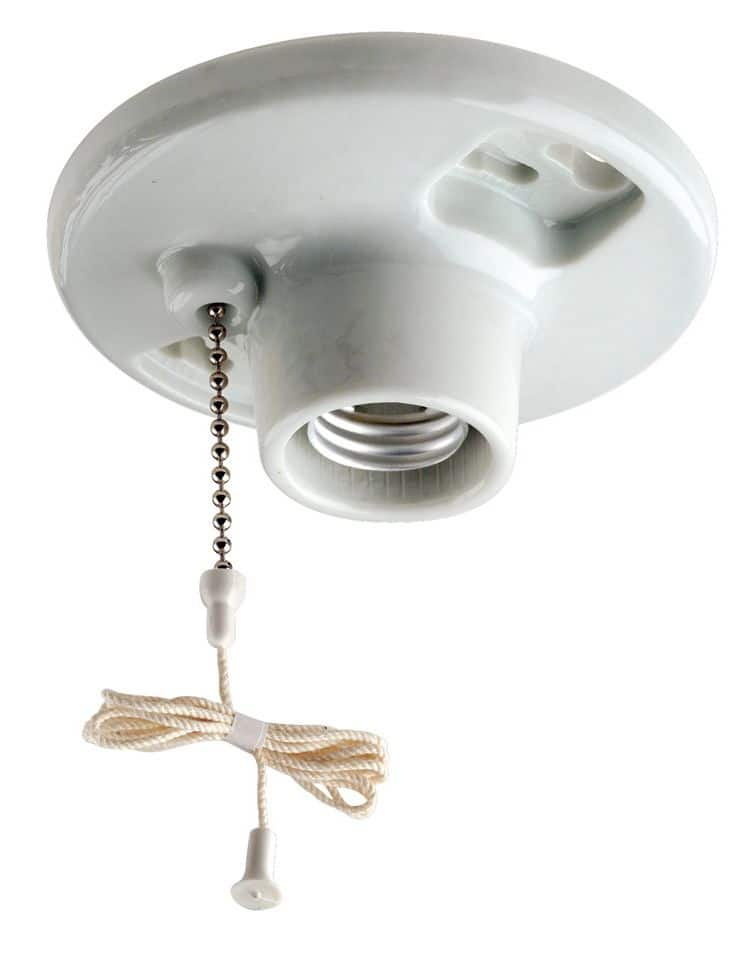
Credit: www.canadiantire.ca
Gather Necessary Tools
Gathering the right tools is the first step to fix a pull string light. Having everything ready makes the process smooth and safe. It helps avoid interruptions and mistakes during repair.
Preparing tools also saves time and reduces frustration. Knowing what you need prevents extra trips to the store. It ensures you handle the repair confidently and correctly.
Basic Tools You’ll Need
- Screwdriver (flathead and Phillips)
- Wire stripper or cutter
- Needle-nose pliers
- Electrical tape
- Replacement pull string or cord
- Multimeter (to test electrical connections)
- Small flashlight or headlamp
Safety Equipment
- Insulated gloves to protect from electric shocks
- Safety goggles to protect your eyes
- Non-slip shoes for stable footing
- Mask to avoid inhaling dust
- Work light for clear visibility
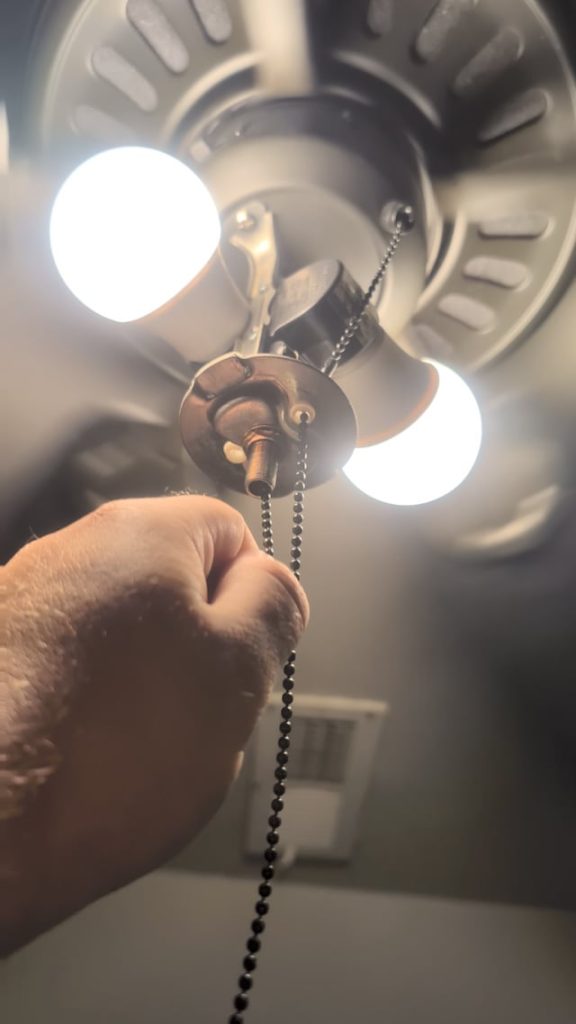
Fix The Pull String Mechanism
Check the pull string for any breaks or tangles that may stop it from working. Replace or fix the string inside the mechanism carefully. Test the light to ensure the repair works properly.
Repairing a pull string light can seem daunting at first. Yet, with the right guidance, it’s a manageable task. The pull string mechanism is often the culprit when your light stops working. Fixing it requires a few straightforward steps. Here’s how you can get started.Replace A Broken String
A broken string is a common issue. First, turn off the power to the light. Unscrew the light fixture to access the mechanism. Look for the broken string. Remove it carefully. Now, thread a new string through the hole. Tie a knot at the end to secure it. Reassemble the fixture. Test the light to ensure it works.Lubricate The Switch
A stiff switch might need lubrication. Begin by turning off the power. Remove the light fixture’s cover. Locate the switch inside. Apply a small amount of lubricant. Use a spray or a few drops of oil. Move the switch back and forth. This helps distribute the lubricant. Replace the cover and test the switch for ease.Adjust The Tension
Sometimes, the string tension is off. This can affect the light’s operation. First, turn off the power. Open the fixture to access the mechanism. Check the tension of the string. It should not be too tight or too loose. Adjust the string by loosening or tightening it slightly. Once satisfied, reassemble the fixture. Turn the power back on and test the light.Repair Wiring Problems
Repairing wiring problems in a pull string light is essential for restoring its function and safety. Faulty wiring can cause the light to flicker or fail completely. Careful inspection and simple fixes often solve the issue without needing a full replacement.
Start by examining the wiring closely. Look for any signs of wear, damage, or loose connections. Proper attention to these details ensures a lasting repair and safer use of the light.
Identify Loose Connections
Loose connections often cause electrical problems in pull string lights. Gently wiggle wires near the switch and bulb socket. Check if any wires move freely or look disconnected. Look for corrosion or burnt marks on connectors. Use a flashlight to see inside tight spaces clearly.
Secure Or Replace Wires
Secure any loose wires with electrical tape or wire nuts. Cut away damaged wire ends and strip insulation carefully. Twist wires together tightly before securing. Replace wires that are frayed, burnt, or broken. Use wires of the same gauge and type for safety. Avoid over-tightening to prevent wire damage.
Test Electrical Continuity
Use a multimeter to test electrical continuity. Set the device to the continuity mode. Touch probes to wire ends or terminals. A beep or zero reading means good continuity. No signal indicates a break in the wire or connection. Test all wires and switches before reassembling the light.
Replace Or Fix Bulb And Socket
Replacing or fixing the bulb and socket is a key step in repairing a pull string light. A faulty bulb or socket often causes the light to stop working. You can fix many issues by checking these parts carefully.
Start by choosing the right bulb for your light. Then, clean or replace the socket if needed. Finally, test the light to make sure it works properly.
Choose The Right Bulb
Pick a bulb that fits your pull string light. Check the wattage and size on the old bulb or the light’s label. Using the wrong bulb can cause damage or poor performance.
LED bulbs save energy and last longer than traditional bulbs. Make sure the base type matches the socket. Screw-in and bayonet bases are common types.
Clean Or Replace The Socket
Unplug the light before working on the socket. Dirt or corrosion inside the socket can stop the bulb from working. Clean the socket gently with a soft brush or cloth.
If the socket is damaged or worn out, replace it. Sockets are inexpensive and easy to find at hardware stores. Make sure the new socket matches the old one’s size and type.
Test The Light Functionality
After replacing or cleaning, put the bulb back in the socket. Plug the light in and pull the string to turn it on. Watch for any flickering or failure to light.
If the light still does not work, check the wiring or the pull switch. Testing helps confirm if the bulb and socket fix solved the problem.
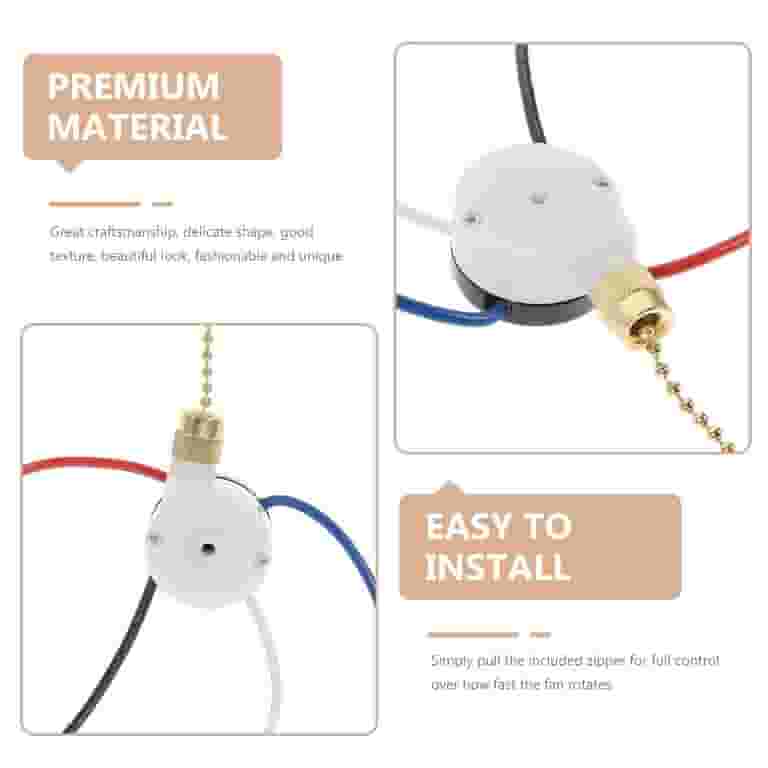
Credit: www.walmart.com
Prevent Future Issues
Preventing future problems with your pull string light saves time and effort. Simple habits keep the light working longer. Small checks and careful use protect the string and internal parts. Stay ahead of wear and tear with easy steps.
Regular Maintenance Tips
- Clean the light fixture regularly with a soft cloth.
- Check the pull string for any signs of fraying or damage.
- Lubricate the internal mechanism lightly to keep it smooth.
- Tighten loose screws or parts to prevent further damage.
- Replace worn-out strings promptly to avoid breakage.
Safe Usage Practices
- Pull the string gently without jerking or yanking.
- Avoid pulling the string at sharp angles to reduce stress.
- Teach all users to handle the string with care.
- Keep the area around the light clear to prevent accidents.
- Do not overload the light fixture with heavy bulbs.

Credit: www.youtube.com
Frequently Asked Questions
How Do I Fix A Pull String Light That Won’t Turn On?
Check the bulb and replace it if burnt out. Inspect the pull string switch for damage or wear. Tighten any loose connections in the wiring. If the problem persists, consider replacing the pull string mechanism.
Why Is My Pull String Light Flickering Constantly?
Flickering often indicates a loose bulb or faulty wiring. Ensure the bulb is screwed in tightly. Check the pull string switch for wear or damage. Replace any defective components to stop flickering.
Can I Replace The Pull String Switch Myself?
Yes, you can replace it if you have basic electrical knowledge. Turn off the power before starting. Remove the old switch carefully and install the new one. Follow safety guidelines to avoid electrical hazards.
What Tools Are Needed To Repair A Pull String Light?
You typically need a screwdriver, wire stripper, replacement switch, and electrical tape. A voltage tester is useful for safety checks. These tools help you safely access and repair the light’s components.
Conclusion
Fixing a pull string light can save you money and time. Small steps like checking the cord or switch often solve the problem. Take your time and follow the guide carefully. Safety matters—always unplug the light before starting. You will feel proud after repairing it yourself.
Keep your lights working well with simple care. Try these tips next time your pull string light stops working. Easy fixes can bring your old light back to life.


