
Is your motion sensor light flickering or no longer turning on when you walk by? Replacing it might seem tricky, but you can do it yourself with the right steps.
Imagine never having to worry about dark corners or wasted electricity again. In this guide, you’ll learn exactly how to replace your motion sensor light quickly and safely. Keep reading, and you’ll save money while making your home smarter and brighter.
Credit: mradelectric.com
Tools And Materials Needed
Before diving into replacing a motion sensor light, gathering the right tools and materials is crucial. Having everything at hand saves you time and reduces frustration. Plus, it makes the process smoother and safer.
Essential Tools For The Job
- Voltage Tester:Ensures the power is off before you start working, keeping you safe from electric shocks.
- Screwdrivers:Both flathead and Phillips head screwdrivers are usually needed to remove the fixture and secure the new one.
- Wire Strippers:These help you strip the insulation off the wires cleanly for proper connections.
- Drill and Drill Bits:Sometimes, new mounting holes are required, especially if your new light doesn’t match the old fixture’s mounting points.
- Ladder:Necessary if your light is mounted high on a wall or ceiling.
Materials To Have Ready
- Replacement Motion Sensor Light:Make sure it fits your existing setup and meets your lighting needs.
- Wire Nuts:These secure the electrical connections safely.
- Electrical Tape:Adds an extra layer of safety by insulating wire connections.
- Mounting Hardware:Screws and brackets sometimes come with the new light, but having extras can be handy.
- Outdoor Caulk or Sealant:If your light is installed outside, sealing around the fixture helps prevent water damage.
Why Skipping Proper Preparation Can Cost You
I once tried replacing a motion sensor without a voltage tester and ended up wasting hours figuring out why the light wouldn’t work—turns out, the power wasn’t fully off. It made me realize how vital this simple tool is. What tools do you think are often overlooked but make the biggest difference in your home projects?

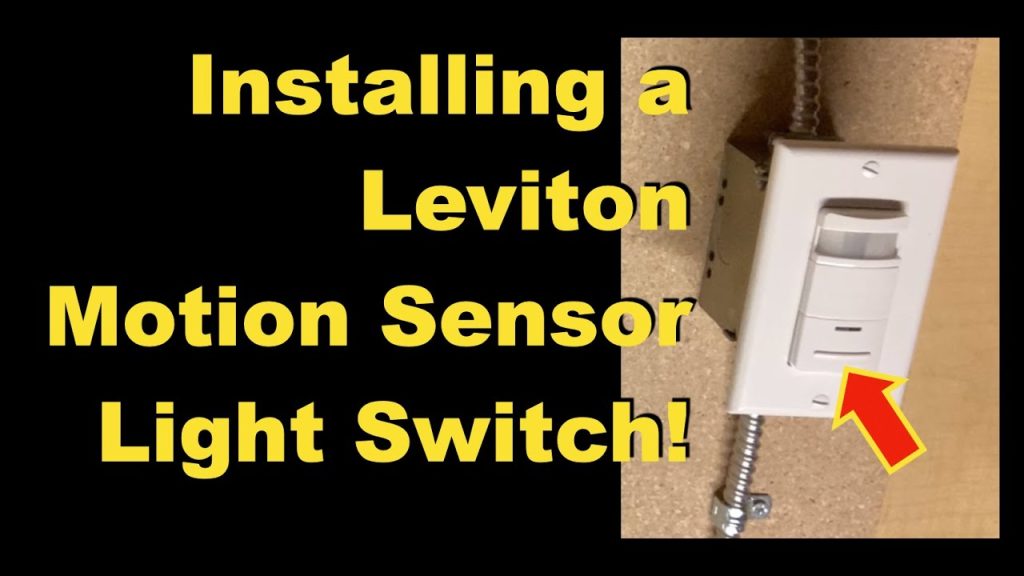
Credit: www.youtube.com
Safety Precautions
Safety is the most important part of replacing a motion sensor light. Electrical work can be risky, and taking the right precautions protects you from harm and prevents damage to your home.
Before you start, think about the risks involved. Are you comfortable working with electricity? If not, consider calling a professional. Your safety comes first.
Turn Off The Power
Always switch off the power at the circuit breaker before touching any wiring. Don’t just rely on the light switch; the breaker ensures no electricity flows to the fixture.
Use a voltage tester to double-check that the wires are not live. This simple step can save you from electric shock.
Use Proper Tools And Equipment
Make sure you have insulated tools designed for electrical work. Regular tools might conduct electricity and increase the risk of injury.
Wear rubber-soled shoes and avoid working in wet conditions to reduce the chance of electric shock. Safety gear isn’t optional—it’s necessary.
Work In Good Lighting And Stable Conditions
Ensure your workspace is well-lit so you can see all wires and connections clearly. Poor visibility can lead to mistakes.
Use a sturdy ladder or step stool if the light is installed high. Never stand on unstable surfaces or makeshift supports.
Understand The Wiring
Before disconnecting anything, take a photo or label the wires. This helps you remember where each wire goes, preventing wrong connections later.
If you find unfamiliar wiring, don’t guess. Research or ask an expert to avoid creating a hazard.
Keep Children And Pets Away
Make sure no one distracts you during the replacement. Children and pets can cause accidents if they enter your work area unexpectedly.
Set clear boundaries and explain that you are working with electricity, which is dangerous.
Turning Off Power
Turning off the power is the safest way to work on a motion sensor light. Electricity can cause serious injury if not handled carefully. Before you start, ensure that no current is flowing to the light fixture. This step protects you from shocks and allows a smooth replacement process.
Always treat the power source with caution. Never assume the light is off just because the switch is in the off position. Confirm the power is completely disconnected before touching any wires or components.
Locate The Circuit Breaker
Find the circuit breaker box in your home. It is often in the basement, garage, or utility room. Look for the label that matches the motion sensor light or the area it is installed.
Switch off the breaker that controls the light. This action stops electricity from reaching the fixture. Double-check to ensure you have turned off the correct breaker.
Use A Voltage Tester
A voltage tester helps confirm the power is off. Touch the tester’s probes to the wires connected to the light. If the tester shows no voltage, it is safe to proceed.
Never skip this step. Sometimes the breaker might be mislabeled or there could be a wiring issue. The tester provides an extra layer of safety before you begin work.
Inform Others About The Power Off
Tell family members or housemates that the power is off for maintenance. This prevents someone from accidentally turning the breaker back on. A simple sign on the breaker box can help keep everyone aware.
Clear communication avoids surprises. It keeps you safe during the replacement process and prevents interruptions.
Removing The Old Motion Sensor Light
Removing the old motion sensor light might seem daunting, but breaking it into manageable tasks can simplify the process. You’re not just taking down a fixture; you’re preparing a clean slate for a new, more efficient light source. Let’s dive into the essentials of safely removing your outdated motion sensor light.
Detaching The Fixture
Before you start, ensure the power is off. This is crucial for your safety. Head to your circuit breaker and switch off the power to the light fixture.
With a sturdy ladder or step stool, reach the fixture. Use a screwdriver to carefully unscrew the fixture from its mount. This usually involves removing a couple of screws. Keep these screws safe as you might need them later.
Once unscrewed, gently pull the fixture away from the wall or ceiling. You might encounter a bit of resistance if it’s been in place for a long time. Take your time and avoid forcing it free.
Disconnecting The Wiring
Now that the fixture is loose, you’ll see the wiring. Typically, there are three wires: black, white, and green (or bare copper). These correspond to live, neutral, and ground.
Use a voltage tester to ensure there’s no electricity running through the wires. It’s a small step that can prevent big accidents.
Carefully disconnect the wires. Twist the wire connectors counter-clockwise to release them. Once all wires are free, you can remove the fixture completely.
Have you ever noticed how tasks like this can be therapeutic? There’s something satisfying about dismantling an old fixture, knowing you’re one step closer to a more efficient setup. What’s your experience with DIY projects? Do you find them rewarding or more of a chore?
Choosing A New Motion Sensor Light
Choosing the right motion sensor light can make a huge difference in your home’s security and convenience. It’s not just about picking any light but finding one that fits your specific needs and environment. Think about how the sensor works and the area it needs to cover before making your decision.
Sensor Types
There are different types of motion sensors, and each has its strengths. Passive infrared (PIR) sensors detect heat from people or animals and are great for outdoor use. Ultrasonic sensors send out sound waves and detect movement by changes in the waves, which works well indoors but can be sensitive to small pets or objects.
Combining sensor types in one unit can reduce false alarms. For example, dual-technology sensors use both PIR and ultrasonic methods, which means the light only activates when both detect motion. Would you prefer a sensor that reacts to heat or sound in your space?
Brightness And Coverage
The brightness of the motion sensor light depends on its purpose. Lights with higher lumens are ideal for wide outdoor areas, while softer lighting suits smaller spaces or pathways. Look for adjustable brightness settings to customize how much light you want.
Coverage area matters just as much as brightness. Some lights cover a narrow path, while others can detect motion across a broad yard. Check the sensor’s angle and range—some offer 180-degree coverage, while others only cover 90 degrees. What size area do you need to light up when motion is detected?

Credit: www.homezoneliving.com
Installing The New Motion Sensor Light
Installing the new motion sensor light requires careful attention to wiring and mounting. Proper installation ensures the light works safely and effectively. Follow simple steps to connect the wiring and mount the fixture securely.
Connecting The Wiring
Turn off the power at the circuit breaker before touching any wires. Use a voltage tester to confirm no electricity flows. Match the wires from the new sensor light to the existing ones. Typically, connect black to black (live), white to white (neutral), and green or bare copper to ground.
Use wire nuts to secure each connection tightly. Wrap electrical tape around the nuts for extra safety. Gently tuck the wires into the electrical box to avoid pinching or damage. Double-check all connections before restoring power.
Mounting The Fixture
Align the mounting bracket with the electrical box. Use screws to attach the bracket firmly to the box. Hold the motion sensor light against the bracket and connect it according to the manufacturer’s instructions.
Secure the fixture with screws, ensuring it does not wobble or hang loose. Adjust the sensor angle for optimal coverage. Turn the power back on and test the motion sensor light to confirm proper operation.
Testing The New Sensor Light
Testing the new motion sensor light is a crucial step to ensure it works correctly and meets your needs. It’s not just about seeing if it lights up but also about confirming the sensor’s sensitivity and timing settings. Taking the time to test thoroughly can save you from frequent adjustments or replacements later.
Powering On
After installation, turn the power back on at the circuit breaker or switch. Watch the sensor light closely as it powers up—it should initialize with a brief flicker or a steady glow depending on the model.
Walk slowly into the sensor’s detection zone to see if the light activates promptly. If it doesn’t, double-check your wiring or connections before moving forward.
Adjusting Settings
Most motion sensor lights allow you to tweak settings like sensitivity, duration, and ambient light threshold. Start by adjusting the sensitivity to catch movement without triggering false alarms from small animals or passing cars.
Set the light duration so it stays on long enough for you to get safely through the area but not so long that it wastes energy. Don’t forget to test the light during different times of the day to find the best ambient light setting—too sensitive and it may turn on during daylight, too strict and it might not activate at dusk.
Have you noticed your sensor light turning off just as you need it most? Fine-tuning these settings can make a big difference in everyday use.
Troubleshooting Common Issues
Troubleshooting common issues with motion sensor lights helps ensure they work properly. Many problems have simple fixes. Identifying the cause saves time and effort.
Check the sensor settings first. Incorrect sensitivity or time delay can cause poor performance. Adjust these settings to fit your needs.
Checking Power Supply And Connections
Power problems often cause motion sensor lights to fail. Confirm the light is receiving electricity. Look for loose wires or blown fuses. Tighten any loose connections and replace damaged parts.
Adjusting Sensor Sensitivity And Range
The sensor might not detect motion if sensitivity is too low. Increase sensitivity for better detection. Also, check the sensor’s range and angle. Move the sensor or adjust its angle to cover the desired area.
Cleaning The Sensor Lens
Dirt and dust on the lens block the sensor’s view. Clean the lens gently with a soft cloth. Avoid harsh chemicals that can damage the sensor. Regular cleaning keeps the sensor responsive.
Testing For Interference From Lights And Objects
Other light sources can confuse the sensor. Remove or shield bright lights near the sensor. Objects like trees or walls may block motion signals. Trim plants or reposition the sensor for a clear view.
Replacing Faulty Components
If problems persist, parts may be faulty. Test the sensor by swapping it with a new one. Replace broken bulbs or sensors quickly. This restores the light’s full function.
Frequently Asked Questions
How Do I Safely Replace A Motion Sensor Light?
Turn off the power at the circuit breaker before starting. Use a voltage tester to confirm no electricity flows. Remove the old sensor light carefully. Follow the wiring diagram on the new sensor for correct connections. Secure the new light and restore power.
What Tools Are Needed To Replace A Motion Sensor Light?
You will need a screwdriver, voltage tester, wire stripper, electrical tape, and ladder. These tools help ensure safe removal and installation. Having them ready makes the process smoother and safer. Always use insulated tools for electrical work.
How To Adjust Sensitivity On A New Motion Sensor Light?
Locate the sensitivity dial or switch on the sensor unit. Turn it clockwise to increase sensitivity or counterclockwise to decrease it. Test the sensor by walking in its range to confirm proper detection. Adjust until it triggers only when desired.
Can I Replace A Motion Sensor Light Myself?
Yes, if you have basic electrical knowledge and follow safety precautions. Always turn off power before working on electrical fixtures. Read the installation instructions carefully. If unsure, consider hiring a professional electrician to avoid risks.
Conclusion
Replacing a motion sensor light can be simple and quick. Follow each step with care and check your work. A new light improves safety and saves energy too. You don’t need special tools or skills to do it. Take your time, and you will finish with success.
Enjoy the bright, smart light in your space. Keep your home safe and well-lit every night.


