
Is your bathroom fan making strange noises or just not working like it used to? A faulty ventilation fan can lead to mold, bad odors, and a stuffy bathroom.
But don’t worry—you don’t have to call a costly professional to fix it. You can replace your bathroom ventilation fan yourself with a few simple steps. In this guide, you’ll learn exactly how to swap out your old fan for a new one, saving money and keeping your bathroom fresh and dry.
Ready to get started? Let’s dive in!
Tools And Materials Needed
Replacing a bathroom ventilation fan needs specific tools and materials. Having the right items ready makes the job easier and safer.
Gather everything before starting. This helps avoid interruptions and speeds up the process.
Essential Tools
- Screwdriver (Phillips and flathead)
- Wire stripper
- Voltage tester
- Drill with drill bits
- Measuring tape
- Utility knife
- Step ladder
- Pliers
Materials Required
- Replacement ventilation fan
- Electrical wire (if needed)
- Wire nuts
- Foil tape or duct tape
- Caulk or sealant
- Drywall anchors (if mounting on drywall)
Safety Equipment
- Safety goggles
- Dust mask
- Work gloves
Turn Off Power
Turning off the power is the first and most important step before replacing a bathroom ventilation fan. This action ensures safety by preventing electric shock or short circuits. Never work on electrical fixtures without cutting the power supply first.
Always confirm the power is completely off before touching any wires or components. Safety should be your top priority throughout the process.
Locate The Circuit Breaker
Find the circuit breaker panel in your home. It is usually in the basement, garage, or utility room. Look for the breaker labeled for the bathroom or ventilation fan.
Switch Off The Correct Breaker
Flip the breaker switch to the “off” position. This cuts electricity to the fan and prevents accidents. If breakers are not labeled, turn off the main breaker to be safe.
Test The Power Status
Use a voltage tester or a simple light tester. Touch the tester to the fan wires or terminals. If no power shows, it is safe to proceed.
Use Caution Around Wiring
Even after switching off the breaker, handle wires carefully. Some homes may have multiple power sources. Double-check power is off before starting work.
Remove Old Fan
Removing the old bathroom ventilation fan is a crucial part of the replacement process. It sets the stage for installing a new, more efficient fan that keeps your bathroom fresh and moisture-free. Taking your time with this step ensures you avoid damage to the ceiling and electrical components.
Disconnect Wiring
Before touching anything, make sure to turn off the power at the circuit breaker. This step is vital for your safety—never skip it. Use a voltage tester to confirm there’s no electricity running to the fan’s wires.
Once the power is off, carefully remove the fan’s wiring connections. You might find wire nuts securing the wires together; twist these off to free the wires. Keep track of how the wires are connected—it helps when installing the new fan.
Detach Fan Housing
Look inside the fan housing for screws or clips holding it to the ceiling joists. Removing these fasteners will allow you to lower the housing gently. Sometimes, the housing is held by metal brackets—these may need to be bent or unscrewed.
Be prepared for some resistance if the housing is sealed tightly. Use a flashlight to inspect hard-to-see areas and make sure nothing else is holding the fan in place. If you encounter insulation stuck to the housing, carefully pull it away without tearing.
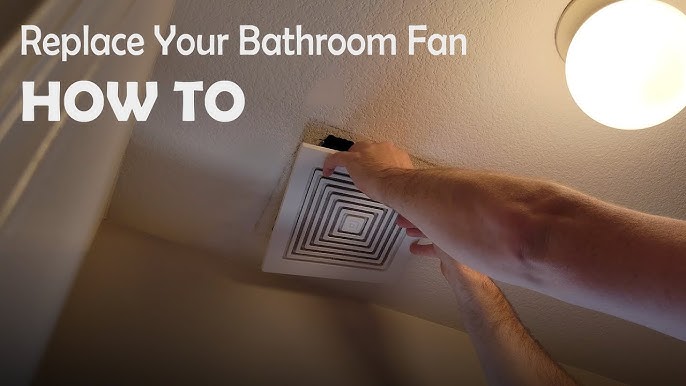
Remove Vent Cover
The vent cover is usually the most visible part of the fan and can be the easiest to remove. It often snaps off or is held by a couple of screws. Gently pull or unscrew the cover to avoid cracking the plastic or damaging paint.
Once off, clean the cover if you plan to reuse it. A clean vent cover can improve air flow and reduce dust buildup in your bathroom. Have you noticed how a dirty vent cover can quietly reduce your fan’s efficiency over time?

Credit: www.youtube.com
Prepare New Fan
Preparing your new bathroom ventilation fan properly can save you from unnecessary headaches during installation. It’s more than just unboxing the fan; it’s about making sure everything fits and functions perfectly before you start. This step ensures a smooth replacement process and helps avoid surprises that could delay your project.
Check Fan Size
Start by comparing the size of your new fan to the old one’s housing. Measure the width, length, and depth of the fan and the duct connection. If the new fan is even slightly bigger or smaller, it might not fit well or seal properly, which could reduce its efficiency.
Think about the space inside your ceiling or wall. Is there enough clearance for the new fan’s motor and wiring? Sometimes models look similar but differ in height or mounting points. Checking these details now saves you from cutting new holes later.
Assemble Components
Once you confirm the fan fits, gather all the parts and assemble them as per the manufacturer’s instructions. This usually involves attaching the grille, mounting brackets, and sometimes the motor housing. Doing this before installation makes the actual mounting quicker and less stressful.
Look over the screws, clips, and any additional hardware included in the box. Missing pieces are easier to spot now than halfway through installation. If your fan has a filter or light, double-check those parts are in place and functioning.
Have you noticed how skipping this preparation can turn a simple task into a frustrating ordeal? Taking your time here means the actual replacement will be smoother, and your new fan will work efficiently right from the start.
Install New Fan
Replacing your bathroom ventilation fan can significantly improve the air quality in your bathroom, reducing humidity and preventing mold growth. If you’ve already removed the old fan, it’s time to install the new one. This process is straightforward and can be completed with basic tools. Let’s dive into the steps to ensure your new fan is installed correctly and efficiently.
Connect Wiring
Before connecting the wiring, ensure the power is off at the circuit breaker to avoid any electrical hazards. Match the wires from the fan to the house wiring—typically, black to black, white to white, and green or bare for the ground wire. Twist the wires together and secure them with wire nuts. If you’re unsure about the wiring, consider taking a picture of the original setup before removing the old fan. This can serve as a handy reference.
Secure Fan Housing
Position the fan housing in the ceiling opening, ensuring it aligns with the ductwork and electrical connections. Use screws to secure the housing to the ceiling joists. A snug fit is crucial to minimize vibrations and noise. If you notice any gaps, use foam tape or caulk to seal them. This extra step not only reduces noise but also increases efficiency.
Attach Vent Cover
Finally, it’s time to attach the vent cover. Align the cover with the housing and gently push it into place. Most covers have spring clips that snap into the housing, securing it without the need for tools. Once the cover is attached, restore the power and test the fan. Listen for any unusual sounds that might indicate a loose installation. If everything sounds smooth, you’re good to go!
Test The Fan
Testing the bathroom ventilation fan before and after replacement is crucial to ensure it works properly and efficiently. This step helps you catch any issues early and avoid moisture problems like mold or mildew. Knowing how to test the fan gives you confidence that your bathroom stays fresh and dry.
Check The Power Supply
Start by turning on the fan switch to see if it powers up. If the fan doesn’t start, check the circuit breaker or fuse box to make sure the power is on. Sometimes a loose wire connection behind the switch can cause the fan to fail, so inspect those if needed.
Listen For Unusual Noises
When the fan is running, pay attention to the sound it makes. A properly working fan should produce a smooth, steady hum. If you hear rattling, grinding, or squeaking noises, it might indicate worn-out motor bearings or debris caught inside the fan.
Measure Airflow Effectiveness
To test if the fan is moving enough air, hold a piece of tissue paper or a light plastic bag near the grill. The fan should pull the material toward it firmly. If the airflow feels weak, the ductwork could be clogged or the fan motor may not be powerful enough.
Check For Proper Venting Outside
Confirm that the fan vents air outside your home, not just into the attic or crawl space. Go outside and look at the vent cap while the fan is on. You should see air blowing out and hear the fan’s noise faintly.
Use A Smoke Test For Air Leaks
Light an incense stick or a smoke pen near the fan grill and watch the smoke’s movement. The smoke should be drawn smoothly into the vent. If smoke leaks around edges or doesn’t move toward the vent, there may be gaps needing sealing.
Maintenance Tips
Proper maintenance keeps your bathroom ventilation fan working well. Regular care prevents odors and moisture buildup. It also extends the fan’s life and improves air quality.
Simple maintenance tasks save money and avoid costly repairs. Clean and check your fan often. A little effort keeps your bathroom fresh and dry.
Cleaning The Fan And Vent Cover
Dust and dirt block airflow and reduce fan efficiency. Remove the vent cover carefully. Use a soft brush or cloth to clean dust and grime. Wash the cover with mild soap and water. Dry it completely before reinstalling.
Checking For Loose Connections
Loose wires can cause the fan to stop working. Turn off power before inspection. Look for any loose or disconnected wires. Tighten connections with a screwdriver if needed. Ensure the fan is securely mounted to the ceiling.
Replacing The Fan Filter
Some fans have filters to trap dust and pollen. Check the filter every few months. Replace it if it looks dirty or clogged. A clean filter improves air flow and fan performance.
Inspecting The Vent Duct
The duct moves moist air outside your home. Check the duct for blockages or damage. Clean out any dust, lint, or debris inside the duct. Make sure the duct vents to the outside, not the attic.
Testing Fan Operation
Turn on the fan and listen for unusual noises. A noisy fan may need lubrication or replacement parts. Check if the fan turns smoothly without shaking. Test the fan’s timer or humidity sensor if installed.

Credit: www.youtube.com

Credit: www.youtube.com
Frequently Asked Questions
How Do I Know When To Replace My Bathroom Fan?
If your bathroom fan is noisy, weak, or fails to remove moisture, it’s time to replace it. Signs include excessive humidity, mold growth, or a burning smell. Regular inspection helps ensure proper ventilation and prevents damage to walls and ceilings.
What Tools Are Needed To Replace A Bathroom Fan?
You typically need a screwdriver, wire stripper, voltage tester, drywall saw, and pliers. A ladder and safety goggles are also recommended. Having these tools ready makes the replacement process smoother and safer.
Can I Replace A Bathroom Fan Myself Safely?
Yes, if you follow safety precautions and have basic electrical skills. Turn off power at the breaker, read instructions, and work carefully. If unsure, consult a professional to avoid electrical hazards or improper installation.
How Long Does It Take To Replace A Bathroom Ventilation Fan?
Replacing a fan usually takes 1 to 2 hours, depending on experience and complexity. Removing the old fan, wiring, and mounting the new one may vary. Proper planning and preparation can speed up the process.
Conclusion
Replacing a bathroom ventilation fan improves air quality and reduces mold. Follow safety steps and use the right tools for best results. Take your time and double-check all connections before finishing. A properly installed fan keeps your bathroom fresh and dry.
Regular maintenance helps the fan work longer and better. Simple tasks like this save money and keep your home healthy. You can do it with patience and care. Good ventilation makes a big difference every day.


