
Are you ready to transform your space by swapping out those old recessed lights for stylish pendant lights? Changing your lighting can instantly boost the look and feel of any room.
But if you’re unsure where to start, don’t worry—you’re in the right place. This guide will walk you through every step, making the process simple and stress-free. By the end, you’ll have the confidence to upgrade your lighting and create the perfect ambiance you’ve been dreaming of.
Keep reading to discover how easy it is to replace recessed lights with pendant lights and give your home a fresh new look.

Credit: www.xhlux.com
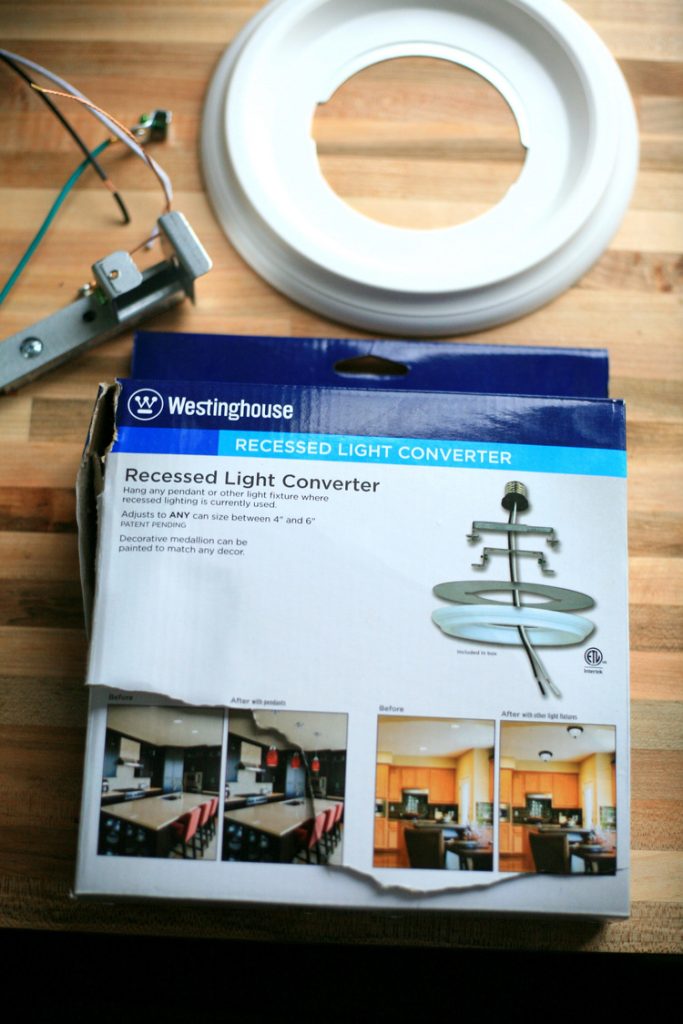
Tools And Materials Needed
Before you start swapping out recessed lights for pendant lights, gathering the right tools and materials is crucial. Having everything at hand not only speeds up the process but also helps avoid unexpected trips to the hardware store. Let’s break down what you’ll need to make your lighting upgrade smooth and safe.
Basic Tools
- Screwdrivers:Both flathead and Phillips are essential for removing fixtures and securing new ones.
- Wire stripper/cutter:Cleanly strips insulation from wires and cuts them to length.
- Voltage tester:To confirm the power is off before you touch any wiring.
- Drill with bits:Useful if you need to create new mounting holes or adjust existing ones.
- Measuring tape:Ensures your pendant hangs at the right height and is centered properly.
Have you ever started a project only to realize you’re missing that one vital tool? Avoid that frustration by double-checking your toolkit first.
Pendant Light Components
- Pendant fixture:Includes the light shade or design element you want to showcase.
- Mounting bracket:Secures the pendant to the ceiling box, matching your fixture’s specifications.
- Canopy:Covers the electrical box for a clean finish.
- Electrical cord or chain:Adjusts the length of the pendant to fit your space.
- Light bulbs:Choose bulbs that suit your fixture’s style and wattage limits.
Each component plays a role in both safety and style. Missing one can affect the overall look or even the fixture’s stability.
Safety Gear
- Insulated gloves:Protect your hands from accidental shocks and sharp edges.
- Safety glasses:Shield your eyes from dust and debris when drilling or working overhead.
- Ladder or step stool:Provides secure access to the ceiling without overreaching.
- Dust mask:Keeps you safe from inhaling particles during ceiling work.
Are you ready to work confidently? Wearing the right safety gear keeps you protected and focused on the job, not on potential hazards.
Preparing For The Replacement
Preparing to replace a recessed light with a pendant light requires careful attention. Safety and proper setup ensure a smooth installation. Take time to get ready before removing any fixtures.
Turn Off Power
Start by switching off the power at the circuit breaker. This step prevents electric shocks during the replacement. Use a voltage tester to confirm the power is off before touching wires.
Remove Existing Recessed Light
Remove the trim and bulb of the recessed light first. Then, carefully detach the fixture from the ceiling. Keep screws and parts in a safe place for later use or disposal.
Inspect Wiring And Fixture Box
Check the wiring for any damage or wear. Make sure the fixture box can support the weight of the pendant light. Replace the box if it is old or not sturdy enough.
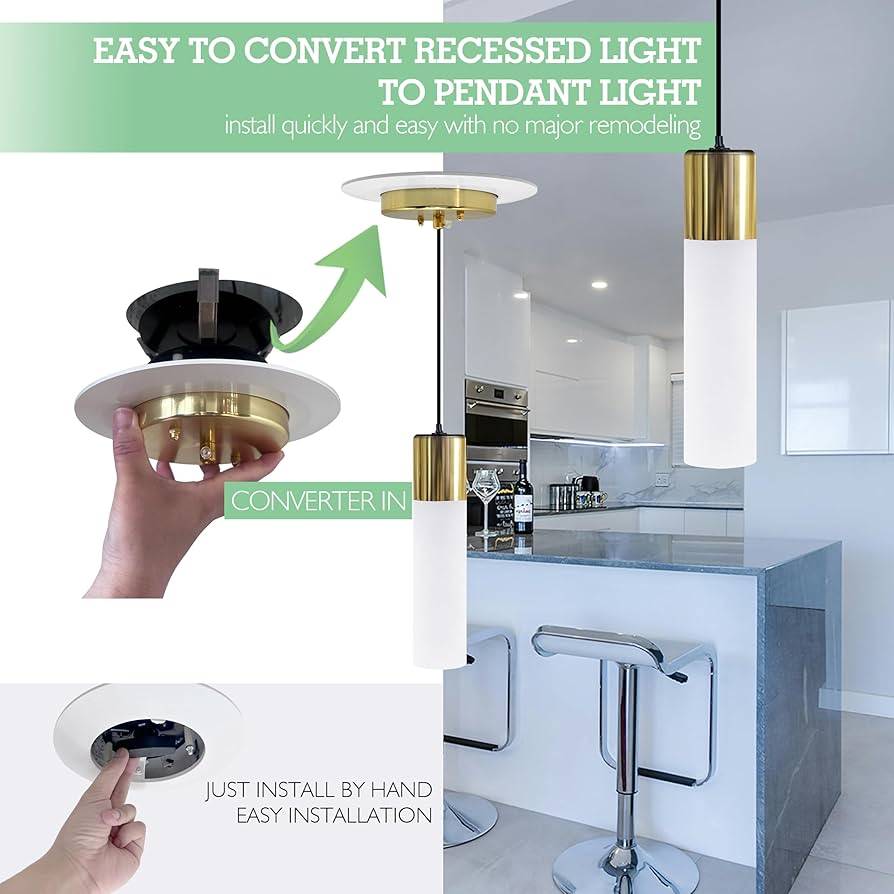
Installing The Pendant Light
Begin by turning off the power to the recessed light. Remove the old fixture and prepare the wiring for the new pendant light installation. Secure the pendant’s mounting bracket, connect the wires, and attach the light to complete the setup.
Installing a pendant light can transform your space beautifully. It brings a unique charm to your room’s aesthetics. Transitioning from recessed lights to pendant lights is straightforward and rewarding.Attach Mounting Bracket
Begin by securing the mounting bracket to the ceiling. Ensure it’s tightly fixed. Use screws provided with your pendant light kit. This bracket supports the pendant’s weight. So, double-check for stability. A secure bracket prevents accidents and ensures safety.Connect Wiring Safely
Turn off the power at the circuit breaker. Safety first! Match the wires from the ceiling and pendant light. Usually, they are color-coded: black to black, white to white, and green to ground. Use wire nuts to secure the connections. Tuck the wires neatly into the ceiling box.Secure Pendant Fixture
Attach the pendant fixture to the mounting bracket. Ensure it hangs straight and is level. Tighten any screws or fasteners. Adjust the pendant’s height if needed. Make sure it is secure and stable. Turn the power back on to test your new light. Enjoy the enhanced ambiance in your room!Adjusting Height And Position
Adjusting the height and position of your pendant light is key to achieving the perfect look and functionality. Unlike recessed lights, pendants hang and can be customized to fit your space and style. Getting this right can transform your room’s ambiance and ensure the light serves its purpose well.
Set Pendant Length
Start by deciding how low your pendant should hang. A general rule is to position the light about 28 to 34 inches above a tabletop or kitchen island. If you’re installing it in an open area, hanging it around 7 feet from the floor usually works well.
Use the adjustable chain or cord to set the length. It’s easier to make it a bit longer at first, then shorten it after testing how the light looks and feels in the space. Ask yourself: Is it blocking your view or creating unwanted shadows?
Align Light Placement
Proper placement matters as much as height. Align your pendant directly over the area you want to illuminate, like a dining table center or kitchen prep zone. This ensures focused lighting where you need it most.
Consider the room’s layout and how people move around. You don’t want the pendant swinging into heads or creating awkward dark spots. Take a moment to stand in different spots and imagine the light’s path before finalizing the position.
Testing And Final Touches
After you’ve securely installed your new pendant light, it’s time to focus on testing and adding the final touches. This stage ensures everything works perfectly and looks great in your space. Skipping these steps can lead to unexpected issues or a less polished appearance.
Restore Power And Test Light
Turn the circuit breaker back on to restore power to the fixture. Use the wall switch to test if the pendant light turns on and off smoothly.
If the light doesn’t come on, double-check your wiring connections and ensure the bulb is properly seated. This is the moment to fix any issues before finishing up.
Install Bulb And Shade
Choose a bulb that complements your pendant’s style and provides the right brightness for your room. Screw it in carefully, avoiding over-tightening, which can damage the socket.
Next, attach the light shade or cover according to the manufacturer’s instructions. This step often transforms the fixture’s look, so don’t rush—align it properly for the best effect.
Clean Up Workspace
Remove all tools and leftover materials from your work area to prevent hazards. Use a soft cloth to wipe dust or fingerprints from the pendant light, ensuring it shines.
Check the floor and surfaces for any debris or screws you might have dropped. How much better does your space feel when everything is neat and your new light fixture looks flawless?
Common Issues And Fixes
Replacing recessed lights with pendant lights can freshen up your space, but it often comes with a few common issues. Understanding these problems and knowing how to fix them will save you time and frustration. Let’s take a closer look at some typical challenges you might face and practical ways to handle them.
Flickering Light
Flickering is one of the most annoying problems after installing a new pendant light. It often happens because of incompatible dimmer switches or loose bulbs.
Check if your dimmer switch works with the type of bulb in your pendant light. LED bulbs, for example, need specific dimmers to avoid flickering.
Also, make sure the bulb is screwed in tightly. A simple twist can sometimes stop the flicker immediately. Have you checked your bulb’s compatibility lately?
Loose Fixture
A loose pendant light not only looks unstable but can also be dangerous. This usually occurs if the mounting bracket or screws aren’t secured properly.
Double-check the bracket that holds your pendant. Tighten any screws and ensure it fits snugly against the ceiling box.
If the fixture still feels wobbly, try adding extra support with a brace or a stronger mounting plate. It’s worth the effort to avoid an accident.
Wiring Concerns
Wiring issues are common, especially when converting from recessed to pendant lighting. Incorrect connections can cause the light not to work or create safety hazards.
Turn off power before touching wires. Match wire colors carefully—usually black to black, white to white, and ground wires to green or bare copper.
If you find damaged or frayed wires, replace them immediately. When in doubt, consulting an electrician can save you from bigger problems.
Safety Tips For Diy Lighting
Replacing recessed lights with pendant lights can refresh any room’s look. Safety is crucial during this DIY project. Taking the right precautions prevents accidents and damage.
Follow these safety tips to protect yourself and your home while changing your lighting.
When To Call A Professional
Electrical work can be dangerous without experience. Call a licensed electrician if you notice any of these:
- Wiring looks old, frayed, or damaged
- Unclear or missing electrical diagrams
- Breaker trips repeatedly during testing
- Uncertainty about local electrical codes
- Complex wiring setups with multiple circuits
Choosing a professional ensures the job meets safety standards.
Handling Electrical Components
Always cut power at the circuit breaker before starting work. Use a voltage tester to confirm no current flows. Never touch wires with bare hands or metal tools.
Keep components dry and avoid working in wet areas. Secure wire connections tightly using wire nuts or connectors. Label wires to avoid confusion during installation.
Using Proper Equipment
Use insulated tools designed for electrical work. Wear safety goggles and gloves to protect eyes and hands. Have a sturdy ladder that fits your workspace. Use a voltage tester and wire stripper for safe handling.
Prepare a clean, organized workspace to avoid accidents. Good lighting helps you see wires and connections clearly.
Credit: www.amazon.com

Credit: jolux-light.com
Frequently Asked Questions
How Do I Remove Recessed Lighting Safely?
Turn off power at the breaker. Remove the trim and bulb carefully. Disconnect the wiring by loosening wire nuts. Always use a voltage tester before handling wires to ensure safety.
Can I Use Existing Wiring For Pendant Lights?
Yes, you can use existing wiring if it meets local codes. Ensure the wiring supports the pendant light’s voltage and wattage requirements. Consult an electrician if unsure about compatibility or safety.
What Tools Are Needed For This Light Replacement?
You’ll need a screwdriver, wire stripper, voltage tester, wire nuts, and possibly a drywall saw. These tools help safely remove recessed lights and install pendant fixtures properly.
How To Choose The Right Pendant Light Size?
Measure the space and ceiling height. Choose a pendant that complements the room’s scale and style. Avoid overly large fixtures that overpower or small ones that under-illuminate.
Conclusion
Replacing recessed lights with pendant lights can change your room’s look. Choose the right pendant light for your space and style. Follow safety steps carefully to avoid problems. Take your time and work with patience. A well-done switch brings warmth and charm to any room.
Enjoy the new light and fresh feel it creates. Small changes can make a big difference in your home. Keep these tips in mind for a smooth update.


