
Are you tired of your plain recessed lights and ready to add some style to your space? Replacing recessed lighting with pendant lights can completely transform the look and feel of any room.
Imagine the warm glow and eye-catching design pendant lights bring, making your space more inviting and personal. In this guide, you’ll discover simple steps to swap out those hidden lights for stunning pendants—no fancy tools or expert skills needed. Keep reading, and you’ll learn how to make your lighting upgrade smooth, safe, and stylish.
Your dream room is just a few steps away!

Credit: hellofromliz.com
Tools And Materials Needed
Replacing recessed lighting with pendant lights requires specific tools and materials. Having the right items makes the process smooth and safe. Prepare all essentials before starting your project.
Essential Tools
- Screwdriver (flathead and Phillips)
- Wire stripper
- Voltage tester
- Drill with bits
- Measuring tape
- Wire nuts
- Electrical tape
- Step ladder
- Pliers
Choosing Pendant Lights
Select pendant lights that fit your room’s style and size. Consider the height of your ceiling and the pendant’s length. Choose the right bulb type and wattage for brightness and energy efficiency. Check if the fixture suits your existing wiring and electrical box.
Safety Gear
- Insulated gloves to protect from electric shocks
- Safety goggles to shield your eyes
- Dust mask if you disturb ceiling materials
- Non-slip shoes for stable footing
Credit: designertrapped.com
Preparing The Workspace
Preparing your workspace is a crucial step before swapping out recessed lighting for pendant fixtures. A well-organized and safe area helps you work efficiently and avoid accidents. Taking time to set up properly can save you frustration and unexpected delays.
Turning Off Power
Safety should be your top priority. Locate your home’s circuit breaker and switch off the power to the room where you’ll be working. You might think just turning off the light switch is enough, but electricity can still flow through the wiring. Double-check by using a voltage tester on the recessed light to confirm there’s no power running through it.
Clearing The Area
Remove furniture and items near the lighting fixture to create enough space for movement. Cover the floor with a drop cloth to catch dust and debris. Clearing the area also helps prevent any accidental damage to your belongings. Imagine working in a cramped space—wouldn’t you want a clear area to avoid knocking things over?
Gathering Supplies
Before you start, gather everything you’ll need. This includes the new pendant light, screwdrivers, wire strippers, electrical tape, and a ladder. Having your tools handy stops you from interrupting the flow of work. Think about the last time you hunted for tools mid-project—avoiding that hassle makes a big difference.
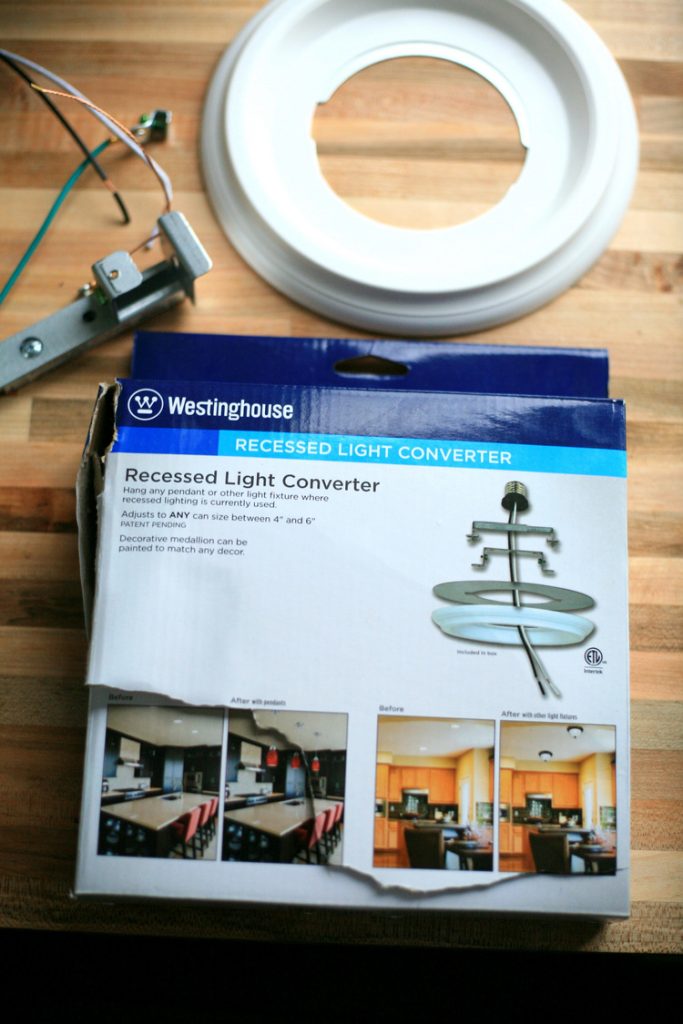
Removing Recessed Lighting
Removing recessed lighting is the first step to install pendant lights. This process involves careful handling to avoid damage. Safety is important. Turn off the power before starting.
Removing Trim And Bulbs
Start by taking out the bulbs from the recessed fixtures. Some bulbs twist out, while others pull straight out. Next, remove the trim that surrounds the bulb. Trim pieces usually snap or screw off. Keep these parts aside for reuse or disposal.
Disconnecting Wiring
Open the junction box inside the ceiling. This box holds the wires connecting the light fixture. Unscrew the wire nuts and carefully separate the wires. Make sure the power is off to prevent shocks. Use electrical tape to cover exposed wires if needed.
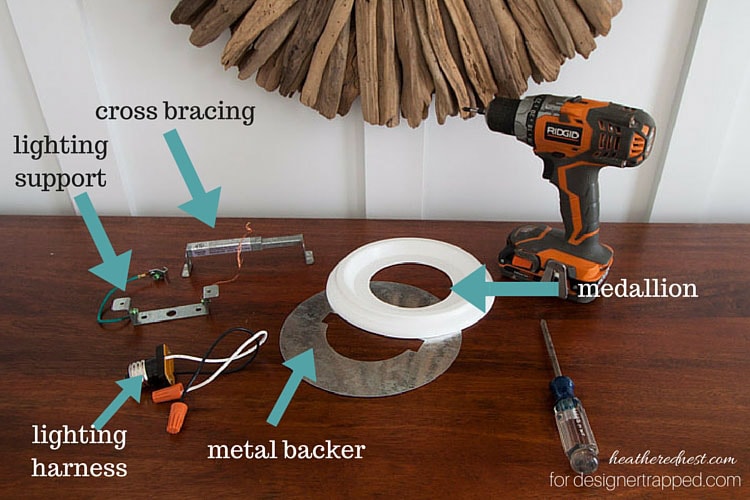
Taking Out Housing
The housing is the metal can inside the ceiling. It holds the light bulb and trim. Release the clips or screws that secure the housing. Gently pull the housing out of the ceiling. Be careful not to damage the drywall or ceiling material.

Credit: hellofromliz.com
Installing The Pendant Fixture
Installing the pendant fixture is the moment your new lighting design truly begins to take shape. This step involves careful attention to both the mounting hardware and electrical connections to ensure safety and style. Whether you’re upgrading a tired recessed light or simply adding charm to your space, the right installation makes all the difference.
Installing Mounting Bracket
First, remove the old recessed light fixture carefully. Check the electrical box to confirm it can support a pendant light’s weight. Most pendant lights come with a mounting bracket—attach this bracket securely to the electrical box using the provided screws.
Make sure the bracket is tight and level. If it wobbles, the fixture won’t hang properly, and that could cause problems later. A stable base is key for a polished look and long-lasting installation.
Wiring The Pendant Light
Before touching any wires, turn off the power at your breaker panel. Safety cannot be overstressed here. Use a voltage tester to double-check that the wires are not live.
Match the wires from your pendant light to the house wiring by color—usually black to black (hot), white to white (neutral), and green or bare copper to ground. Twist the wire ends together and secure them with wire nuts. Wrap electrical tape around the wire nuts for extra security and to prevent any accidental loosening.
Securing The Fixture
After wiring, tuck the wires carefully into the electrical box. Lift the pendant fixture and align it with the mounting bracket. Use the screws supplied with your pendant to attach the fixture firmly to the bracket.
Don’t rush this part; a loose fixture can tilt or fall, which is both unsafe and unsightly. Once secured, adjust the pendant’s height if it’s adjustable, then install the bulb and any decorative elements. Step back and admire how the new light transforms your space!
Adjusting Pendant Height
Adjusting the pendant height ensures the light fits your room’s style and needs. Lower it for task lighting or raise it for a softer glow. This simple step enhances both function and look.
Adjusting the height of your new pendant lighting is crucial for both function and aesthetics. The right drop length can transform your space, ensuring it complements your decor and provides the perfect amount of light. Whether you’re updating your kitchen, dining room, or any other area, nailing the height ensures your pendant lights will shine—literally and figuratively.Measuring Drop Length
Before you start, measure the desired drop length from your ceiling to where you want the bottom of the pendant to rest. Typically, for kitchen islands, pendants should hang about 30 to 36 inches above the countertop. Use a tape measure for precision, and remember to account for any furniture or fixtures that might affect the height.Shortening Or Lengthening Cord
Once you have your measurements, you’ll need to adjust the cord length accordingly. Most pendant lights come with an adjustable cord, allowing you to cut or extend it as needed. Ensure you safely secure any excess cord inside the ceiling canopy for a neat finish.Final Positioning
Now, step back and assess the positioning of your pendants. Adjustments can be made to ensure they are level and proportionate to the space. Ask yourself, does the height feel balanced with the rest of the room? Small tweaks can make a big difference in achieving the perfect look.Testing And Finishing Touches
After installing your new pendant lights, the final phase of the project—testing and finishing touches—is crucial. This step ensures your lights work safely and look polished. Taking a moment to properly restore power, check functionality, and clean the area will leave your space looking professional and bright.
Restoring Power
Before flipping the switch, double-check that all wiring connections are secure and insulated. Turn your circuit breaker back on carefully and avoid rushing this part. Have you ever experienced a sudden blackout because you forgot to reset the breaker? Taking your time here prevents that headache.
Checking Light Functionality
Once power is restored, test each pendant light individually. Look for flickering, dimming, or any unusual sounds—these are signs something might be wrong. If you notice any issues, switch off the power immediately to troubleshoot safely. Remember, your goal is to enjoy a steady, clean glow that enhances your room’s atmosphere.
Cleaning Up
After confirming your lights work perfectly, it’s time to tidy up. Remove any dust or fingerprints from the glass or metal parts using a microfiber cloth. Don’t forget to vacuum or sweep the floor to clear away debris from installation. A neat area not only looks great but also helps you appreciate your new lighting without distractions.
Troubleshooting Common Issues
Replacing recessed lighting with pendant fixtures can dramatically change the look of your space, but sometimes things don’t go as planned. You might encounter issues that stop your new pendant lights from working correctly. Understanding common problems and how to fix them will save you time and frustration.
Light Not Turning On
If your pendant light doesn’t turn on, first check the power source. Is the breaker switched on? Sometimes the simple act of flipping the breaker back can solve the problem.
Next, verify the wiring connections inside the fixture box. Loose or incorrectly matched wires can prevent the light from powering up. Make sure the black (hot) wires connect to each other, and the white (neutral) wires do the same.
Have you double-checked the bulb? A dead bulb is an easy fix and often overlooked. Try swapping it with a new bulb before diving into more complex troubleshooting.
Flickering Or Dim Lights
Flickering or dim pendant lights often point to a poor connection or incompatible bulbs. Are you using dimmable bulbs with a compatible dimmer switch? Mismatched components can cause flickering or reduce brightness.
Loose wiring in the fixture or switch can also cause intermittent flickering. Inspect the connections carefully and tighten any loose wires.
Sometimes, the voltage supply might fluctuate, especially in older homes. Consider using a voltage tester to check for unstable power levels. Have you noticed flickering in other lights around your house? That could indicate a bigger electrical issue.
Loose Fixtures
A loose pendant fixture is not only annoying but can also be unsafe. Make sure the mounting bracket is securely attached to the ceiling box. If the ceiling box is old or damaged, it may need replacing or reinforcement.
Check the weight rating of the mounting hardware. Pendant lights can be heavier than recessed fixtures, so using the proper support is crucial.
Have you tried gently wiggling the fixture? If it moves easily, tighten all screws and connections. Adding a safety cable can provide extra security for heavier pendants.
Safety Tips For Diy Lighting
Replacing recessed lighting with pendant fixtures can enhance your room’s style. Safety is key during this DIY project. Handling electrical components needs care to avoid accidents. Follow clear safety tips to protect yourself and your home.
Avoiding Electrical Hazards
Always turn off power at the circuit breaker before starting work. Use a voltage tester to ensure wires are not live. Avoid touching wires with wet hands. Keep tools and work areas dry. Never overload circuits with too many fixtures. Use wire nuts to secure connections firmly.
Using Proper Tools
Select tools designed for electrical work. Insulated screwdrivers and pliers reduce shock risk. Use a sturdy ladder that reaches the ceiling safely. Have a voltage tester, wire strippers, and a drill handy. Proper tools make installation easier and safer.
When To Call A Professional
Do not attempt wiring if unsure about electrical codes. Complex wiring or old circuits need expert handling. Call a licensed electrician for inspections and permits. Professionals ensure the job meets safety standards. Protect your home and family by choosing help when needed.
Frequently Asked Questions
How Do I Remove Recessed Lighting Fixtures Safely?
Turn off power at the breaker. Remove the bulb and trim. Unscrew and carefully pull the housing from the ceiling. Disconnect wires using a voltage tester to ensure safety. Always follow manufacturer instructions to avoid damage or injury.
What Tools Are Needed To Install Pendant Lights?
You need a screwdriver, wire stripper, voltage tester, drill, and ladder. Also, have wire connectors and electrical tape handy. These tools help safely remove old fixtures and install new pendant lighting.
Can I Use Existing Wiring For Pendant Lights?
Yes, you can usually use the existing wiring from recessed lights. Ensure the wiring supports the new pendant fixture’s voltage and weight. If unsure, consult a licensed electrician to meet safety codes.
How Do Pendant Lights Change Room Ambiance Compared To Recessed Lighting?
Pendant lights create focused, decorative lighting. They add style and visual interest. Recessed lights offer uniform, subtle illumination. Pendants can act as statement pieces, enhancing room ambiance and design.
Conclusion
Replacing recessed lighting with pendant lights can brighten your space nicely. It adds style and a fresh look to any room. You only need a few tools and some patience to start. Make sure to turn off power before working with wires.
Choose pendant lights that fit your room’s size and style. The right lighting can change how your home feels. Enjoy the new atmosphere created by your updated lighting. Small changes make a big difference in home design. Try it yourself and see the results.


