
Looking to add a cozy, stylish touch to your living space without spending a fortune? Sewing your own DIY pouf ottoman is easier than you might think—and it’s a fun project you’ll be proud of.
Imagine having a comfy, custom-made piece that not only looks great but also fits perfectly in your home. In this guide, you’ll discover simple steps to create your own pouf ottoman, even if you’re new to sewing. Ready to transform your space and impress your friends?
Let’s get started!

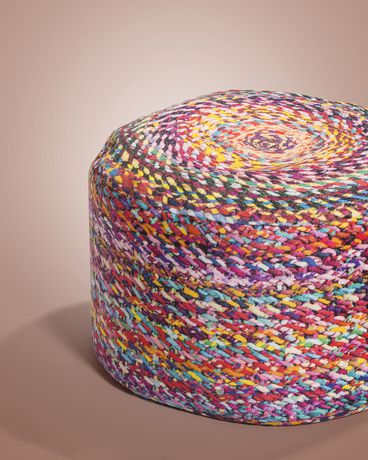
Credit: modern-textiles.com
Materials Needed
Gathering the right materials is essential before you start sewing your DIY pouf ottoman. Each choice you make, from fabric to filling, affects the final look, feel, and durability of your project. Let’s break down what you’ll need to create a pouf that fits your style and comfort perfectly.
Fabric Choices
Choosing the right fabric sets the tone for your pouf ottoman. Durable fabrics like canvas, denim, or upholstery fabric work well because they hold up against daily use. If you want a softer feel, cotton or linen blends can be comfortable but may need a protective coating for durability.
Think about where your pouf will live. Will it be in a high-traffic area? If yes, pick a fabric that’s easy to clean and resistant to stains. Bold patterns can hide wear and tear better than solid colors, so consider that if you expect heavy use.
Filling Options
The filling determines how firm or soft your pouf will feel. Common filling choices include polyester fiberfill, foam pieces, or even recycled materials like old clothes or fabric scraps. Polyester fiberfill is lightweight and fluffy, perfect for a pouf you want to sink into.
If you prefer something firmer, chopped foam or bean bag pellets offer better support. You can also mix fillings to get the right balance of comfort and shape retention. Have you thought about how often you’ll move your pouf? Lighter fillings make relocation easier.
Sewing Tools
Having the right tools makes your sewing process smoother and more enjoyable. You’ll need a sewing machine capable of handling thick layers if you use dense fabrics or multiple layers of filling. Sharp fabric scissors and pins help keep your fabric neat and secure.
Don’t forget essential supplies like thread that matches your fabric, measuring tape, and a marking pen or chalk for precise cuts. A zipper or hook-and-loop tape (Velcro) is useful if you want a removable cover for easy washing. What tools do you already have that could make this project easier?
Measuring And Cutting Fabric
Measuring and cutting fabric is a crucial step in making a DIY pouf ottoman. It sets the foundation for the entire project. Accurate measurements ensure the pouf looks good and fits well. Cutting fabric carefully prevents waste and keeps seams even. Take your time and work with precision.
Determining Size
Decide the pouf’s size before measuring fabric. Think about where you will place it. Measure the height, width, and depth you want. Add extra inches for seam allowances and stuffing space. Write down these numbers clearly. Double-check measurements to avoid mistakes.
Cutting Patterns
Create simple paper patterns based on your measurements. Use these patterns to trace shapes onto the fabric. Pin the patterns securely to avoid shifting. Use sharp fabric scissors for clean cuts. Cut slowly along the lines. Keep fabric flat and smooth while cutting. Save scraps for patching or small projects.
Sewing The Ottoman Cover
Sewing the ottoman cover is where your project truly takes shape. This part requires attention to detail, but it’s also where you get to see your fabric and design choices come alive. Ready to get hands-on with your sewing machine? Let’s make sure your ottoman cover fits perfectly and lasts.
Stitching Seams
Start by aligning your fabric pieces with the right sides facing each other. Use pins or clips to keep the edges together evenly. This helps prevent shifting as you sew.
Choose a straight stitch with a medium stitch length for durability. Sewing slowly near corners will give you cleaner edges. Don’t forget to backstitch at the beginning and end of each seam to secure the stitches.
If you want your ottoman cover to look polished, consider pressing the seams open with an iron. This simple step flattens the fabric and makes the cover easier to assemble. Have you tried pressing seams before sewing pieces together? It can change the whole appearance.
Adding Zippers Or Closures
A zipper or closure lets you remove the cover for washing or swapping fabrics. Choose a heavy-duty zipper that matches your fabric’s color and weight. This keeps your pouf looking neat and functional.
Place the zipper along one seam, usually the back or side, where it won’t be in the way. Pin it carefully, then sew with a zipper foot for a close, smooth stitch. If you’re new to zippers, practice on scrap fabric first to build confidence.
Alternatively, you can add Velcro strips or buttons for an easier closure method. While not as tight as zippers, they’re quick to attach and remove. What closure style fits your lifestyle best—quick and simple, or sturdy and hidden?
Preparing The Filling
Choose soft stuffing like foam or fiberfill for a comfortable pouf ottoman. Fill evenly to maintain shape and avoid lumps. Ensure the filling fits snugly inside the sewn cover for a neat finish.
Preparing the filling for your DIY pouf ottoman can be as exciting as sewing the cover itself. The filling not only determines the comfort but also the durability of your pouf. It’s crucial to choose the right materials and techniques to ensure your creation is both functional and long-lasting.Choosing The Right Stuffing
Selecting the ideal stuffing is the first step to a comfortable pouf. Common options include polyester fiberfill, foam, old clothes, or even recycled materials like plastic bags. Each stuffing material has its pros and cons, so consider how firm you want your ottoman to be. Polyester fiberfill is soft and easy to find, but it might require frequent fluffing. Foam provides a firmer feel and is durable, though it can be more expensive. Recycled materials are budget-friendly and environmentally conscious, yet they can be uneven and require extra effort to achieve the desired shape.Filling Techniques
Once you’ve chosen your stuffing, the technique you use to fill the pouf is equally important. Start by ensuring the cover is inside-out before you begin filling. This tip might seem simple, but it can save you a lot of hassle later. Layer the stuffing gradually, using your hands to push and shape it into corners for an even spread. If you’re using pieces of foam, cut them into smaller sections to fit snugly into your pouf. For a more structured look, alternate layers of different materials to balance firmness and comfort. Have you ever thought about adding a zipper to your pouf? This allows for easy adjustments or cleaning, a practical addition you might want to consider.Assembling The Pouf Ottoman
Assembling your DIY pouf ottoman is where your hard work comes to life. This stage requires patience and attention to detail to ensure a sturdy and comfortable finished product. Let’s dive into the crucial steps of filling and sealing your pouf cover, so it not only looks great but holds up well over time.
Inserting The Filling
Choosing the right filling impacts the comfort and shape of your pouf. You can use foam beads, polyester stuffing, or even old cushions. Each type offers different firmness and weight, so think about how you’ll use your pouf.
Start by opening the pouf cover carefully. Add the filling gradually, pressing it down as you go to avoid lumps. Don’t overfill; your pouf should be firm but still soft enough to sink into slightly.
Have you ever noticed how a poorly stuffed pouf loses shape quickly? Taking the time to distribute the filling evenly makes all the difference in durability and comfort.
Sealing The Cover
After filling, it’s time to close the cover securely. If your pouf cover has a zipper, make sure the zipper teeth are aligned properly to avoid snags. For covers without zippers, sewing the opening shut by hand or machine is essential.
Use small, tight stitches to prevent the filling from escaping. If you’re hand-sewing, a ladder stitch works well for an invisible finish. Take your time here—rushing can lead to weak seams and a messy look.
Think about how often your pouf will be used. Would a removable cover with a zipper make cleaning easier? Sometimes a little extra effort in this step saves you time and hassle later on.
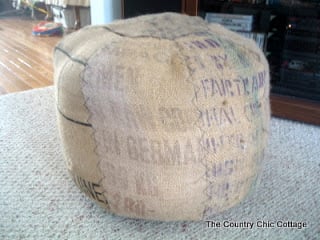
Credit: www.thecountrychiccottage.net
Customization Tips
Customization is what transforms a simple pouf ottoman into a unique piece that reflects your personality and style. It’s your chance to add a personal touch that makes your DIY project truly stand out. Think about how small changes in design can create a big impact on the overall look.
Adding Decorative Elements
Consider adding buttons or tassels to give your pouf an extra layer of detail. Buttons can create a tufted look, making the pouf feel more plush and inviting. Tassels or fringes on the edges add a playful, boho vibe that changes the texture and movement of the piece.
Another idea is to sew on patches or fabric appliqués. These can be fun shapes or meaningful symbols, which make your pouf a conversation starter. Don’t hesitate to experiment with different sizes and placements to see what feels right for your space.
Choosing Colors And Patterns
Think about the room where your pouf will live. Do you want it to blend in or pop out as a statement piece? Bold colors like deep reds or bright blues catch the eye, while neutral tones fit more comfortably with existing décor.
Mixing patterns can be exciting but requires balance. Pair a floral fabric with a subtle stripe or a solid color to avoid overwhelming your space. Have you tried using unexpected fabric combinations to add depth? Your choices here can make your pouf a focal point or a cozy complement.
Maintenance And Care
Keeping your DIY pouf ottoman looking fresh and sturdy takes a bit of regular care. Maintenance isn’t just about appearance; it helps your pouf last longer and stay comfortable. You’ll find that simple cleaning and timely repairs save you time and money down the road.
Cleaning Instructions
Start by vacuuming your pouf regularly to remove dust and dirt trapped in the fabric. Use a brush attachment for delicate materials to avoid damage. Spot clean stains as soon as they appear using a mild detergent mixed with water.
Test the cleaning solution on a small, hidden area first to make sure it doesn’t discolor the fabric. Dab gently with a clean cloth rather than rubbing, which can spread the stain or damage fibers. For removable covers, check if they’re machine washable and follow the care label instructions carefully.
Repair Tips
Small tears or loose seams are easier to fix than you might think. Keep a sewing kit handy with matching thread and sturdy needles. When you spot a loose seam, sew it back with small, tight stitches to prevent further unraveling.
If the pouf starts to lose shape, add extra stuffing to plump it up. You can use foam pieces, polyester fiberfill, or even old clothes cut into small bits. Have you noticed any weak spots developing? Reinforce those areas with a patch inside the cover to strengthen the fabric without altering the look.
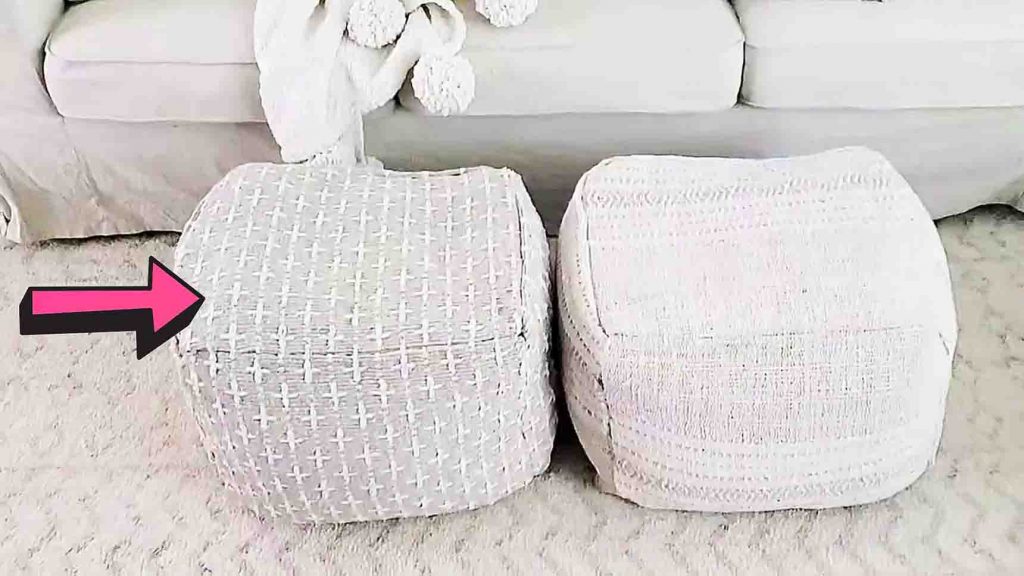
Credit: diyjoy.com
Frequently Asked Questions
What Materials Are Needed To Sew A Diy Pouf Ottoman?
You need fabric, foam or stuffing, thread, scissors, a sewing machine, and measuring tape. Choose durable fabric for longevity. Foam or stuffing provides comfort and shape.
How Do I Choose The Right Fabric For A Pouf Ottoman?
Select a strong, thick fabric like canvas, denim, or upholstery fabric. It should be durable and easy to clean. Consider color and pattern to match your decor.
What Sewing Techniques Are Best For Making A Pouf Ottoman?
Use straight and reinforced stitches for strength. Double-stitch seams to prevent tearing. Finish edges with zigzag stitches or bias tape for durability.
How Do I Stuff A Diy Pouf Ottoman Properly?
Fill the pouf with foam pieces or polyester stuffing evenly. Avoid overstuffing to maintain comfort. Make sure stuffing fills all corners for a uniform shape.
Conclusion
Sewing your own DIY pouf ottoman brings both fun and function. You save money and add a personal touch to your home. Each stitch builds your skill and confidence. Choose fabrics that match your style and space. Enjoy the comfort and charm this handmade piece offers.
Simple steps lead to a cozy, stylish result. Give your room a fresh look with this easy project. Your new pouf will be a favorite spot to relax. Try this craft and feel proud of your creation.


